On Linux operating systems, if you are looking for best VirtualBox alternatives then KVM is one of them. No doubt, the Virtual box is a very good piece of software for virtualizing different OS on Linux, Windows, macOS and FreeBSD.
KVM stands for Kernel-based Virtual Machine provides Linux kernel-based virtualization and runs on X86 processors with the appropriate hardware virtualization technologies from Intel (VT) or AMD (AMD-V) and on the System z architecture.
Step to install KVM on Ubuntu 20.04 LTS server
Here in this article will see the steps to install KVM on Ubuntu 20.04 Focal Fossa and then use it via the command line (for headless server) as well as graphical user interface via Virt-Manager to create virtual machines.
Requirements
Ubuntu 20.04 Linux distro, Virtualization supported Processor and a non-root user with sudo rights. Here first will setup KVM and then Virt-manager then will see how to use both.
Step 1: Update the System
To ensure all the packages available on your Ubuntu 20.04 LTS system are up to date. We will run a system update command.
sudo apt update
Step 2: Check your CPU supports the Virtualization
Before installing KVM, we should know, whether our server, PC or laptop supports the Virtualization or not, thus run a simple command given below.
lsmod | grep kvm
The output will be something like this:
I am using AMD CPU, thus it is shown that, if you are on Intel, that will be print in the output.
kvm_amd 98304 0
ccp 86016 1 kvm_amd
kvm 663552 1 kvm_amd
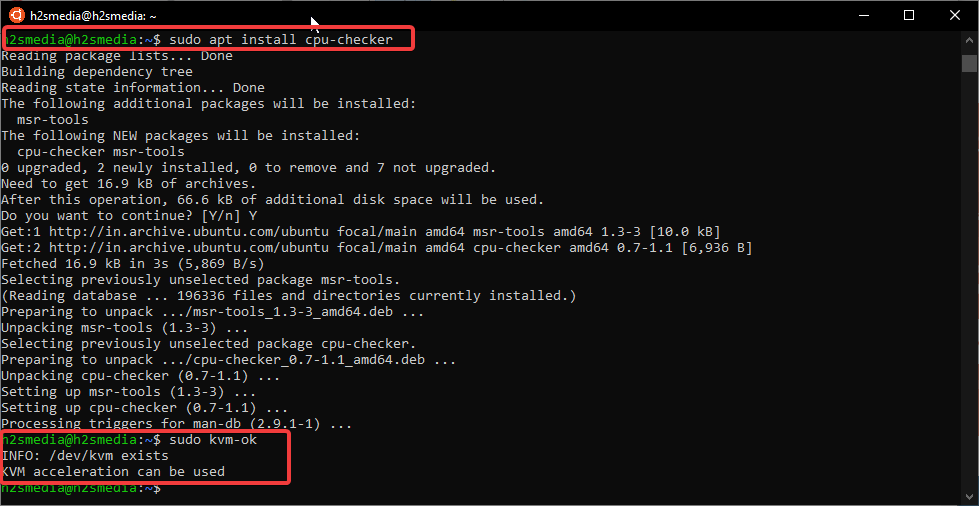
We can also use the CPU Checker utility to check whether KVM is supported by the CPU or not. For that use these commands:
sudo apt install cpu-checker
sudo kvm-ok
The output will be like this:
h2smedia@h2smedia:~$ sudo kvm-ok
INFO: /dev/kvm exists
KVM acceleration can be used
Step 3: Install KVM on Ubuntu 20.04
To get the Kernel-based Virtual Machine on Ubuntu, we don’t need to add any third-party app. It is already in the official repository of Ubuntu and can be installed using the APT package manager.
Along with KVM we also install some other tools need to manage our virtual machines.
sudo apt-get install qemu-kvm libvirt-daemon-system libvirt-clients bridge-utils virtinst
Step 4: Add user to libvrt Group
To use the existing user with full rights to manage virtual machines using the libvrt, we need to add in its group, well generally it happens automatically, however, use the command:
sudo adduser username libvirt
Replace the username with your ubuntu’s.
To make sure the Libvirt is working fine check its status:
service libvirtd status
Now, we can start creating Virtual Machines on Ubuntu using the KVM. There are two ways to do that, one is command line and other is a Graphical tool called Virt-Manager. We show both.
Manage KVM Virtual Machine using the command Line
Create Virtual Machine on CLI
Before moving further install virt-viewer on your machine if you have not, however for headless servers we need some other machine that supports the GUI to access KVM running guests either using Virt-Manager/Virt-Viewer or VNC viewer.
sudo apt install virt-viewer
To create and manage VM using the command line, we also need the ISO file of the distribution which you want to use as guest OS.
Once you have that use it with the below command.
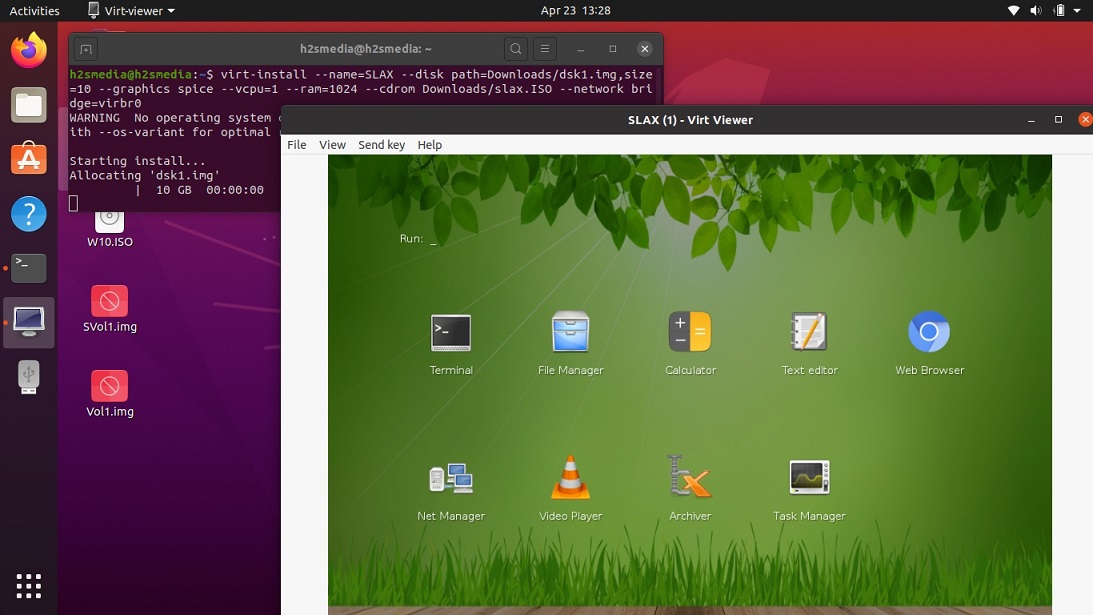
sudo virt-install --name=Slax --disk path=/var/lib/libvirt/images/dsk.qcow2,size=10 --graphics spice --vcpu=1 --ram=1024 --cdrom Downloads/slax.ISO --network bridge=virbr0
Explanation of the commands used above:
–name – Use to give a name to your virtual machine.
–disk path: The location where you want to create a virtual storage drive for the guest OS to install. In the above command: Images under libvirt is the folder where I want to create a virtual storage disk in the .qcow2 format. So, the dsk.qcow2 is the name given to storage image formatted in qcow2, you can choose a different location with some other volume name. You can also use other disk image formats such as img.
–graphics: Type of graphics to export the Display of Guest OS, usually Spice or VNC.
–vcpu: Define how many virtual CPU you want to assign to the virtual machine.
–ram: Amount of memory.
–cdrom: location of the ISO file to boot the VM initially for installation.
–network bridge: Network interface for virtual machines.
Connect Virt-Viewer
The moment you run the above command to create a Virtual machine on KVM, the process will allocate the mentioned resources such hard disk space, RAM, CPU and others along with that it will immediately look for the Virt-Vierwer installed on our system and pop-up a graphical interface window for the installation of the guest VM.
To remotely connect KVM through Virt-Viewer here is the command:
virt-viewer --connect qemu+ssh://username@server-ip/system VMname
username: The username of the system that is running the KVM
Server-IP: IP address or domain name of the KVM server.
VMname: Name of the Virtual machine want to connect
The Virtual Manager also can be used for the same purpose to connect VM remotely.
Create & Manage KVM Virtual machines via GUI Virt-Manager
1. Install Virt-Manager
To manage KVM Virtual environment on Ubuntu 20.04 graphically we have several tools and one of the popular ones which developed by the RedHat is Virt-Manager. It is a simple tool that uses libvirt for managing VMs sunning on Qemu/KVM.
The tool is available to download in the official Ubuntu repository, thus here is the command:
sudo apt install virt-manager
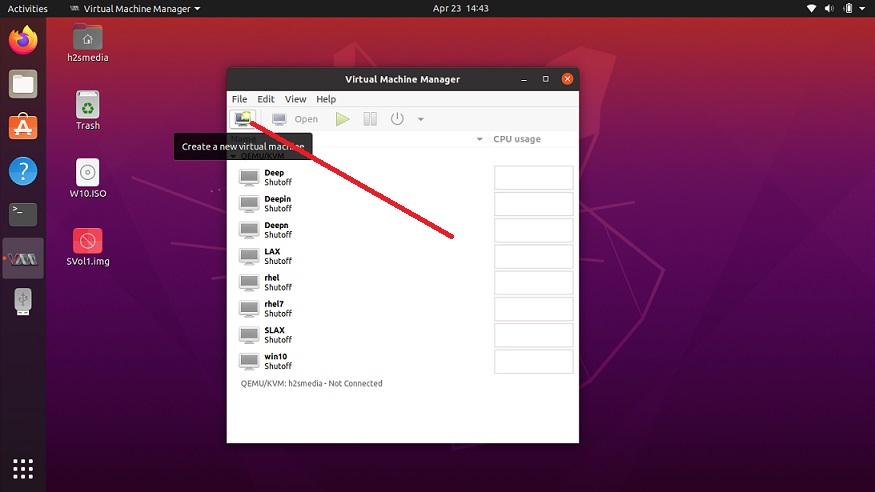
2. Run Virt-Manager to create Virtual machines
After the installation, it can be started from the Activities, just go there and search for it. Once it appears, click on the Display icon to create a new virtual machine.
Also, if you have earlier created any VM via the command line all that will also be there on Virtual Machine Manager; if you want you can start directly using them.
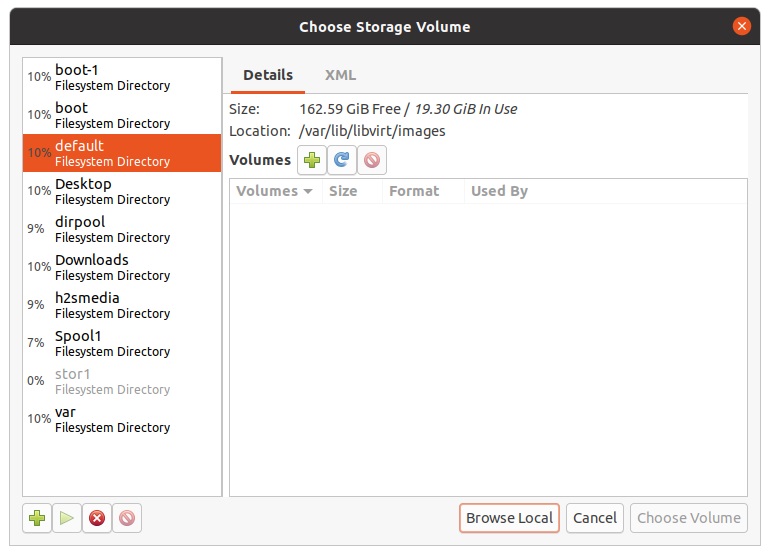
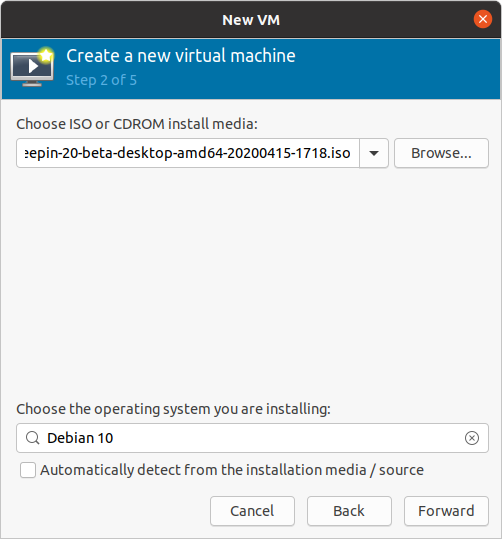
3. Local Install media (ISO image or CDROM)
The first step is to set the bootable medium for VM, thus select Local install media, the first option. In case you already have a VM disk image imported or used earlier that can be used as well.

Now, click on the Browse button and again on the Browse local button to open file manager, navigate to Distribution or OS ISO file which you want to install.
After that uncheck the box of “Automatic detect from the installation source or medium” in case it hasn’t been able to detect the operating system you are about to install. And then click on the X button given in the front of space for “Choose the operating system you are installing” and type a few words of the distribution. As it appears select that.
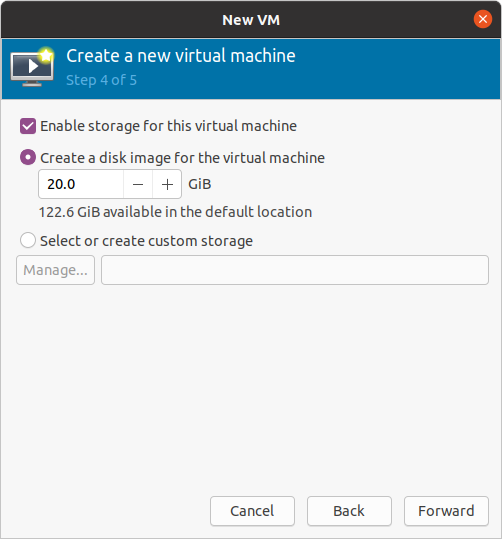
4. Create a disk image for the KVM virtual machine
At this step, enter the amount of storage you want to assign to the VM you are about to install. For example, for Debian, the user can start with 20GB of space or more.
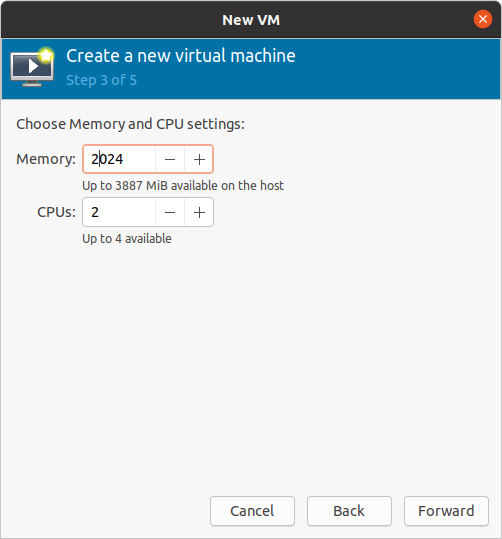
5. Choose Memory and CPU settings
Another important thing to set is RAM and Virtual CPU, however, the maximum amount of resource in both you can assign will be given at the bottom of the boxes. For example, the total RAM is available to assign on our system is 3887 MB RAM and 4 CPU, you can see in the below screenshots.
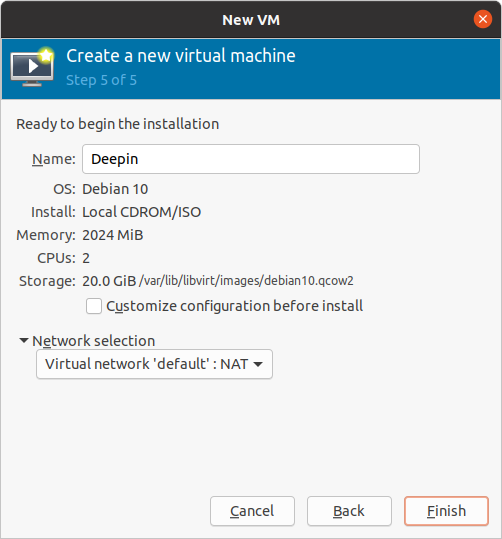
6. VM Name and Network Selection
Change the VM name, if you wish and select the network type, by default it will be on NAT.
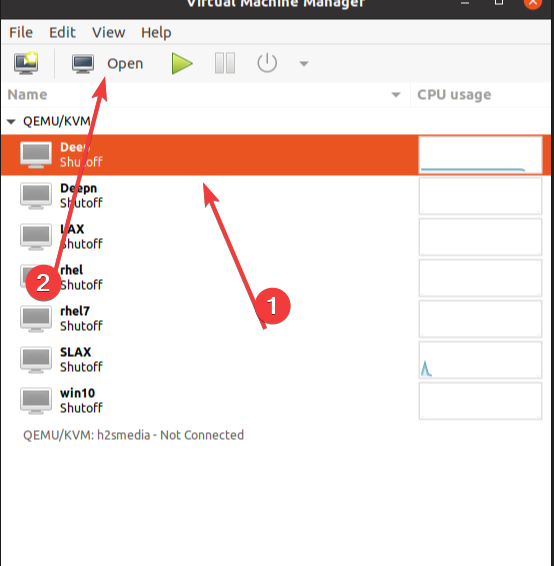
7. Run machine or edit hardware configuration
If you want to run the machine, just select that and click on the Green colour play button. Or else to edit the existing hardware configuration of any created VM listed on Virtual Manager, Select it and click on the Open button.
Now, click on the blue colour exclamation button.
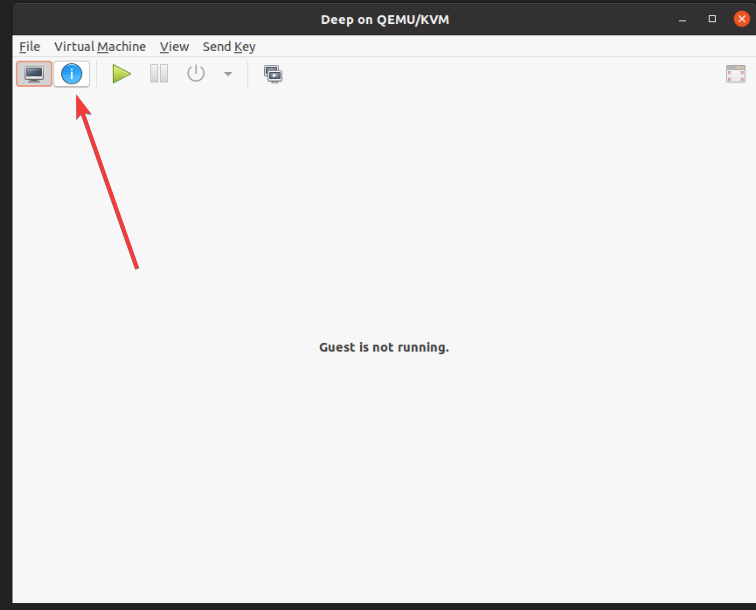
All the available hardware resources will be in front of you, just add, remove or edit whatever you want.

Once done, click on the Display icon and then Start button.
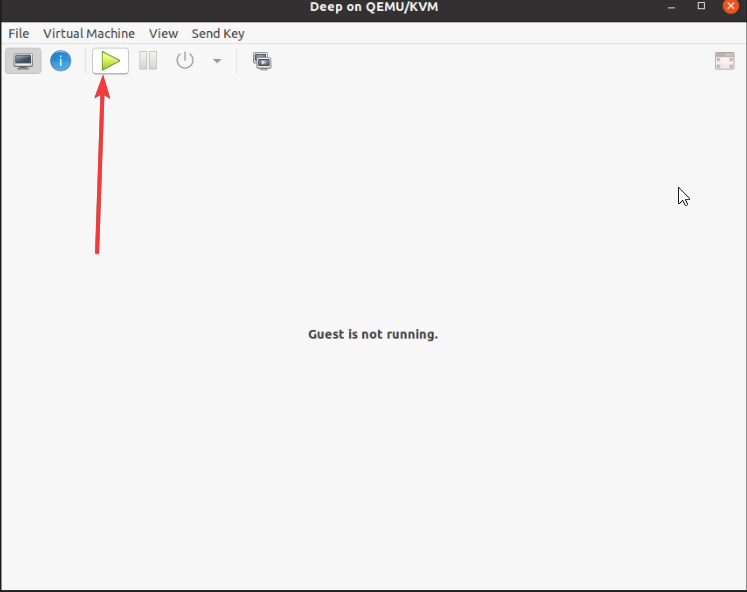
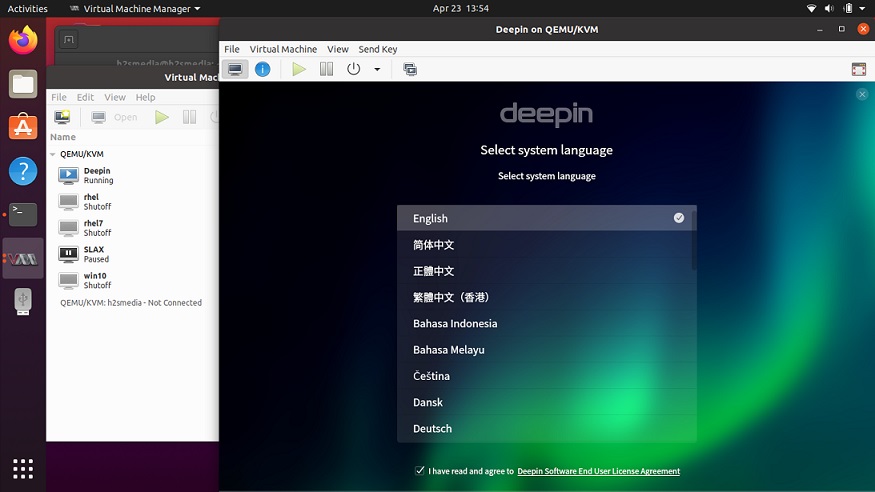
In a few seconds, your KVM machine will boot and give you access to install the guest OS.
Other Articles:


It’s going to be ending of mine day, but before end I am reading this enormous piece of writing to improve my experience.