MySQL is a popular and mature SQL based database system used by millions of servers around the world to cater to commercial and enterprise demands of data storage. It is free (open source) database system. Unlike Microsoft Access, for example, MySQL only provides pure database functionality. The management of the databases, the programming of forms, queries or reports is reserved for external applications.
MySQL is a full-fledged relational database that can be used particularly well on a web server. The stability and the functionality have been optimized in the new version, although we can install it on Windows as well, however, most of the time it used on Linux servers or Desktops in a stack of LAMP (Linux, Apache, MySQL and PHP) to provide a working web environment for most of the web applications, for example, WordPress CMS.
Requirements
This tutorial will show you how to set up the latest version of MySQL 8.0 on the Ubuntu 20.04 LTS server, thus we need Ubuntu Focal fossa with sudo rights for the installation process.
Step 1: Update the system to the latest
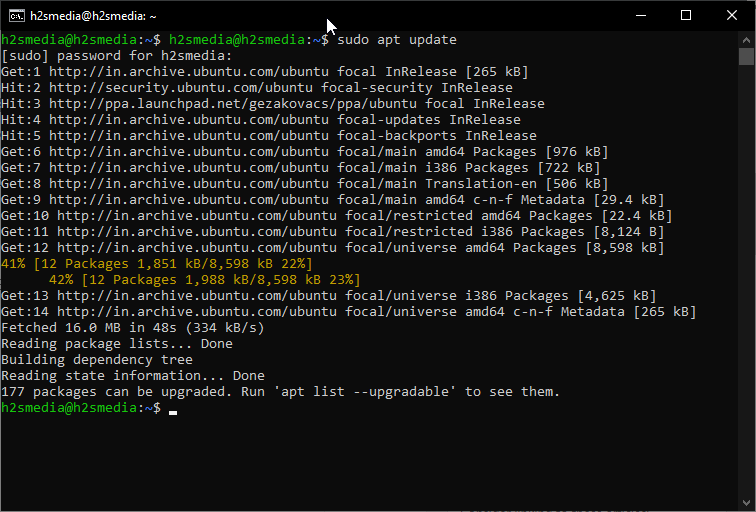
To make sure all the installed packages of Ubtunu 20.04 are up to date along with repositories, we have to run the command of update.
sudo apt update
Step 2: Install MySQL on Ubuntu 20.04
For the installation of the MySQL on Ubuntu 20.04 LTS, we don’t need to add any third-party repository, all packages are available on the official APT package repo, thus we just need to run one single command to get and install them; while we are writing this tutorial the latest version of it available officially on focal fossa repository was the latest Mysql 8.0.
The command will be:
sudo apt install mysql-server
Enter your root password and it will prompt the MySQL version going to be installed along with dependencies it needed. Give your permission by typing Y and hit the Enter button.
Output:
h2smedia@h2smedia:~$ sudo apt install mysql-server
Reading package lists... Done
Building dependency tree
Reading state information... Done
The following additional packages will be installed:
libaio1 libcgi-fast-perl libcgi-pm-perl libevent-core-2.1-7 libfcgi-perl
libhtml-template-perl libmecab2 mecab-ipadic mecab-ipadic-utf8 mecab-utils
mysql-client-8.0 mysql-client-core-8.0 mysql-server-8.0 mysql-server-core-8.0
Suggested packages:
libipc-sharedcache-perl mailx tinyca
The following NEW packages will be installed:
libaio1 libcgi-fast-perl libcgi-pm-perl libevent-core-2.1-7 libfcgi-perl
libhtml-template-perl libmecab2 mecab-ipadic mecab-ipadic-utf8 mecab-utils
mysql-client-8.0 mysql-client-core-8.0 mysql-server mysql-server-8.0
mysql-server-core-8.0
0 upgraded, 15 newly installed, 0 to remove and 177 not upgraded.
Need to get 29.8 MB of archives.
After this operation, 245 MB of additional disk space will be used.
Do you want to continue? [Y/n]
Step 3: Secure MySQL installation
Here we will run the MySQL security script to configure some options prompted by the installer of this open-source database program such as remote login, password validation plugin to make sure user using the secure password only by running the strength test; setting up of root user password for database and more.
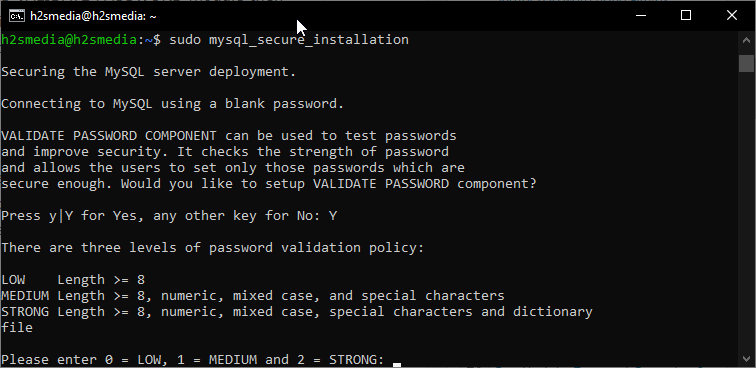
sudo mysql_secure_installation
So, the first thing it will prompt is to secure, the deployment of MySQL server by installing VALIDATE PASSWORD COMPONENT as I told above will use to test passwords and improve security. If you want to setup VALIDATE PASSWORD module then press Y and hit Enter button. However, if you are using MySQL for some experiment and personal usage to test some app locally in a confined network, I would recommend not to install it. Or select the low strength policy.
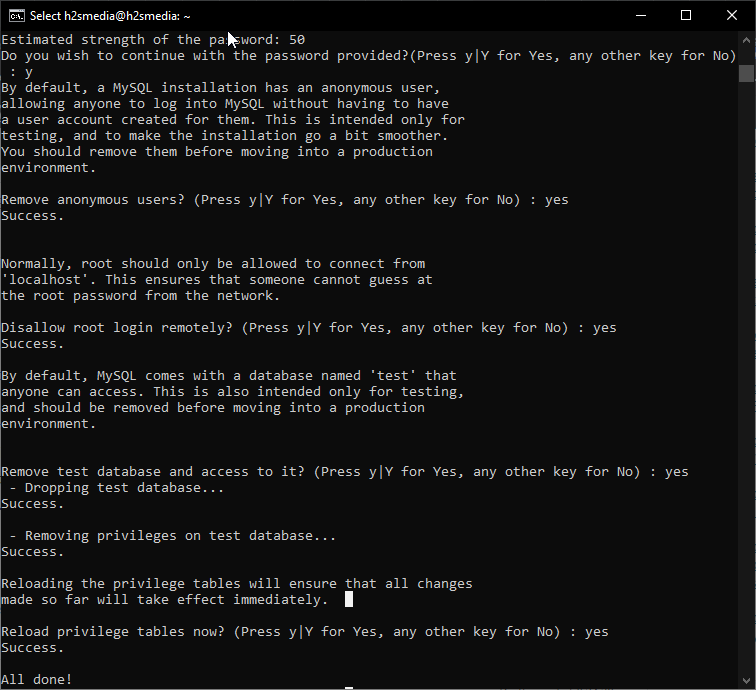
Next, set the root password which is by default blank. Enter the password and give your consent to set the same.
Now, by default there are anonymous users on MySQL, type Yes to remove them, this will improve the security of a database.
To harden the security of the database further, the security script will ask you to disable the remote root login, this will make sure the database can only be login using root user by the administrator locally.
Finally, remove unwanted test database and access to it, and reload privilege tables.
Note: If you just want to set or change the root user password of MySQL then:
sudo MySQL
ALTER USER 'root'@'localhost' IDENTIFIED WITH mysql_native_password BY 'pass';
Replace the pass with the one you want to set.
Step 4: Test MySQL Community Server service
Although, everything will be up and run after installing, however, if you want to check its status, here is the command:
systemctl status mysql.service
The output of the above command:
● mysql.service - MySQL Community Server
Loaded: loaded (/lib/systemd/system/mysql.service; enabled; vendor preset: enabled)
Active: active (running) since Fri 2020-04-17 20:06:17 IST; 2h 50min ago
Main PID: 6327 (mysqld)
Status: "Server is operational"
Tasks: 39 (limit: 3525)
Memory: 379.0M
CGroup: /system.slice/mysql.service
└─6327 /usr/sbin/mysqld

Apr 17 20:06:15 h2smedia systemd[1]: Starting MySQL Community Server...
Apr 17 20:06:17 h2smedia systemd[1]: Started MySQL Community Server.
h2smedia@h2smedia:~$
To know more about the installed database system such as version, UNIX socket, and total server uptime, queries per second… we can use mysqladmin tool.
sudo mysqladmin -p -u root version
The output
h2smedia@h2smedia:~$
Enter password:
mysqladmin Ver 8.0.19-0ubuntu4 for Linux on x86_64 ((Ubuntu))
Copyright (c) 2000, 2020, Oracle and/or its affiliates. All rights reserved.

Oracle is a registered trademark of Oracle Corporation and/or its
affiliates. Other names may be trademarks of their respective
owners.

Server version 8.0.19-0ubuntu4
Protocol version 10
Connection Localhost via UNIX socket
UNIX socket /var/run/mysqld/mysqld.sock
Uptime: 2 hours 56 min 13 sec

Threads: 3 Questions: 24 Slow queries: 0 Opens: 139 Flush tables: 3 Open tables: 59 Queries per second avg: 0.002
h2smedia@h2smedia:~$
Command to create new user and database in Mysql 8.0
The command to create a database and user.
CREATE DATABASE h2sDB;
Note: Replace h2sDB with the database name you want to give it.
CREATE USER 'h2smedia'@'localhost' IDENTIFIED BY 'pass';
Grant rights to manage database activities to the user you have.
grant all privileges on h2sDB.* to h2suser@localhost;
Note: Replace the h2smedia with the username and pass with the password you want to assign.
Ending notes
So, this was a quick tutorial to install, set up, and secure Mysql on Ubuntu 20.04 server along with the commands to create user and database.


Hello,
How I can install MySQL 5? This is very important to me for using Magento 1 version.
Thank you.