
Vivo is the fifth largest Chinese smartphone manufacturer company. In India, Vivo is doing well due to its strong offline marketing and mid-range segment devices. The personally what I like in the Vivo’s phone is its sound quality. Nowadays you don’t need to push multiple commands to root your device, there are lots of software available online those can root the Android devices with just a few clicks, Kingroot, and One click root are some of them. The short list of Vivo phones support by both the rooting software are Vivo Y51/Y55L/Y31/Y31L/Y21L/Y21/Y11, vivo V3/V3 Max/V1/V1Max, vivo X5/X5 Pro/X5 Mac/Xshot/X3S,
Tutorial: How to Root Vivo Android Phone with PC using Onclickroot
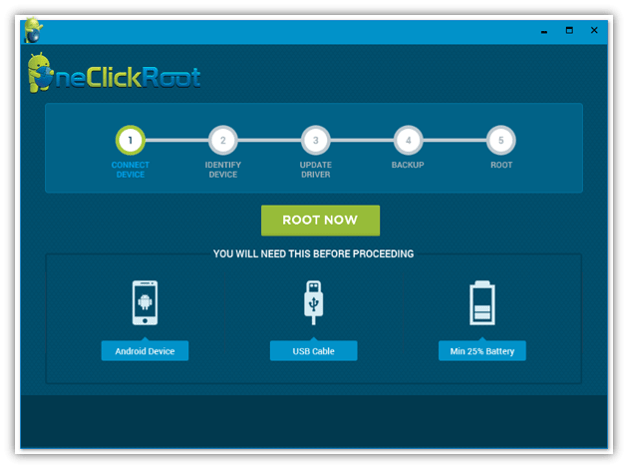
Step 1: Go to Oneclickroot website and download it on PC or Mac
After downloading this free software, just install it on your computer and launch it. After the installation procedure, the rooting interface of software will open as shown in the below give screenshot.
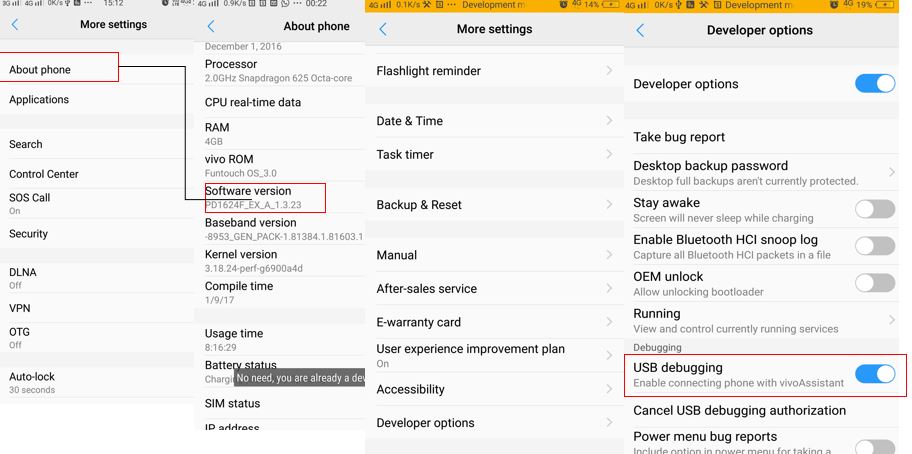
Step 2: Using USB connect the Vivo Phone to the Computer
Using the standard USB cable or the one came along the box of your VIVO phone connect it with the computer. After connecting go to settings->Build number or software version and tap it 7 times to enable the Developer option in the phone. Once the developer option enables go to -> Developer options-> USB debugging and check it to enable. The Oneclickroot software will automatically detect the phone and if not then close and reopen it.
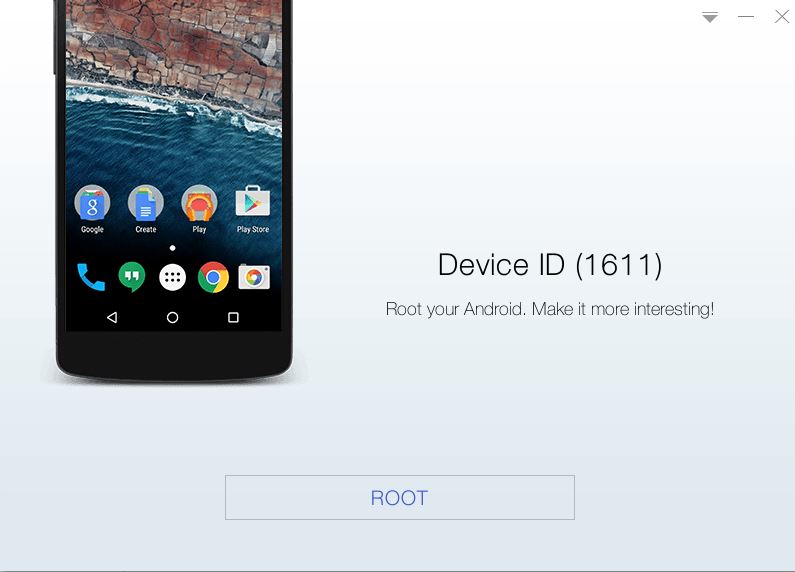
Step 3: Start Rooting VIVO Phone for Now
After the identifying your device the software will show a “Root Now ” button. Click it to initiate the rooting procedure. The procedure may take some time to complete and make sure while rooting process doesn’t disconnect your device because it may harm the phone. When the rooting is done, you will get the success message and then you can disconnect the phone from the computer.

Tutorial: Root Vivo without connecting to PC using KingoRoot APK
Note: Before going to Desktop procedure use the apk method it may root your device and if not then move towards the PC root method.
Step 1: First download the KingoRoot.apk and install it. To install the apk from external sources you need to give a permission to your phone. To enable the unknown sources apk or app installation got to Setting>Security>Unkown Sources.
Step 2: After installing the app, launch the KingRoot.
Step 3: Once you open the app and click the option “One Click Root”.
Step 4: The rooting process will start and if everything is ok, the VIVO phone will root successfully. However, if the rooting process failed then try more than once. Still, if you do not get succeed, go to desktop method.
How to Root Vivo using PC by KingoRoot
Note: Before starting the rooting process of your Vivo Android phone, you should backup your Vivo’s or any phone your want to root.
Step 1: For rooting the phone by using the desktop, just download the KingoRoot desktop version.
Step 2: Second enable the USB Debugging mode on your device if you have not. You can see the process of enabling the USB Debugging in step 2 of above OneClickRoot tutorial.
Step 3: Enable the install app from Unkown sources which you have already done in the above Kingoapp tutorial. You can see that.
Step 4: Charge the battery of your Vivo phone at least 70% before rooting and be sure that the internet connection is properly connected, it might be needed to download the driver of your phone.
Step 5: Now launch the installed desktop version of the Kingoroot and connect the device. The software will automatically detect the phone. Please use your original USB cable or good quality OEM to connect it.

Step 6: If the Kingroot unable to find the driver compatible with your Vivo smartphone, it will automatically download it from the internet.

Step 6: Now, click on Root button and start the Android rooting process. Make sure the device is powered on.
Step 8: During the rooting, the device may boot several times but don’t worry it’s a normal thing. The rooting process may take several minutes and don’t touch or unplug the device during the rooting process.

At last, your Vivo phone will be successfully rooted by KingoRoot. If you get any problem, please comment, we will give you the best possible solution.


hello my name is shajahan ,i tried Root My mobile using App And Desk Top Method . both are Showing failed Root.
pls tel me good solution
hello ,i tried Root My mobile using App And Desk Top Method . both are Showing failed Root.
pls tel me good solution
hi man can you sent me a link of the Kingroot?