ClipIt is a lightweight, fully featured GTK+ clipboard manager for Linux operating systems to manage copy-paste, so that items you don’t lose anything.
We cut and copy several items to our clipboard when we work on our electronic gadgets, no matter whether it is a smartphone or a full-fledged PC. But the number of items we cut and copy is way more than those we cut and copy on our smartphones, and most of them are texts. The simple fundamental aspect of the clipboard, you can paste only the last item cut or copy. Items cut or copied before the last item might not be lost, but we can’t use them, which literally means it is lost for us. But there are programs and ways to monitor the clipboard, on Windows, Android, and other platforms.
Talking about Linux, which is an open-source platform, you can even use a program to monitor your clipboard so that you can insert or paste something cut or copied long before the last item. Linux is an open-source platform, and thus, you can get the utility to monitor the clipboard directly from the official repository of Linux. I would even say, ClipIt is even better than most other proprietary utilities available on Windows and Android. There are a lot of options to configure and turn things your way. Don’t be get confused between ClipIt and Clipgrab. Clipgrab is Youtube downloader and converter, see this: How to install ClipGrab on Ubuntu Linux
So without further delay, let’s get started…
How you can install and use ClipIt on Linux
Note: Here we are using Ubuntu 19.04 and the steps will be the same for Ubuntu 18.04/16.04/14.04… along with Debian, Elementary and other similar Linux OS. For other Linux OS such as CetnOS, Fedora, Arch Linux and more see: the Project’s Github page.
Step 1: Open your Ubuntu Linux Terminal
To open command terminal simply use keyboard shortcut CTRL+ALT+T.
Step 2: Install ClipIT on Ubuntu or Linux Mint
Type the following command to start installing ClipIt on your system.
sudo apt-get install clipit

Step 3: Accept the installation of Additional packages
The installation will start, and you will have to allow installation of the additional packages i.e. libxdo3 and xdotool for installing ClipIt. Just enter ‘y’ and hit the enter key.
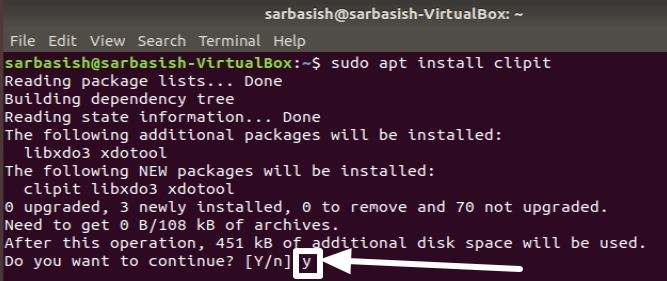
The installation shouldn’t take a lot of time, though it will depend upon the speed of your internet connection and your system performance.
Step 4: Find and open ClipIt from apps
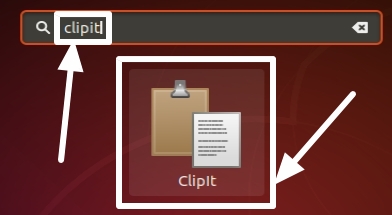
Once the installation is complete, just exit the Terminal. ClipIt should automatically start after the installation is complete, and if it doesn’t, just open ClipIt from the apps section of your operating system.
Step 5: ClipIt settings
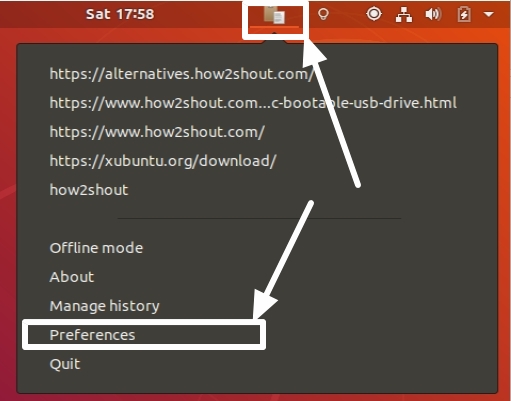
The ClipIt icon should now be available in the taskbar, and it will monitor and record every single text that you copy. Just click on it to see the captured clips and to insert one of them, just click on the appropriate clip.
Click on ‘Preferences’ to change different settings associated with the app.
Step 6: Clipboard History
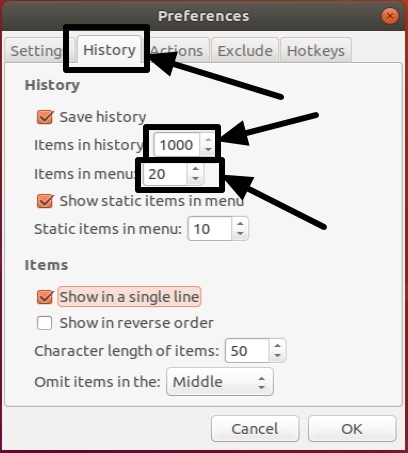
You can set a limit on a number of clips that will be added to the history, which is up to 1000, and the number of clips that will be shown in the clip list. You can change all these settings in the ‘History’ tab.
Step 7: Hotkeys or key shortcuts for ClipIt Clipboard manager
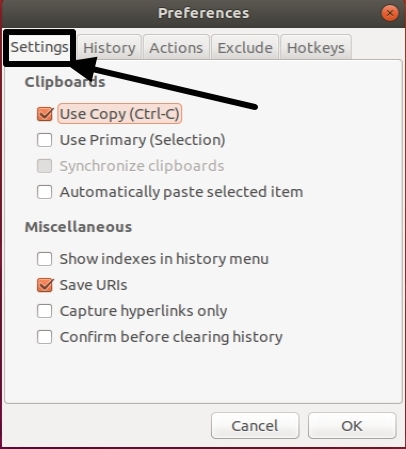
To change the hotkeys or the shortcut keys associated with ClipIt, you can go to the ‘Hotkeys’ tab, and to change some general settings, you can select the tab that says ‘Settings’.

To see the list of clips or copied items, just hit the ‘Ctrl+Alt+H’ or your assigned key combination. Use the up and down navigation keys and hit the enter key to paste the clip.

So that was it. ClipIt is a very useful program to manage your clipboard on almost all the Linux distributions you can think of.
Do you have any question in mind, or you faced troubles installing or using ClipIt? Feel free to comment the same down below.
Other Useful Resources:
Related Posts
How to Reopen Closed Windows or Tabs in Firefox
How to Install Django on Windows 11 or 10
How to set Gemini by Google as the default Android assistant
How to create data bars in Microsoft Excel for numeric values
How to open HEIC images on Windows for free
How to install Server Manager Windows 11 or 10