Here we learn the command line method to install BalenaEtcher on Windows 11 to create bootable USB drives for Linux ISO files.
BalenaEtcher is an open-source software to create bootable USB drives on Windows, macOS, and Linux. However, if you are a Windows user then it is recommended to use Rufus, instead BalenaEtcher.
It is also known as Etcher, a program to copy ISO files to USB sticks and SD cards to create bootable drives for various OS. With the help of the AppImage format, it supports all most all mainstream Linux distros such as Ubuntu, CentOS, RHEL, and more.
The interface of the tool is very easy to understand and any inexperienced user who hasn’t used bootable USB drive creator earlier can also operate it. The language it uses is English.
Note: We recommend using Rufus first on Windows 11 to create bootable USB drives. If it doesn’t work for you then you can shift to BalenaEtcher.
Steps to install BalenaEtcher on Windows 11
Here we will show the quick way to install the BalenaEthcer on Windows 11 without visiting its official website.
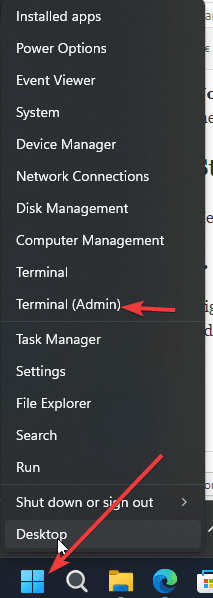
1. Open Command terminal (as Admin)
Right-click on the Start button and select Terminal (Admin). This will open the Windows Terminal with Administrative rights to install software and execute other important tasks as a Superuser.

2. Install BalenaEtcher on Windows 11
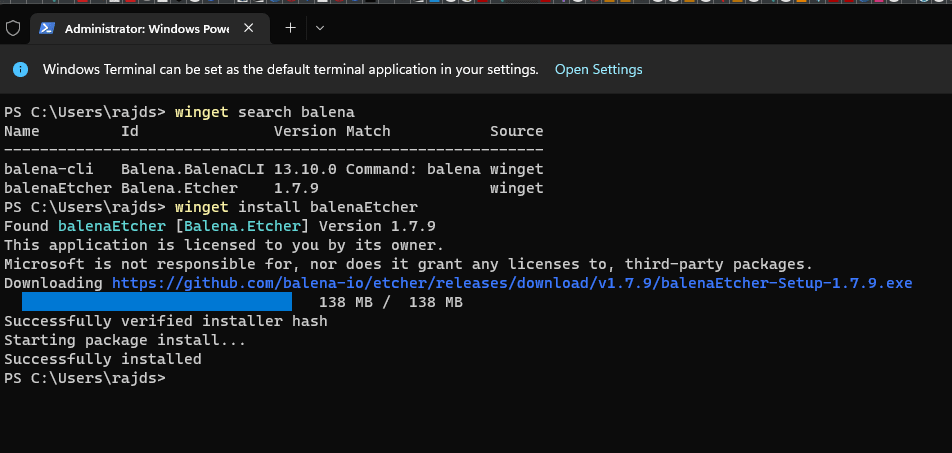
Now, on your Windows Terminal, just run the given command that uses Winget, a default windows package manager. Using it we don’t need to visit the official website of software to download and install them. Everything will happen automatically with the help of just a single command.
winget install balenaEtcher

3. Run the software
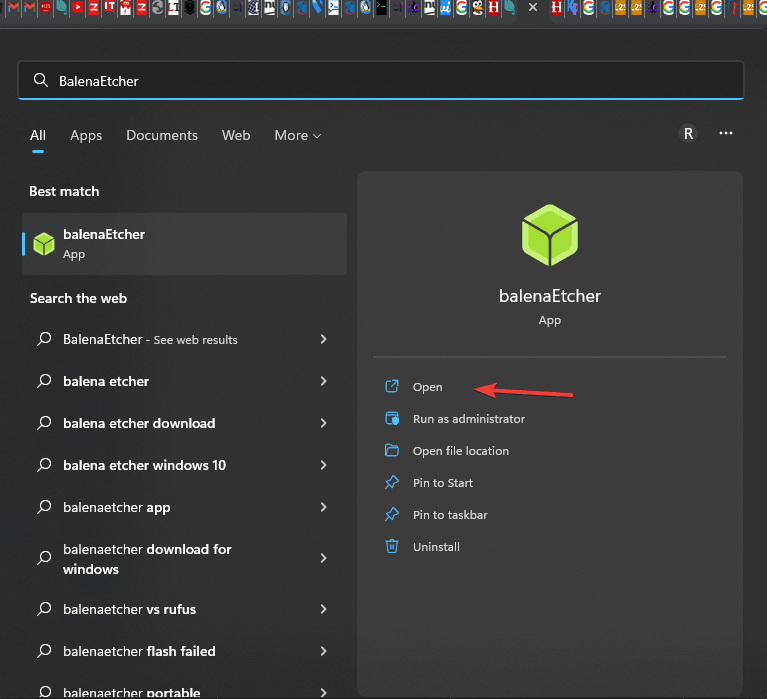
Once the installation is completed, the users can run the Etcher USB maker like any other tool. Go to the search box and type- balenaEtcher as its icon appears, click to run the same.

4. Create a bootable USB Drive using BalenaEtcher
Step 1: Insert a USB drive
Once the installation is completed, insert the USB flash drive to make the bootable USB flash drive and open Etcher from the desktop shortcut menu or the Start menu as shown in the previous step.
Step 2: Select a bootable image for Etcher
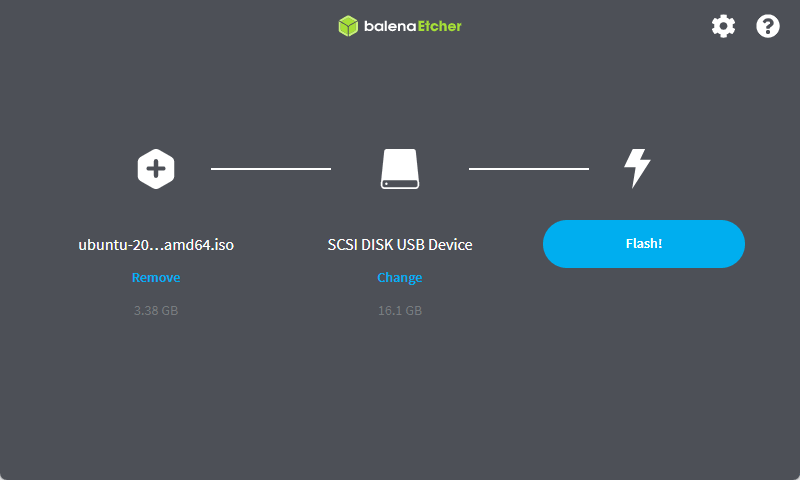
Just click on ‘Flash from file‘ and choose the image for creating the bootable USB flash drive. BalenaEtcher supports several image formats like ISO, BIN, DMG, IMG, ETCH, and many more. Chances are very less, you will have an image with the format not supported by BalenaEtcher.
Step 3: Select the connected USB flash drive on BalenaEtcher
Next, choose the USB flash drive that you want to make bootable. Click on the Select Target button and select the USB drive attached that you want to make it bootable.
Just select the desired USB storage device and click on ‘Select’.
Step 4: Flash ! to create a bootable USB drive
Finally, click on ‘Flash!’ to create the bootable USB flash drive with the default settings.
Once the process starts, flashing will take some time depending upon the size of the bootable image, and the speed supported by the USB flash drive.

Step 5: Flash Complete, Eject the drive
On getting the ‘Flash Complete!’ message, you can exit Etcher or start flashing another USB flash drive.
Other Articles:
⇒ 4 Best Software to create a Bootable USB drive on Windows 10
⇒ How to Create a Bootable USB from Ubuntu ISO
⇒ How to install Ubuntu 22.04 on Windows 11…
⇒ Install Windows 11 on a VMware Player
Related Posts
How to Install Django on Windows 11 or 10
How to open HEIC images on Windows for free
How to install Server Manager Windows 11 or 10
Install Remote Server Administration (RSAT) Tools for Windows 11 or 10
Get back the Missing Show Desktop icon in Windows 11
Get Missing Hibernate Button Back on Windows 11 using CMD