Windows 10 or 11 has a hidden data backup feature called “File History” that works like Apple’s Time Machine to back up and restore previous versions of your files in the background. Here we see how to enable and use “File History” on Windows.
Well, due to common OS errors, hardware problems, computer viruses our files are always at risk, hence we should have a backup plan for them. It is because if an important file has been accidentally deleted or an irretrievable photo has been messed up by image processing then it going to make you frustrated. Of course, you can make a backup copy of all your files in a separate external hard drive but it is not possible manually every time for all files, hence there must be an automated process. And we talked about that in this article.
How to Enable file history in Windows 11 or 10
- Go to Windows 11 or 10 Search box.
- Search for “File History“. It is available under Control Panel.
- When the option appears, click this backup feature icon to open the same.
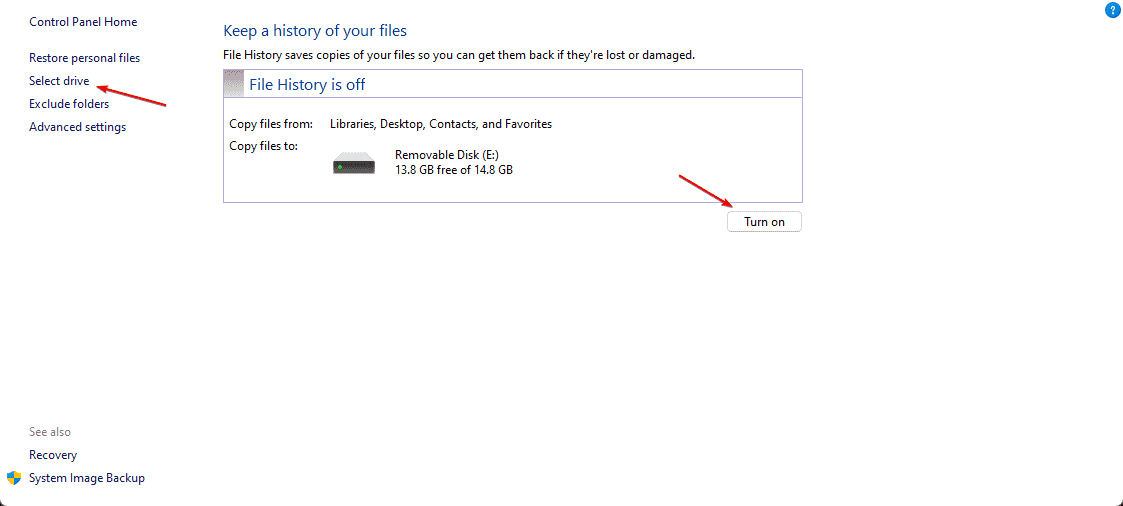
- Click on the Select Drive option given on the left side menu.
- You will get the list of all connected hard drives both internal and external. It is recommended to select an external USB drive or NAS network drive to play safe, in case there would be any hardware failure.
- Once you have Selected the Drive, click on the “Turn On” button.
- The system will automatically start backing up your current File changes history.
That’s it. Windows automatically saves changed files on the selected hard drive in the “file history” folder. If your hard drive is not connected or you want to remove it, you can do that as well.
File History: Hard Drive Not Connected
File History: Change Time
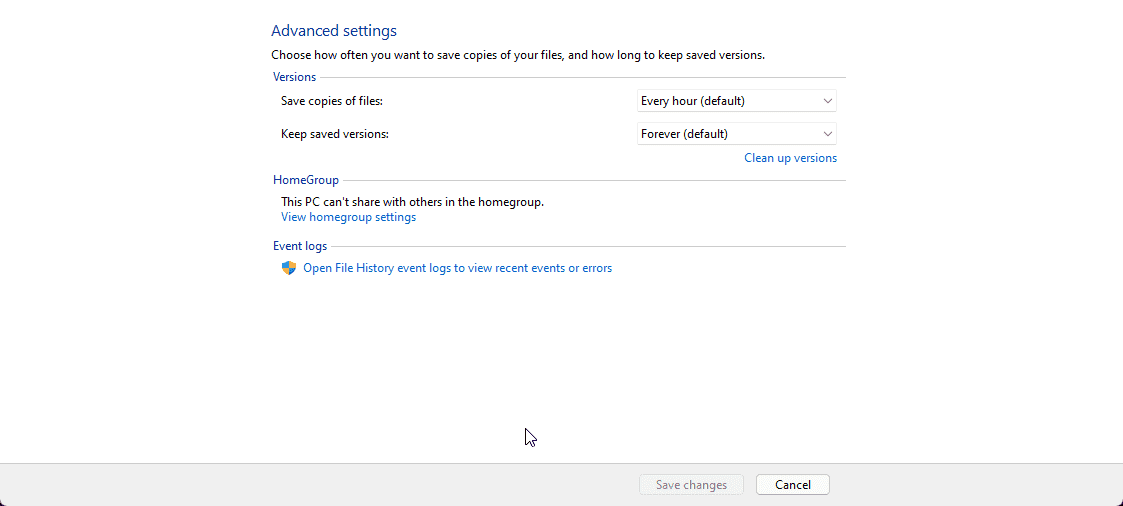
We can control the frequency of backup of files this will tell the Windows when to backup and when not. By default Windows, backup a copy of the file every hour. If the interval is too short or long for you, adjust it as follows:
- Go to File History Backup Settings.
- Click on the Advanced Settings.
- Select the dropbox given in front of “Save Copies of files” to select the Time
- To change the backup interval choose any option between Every 10 Minutes and Daily.
- Whereas one more option is there to tell the system how long you want to keep the backup version of the file. Under “Keep Saved Versions”, it will be – Forever, if you want, can change it as per the requirements. Well, if you don’t know what to do then leave the default settings as it is. Whereas for those who have limited storage space, the option Until space is required is recommended.
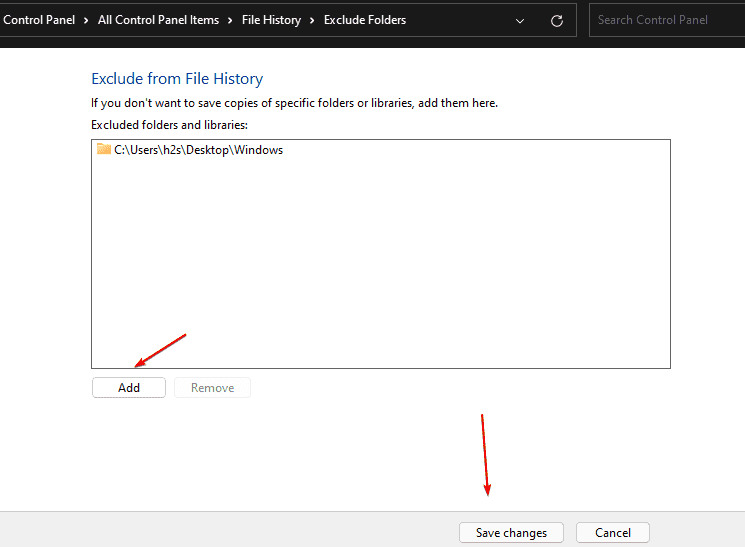
File History: Exclude Folder
- Again go to the File History Settings.
- From the left side select “Exclude folder“
- Click on the Add folder
- In the Windows Explorer that appears, navigate to the desired folder.
- Click Select this folder.
- Save Changes.
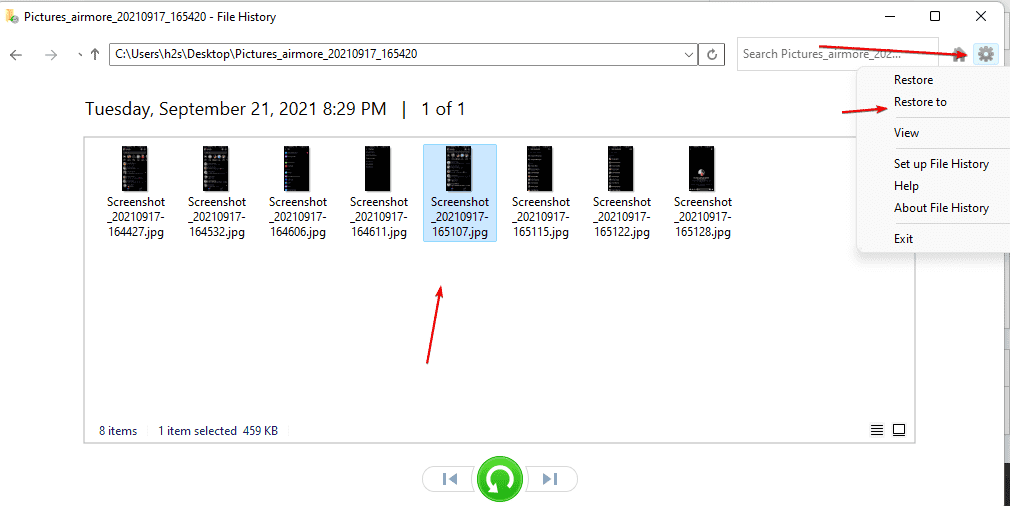
Restoring a changed file or previous version
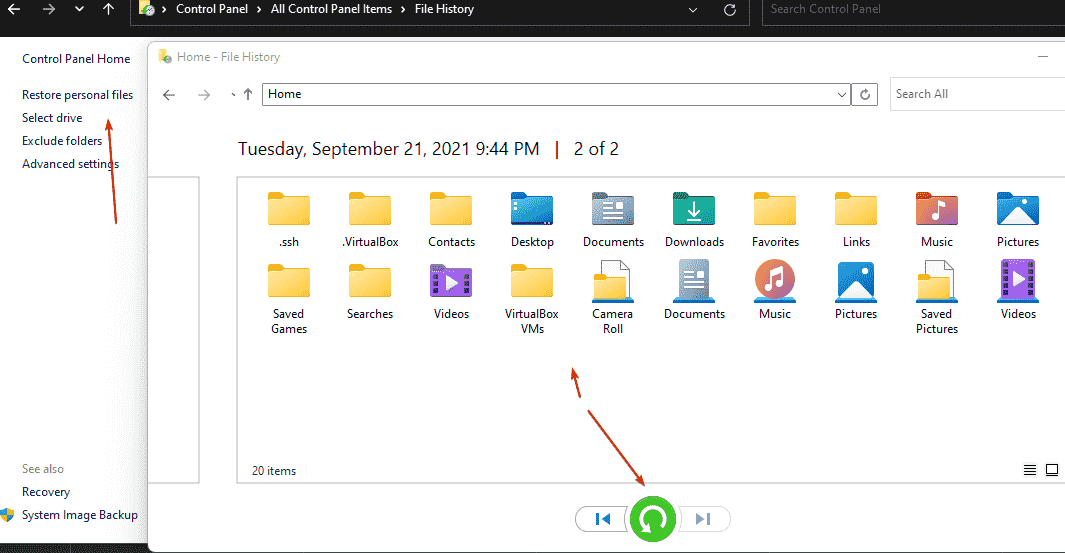
- From the Settings select “Restore Personal Files“
- In the menu that appears, select the file to restore.
- Then click on the Restore button.
- Select Replace the existing file option.
Note: To restore the file in some other location, click on the Gear icon given on the right top side and select Restore to.



I like the helpful info you provide in your Blog. Keep writing such kind of info on your blog.
It was truly informative. So excited to be a part of this! Thank you for supplying these details.
Great, Thanks for sharing this Blog post. Really looking forward to read more. Very interesting info !
If you check the “Backup Settings” in Windows 10, it has the ability to “include” folders. This inclusion option seems to be missing in Windows 11.
Same issue here. How do I add other folders to File History?