Many times in Ubuntu Linux the apt-get command stuck in somewhere while installing or performing some commands in the Ubuntu terminal. The error you get in the apt-get which is a package management tool in Ubuntu are:
E: Could not get lock /var/lib/dpkg/lock - open (11 Resource temporarily unavailable)
E: Unable to lock the administration directory (/var/lib/dpkg/) is another process using it?
These errors are so annoying that a new Ubuntu Linux user might get frustrated and think that the Linux is not meant for him/her. But everything has a solution and this too, Linux operating system is wonderful because you can modify and use it as per your choice.
Unlock the administration directory (/var/lib/dpkg/) in Ubuntu
This tutorial is applicable for all Ubuntu versions such as Ubuntu 20.04, 19.04, 18.04, 16.04… including Linux Mint, Debian, and other similar OS.
Here are some other error examples you might be faced:
E: Could not get lock /var/lib/apt/lists/lock - open (11: Resource temporarily unavailable)
E: Unable to lock directory /var/lib/apt/lists/
E: Could not get lock /var/lib/dpkg/lock - open (11: Resource temporarily unavailable)
E: Unable to lock the administration directory (/var/lib/dpkg/), is another process using it?
Login as Root
Step 1: First of all you should have root access to your Ubuntu Linux to unlock the locked apt-get.
Step 2: Switch to root using the command
su
and enter the password for the root user.
Command To find the Process uses the APT
Step 3: The errors shown above are because there would some process running in the background that has locked the apt and we need to find out which process using it.
To find out all apt-get or apt processes use the following command:
ps aux | grep apt

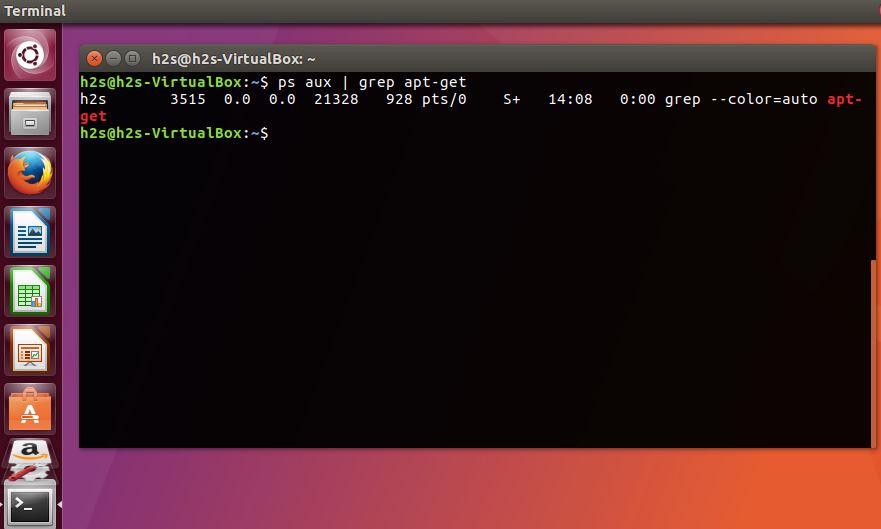
This command will show all the active processes and those using apt. Now find the process those showing the apt in red color as shown in the above screenshot. You will see a process ID (PID) of each process in the first column. Just write down all the process IDs of processes using the apt (red in color) command.
Kill the Process in Ubuntu Terminal
Step 4: Replace the ProcessID with the ID you noted in the previous step that has locked and uses the apt.
sudo kill -9 processID
OR
sudo kill -SIGKILL processID
For example, in step 3 of this tutorial, the two process uses the apt is 3499. Now, if we want to kill it to unlock the apt, we use the command in this form:
sudo kill -9 3499

or

sudo kill -SIGKILL 3499
Clear the Lock Files
If the error still persists then you need to remove the lock files created under the /var/lib/dpkg/ directory.
sudo rm /var/lib/dpkg/lock
sudo dpkg --configure -a
And if the lock files are under the /var/lib/apt/lists/ directory then use these commands to remove:
 sudo rm /var/lib/apt/lists/lock
 sudo rm /var/cache/apt/archives/lock
After removing the above lock files run the update command to see the apt-get is working or not…
sudo apt-get update
If you have any questions or doubt let us know…


Removing the dkpg file was the solution that worked for me thx