Creating a Google Analytics account and use it for a website based on WordPress is quite easy, you don’t need a special developer or coder for that. As the word Analytics suggests this Google tool is also meant to analyze, tracking and reporting of your website/app traffic and other performance like speed, bounce rate, users loyalty rate and more. The Google Analytics is the freemium web-based analytics hosted and offered by Google. It was launched in 2005.
Apart from the web analytics service, the Google also offers their Analytics app for Android and Apple (iOs) platforms. The paid version of Google Analytics known as the Google Analytics 360 mostly used by big enterprises. The user can create 100 free accounts/property of GA using a single Gmail ID.
So, now I think you know enough about the GA and its time to know how to create and set up the free Google Analytics account for websites.
How do you create & get a Google Analytics account?
To create a free Google Analytics account follow the below given steps:
- Go to http://www.google.com/analytics/ which is the official website to create an Analytics account.
- Click on the Start for free to sing up the Google Analytics free web version.
- Now it will ask you to use your Gmail ID to complete the sign-up process. If you have one then enter otherwise create a one for you. Enter the Gmail ID and Click on the NEXT button.
- Once you log in successfully using the Gmail ID, click on the Sign-Up button given under the text “Start using the Google Analytics”.
- Select the Website option or App according to your requirement of tracking.
- Fill all the details and Click on Tracking ID.
- Accept the terms and conditions from the pop-up page.
- Copy the Google Analytics Tracking ID code and paste just before the <HEAD> tag of your website home page. This will start tracking all the pages present on your website domain.
If you have any problem in setting up the code then you can see our guide: How to setup and Activate Google Analytics on WordPress. In this tutorial, we had discussed distinctive methods to implement the tracking code of Google Analytics to WordPress based website. For a user with some HTML knowledge: Where is the Closing/Opening Body Tag in WordPress Situated?
Step by step process to set up the Google analytics account with screenshots:
Now we are going to elaborate the above-given steps of creating GA account.
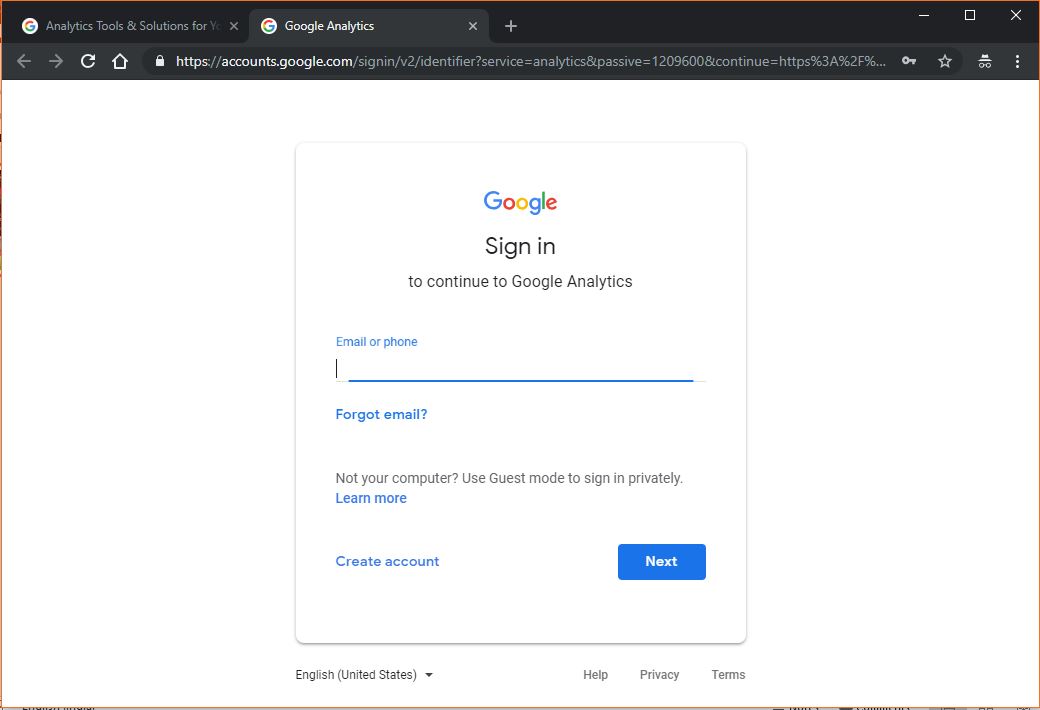
Step 1: Sign up: When you visit the Analytics page of Google you will see two options on the right top side. If you already have an account then you can go for the Sign in option but am assuming that you here because you don’t have one. So, that’s why click on the Start for free button.

Step 2: Sign in with Gmail ID: As I said above you need to have one Gmail ID to set up the account for Google Analytics. Just enter that and Click on the NEXT to enter the password. After this, you will be redirected to the next step.
Step 3: Start using Google Analytics: You almost about to complete the process for that click on the Signup button given on the right side. 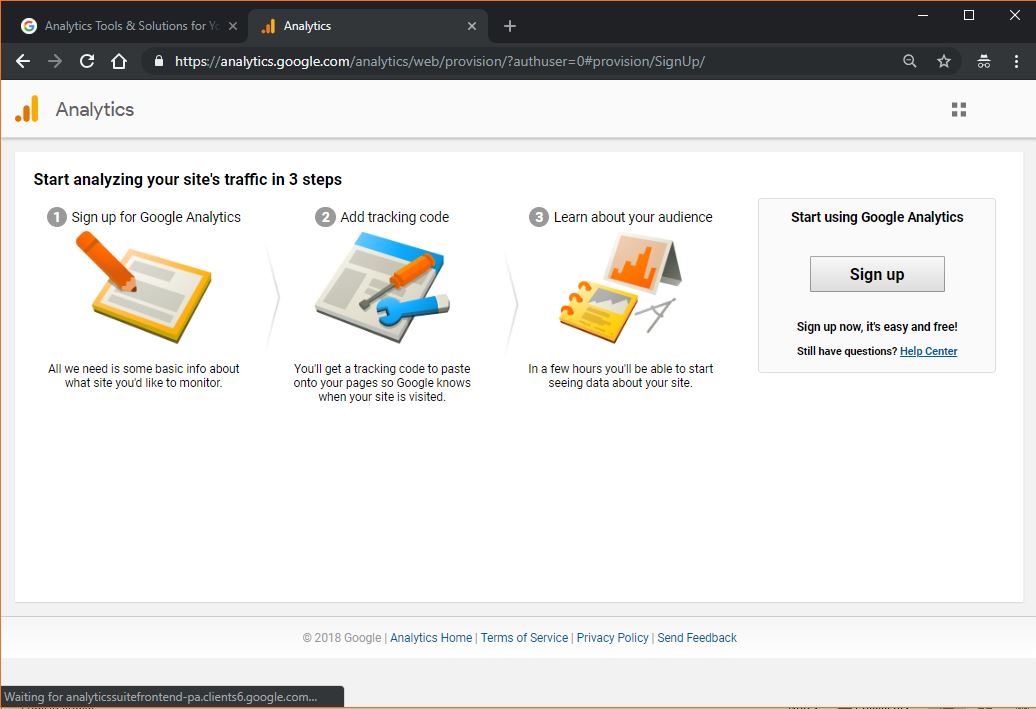
Step 4: This is the entree of your Analytics: If you want to use the Analytics to track the Website then select that otherwise if you are here for the Mobile app then you know what to select. After selecting the object you want to track, scroll down and give some name to your Google Analytics account, you can type any Account name that you want.
![]()
Scroll further, type your website name, Website URL (select the http:// or https), Industry category, Reporting time zone (your country time).
![]()
Step 5: Tracking ID: Leave the Data Sharing settings as it is. And click on the Get Tracking ID button.
![]()
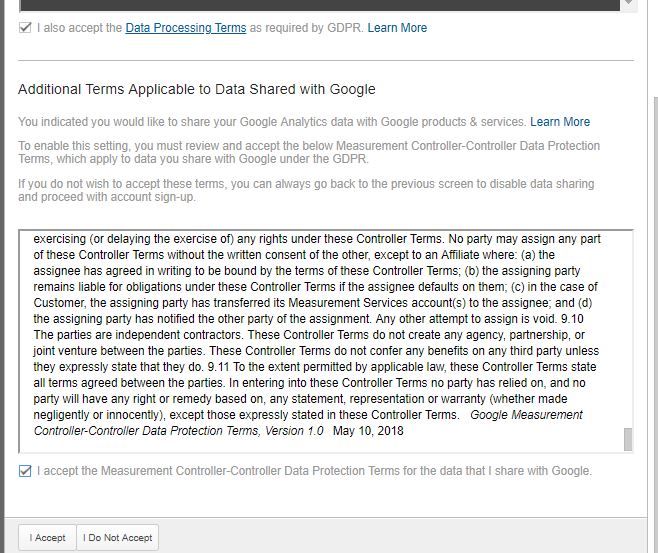
Step 6: Terms and Conditions: As soon as you click on the Terms and Conditions you will see a pop-up page. Check the boxes to accept the terms and conditions, and then click on the Accept button given at the bottom.
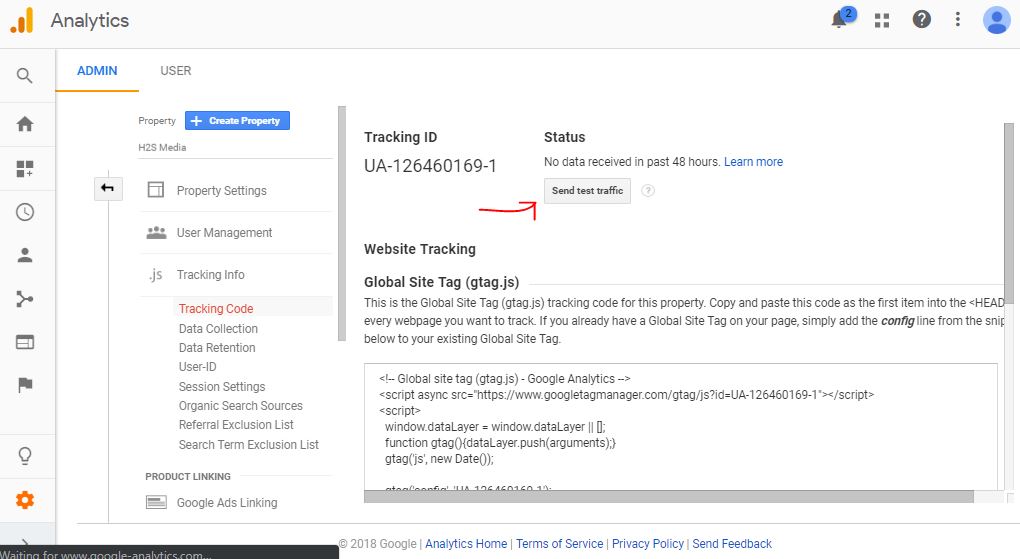
Step 7: Copy and paste tracking code: Finally the under the Tracking info tab you will find the tracking code that you need to copy and paste just after <head> tag of your website homepage. I have given the links above, in case you don’t know how to do this.
![]()
Step 8: Test the Google Analytics for your website: After implementing the tracking code, clean cache if you are using some plugin for that. After some time, log in to the Google Analytics and to check whether it tracking or not.
- Login Analytics.
- Click on the Admin or Gear Icon given on the left bottom side.
- Under the Property settings click on the Tracking code.
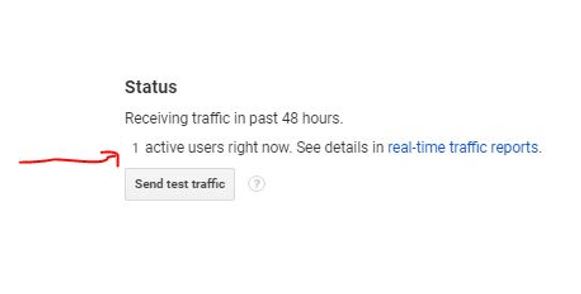
Just above the code, you will find an option “Send Traffic” click on that. The Google will start sending some traffic to your website in order to check the Google Analytics working or not. Once it starts sending the referral traffic, you can see that in the real-time time user just above the Send traffic button. For more details, refer the below screenshots:
How to use the Google Analytics App for Android or iPhone
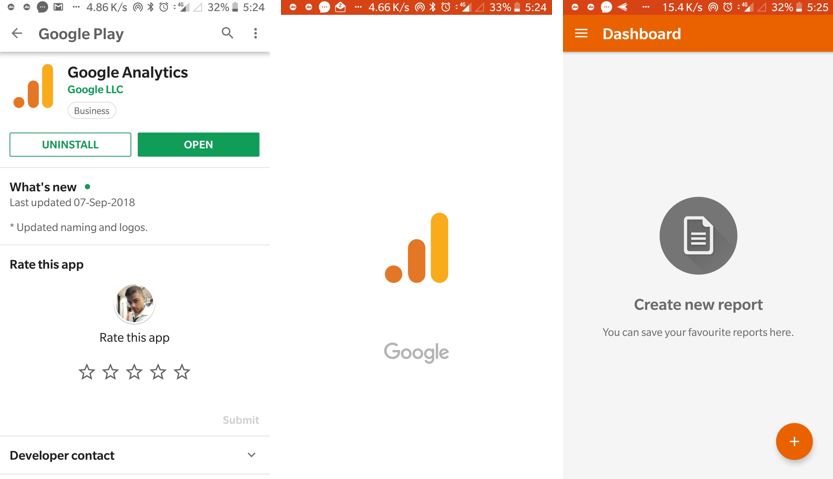
- Go to the App store or Google Play store and search for Google Analytics. You can also use these links: Android and iPhone(iOS).
- After installing the Google Analytics app. It will ask you to Add account.
- Tap on that and log in with the Gmail ID you used to sign up the Google Analytics account. If you are an Android user then it also shows the previous Gmail ID those already have logged in the smartphone.
- Once you logged in, tap on the burger icon given in the left top side of the app.
- And here you will get all options such as Real-time, Acquisition, Behaviour and more. To check all page views tap on Behaviour->All pages.
- How to Block referrer spam traffic in WordPress and Google analytics
- How to Add Google Analytics Dashboard for WordPress
- Tutorial to Remove WordPress Admin Page Traffic From Google Analytics
- How to create and run experiments in Google website optimizer
Related Posts
Google Site Kit for WordPress to integrate Analytics, AdSense, Search Console & PageSpeed
How to Install Matomo PIWIK self-hosted analytics on CPanel
How to install Open Web Analytics (OWA) on Ubuntu and CentOS
How to get a Google Analytics account code (Free)?
How to create and run experiments in Google website optimizer
How to set up Google Website Optimizer Account