To install and experience the Android x86 on PC you nee two things VirtualBox or Vmware software and Android x86 ISO image or Android x86 VM image.
Android, the most popular operating system, now not only just limited to your smartphones. If you have the curiosity to use it on your personal computer (PC) then you can do it. Now, the users those have a spare machine to test the Android operating system on PC can use the Android ISO image. You just need to make a bootable USB drive using the downloaded ISO images of Android 7.0, 8.0, 9.0 or whatever the version you want. However, if you don’t have the extra system to test the Android then another option which available is Virtualization. The most popular Virtualization software are VirtualBox and Vmware. The VirtualBox is an open source tool and available for Linux, Windows, and Mac. While the other one Vmware is also available for the OS mentioned but it is proprietary software.
You can either use the Android ISO image to install the Android OS on VirtualBox / VMware or simply download the pre-configured Android x86 Virtual machine image (VM). The benefit of using Virtual Image is, you don’t need to configure storage, Ram, other hardware configuration for the OS on Virtualization software. Just download the Android VM image and it simply boots as a preinstalled machine. It saves a lot of time.
Prerequisites to install Android x86
To install and experience the Android on PC you nee two things VirtualBox or Vmware software and Android x86 ISO image or Android x86 VM image. Here in this tutorial, we are going to use the VirtualBox and to save time and make it easy to install the Android on PC, the Android x86 VM image.
Here are the Links to download the above-mentioned prerequisites software.
VirtualBox: Link
Android X86 VM image: Link ( VM image available while writing the article are: Android-x86 8.1-RC2 Oreo, Nougat, Marshmallow (R3), 5.1 (RC1), Android x86 4.4 r1 and more)
Android x86 ISO image: Link (For those don’t want to use the Andriod VM image)
Install Android OS on VirtualBox and VMware
Note: It doesn’t matter which operating system you are using it could be Linux, Windows or Mac because the process of working with Virtual or Vmware is the same for all of them. While writing article Android OReo was the latest build.
Step 1: Download VirtualBox or VMware player
First of all, download and install the VirtualBox on your PC machine ( Linux, Windows or Mac).
Step 2: Get Android Oreo OS VM image
After the installation of the Virtualbox, you need to download the VM image from the link given above given in this article. On the website, you will find two images one is for VirtualBox and other is meant for Vmware. According to your software select that. As we are using the VirtualBox, so we downloaded the VirtualBox image. While writing this the article the latest Android VM image available on the website was Android-x86 8.1-RC1 Oreo.

Step 3: Extract Android X86 VM image file
The downloaded the Android X86 VM image file will be in a 7z archive format. After downloading you need to extract the Android VM image from using the normal Winrar or 7zip or any other archive/ compression software.
Step 4: Run the VirtualBox.
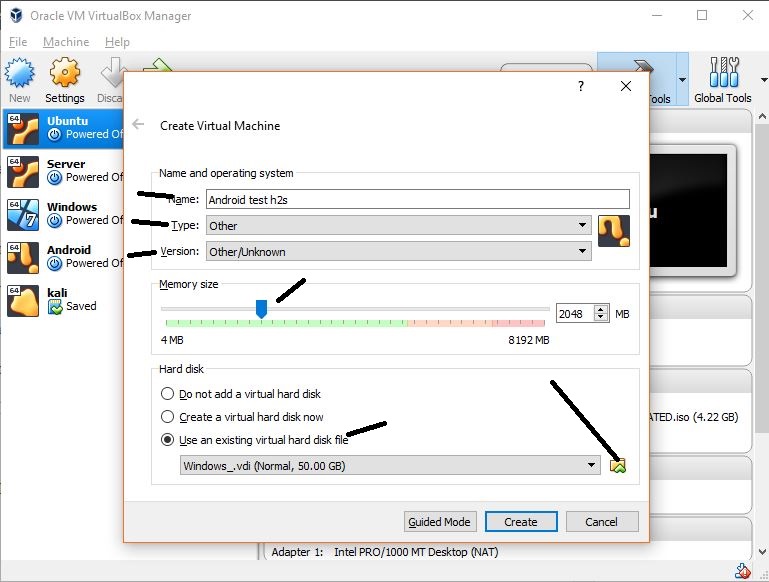
- Click on the NEW button from the VirtualBox menu.
- Give some name to your Android virtual machine, like we have given Android test H2s.
- From Type’s drop-down select the Other and Version = other/unknown.
- Select the size of memory you want to provide your operating system. We have assigned 2GB for fluid functions.
- From the Hard disk section, select the option- Use an existing virtual hard disk file.
- Click on the Folder icon.
Step 5: Select the extracted Android X86 VDI image which you downloaded above.


Step 7: Select the created Android x86 Virtual machine from the left panel of VirtualBox.
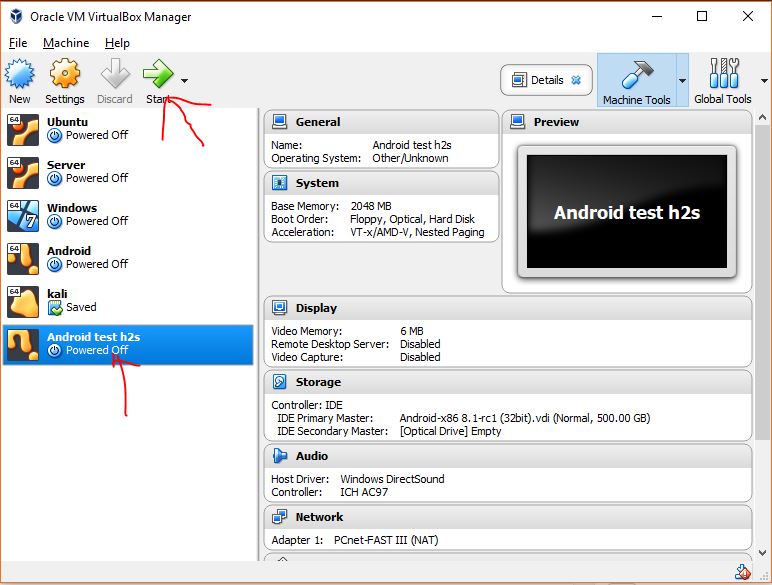
Step 9: The Android Virtual Machine will start.
Step 10: Select the normal mode- Android X86 8.1-rc1

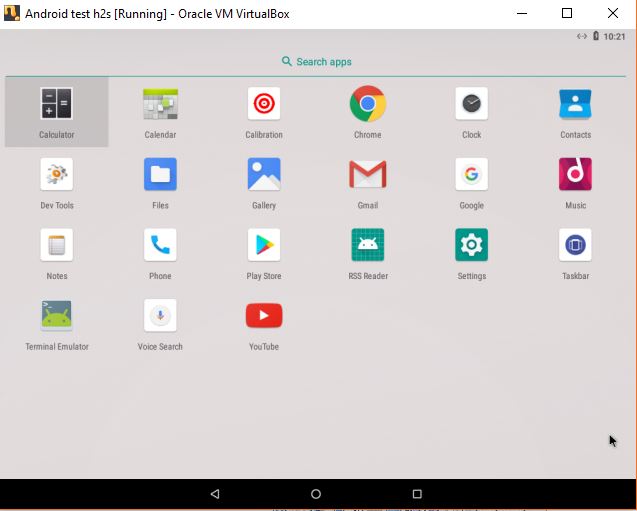
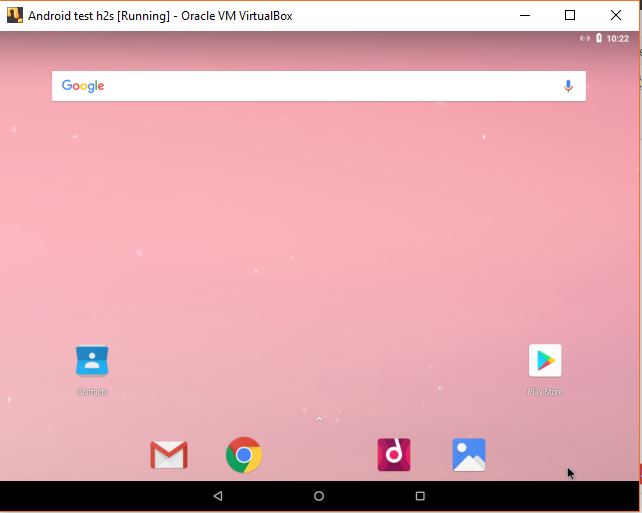
Step 11: Android x86 is installed
The OS has been installed and it will boot to provide you with a familiar screen like your smartphone.
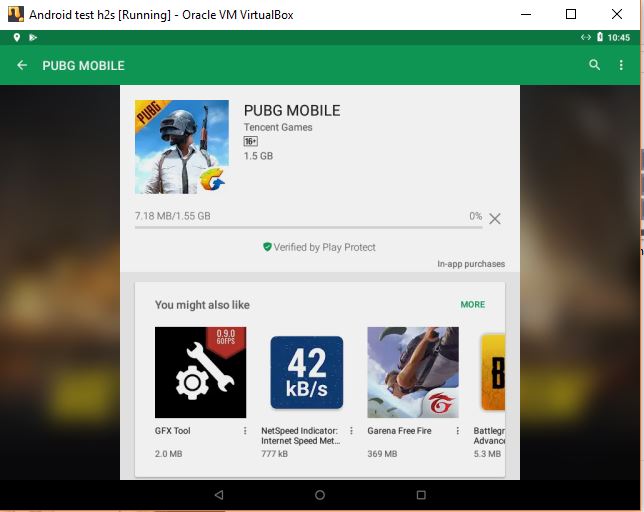
We tried to install the PUBG on the Android x86 Virtual Machine on Linux PC and it worked…
Other Useful Resources:
- How to install Android emulator Anbox on Ubuntu Linux
- Install Ubuntu on Windows 10 using Virtualbox Virtual Machine
- Run Windows 95 app on a Windows, Mac or Linux
- How To install Portable Virtualbox on USB to Run Virtual Machines Anywhere
- Create Windows Virtual machine on Linux (Ubuntu)
- Install Kali Linux on VirtualBox on Windows, Linux, Mac, or other platforms
Related Posts
How to Download Firefox for Android Without Google Play
How to set Gemini by Google as the default Android assistant
What is stopping smartphone gaming from becoming the next big thing? The problems, and the possible solutions
How to turn off call recording announcements on Android Google Dialer
How to install Winget package manager in Windows 2022 Server
How to View Listening Ports Using Netstat