
Cockpit open-source software is a lightweight headless CMS that can be self-hosted to publish content. With a slim management interface, simple installation steps and NoSQL database support, the Cockpit is for those want to publish their ideas on the internet using a headless platform and command line. However, it also features intuitive Dashboard to easily manage settings, API, Account, YML configuration file, collections, forums and more for those don’t want to get through everything via commands.
Headless Cockpit CMS is a PHP language developed application based on micro-framework known as Lime, developed by Agentejo. Furthermore, by default, this open-source CMS uses SQLite database however we can also use MongoDB as well. Its minimalistic GUI Dashboard interface largely based on JQuery, external PHP libraries are used very strictly to make the CMS a lean application.
We can install it on any Linux server with the following requirements…
Cockpit CMS software installation requirements
- PHP 7.1 or greater
- PDO with SQLite support (or MongoDB)
- Enable GD & Zip extension
- Apache (with mod_rewrite enabled) or Nginx
Furthermore, the official documentation is not yet much extensive thus developers will need to search a lot in Cockpit forum to solve a problem.
Just like other headless systems, those are meant to operate using the command line and difficult for a normal user, in the same way, Cockpit is also for developers or those have proficiency in the command line. It is not like popular WordPress where one will go and create a website. Thus, Cockpit CMS would be challenging to those don’t have a coding background. However, developers those are dealing with APIs that is popular among front-end developers who specialize in new frameworks such as React or Vue would not have any difficulty to operate Cockpit CMS.
Nevertheless, if you are just a beginner and learning web developing then definitely you should try your hand on Cockpit CMS to know how it works. Here, we will give a tutorial on Cockpit headless CMS installation on Docker.
Install Cockpit headless CMS on Docker
Here, I am assuming that you already have Docker on your server or Desktop where you want to setup Cockpit.
Step 1: Run Cokpit Docker command
Simply run the following command, it will fetch the container image build from a docker hub that contains Linux distro image along with Apache, PHP, core files of Cockpit and other dependencies, in short, a complete package that we need to run this headless content management system. Everything will be pre-configured no hassle at all.
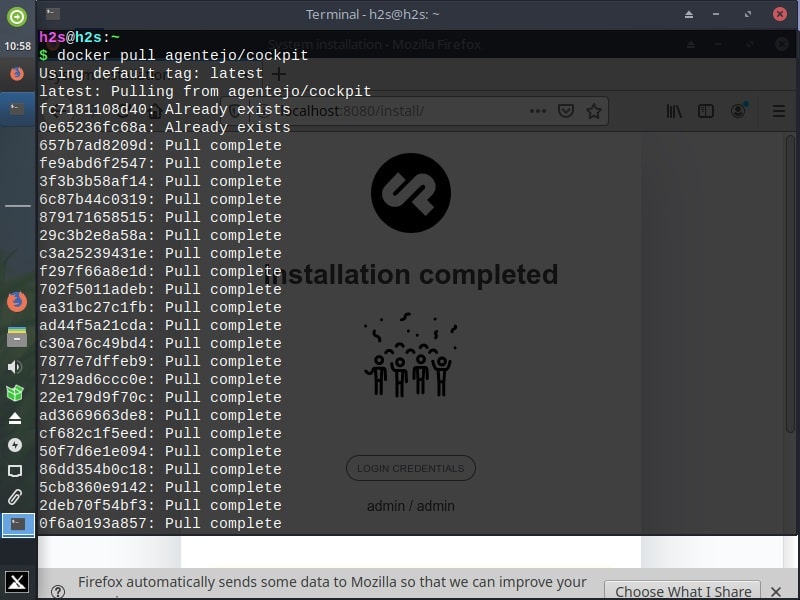
docker pull agentejo/cockpit
Step 2: Start created Cockpit Container with http
Now, we will start the above-created container at port 80 to easily accesses our CMS in the browser.
docker run -d --name cockpit -p 8080:80 agentejo/cockpit

Step 3: Open Browser
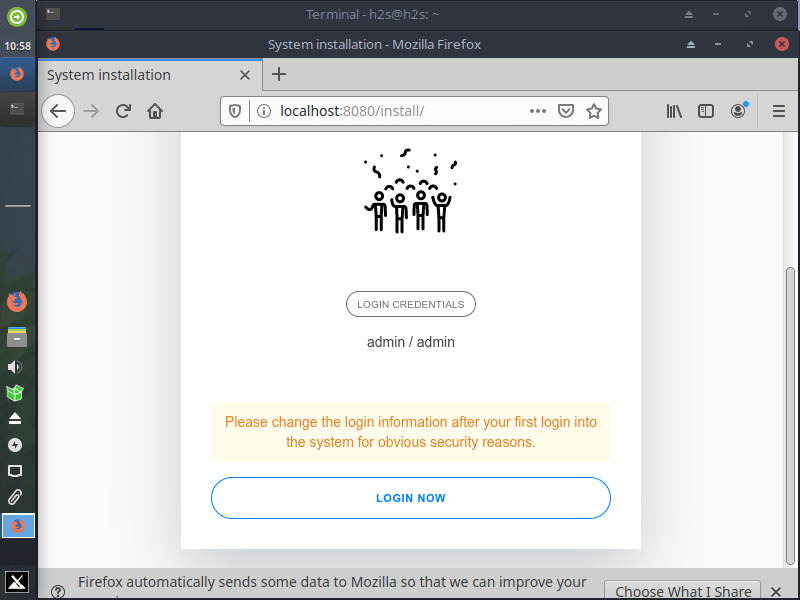
Everything is done, go to your server or other system’s browser and open http://localhost:8080/install
This will give a message that “installation is successful”, now click on log in.
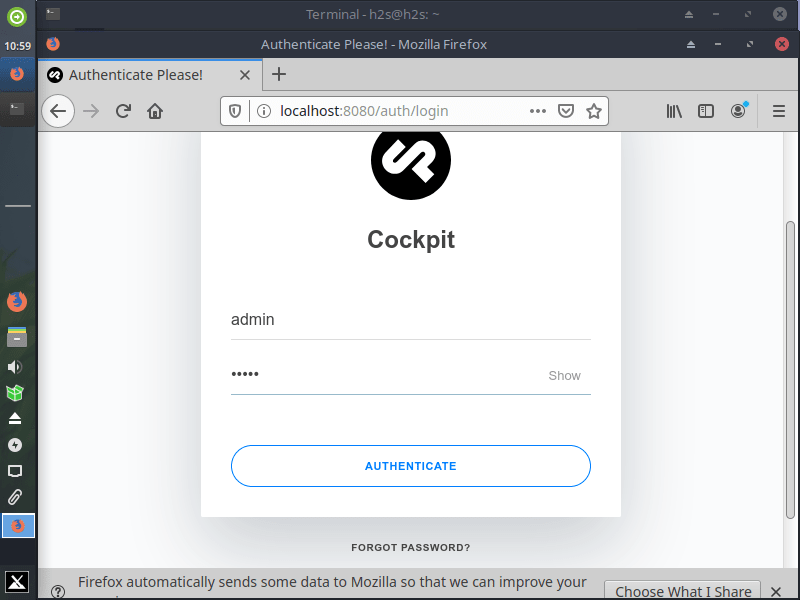
Step 4: Log in
Click on the Login button. Enter default username and password that is admin for both.
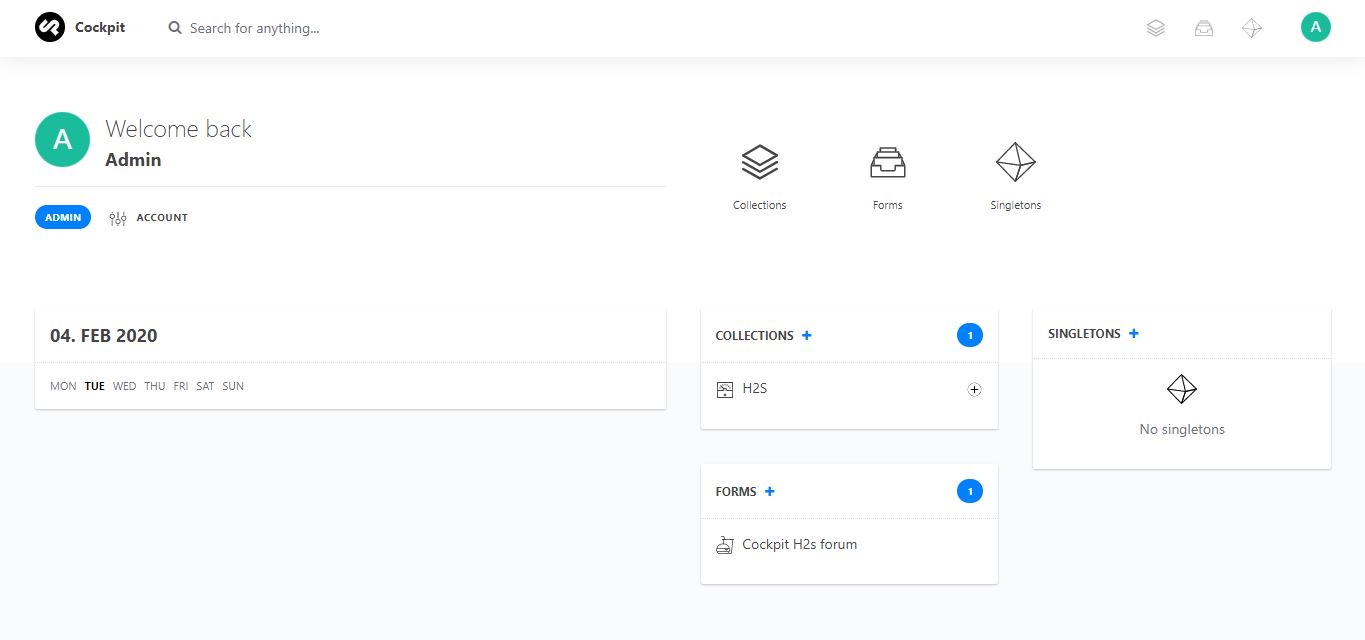
Step 5: Cockpit CMS Dashboard
Finally, the Cockpit Dashboard will be in front of you to access Collections, Forums and Singletons.
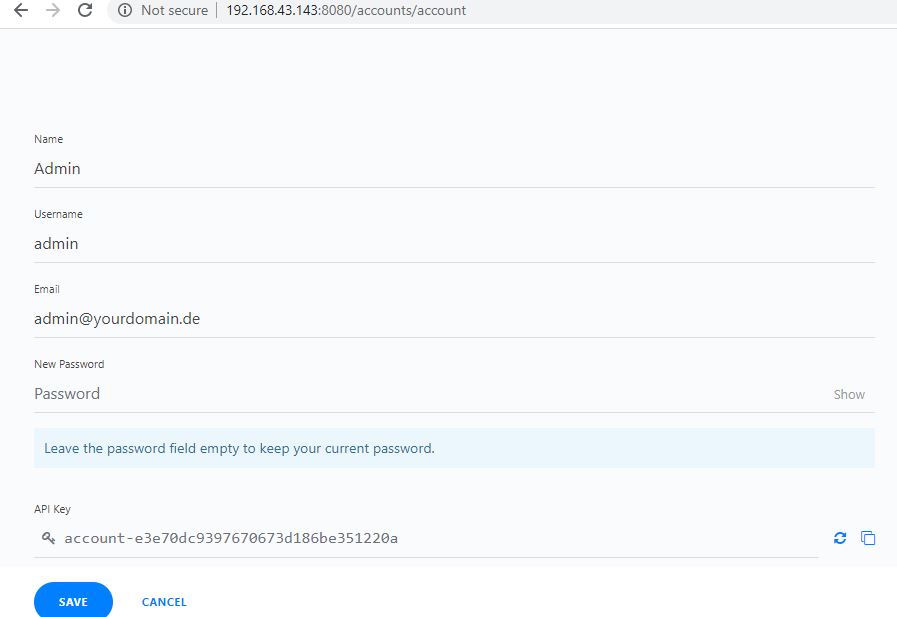
To change the Admin Password click on the icon given on the right top side and select Accounts. Add the custom username and password you want to use.
So, the backend is here. Although it has a very clean backend system, lacks in the front end. To display data and other entries done on the backend developer or programmer has to use a web framework to display data such as Reactjs, silex or others.
Other Articles:
Related Posts
How to Reopen Closed Windows or Tabs in Firefox
How to Install Django on Windows 11 or 10
How to set Gemini by Google as the default Android assistant
How to create data bars in Microsoft Excel for numeric values
How to open HEIC images on Windows for free
How to install Server Manager Windows 11 or 10