Flameshot is an open-source screenshot tool meant to make the life of Linux users easier. It is a perfect alternative to ShareX for Linux such as Ubuntu 20.04 LTS.
There are various open-source software available to take a screenshot, even the Ubuntu comes with own screen capturing tool which can be accessed directly from the Applications or using the keyboard shortcut Ctrl+PrtScn. However, Flameshot comers with few editing capabilities such as we can draw arrows or lines, blur elements or highlight them with a frame, adding text and much more.
With Flameshot, one can take screenshots in one step and also find the program visually appealing. The colour of the buttons can be changed and designed to match your own system.
Here we are installing Flameshot on Ubuntu 20.04 LTS, however, the commands will be the same for Linux Mint and other similar OS.
Open Command terminal
Although we can install the Flameshot from the Ubuntu Software centre, however, I prefer a command terminal. To open it, you can use the keyboard shortcut CTRL+ALT+T.
Run System Update command
To make sure all installed packages and existing repos are up to date, run the system update command:
sudo apt update
Command to install Flameshot on Ubuntu 20.04 LTS
To download and install Flameshot, we don’t need to add any third-party repository, it is available on the official APT repository of Ubuntu Focal fossa and even on the previous versions such as Ubuntu 19.10/19.04/18.04. So, here is the command:
sudo apt install flameshot
Run Flameshot
Go to Activities given on the top left side of the Ubuntu and click on its icon. Or else directly on terminal type: flameshot
After starting it you will see its icon in the taskbar, click on that and select configuration.
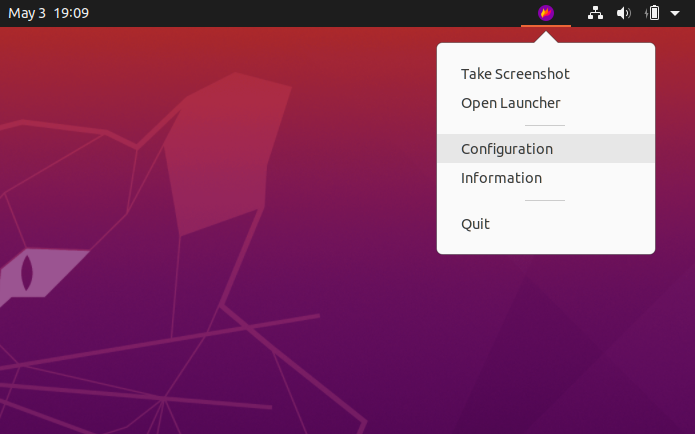
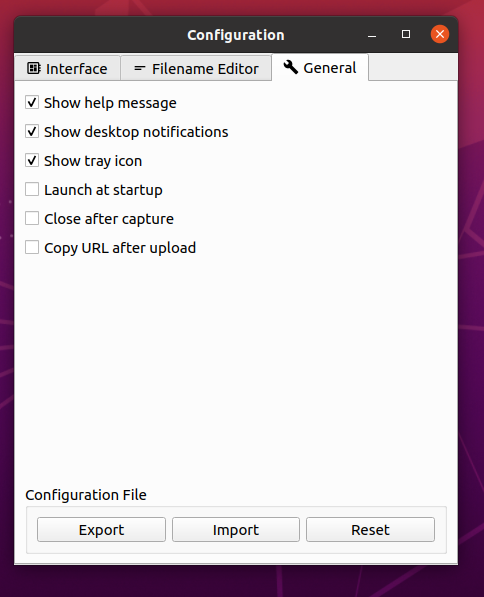
From here, one can change the Interface and behaviour of Flameshot, for example, if you want to make the Flameshot autostart with Ubuntu, then select the “Launch at Startup” option.
Configure Shortcut key for Flameshot
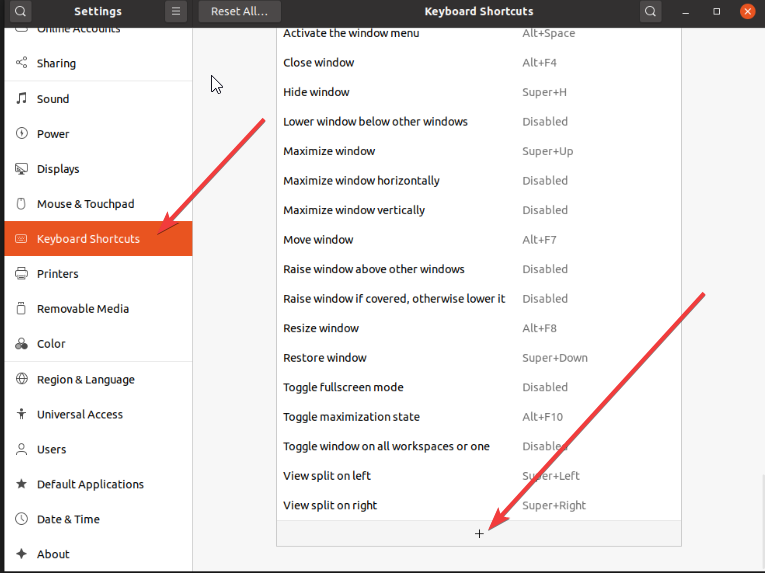
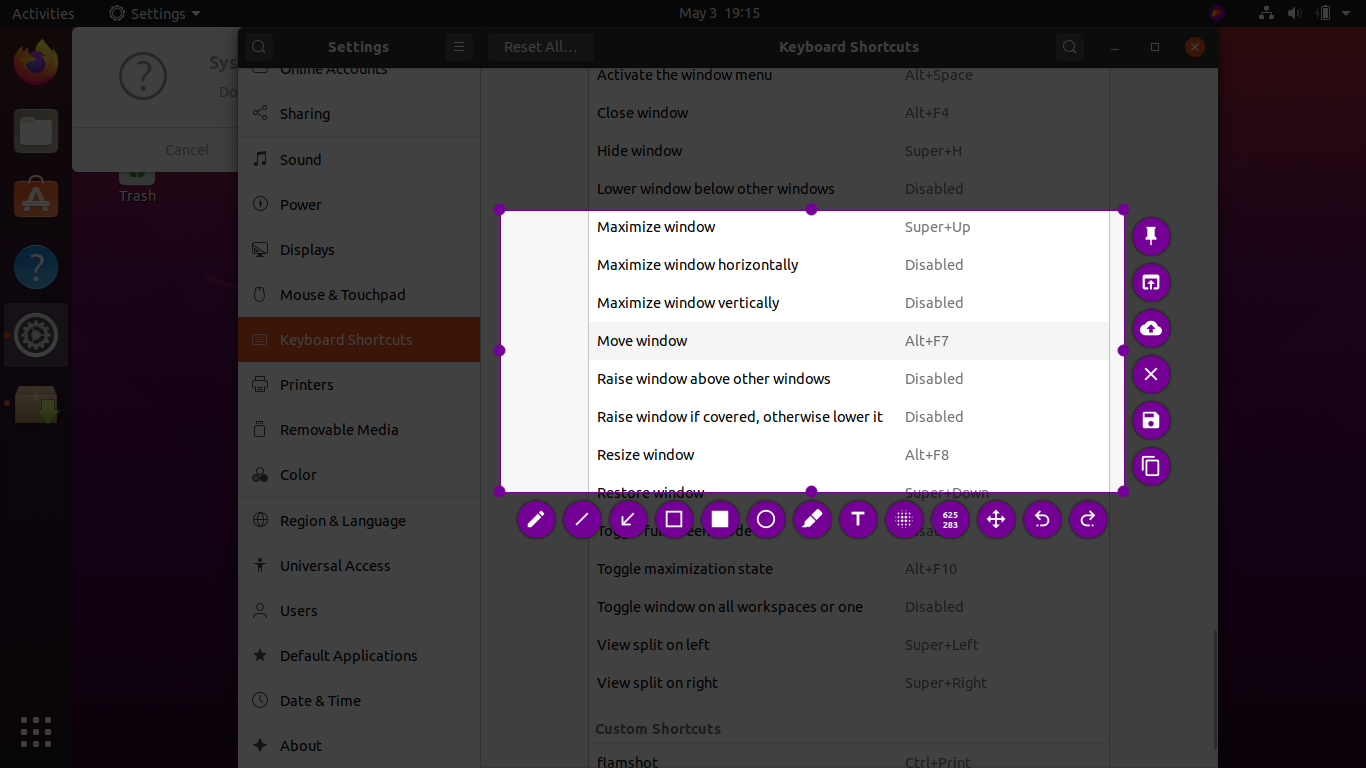
Go to Ubuntu Settings and from the left side panel select Keyboard Shortcuts option.
Now, scroll down to the end of the right-side panel, where you will see a + icon. Click on that to add a custom keyboard shortcut.
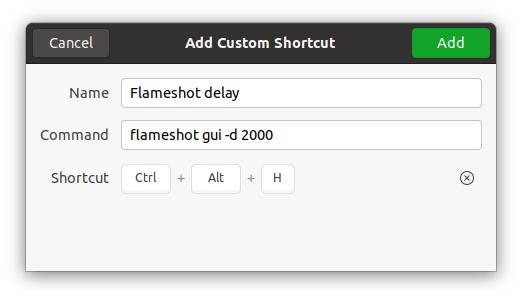
In the Name, give anything you want. Here I am typing Flameshot.
Now the command to activate this screenshot tool is flameshot gui and the last thing which we need to set is the shortcut keys.
In Ubuntu, Ctrl +PrtScn is already used by its default tool. You can change that something else but it would be a great idea to set something different for Flameshot and leave the default one as it is.
Therefore, I am setting CRTL+ALT+G, you can set whatever you want. Finally, click on the Add button.

Add one more custom shortcut by again clicking on + icon. This one is because many time we need some delay to activate the screenshot. For example, you want to capture some screenshot using Flameshot but after 2 minutes, thus the command for that is:
flameshot gui -d 2000
Now, set some different shortcut keys for this one, so when you need a delay in capturing a screenshot use this one otherwise the regular one you created above.
Here how Flameshot GUI looks like when activated.
Few other Commands to customise Flameshot
- Fullscreen capture with custom save path (no GUI) and delayed:
flameshot full -p ~/myStuff/captures -d 5000 - Fullscreen capture with custom save path copying to clipboard:
flameshot full -c -p ~/myStuff/captures - Capture the screen containing the mouse and print the image (bytes) in PNG format:
flameshot screen -r
- Capture screen number 1 and copy it to the clipboard:
flameshot screen -n 1 -c
Related Posts
How to Reopen Closed Windows or Tabs in Firefox
How to Install Django on Windows 11 or 10
How to set Gemini by Google as the default Android assistant
How to create data bars in Microsoft Excel for numeric values
How to open HEIC images on Windows for free
How to install Server Manager Windows 11 or 10