Here in this tutorial, we use the FreeNAS ISO image to create a FreeNAS VM (virtual machine) using the VirtualBox on Windows, Linux, and MacOS.
FreeNAS is the open source NAS operating system based on FreeBSD and doesn’t need any introduction. Using the FreeNAS, a user can create its own personal NAS box using some old computer or even a virtual machine. Moreover, if you forward your local IP address of the FreeNAS to the public IP (to access remotely) of yours then you can use it as a kind of personal cloud server where you can install and access different kind of software like plex media server, WordPress and more. It comes with ZFS to protect, store, backup, all of your data. The ZFS is an enterprise-ready open source file system, RAID controller, and volume manager. FreeNAS comes with features like File Sharing (NFS, FTP, AFP, iSCSI, WebDAV), Web Interface, Data Protection, Snapshots, Replication, Encryption, Backup services (Windows Backup, rsync, Apple Time Machine, TrueOS Life Preserver, and Plugins.
Also, point to be noted that the FreeNAS installation needs a separate hard drive for storing the data apart from the device hard drive where you are about to install it. This means if you have only drive attached to PC or virtual machine you only able to install the FreeNAS and for storing any data you require a separate one. Moreover, before using the FreeNAS as the commercial or permanent solution you can install it on the USB storage/pen drive too; so that you can use your computer hard drive for storage purpose.
Other best way to test or use the FreeNAS is the Virtual environment where you can install FreeNAS for testing and learning purpose. But as per the official website for the commercial or production purpose, the installation of FreeNAS on the virtual machine is not recommended.
To install and run the FreeNAS VM (Virtual machine) on the Virtual box you have to create a virtual machine that fulfils the following minimum requirements of FreeNAS OS:
- FreeNAS ISO image
- 8GB RAM at least.
- Minimum 8GB virtual disk to install and boot the FreeNAS OS
- One spare virtual drive at least 4GB to store content.
Let’s start with the step by step tutorial to install the FreeNAS virtual machine on VirtualBox:
For this tutorial, we used VirtualBox and FreeNAS 11.2 ISO image. And the process of installation will be the same for Windows, Linux or MacOS.
Step 1: Download the FreeNAS ISO image:
First of all, go to the freenas.org and download the open source FreeNAS operating system ISO image. You can also use this link: https://www.freenas.org/download-freenas-release/. During performing this tutorial the latest version was Freenas 11.2.
Step 2: Download VirtualBox
If you already have VirtualBox then skip this step. Otherwise, use this link (download) to get VirtualBox for Windows, Linux or MacOS. On Linux Like Ubuntu OS, you can install the Virtual Box with just one command on command terminal.
Step 3: Create VM (Virtual Machine) for FreeNAS on VirtualBox.
After downloading and installing the VirtualBox, its time to create a Virtual machine for FreeNAS.
1. Open the Virtual Box.
2. Click on the New button.
3. Enter some name for your FreeNAS virtual machine and the from type drop-down box select the Other and Version- Other/Unkown(64-bit).
4. Set the Memory size, we set it 4Gb, here because of our testing system limitations, but recommended is 8GB. So, if you have that much free memory on your machine then go ahead and assign it for your FreeNAS.
5. Now Click on the Create button.
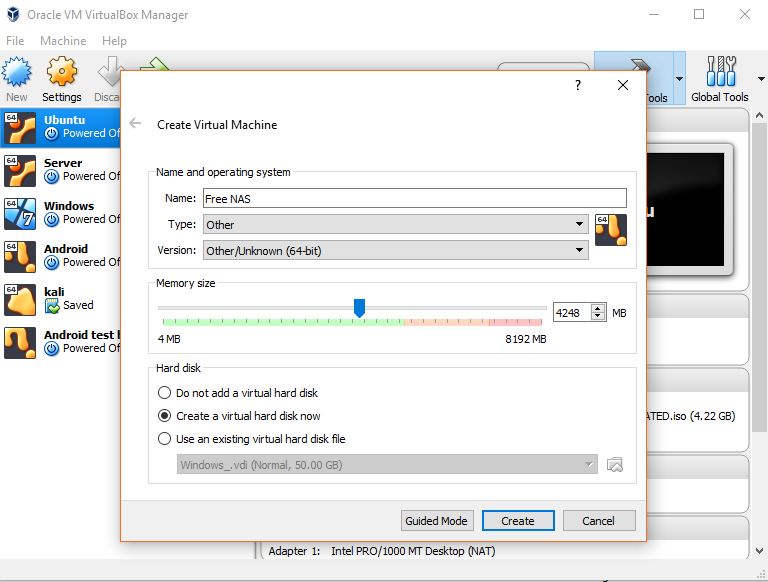
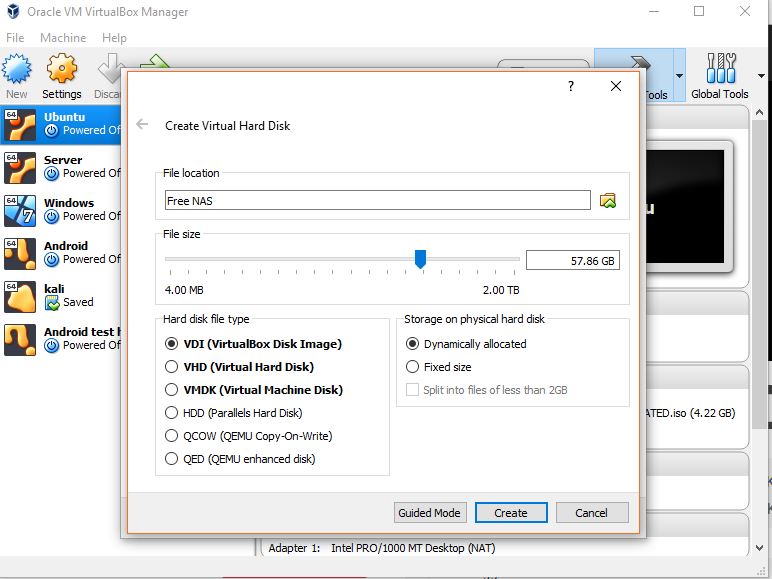
6. Create a Virtual Hard Disk for your FreeNAS VM. At least 4Gb should be there but we assigned it 57GB and you can assign according to the availability on your machine.
7. Once the Drive created click on the Create button.
8. Now select you created FreeNAS virtual machine from the left side and then click on the Settings option given in the menu of the VirtualBox.
9. From the Settings click on the Storage option and the on the CD icon given on the right as shown in the below given screenshot.
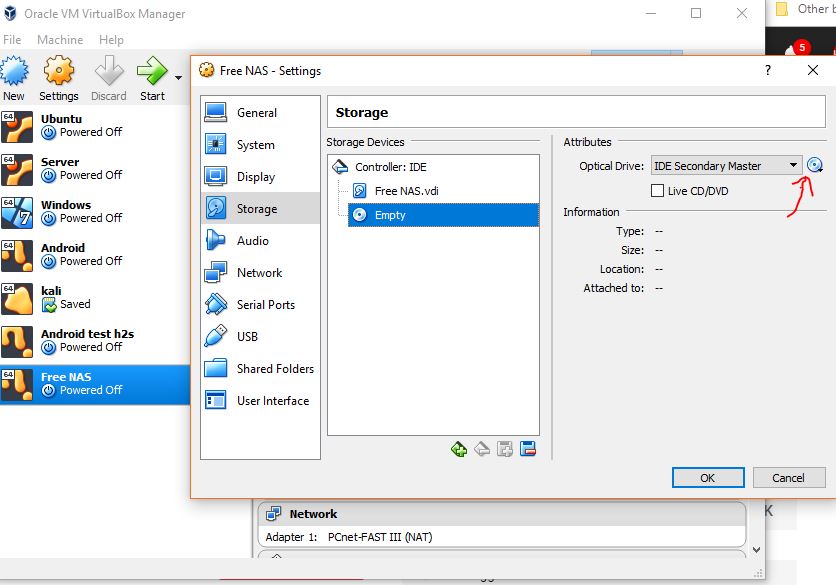
10. Click on the Choose Virtual Optical Disk File option and browse the FreeNAS ISO image downloaded above.
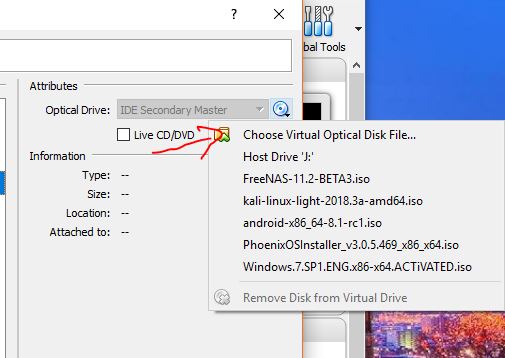
11. Now you can see the FreeNAS ISO image will be showing under the Storage Devices.
As I told you above that we can’t use the hard drive for storage where we installing the FreeNAS. SO, for storage, we need to attach one other virtual hard drive to our FreeNAS VM.
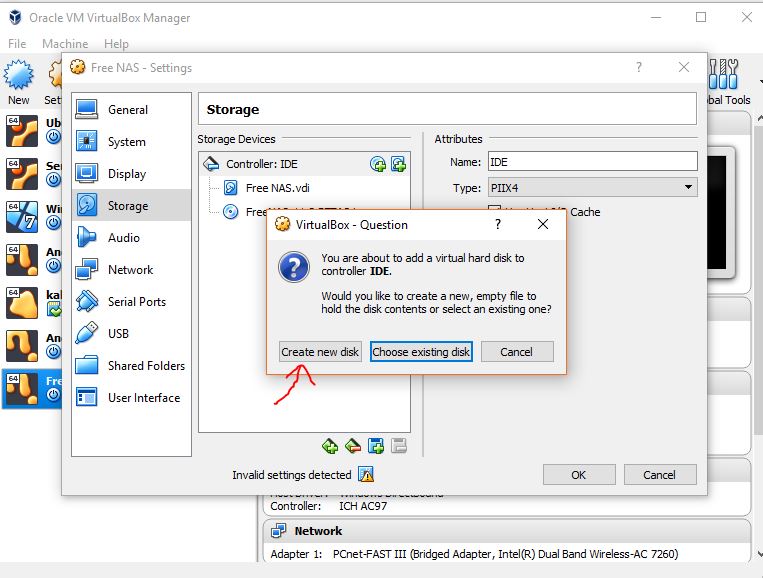
12. For that under the Storage click on the Controller: IDE option and then on the plus icon + hard disk icon.

13. Click on the Create New Disk button
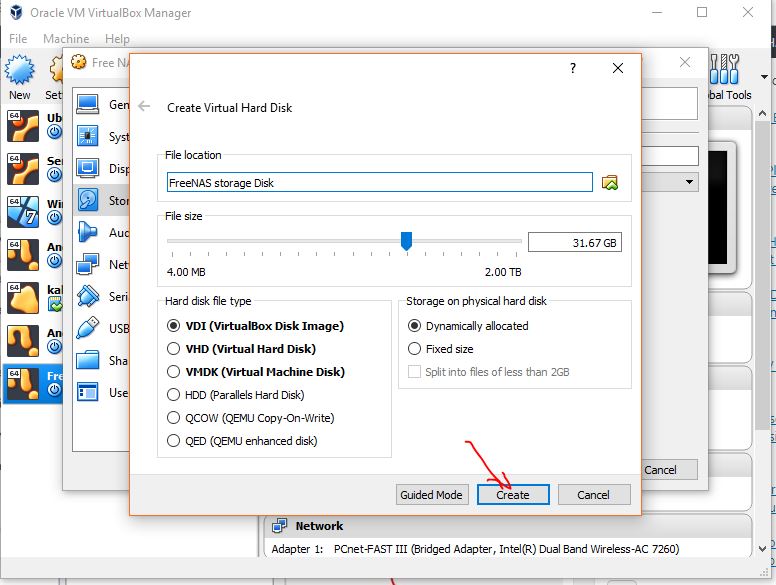
14. Set the Disk Space you want to assign to the storage of your FreeNAS and then click on the Create button.
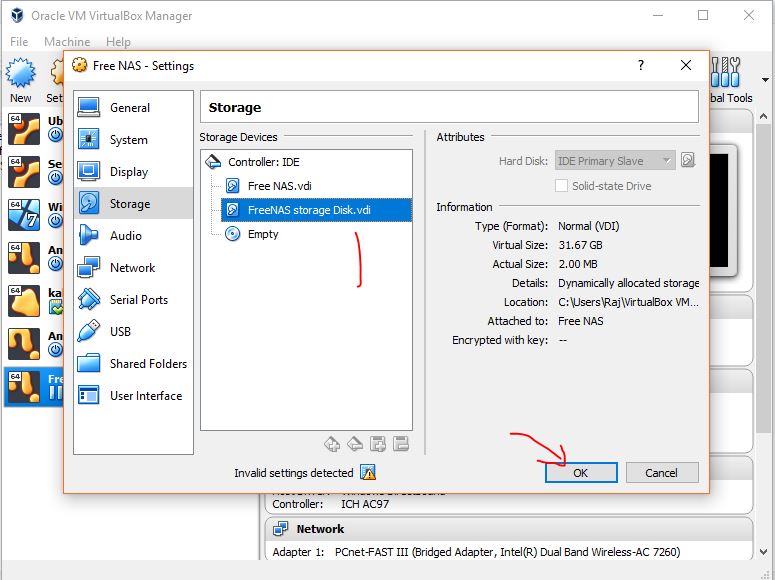
15. Now click on the OK button.
Step 4: Network Configuration
Once you did with the Virtual Harddrive configuration click on the Network option and select the Attached to: Bridged Adapter. You need to select this option because only then you can communicate the FreeNAS from the host or other computer presents in your local network.
Press the OK button.

Now, Select your FreeNAS VM from the left side pan of the VirtualBox and then click on the START button given in the Menu.
Step 5: Install FreeNAS on VirtualBox as Virtual Machine.
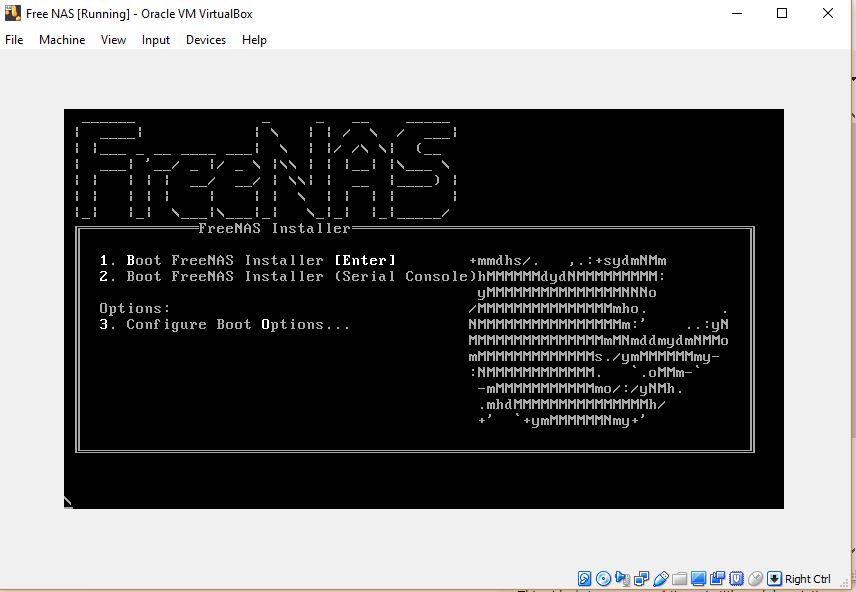
Press Enter button to start the installation of the FreeNAS.
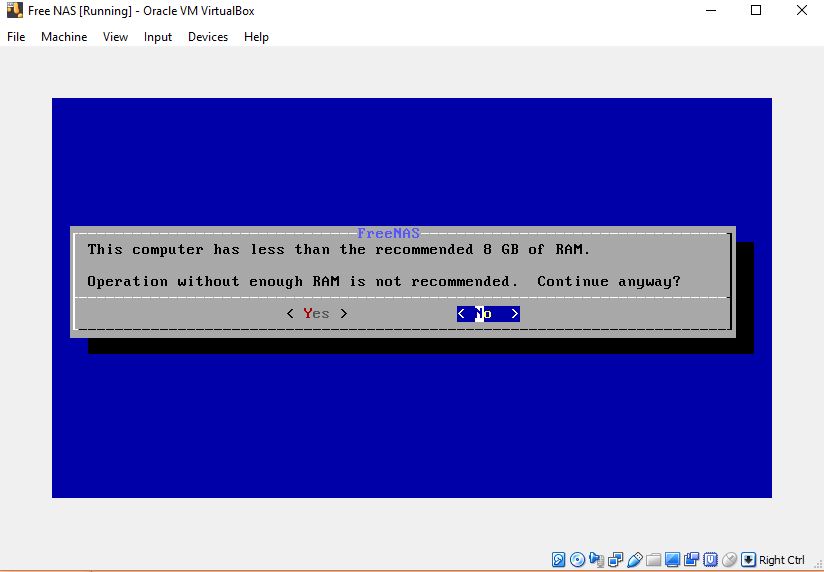
If you have assigned a lower amount of RAM to your system as recommended then you will see a message pointing that. Just select the YES and press the ENTER.
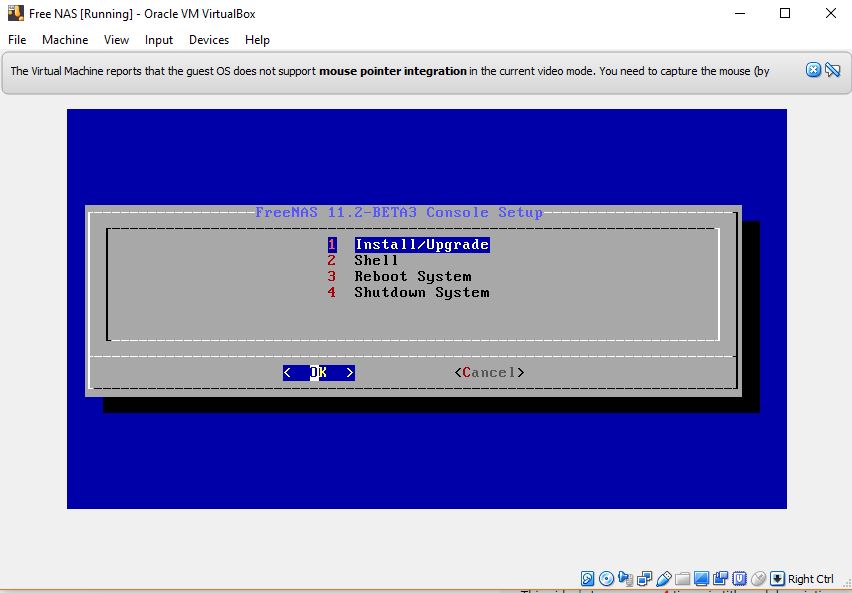
Now select the Install/Upgrade option using Keyboard and press Enter.
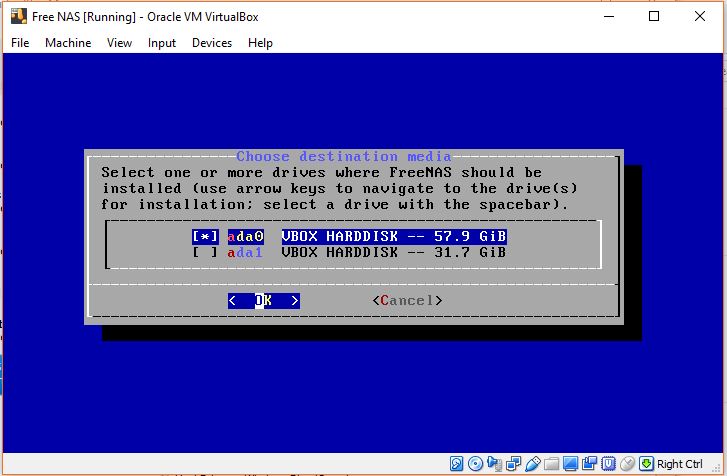
Use the arrow keys and spacebar button from the keyboard to select the drive in which you want to install the FreeNAS.
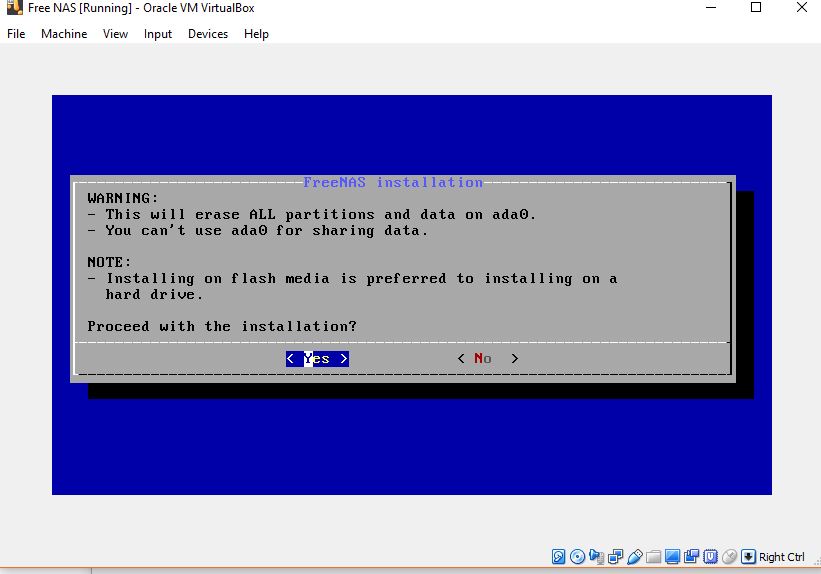
Select the YES to erase the partition and start the FreeNAS installation.
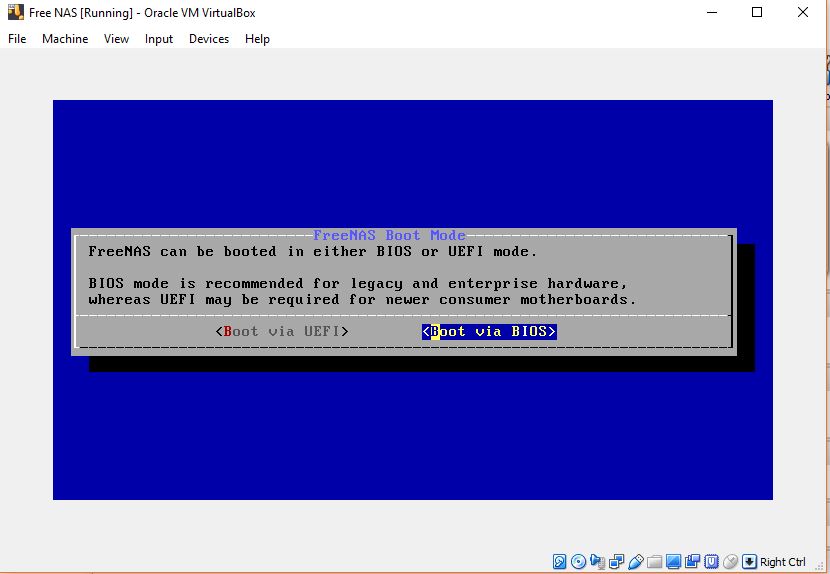
FreeNAS has both the capabilities of booting either from BIOS or UEFI mode. Select the Boot via Bios option.
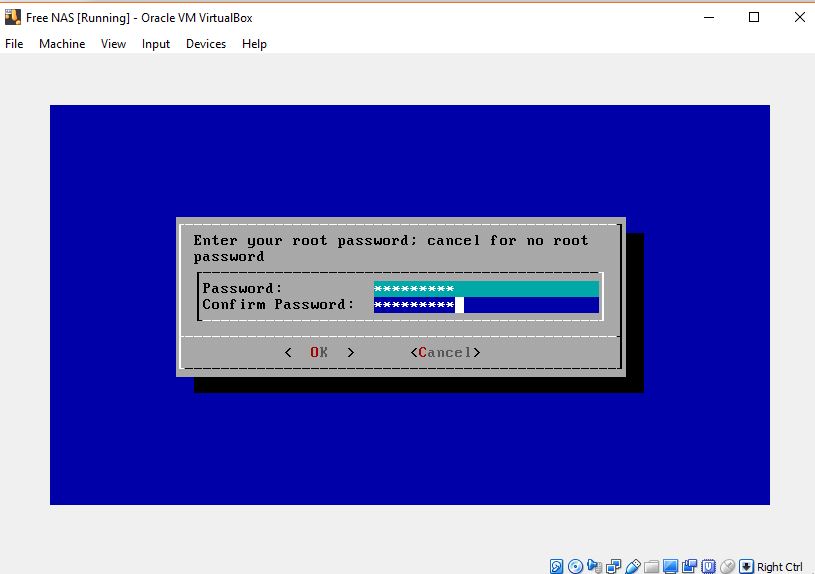
During the installation, the FreeNAS will ask you to set the root password.
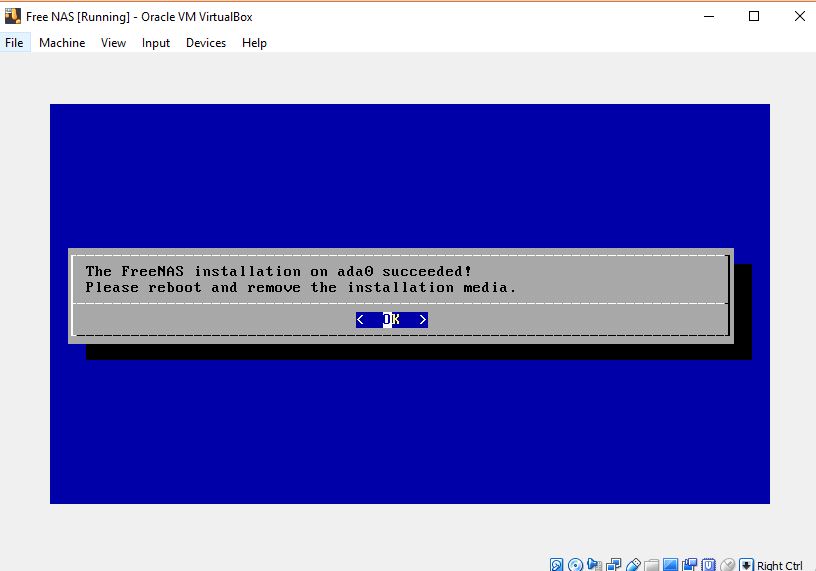
Once the installation is done. Press the Enter button and remove installation media which is a FreeNAS.ISO image by right-clicking on the CD icon given at the bottom of your VirtualBox.
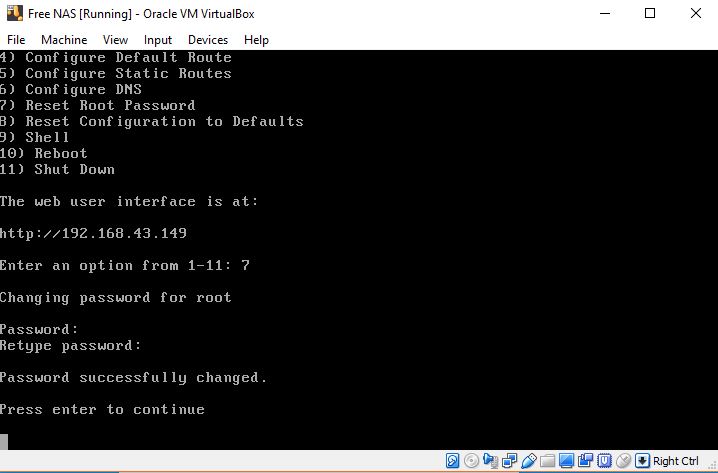
After the installation has done you will see a couple of options including the IP address that you can use to access the FreeNAS in your browser (web interface).
In case you want to change the root password:
Type ‘7′ from your keyboard and press the Enter button. And type the new password you want to assign to your FreeNAS box.
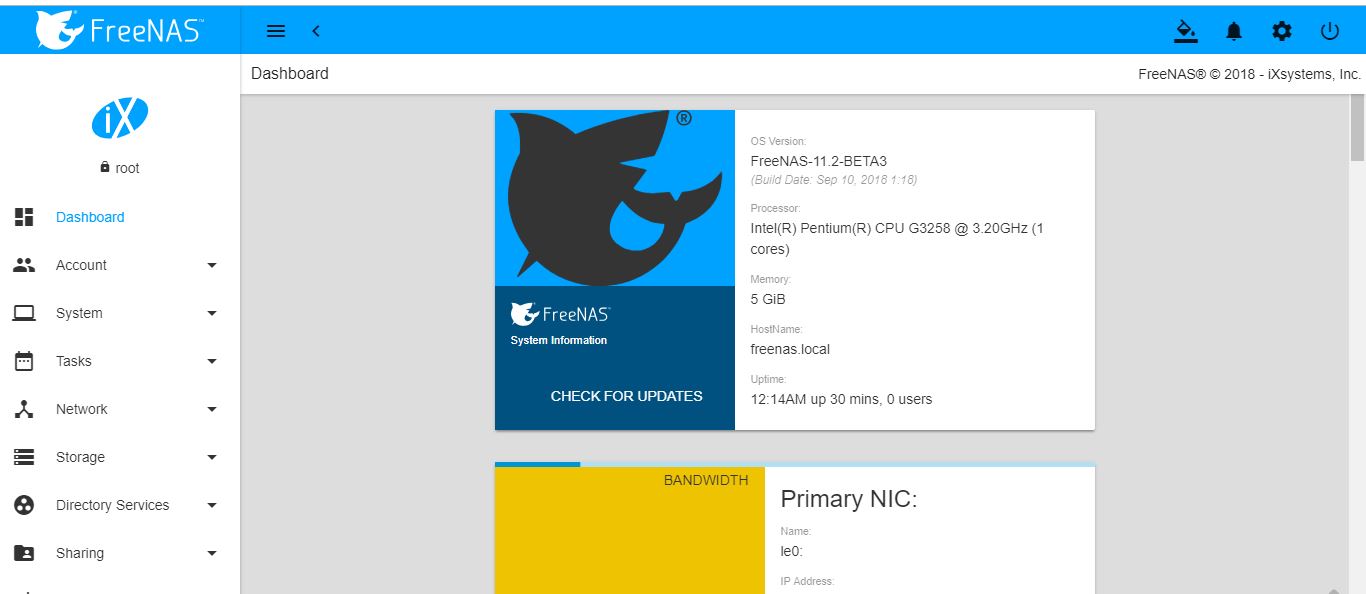
Step 6: Access FreeNAS web user interface.
To access the web user interface of the FreeNAS just type the IP address which shown on the Console setup of the FreeNAS.
For example, In our case, the IP address is 192.168.43.149.
When you enter the IP address you will see the login FreeNAS login screen.
Enter the Username- root, and password- You set in your case.

Finally…
Other Resources to See:
- How to Install Ubuntu on Windows 10 using Virtualbox Virtual Machine
- Install Rockstor NAS On Ubuntu/Debian in Virtual Machine
- How To Install Ubuntu From a USB Stick on Windows 10 PC
- How to create Windows Virtual machine on Linux (Ubuntu)


Thanks!
i wanr everyone to be able to save photos to server, how do i do this???