In this tutorial, we find two different ways to install the GitHub Desktop app on Windows 10 or 11 one is using the Command line, and the other is GUI.
GitHub Desktop is a free and open-source Desktop application available to run on Windows. It is developed by GitHub to provide a Git GUI client to manage repositories graphically instead of command line. Users will have an easy-to-use interface for managing and organizing repositories hosted on the GitHub platform. The software is written in TypeScript and uses React. Using it developers of all skill levels can easily collaborate and work together on projects, making it an ideal choice for both beginners and experienced developers alike. However, it seems like the developers of the GitHub Desktop app have ignored Linux users because it is only for Windows and MacOS.
So, in this guide, we discuss the step-by-step process of installing GitHub Desktop on your Windows 10 or 11 systems.
#1st Method using GUI.
Step 1: Download GitHub Desktop
Those who don’t want to use the command line for installing GitHub Desktop can manually download it from the official website. Visit the link to get the executable setup file on your system using the “Download for Windows 64-bit” button. As you click it, a pop-up will appear to save the GitHubDesktopSetup-x64 .exe file.
Step 2: Install GitHub Desktop on Windows 11 or 10
After finishing the downloading process, the setup file will be on your system. Double-click on it to start the Installation process for GitHub Desktop. Wait for a few seconds, soon the system will launch the software automatically, as it is done with the setup operations. Learn the Advantages of Using GitHub desktop.

#2nd Method using Command prompt or PowerShell
Step 3: Using Command prompt or PowerShell
If you are not interested in the GUI way to install it as shown in Step 2 of this tutorial which involves the manual visit of the website to get the software copy. Then, use the easy-to-use and straightforward command prompt (CMD) or Powershell to install the GitHub Desktop application. For that, here we are using Windows 10 or 11’s inbuilt Package manager called Winget.
The command to follow is:
For Stable version:
winget install GitHub.GitHubDesktop
For Beta Version:
winget install GitHub.GitHubDesktop.Beta
Step 4: Launch GitHub Desktop
We can run the GitHub Desktop app like any other Windows 10 or 11 application, doesn’t matter which method you have used to install it. Click on the Start menu and search for the app, as its icon appears, click to run the same.
However, there are a couple of steps we need to follow further to integrate the GitHub Account into its Desktop app. Here are those.
- Once the installation is completed, click on the “Sign in to Github.com” button or Enterprise as per your plan. If you are not interested in connecting the GitHub Hosting account and want to use the application to manage the local repository then can use the Skip this Step option.

- Enter your GitHub.com Account username and password to log in

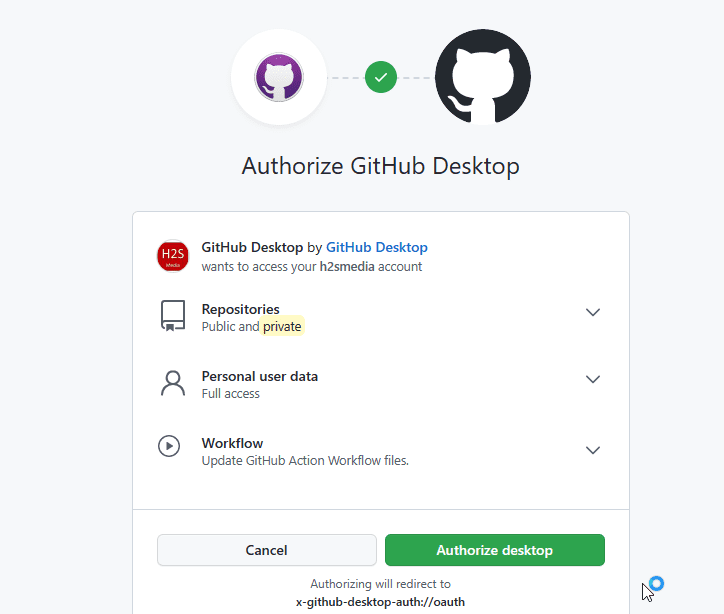
- Review the access the app is going to take and click on the Authorize Desktop button.
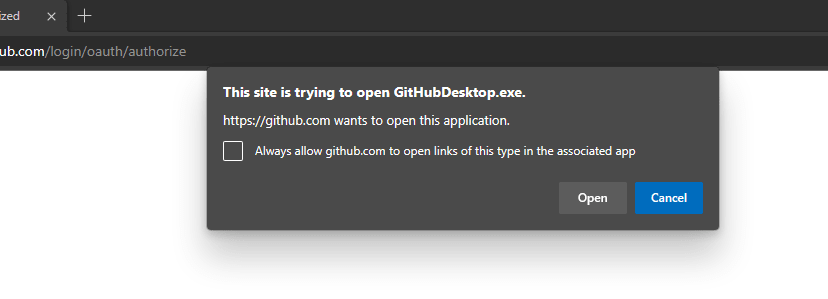
- Check the box, when a pop-up appears to run GitHub-Desktop.exe and click on the Open button.
- Click on the Finish button and Start cloning your available repositories.

- The final interface of the application.
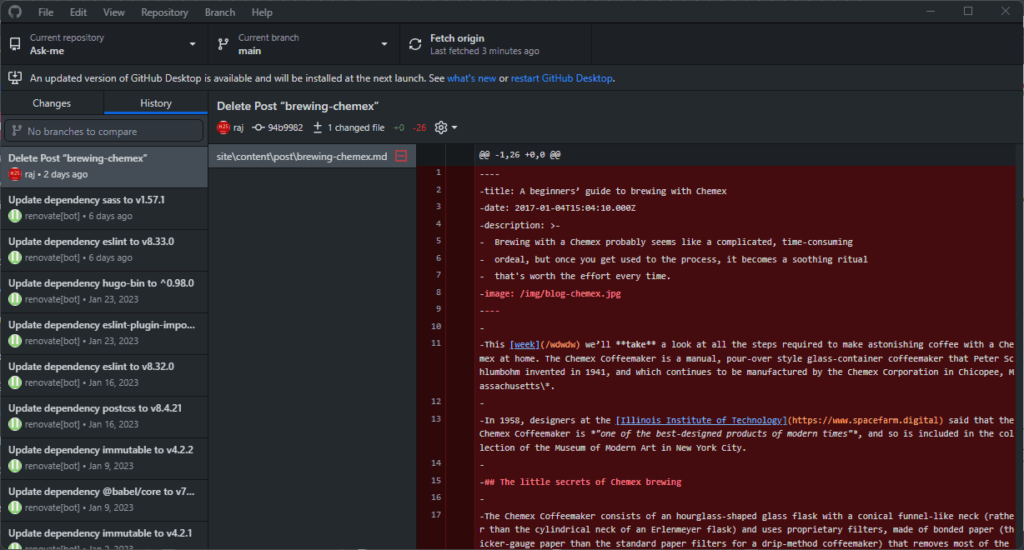
Step 6: Create a New Repository
To start with the application, let’s create a new repository. For that click on the “File” menu and select “New Repository” or use the keyboard shortcut – Ctrl+N. We have to give some name to the repo we want to create so that we will able to identify it easily. The desktop application will prompt for that.
To save the Repos files, the application will choose the default location configured by it, however, you can choose some other, if required. Further, you can configure Git to ignore some particular language, can initialize it will a README file, or even can select the license for your repository. Once done, just click on the Create button.
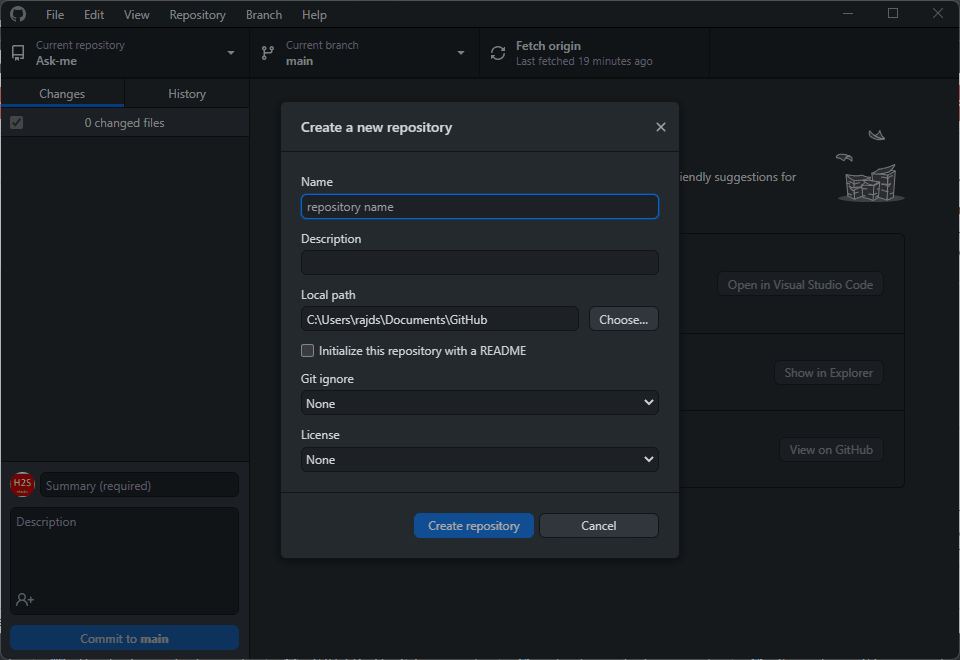
Step 6: Clone an Existing Repository
To start with an existing repo on the GitHub Desktop app, we can clone it. Click on the “File” menu and select “Clone Repository” or use the keyboard shortcut – Ctrl+Shift+O. You will be prompted by the software to enter the name of your Repo that needs to be cloned. Alternatively, we can use the GitHub URL of other available code repositories as well.

Step 7: Start Working on Your Project
Existing users of the GitHub web platform will not find any difficulty to use its Desktop app. They immediately can start working on their projects after setting up the app. With the help of a few clicks, a user can create new files, edit the existing ones, push or pull the origin, and a lot more. Further, being a Git version control platform, GitHub Desktop will keep track of the changes and allow you to revert to previous versions if necessary.
Conclusion
Installing GitHub Desktop on a Windows 10 or 11 machine is a quite simple and easy task that can be done in a few minutes. Offering users ample control over their Git repositories, the app makes it effortless to work on projects on Windows PC or laptops. Therefore, if your all repositories are on the GitHub Platform then its Desktop app is an ideal choice for anyone who needs to harness the power of Git on their computer.
FAQs
Yes, we need a GitHub account to use GitHub Desktop which is free to create by anyone using the web platform of this Git hosting service.
No, GitHub Desktop is also available for macOS.
Of course, we can use the application to collaborate and work with a team. Along with options to track other users and the changes made by the Team members to code.
Yes, GitHub Desktop is open-source software, therefore free to use, and its source code is available to review and contribute by anyone.
No, this Git Client GUI app is developed to manage the repositories hosted only on GitHub. If you want to work with repositories hosted on another Git hosting service, you’ll need to use a different Git client such as SourceTree.
Related Posts