Screen recording is something that we all do from time to time in a number of situations. With the help of screen recording, we can illustrate something, and at the same time, it can also be used as tutorials to show how to do something useful, to others. Nowadays, screen recording can also be done on our smartphones and most smartphone manufacturers have also integrated the feature within the user interface. In a similar way, we can also record the screen without the need of using any third-party software on Windows, however, if you are looking for some extra features and more convenience while recording the screen you should always depend on a third-party party program.
But not everybody is looking for the best and the most premium tools for screen recording, and that’s where you can always depend on a simple program for screen recording. That said, you can use ShareX, which is a great tool for dealing with photos and screenshots, and you can also use it as a miniature screen recording tool, not to mention, with limited features. ShareX is lightweight and there aren’t any complications associated with recording the screen using the software. That’s why you should keep it handy to use it as a go-to screen recording tool if you need to record your screen quickly.
So without any further delay, let’s get started with how you can record the screen using ShareX on your Windows computer.
Recording screen on a Windows 10/7 computer
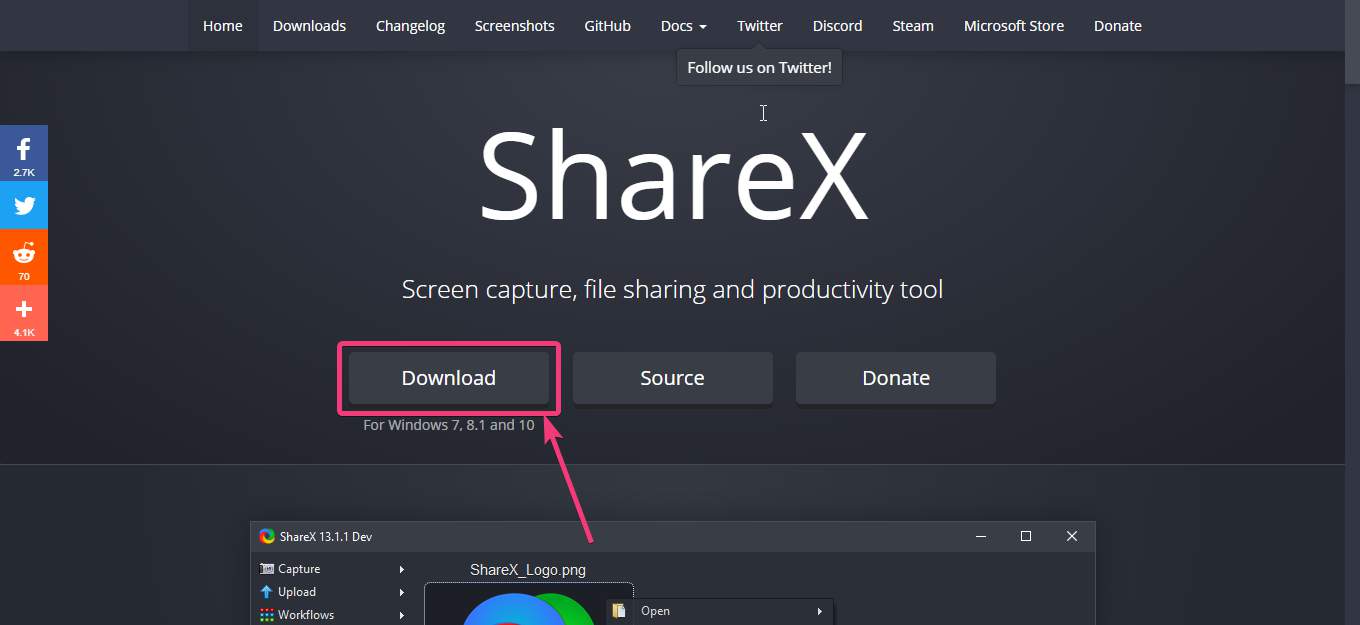
- Download and install ShareX, if you haven’t downloaded it already and install it exactly the same way you install other Windows programs.

Download and install ShareX
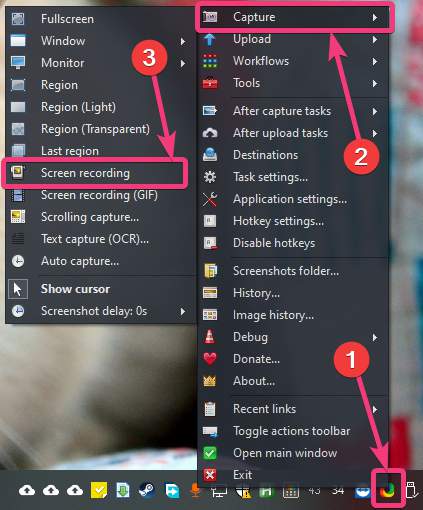
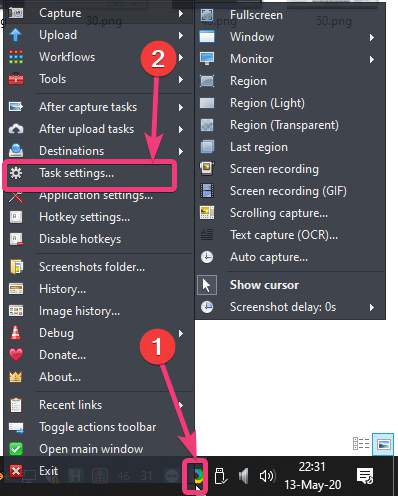
- After you have downloaded and started ShareX on your Windows computer, right-click on the ShareX icon in the system tray, move your mouse pointer to ‘Capture’, and then click on ‘Screen recording’.

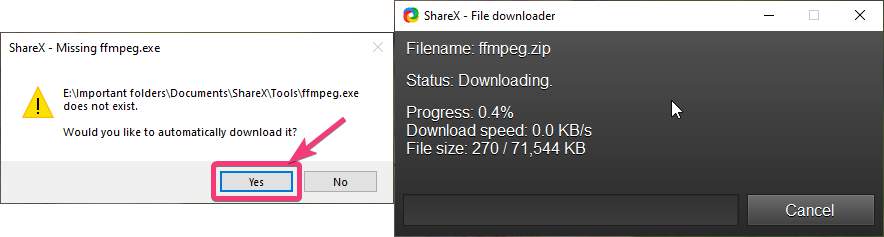
ShareX icon in the system tray - On trying to record the screen for the very first time, ShareX will prompt you to download ‘ffmpeg.exe’ ShareX will automatically download the necessary files. Just click on ‘Yes’. The size of the file is around 70 MB.

download ffmpeg
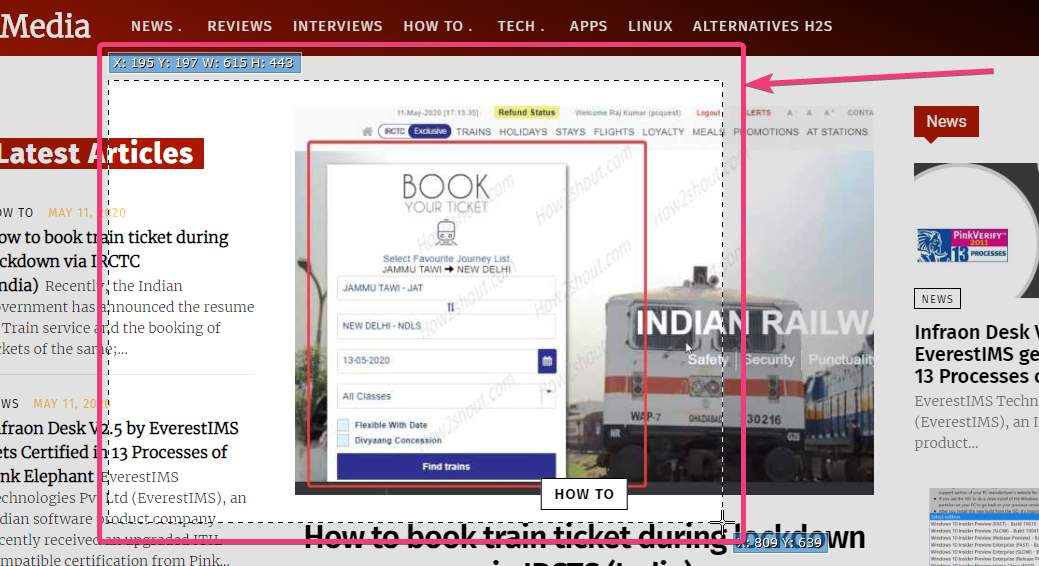
- After ffmpeg.exe is downloaded, click on ‘Screen recording’ again, in the same way, and then you will have to choose the part of the screen that you want to record.

Screen recording - You can select the full-screen if you want to record everything, and alternatively, you can also select a part of the screen. Just select as per your requirements.
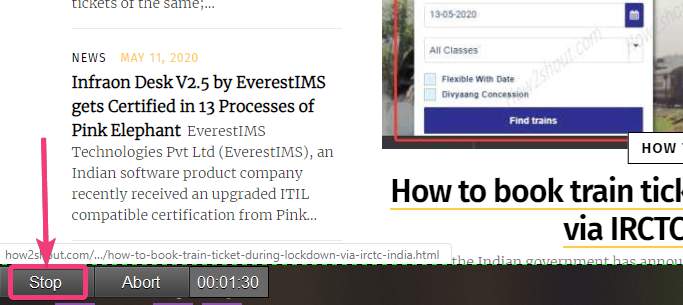
- The screen recording will start immediately and after the recording is over, you can stop the screen recording by clicking on the ‘Stop’ button in the toolbar that will automatically appear after you start screen recording. Alternatively, you can click on ‘Abort’ to discard the recording at all.
- After the recording is over, you can see the screen recording video in MP4 format in the default directory assigned to ShareX for recording the screenshots.
- Even though screen recordings will be saved in MP4 format, there are certain screen recording options that can be configured by. For example, you can change the video and audio codec, preset, audio bitrate, video, and audio source, and additional granular options can also be configured if you find that important.
- To do that, right-click on the ShareX icon in the system tray, and click on ‘Task settings…’.

Screen recording using ShareX
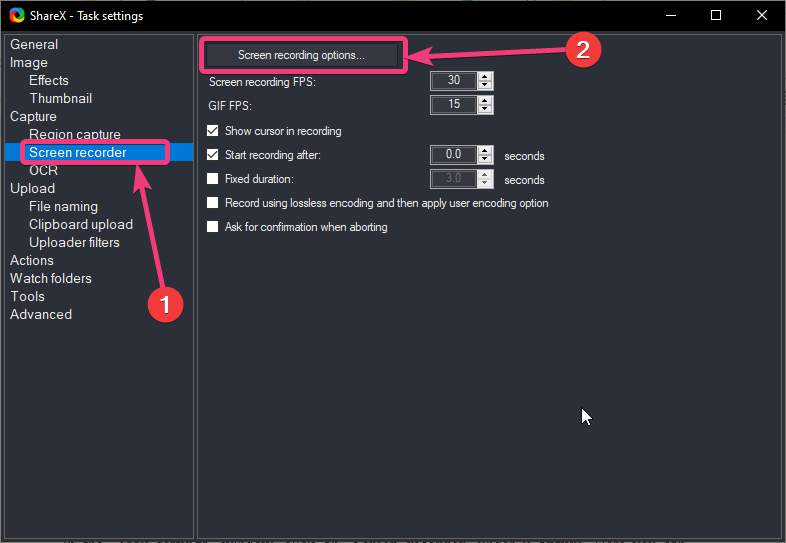
- In the ‘Task settings’ window, click on ‘Screen recorder’ under ‘Capture. Here you can change the frame rate of videos, GIFS, decide whether you want the cursor at the time of recording, and change other settings. To change additional settings, click on the button that says ‘Screen recording options…’.

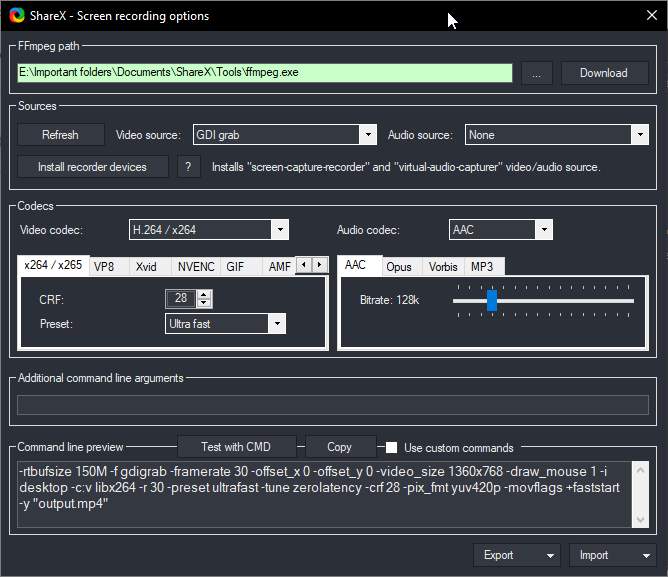
Screen recording options
- Here you can change the path of the FFmpeg.exe file, change the video and audio codec, configure the audio and video source, audio bitrate, and configure other advanced settings. You can also export the current settings or import any set of existing settings in this window.

change the path of the FFmpeg.exe file
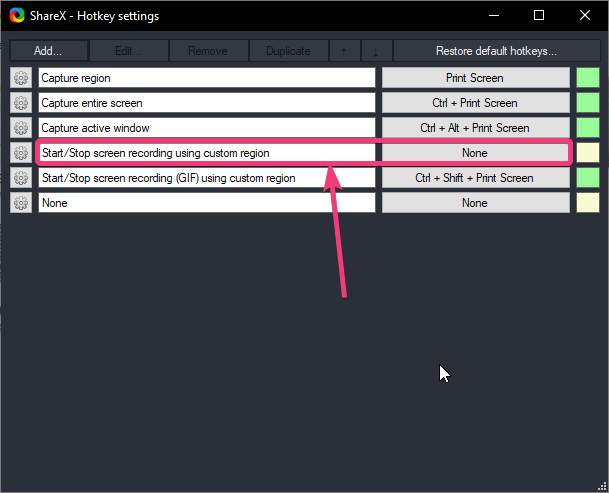
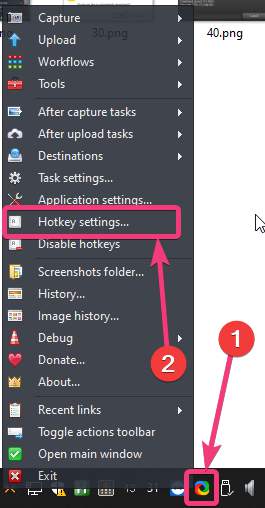
- Additionally, you can also right-click on the ShareX icon in the system tray, and click on ‘Hotkey settings…’ to assign a hotkey for starting and stopping screen recording.

Hotkey settings…
- Here, you can set a hotkey to both start and stop screen recording and GIFs. By assigning shortcut keys, aka. hotkeys, it will be more convenient for you to deal with all types of recording on ShareX.

set a hotkey to both start and stop screen recording
- ShareX is an all-in-one tool that can help you capture screenshots, do screen recordings, and carry out a number of other similar tasks quite easily. ShareX is a program that you should keep in handy on your Windows computer.
So, that was all about, how you can record screen on Windows using ShareX. Do you have anything to say? Feel free to comment on the same below.
Other Articles:
Related Posts
How to Reopen Closed Windows or Tabs in Firefox
How to Install Django on Windows 11 or 10
How to set Gemini by Google as the default Android assistant
How to create data bars in Microsoft Excel for numeric values
How to open HEIC images on Windows for free
How to install Server Manager Windows 11 or 10