Are you looking for the simplest and easiest method to install Plex Media Server on Ubuntu 19.04? Here is that. Single command of snap will setup Plex server for you…
Plex Media Server doesn’t need an introduction however, those are not acquainted with it; the Plex Server is a software that is free to use and cross-platform. This means it is available for Windows, Linux, FreeBSD, NAS, and macOS along with a wide range of Client apps to stream videos from the Plex Medi server. Not only videos, but the users can also stream music files too locally as well as remotely along with TV shows, and photos on PC, Chromecast, Android or iOS smartphone, tablet, ROKU, etc.
We are going to use the Snap package manager for the installation Plex server here. The benefit of using SNAP is it makes everything so simple. No need to download and install each file separately.
Install Plex Media Server on Ubuntu 19.04 via Snap
Though this article performed on ubuntu 19.04 disco dingo, it will be also the same for other older versions such as Ubuntu 18.10/18.04/17.04/16.04/14.04… along with Elementary OS and Linux Mint. Yes, you can use the commands given here to install the Plex Media Server on Elementary OS.
Install Snap-on Ubuntu
If you are using Ubuntu 19.04, the snap comes as a pre-installed application. However, for older Ubuntu systems to install SNAP, the users can use the command:
sudo apt-get install snapd
Snapd is a daemon required to run snaps, it also includes the command snap which we need here to install the Plex Media Server.
Install Plex Media Server using SNAP
We don’t need to go for long manual steps and multiple settings to set up the Plex Media server if we are using SNAP. It installed the PLEX server in a confined environment without any kind of interaction with any other web server like apache running on the same system. Snap application packages of software are self-contained and don’t rely on traditional package management like APT or YUM.
Sudo snap install plexmediaserver
Trivia: In case you want to restart/start/stop the Plex server in future then use Snap service commands:
sudo snap restart plexmediaserver
sudo snap stop plexmediaserver
sudo snap restart plexmediaserver
To find out what services running under snap the command is:
sudo snap services
Plex Media Server Initial access
Once you run the above Plex media server installation command using snap-on Ubuntu 19.04, you automatically get all packages in their respective place. The only thing which you have to do- Open your browser and type your machine IP address along with port number 32400.
server-ip-address:32400
Replace server-IP-address with your local or machine IP address.
If your plex on your local machine then use the localhost then you can also use:
http://localhost:32400/web
Setup Plex Media Server on Ubuntu 19.04
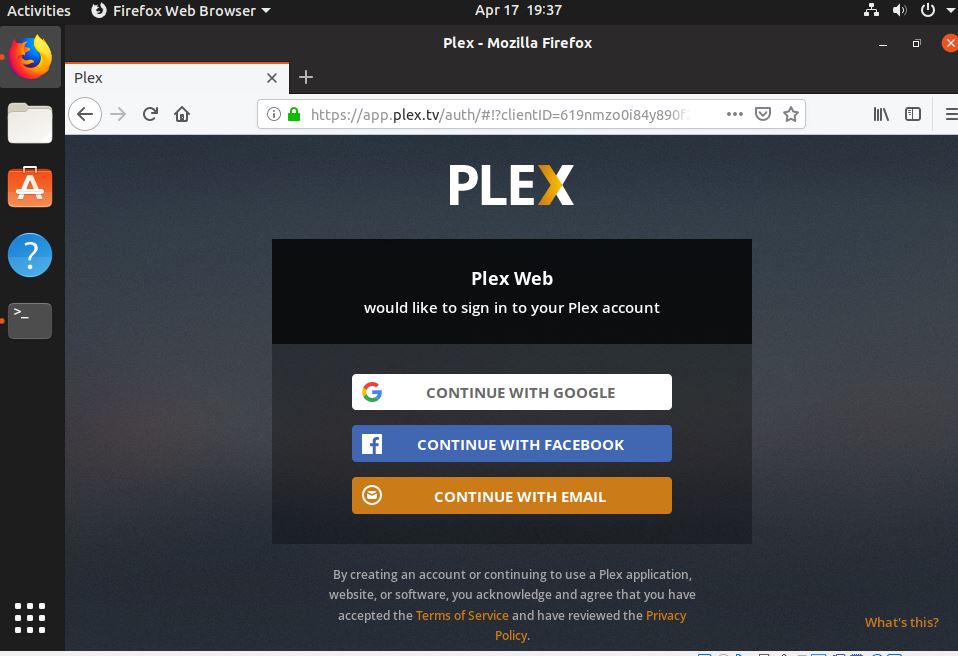
Step 1: The first screen will appear asking you to login into your Plex account using Google, Facebook, or Email ID. If you don’t have a Plex server account then you use any of the given sign-in mediums to create the same. Or use this link to Plex sign up.
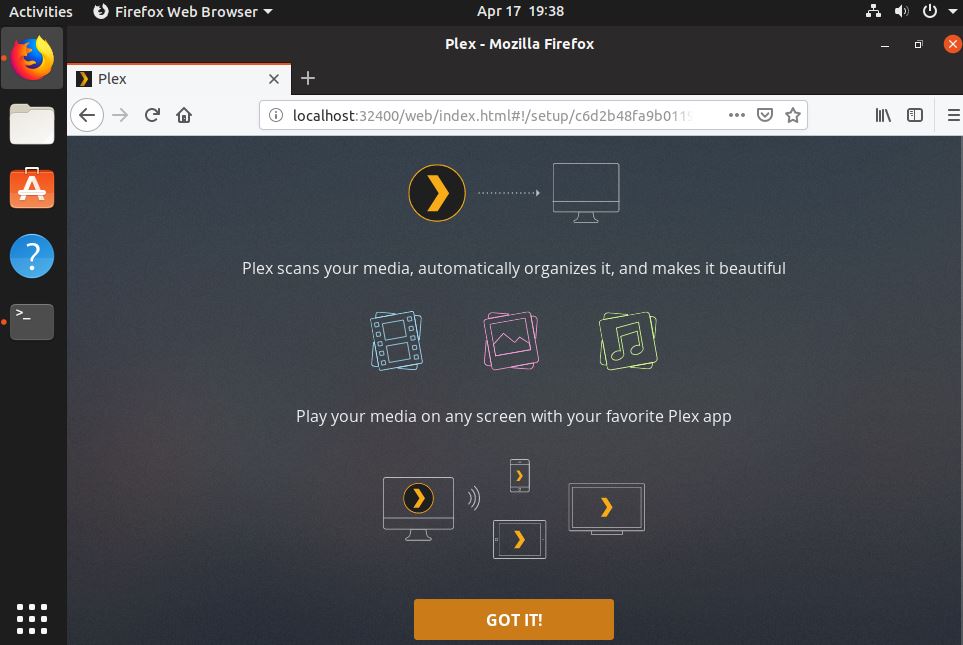
Step 2: After signing in, the Plex will again get back to your local server IP address. At this step just click on Got it button.
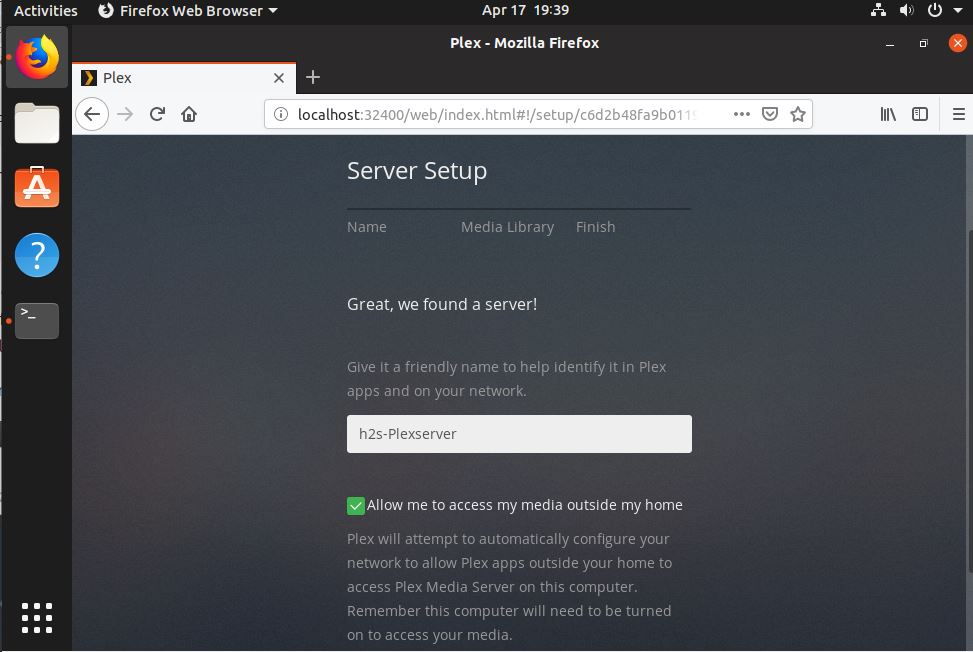
Step 3: The Plex Server on Ubuntu 19.04 will identify your local installed server and ask you whether you want to assign some custom name to it. Give some friendly name and click on the NEXT button.
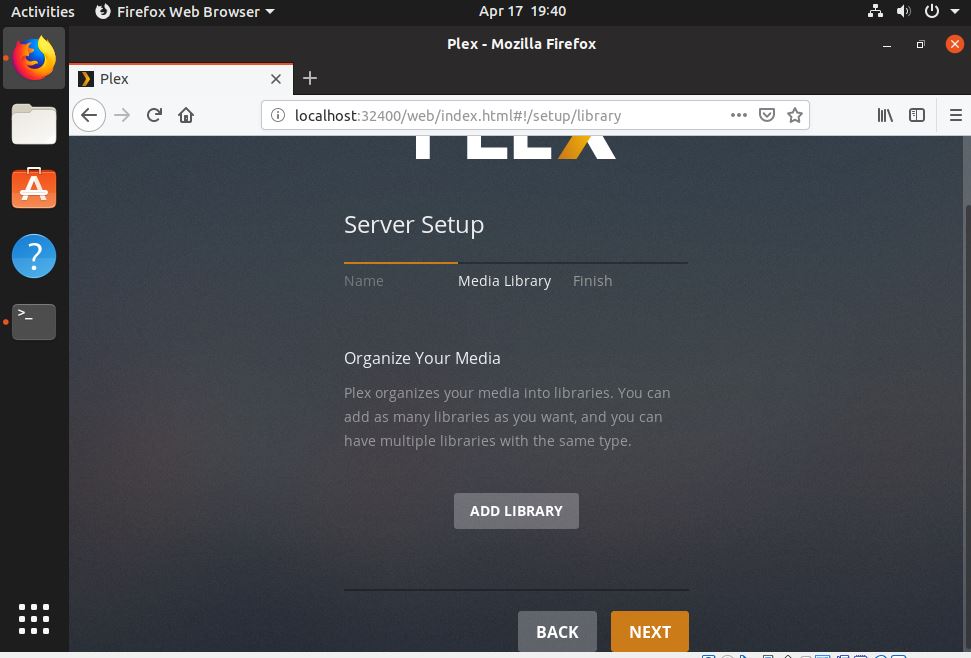
Step 4: Its time to add some media files to Plex. Click on Add Library button.
Note: You can also Add Media files to Plex later from Dashboard.
Step 5: Select the Type of Media files you would like to add to your media server. We are adding some Music files.

Step 6: Click on the “Browse For Media Folder” button.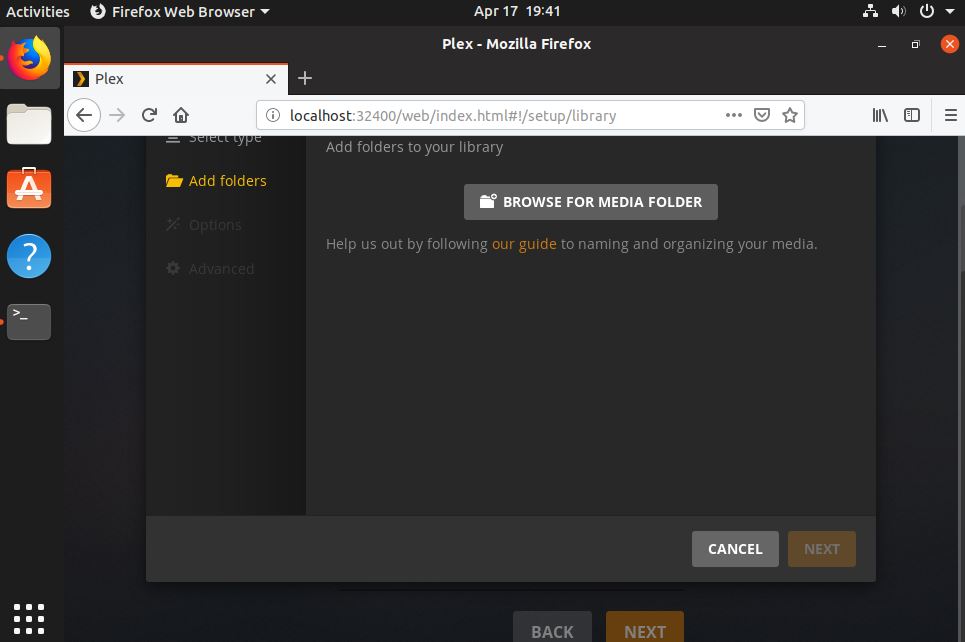
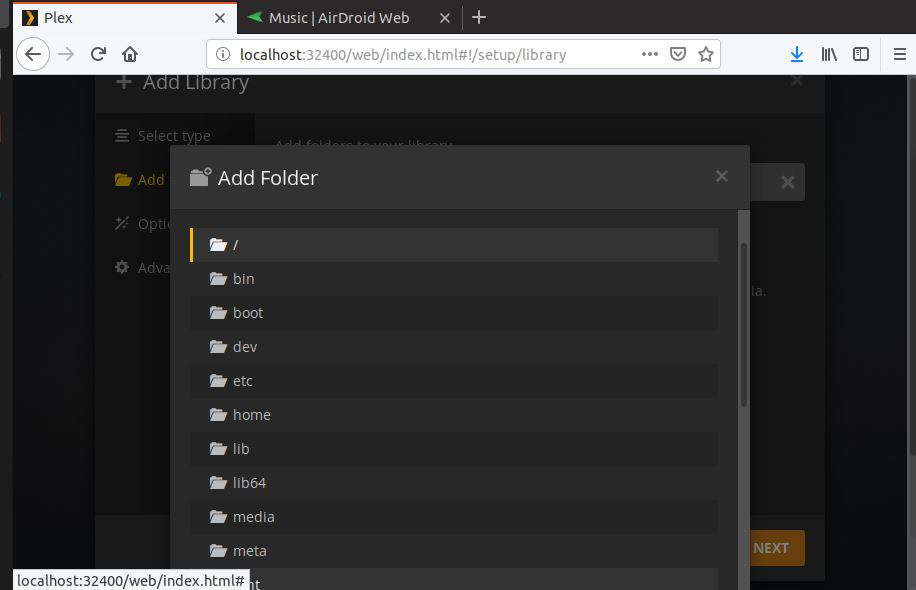
Step 7: Select the folder which has your Media files. For example, our Music files are in the /media folder so, we have selected that.
You can repeat the same step to add other media files folder and then finally move towards the Finish.
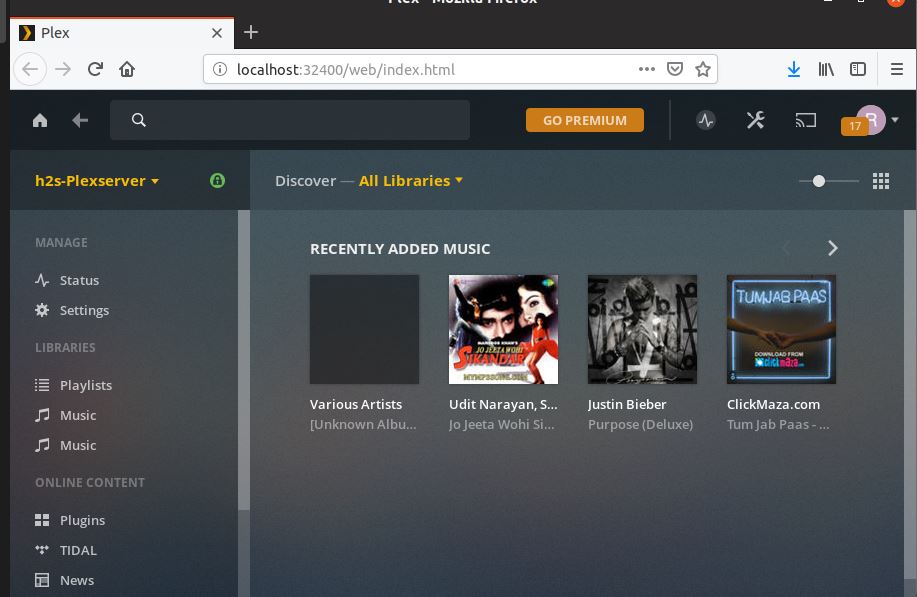
Step 8: After adding the library and finishing setup you will find your newly install Plex server Dashboard with all media files in it.
Note: If while playing any music you got some error like “Error code: s9009 (Manifest)“. Then install vlc, it is a codec problem, I think and after installing it worked for me.
sudo apt install vlc
In the future, if you want to update the Plex Media Server installed using SNAP package manager then use the below command:
sudo snap refresh plexmediaserver
In this way just using the single command of SNAP, we install the Plex Media Server on not only Ubuntu 19.04 but other Linux OS such as Centos, Debian, OpenSUSE, and more… However, this method is easy to use but the traditional one gives more control over the back end and on every file from Apache server to other supported services( see the traditional method to install Plex on Ubuntu). But for newbies installation via snap is recommended.
To clear some doubts related to Plex see: Plex media server FAQ ( Frequently Asked Questions)
Let us know if you face any problems…
Other Tutorials to Read:


My screen is not like your final screenshot. It has nothing on the right. I have deleted and added movies and music libraries three times, but nothing is showing.
I have adjusted settings in my firewall to open 32400 to my LAN.
How are my other machines supposed to connect to Plex?
If you are using any local machine then simply the IP address of the Plex server and if you want to access via the internet remotely then first enable the remote access in your Plex setting and forward Plex server IPaddress along with port in your router.
Further adjusted firewall to open all :324** ports.
Other machines using https://plexserver:32400/web and the righthand panel fills up OK after a LONG time scanning the libraries.