If you would like to create another local user account on your Windows 11 PC, simply follow the instructions given in this article.
Earlier in Windows 7, a new user can be added from the Control panel, however, now under Windows 11 Settings, it can be done in a more simplified way. Here we will show you three different methods of how you can create a new user. Decide for yourself which method you prefer.
#Quick view
Add Windows 11 new user via the settings
- Open the Windows settings and click on the ” Accounts ” section.
- Click the Family and Other Users category on the left.
- Then select ” Add Other User “.
- If the new user has a Microsoft account, enter the associated email address and click ” Next “. The Microsoft account is set as a new user.
- If you don’t have a Microsoft account, you‘ll need to select ” I don’t know this person’s sign-in information“. Then click on ” Add a user without a Microsoft account ” and set a username and password. Finally, click on ” Next “. The user was created successfully.
Create a new user via the command prompt
- Open the Windows start menu and enter ” cmd “.
- Right-click the Command Prompt tile and select Run as Administrator.
- Enter the following command in the command prompt:
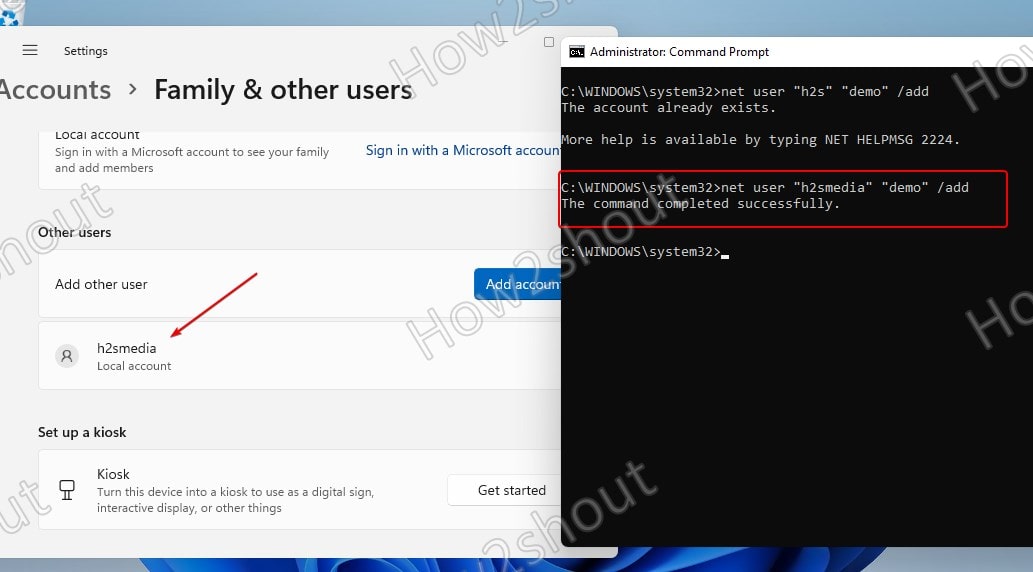
net user "Username" "Password" /addInstead of ” Username ” enter the desired username. For ” Password ” you then have to define a password for the new user. - Press the [Enter] key. You have now successfully created a new user.
Create Windows 11 new user via the password settings
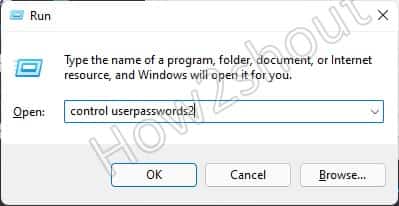
- Press the key combination [Windows] + [R] and enter
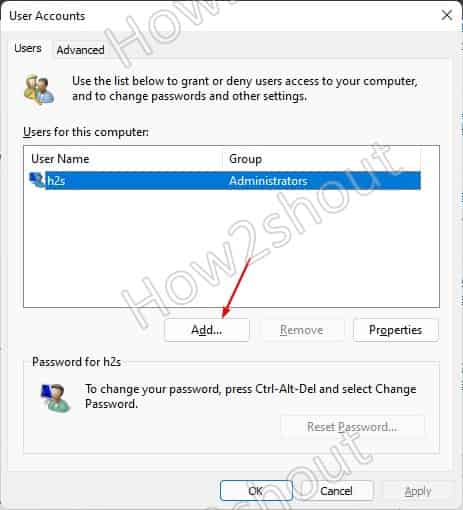
control userpasswords2. Then press ” OK “. - Click on ” Add … “.
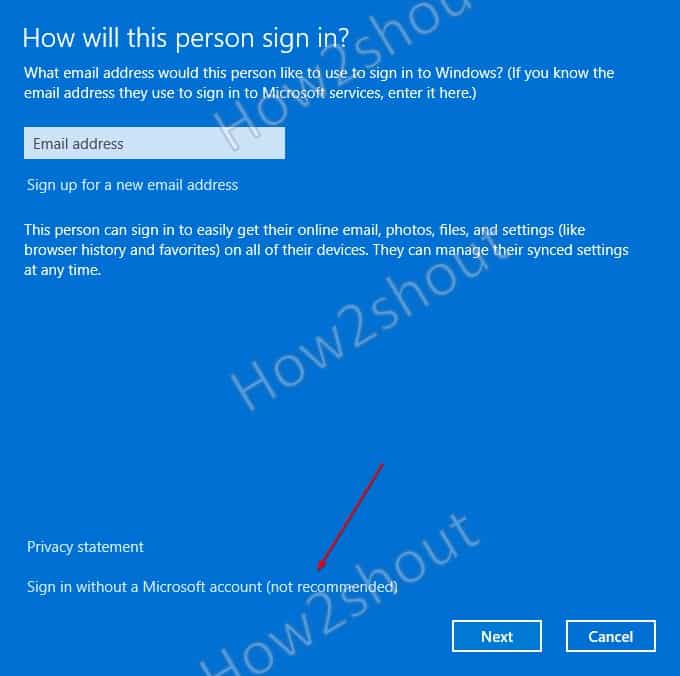
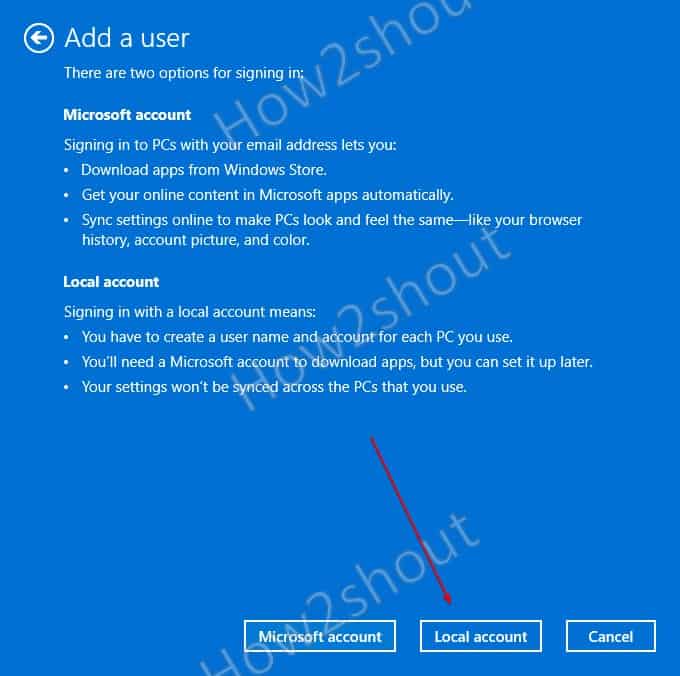
- Select ” Sign in without a Microsoft account (not recommended), ” then select ” Local Account “.
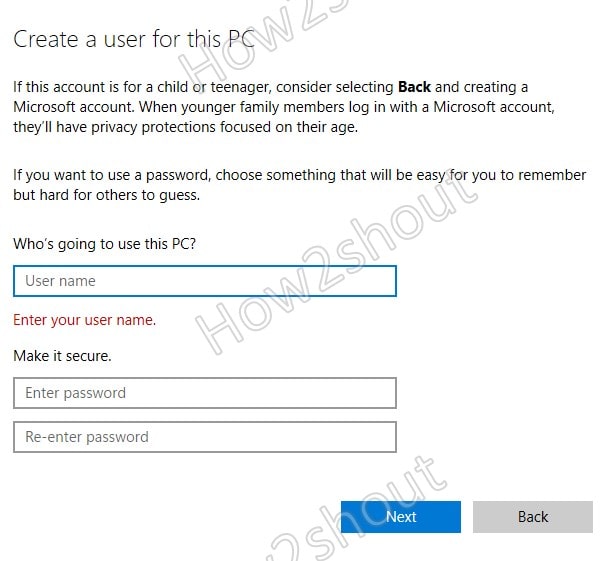
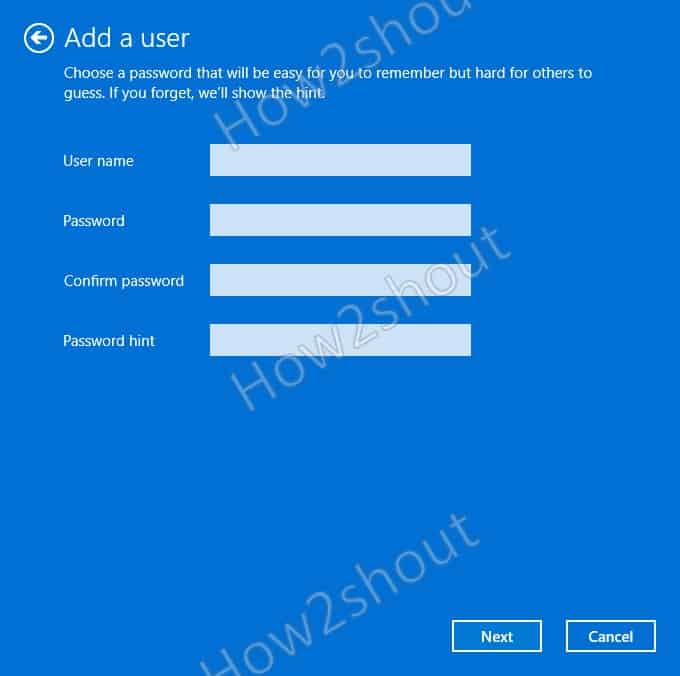
- Enter a username, the desired password, and password help. Then click on ” Next “. Finally, go to ” Finish ” to create the new user.
#Steps in detail with screenshots
Way 1: Add Windows 11 new user without Microsoft Account
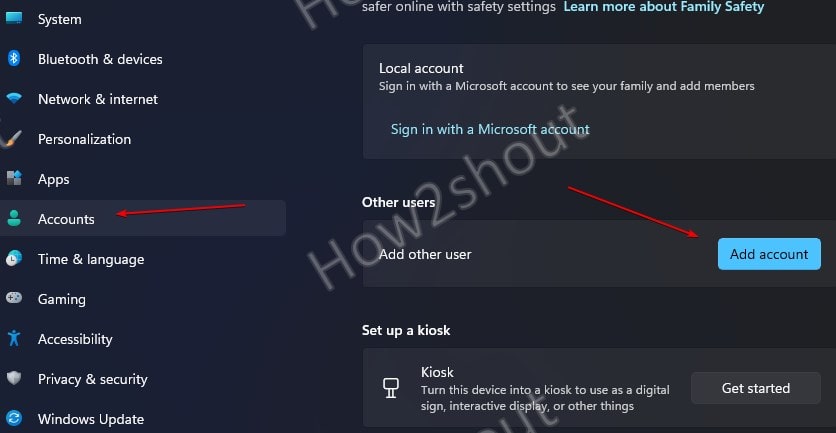
Step 1: Open Windows settings, for that you can press the Win + I key. Then click on Accounts.
Step 2: Select the tab “Family & other contacts “. Click the “Add Account” button.
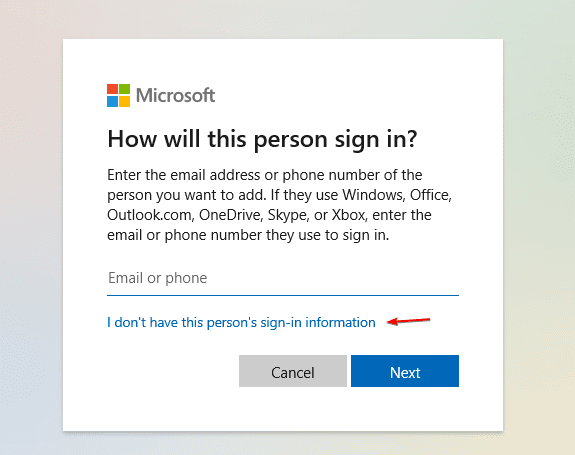
Step 3: Select “I do not have this person’s sign-in information” to create a regular Windows 11 local account.
Note: If you want to add a user using the Microsoft account then enter the email address or phone number associated. After that click the ” Next ” button. In this case, the user account is linked directly. The password of the Microsoft account then also applies to the new PC user.
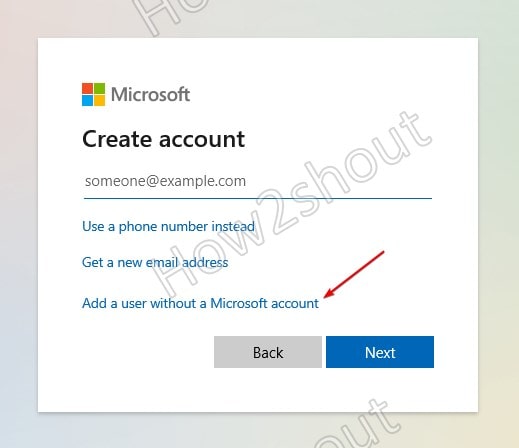
Step 4: Click “Add a user without a Microsoft account ” to create a local user.
Step 5: Now define the credentials for the new user. This includes the user name, the password. To save the data click on ” Next,” you have successfully created a new user.
Way 2: How to Add a local new user via the command prompt
Step 1: In Windows 11, the search box type “cmd “. When it appears click on “Run as administrator “.
Enter the command:
net user "Username" "Password" /add
Step 2: For “Username” you must enter the name you want to give to your new user. For “Password” enter the desired password. Press the [Enter] key to confirm the creation of the new user.
Way 3: Create a new user via the password settings
Although the Microsoft in Windows 11 Home will force to add users using the Microsoft Account, however still you can follow the steps given in this tutorial. Apart from the other given ways, one more is there that allows you to create a purely local account. The advantage of a local account nothing is going to sync thus your data will be on your own system. Nevertheless, you still have the option to link your Microsoft account to your local user account later.
Step 1: Open the Run command box. For that press the key combination [Windows keys ] + [R]. Then enter control userpasswords2.
Step 2: Now select ” Add … “.
Step 3: Click “Sign in without a Microsoft account (not recommended) “.
Step 4: Then select “Local Account“.
Step 5: Now set the important data for the new user that includes the username, password, and password hint. Then click on ” Next “.
Step 6: By clicking on “Finish“, you will have a new user on the computer.
Closing Thoughts:
So, these were the few ways to create a local user account on Windows 11 without using the Microsoft account link.


Hello could you just put the link to make a new account?