Using the default system repository you will have MySQL 8.0 Server to install, however, if you want to install MySQL 5.7 Database server on Ubuntu 20.04 LTS (Focal Fossa) Linux. Then we need to install this Database’s official repository manually.
Oracle MySQL is a popular database server used by thousands of server programs around the globe. It is free and open-source, hence anyone can deploy it without paying anything. It is a cross-platform program, therefore available for all the popular operating systems.
MySQL 5.7 Database Server installation on Ubuntu 20.04 or 18.04 LTS
The steps given here are easy and can be followed on both CLI or GUI Linux versions of Debian-based Ubuntu 20.04. You just need access to the internet and a sudo user on your machine to set up MySQL 5.7; 7.5 and 7.6.
1. Download Oracle MySQL repo on Ubuntu 20.04
As we know the MySQL 5.7 packages are not available to install using the base repository of Ubuntu 20.04, hence we need to download and add the one manually using the command given below.
Here we are not adding the current Debian repository instead of an old one.
wget https://dev.mysql.com/get/mysql-apt-config_0.8.12-1_all.deb
2. Install the repository package
Once you have downloaded the Debian package meant to add Oracle MySQL repo, either use DPKG or APT to install the same.
sudo apt install ./mysql-apt-config_0.8.12-1_all.deb
3. Configure Repo for MySQL 5.7
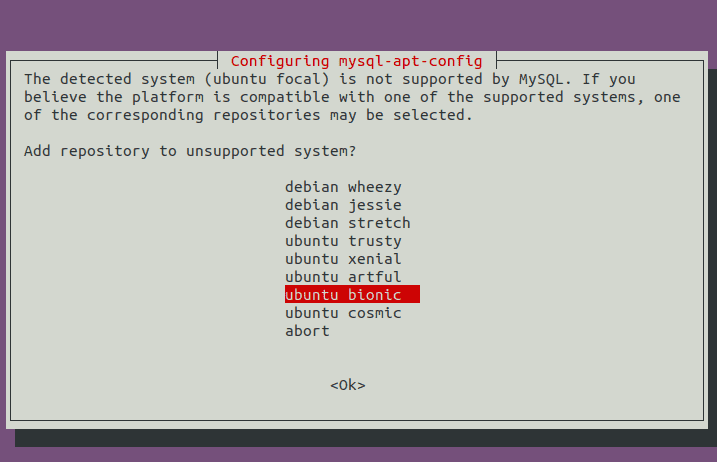
Now, a text-based wizard will open with multiple Ubuntu versions to select. Use the arrow key and select “Ubuntu bionic” and hit the “Enter” key.
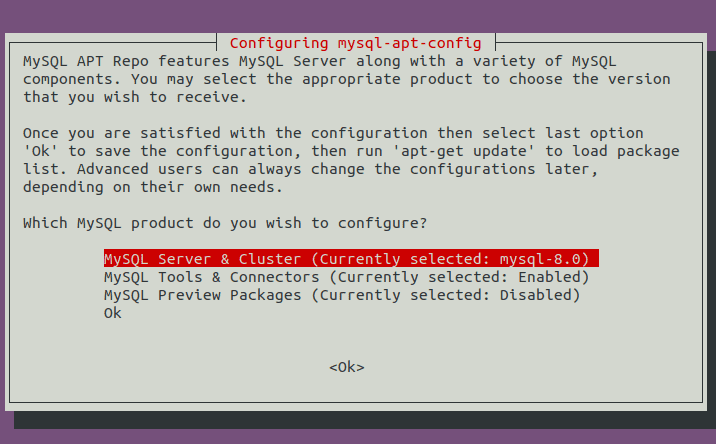
Which MySQL Product do your Wish to Configure?
As here we want to install the Database Server, then let it be selected and hit the Enter key.
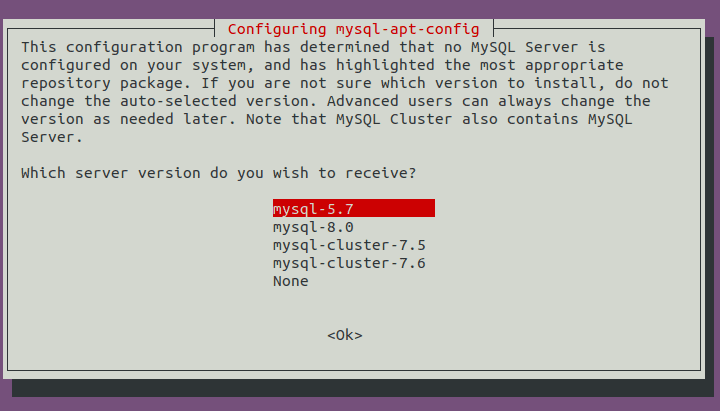
Which Database Server version do you with to receiver?
Of course, we want the MySQL-5.7 version to install on Ubuntu 20.04, hence select it and press the Enter key.
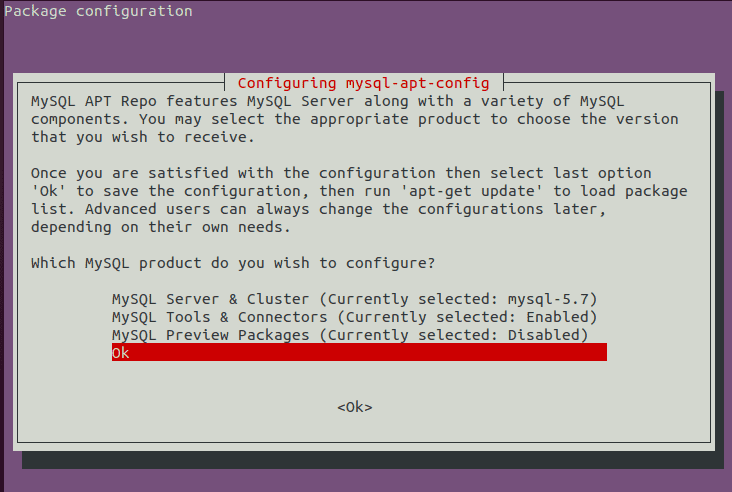
Finally, use the arrow key to OK and again hit the “Enter” key.
4. Run system update
Now, we have added the repository successfully. Let’s run the system update command so that our system can recognize the newly added repo by flushing the APT cache.
sudo apt update
5. Command to Install MySQL 5.7 on Ubuntu 20.04
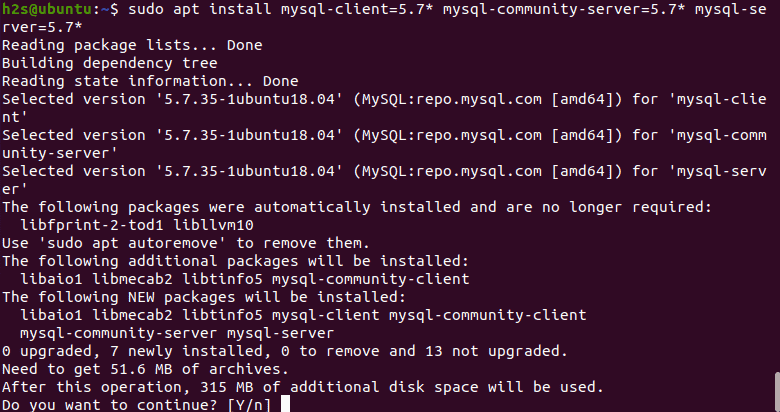
Finally, run the below-given command to get the Database client and Server packages for your system to install.
sudo apt install -f mysql-client=5.7* mysql-community-server=5.7* mysql-server=5.7*
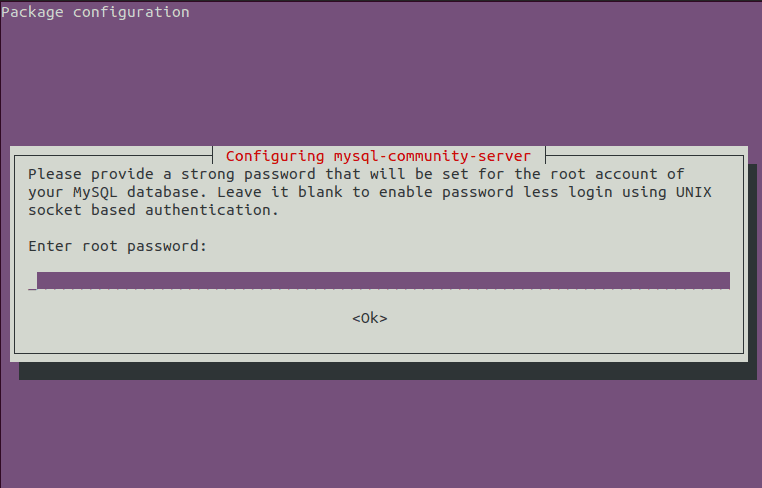
Remember when the setup asks you to set a password for the root account of your MySQL database. Enter whatever you want to set (two times) and hit the Enter key.
6. Secure your MySQL Installation
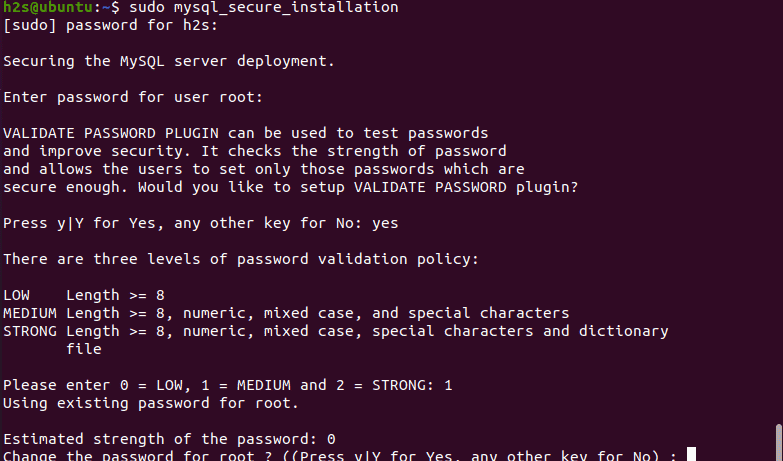
Well, the 5.7 version of the Oracle MySQL server and client have been configured successfully, let’s run a command that will provide a few guided options to secure your Database Instance.
sudo mysql_secure_installation
Follow the wizard and set secure your deployment.
7. Check version
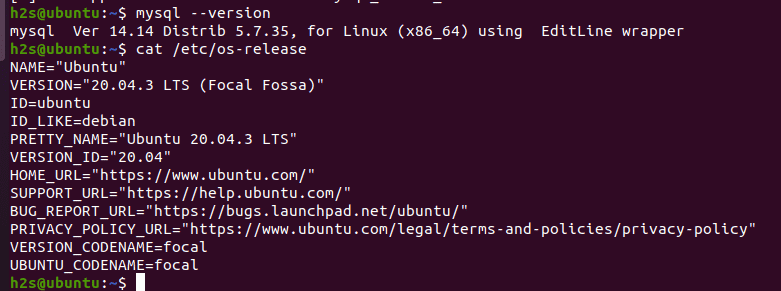
To confirm you have MySQL 5.7 on Ubuntu 20.04, let’s check the version using the given command;
mysql --version
Other Articles:
- Access remote MySQL database in local phpMyAdmin
- How to install MariaDB 10 on AlmaLinux 8 or Rocky Linux
- Command to take a backup of MySQL database
- How to copy a table structure without copying data in MySQL


Thank you! This was right to the point and very very helpful.