If you are using Linux Virtual Machines such as Ubuntu and CentOS on Vmware Workstation Player and want to add an extra virtual hard disk, then here are the steps to follow.
Vmware Workstation Player is a popular platform available for Windows and Linux for creating various kinds of virtual machines. It is free for personal usage. So, if you have created a smaller in size Virtual hard disk for your Vmware Player running Linux virtual Machine and later you realized that you are running out of space, then add an additional one. Yes, we can add a new virtual hard disk to our machine for extending its virtual space for storing more data.
Add Extra Virtual Hard drive to Vmware running Virtual Machines
The steps given below are applicable to both Debian and Redhat based distros such as Ubuntu, CentOS, ElemetartyOS, Linux Mint, and more. However, here we are using Ubuntu 20.04 LTS Focal fossa.
Open VMware Player and select VM
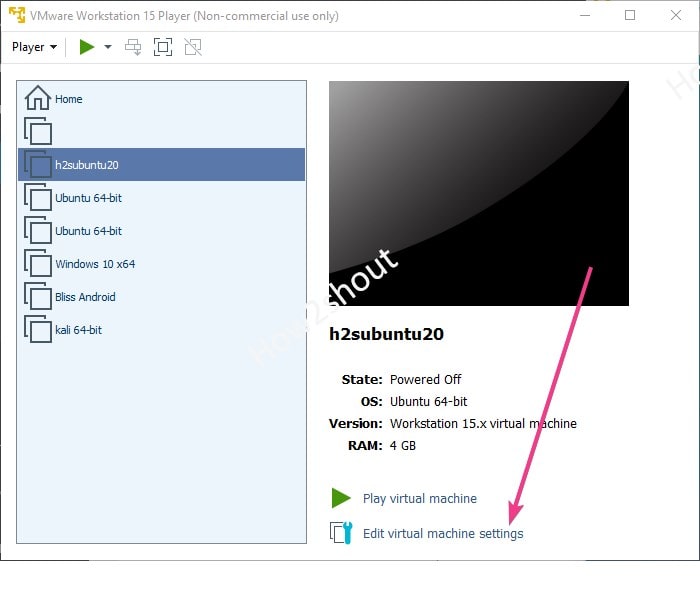
The Linux Virtual machine where you want to add an additional virtual disk, select that on the VMware Player interface and click on the “Edit Virtual Machine Settings” option.
Add new Virtual Hard disk
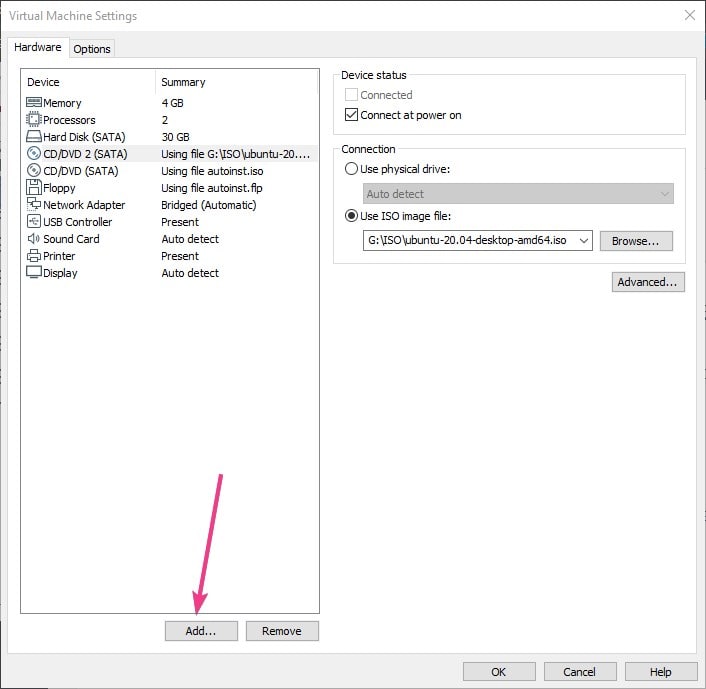
Click on the Add button to add extra hardware to your Virtual machine.
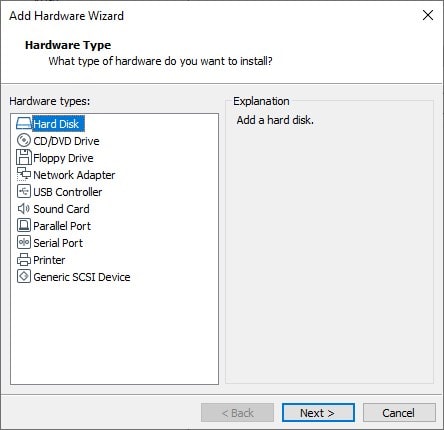
Select the Had Disk from the Hardware Type option list.
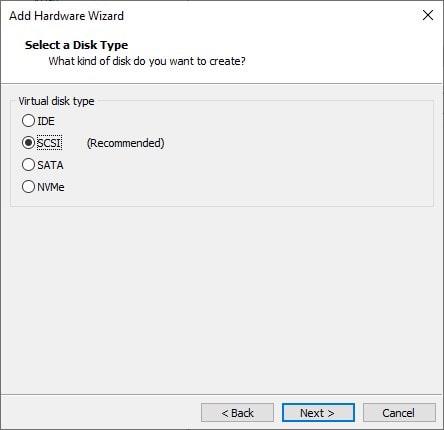
Let the default SCSI selection as it is and click the Next button to move forward.
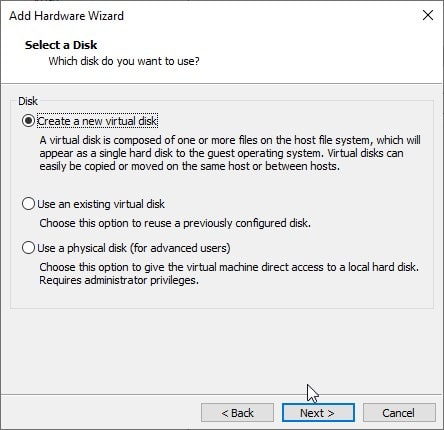
Under disk, select Create a new virtual disk option.
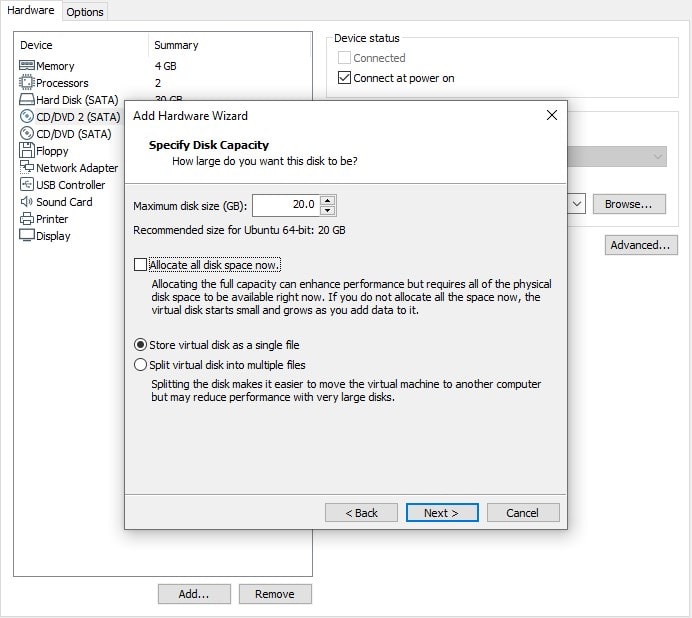
Allocate the amount of space you want to have on your additional hard disk for VM.
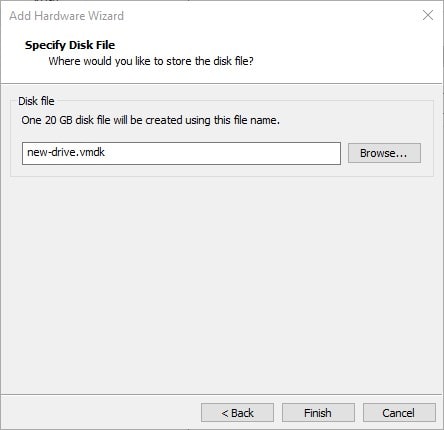
By default, the VMware will create the additional Virtual disk in the main partition of the system where your host is installed. You can change that, click on the Browse button and select the drive where you want the Vmware to store additional disk files.
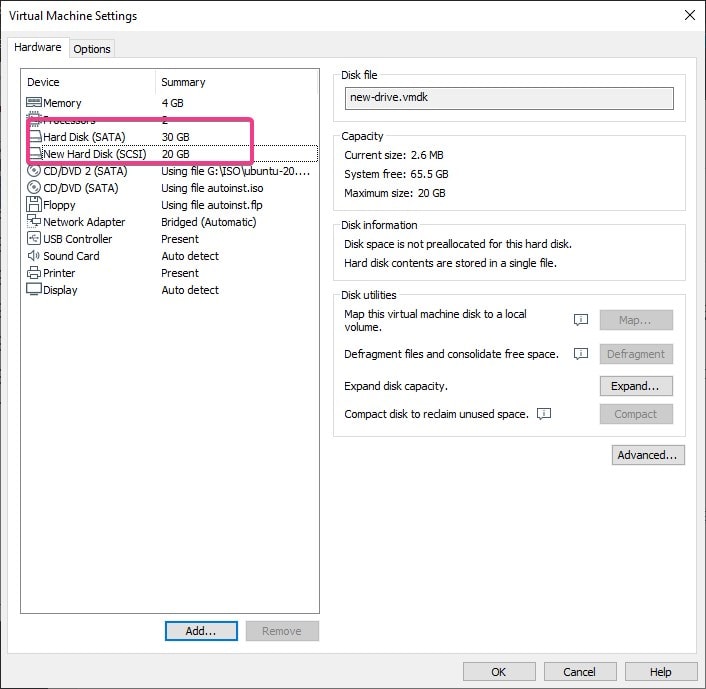
Now, you will see two Hard disks under your Virtual Machine Settings. That’s it now turn the machine ON.
Install Gnome Disk Utility
After turning ON the Linux virtual machine for what you have added new virtual hard disk, install a simple utility called “Gnome Disk” to manage the attached drives. You can also use any other software meant to manage disks such as Gparted.
Here are the commands to install it on your system:
Ubuntu
sudo apt-get install -y gnome-disk-utility
CentOS
yum install gnome-disk-utility
Open Gnome Disk
Go to Applications and search for Disks, as its icon appears click on the same to open it.
Format the newly attached Virtual Disk on Vmware
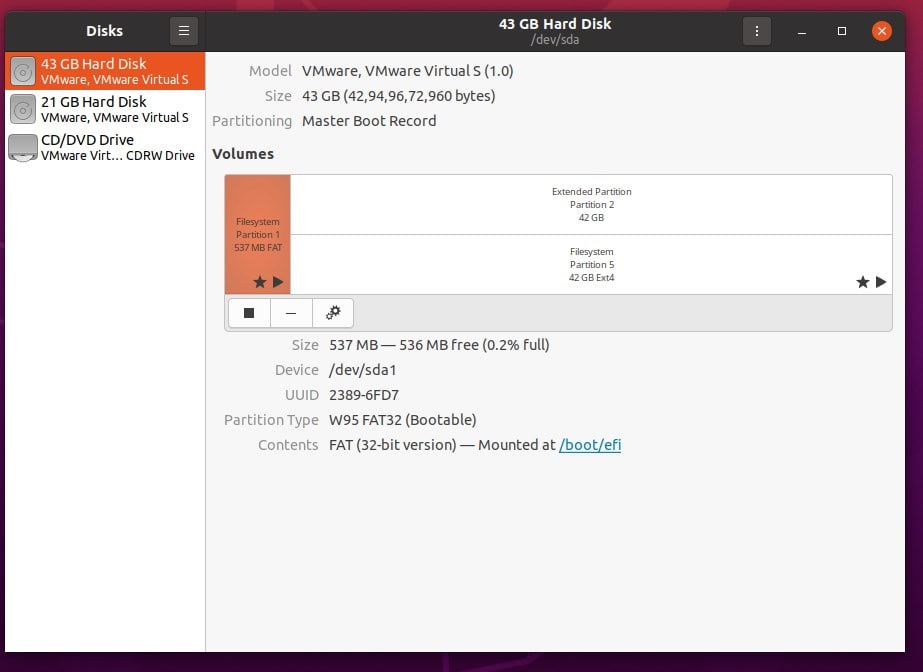
Under the Disk utility, you will see the newly attached Hard disk. Select that.
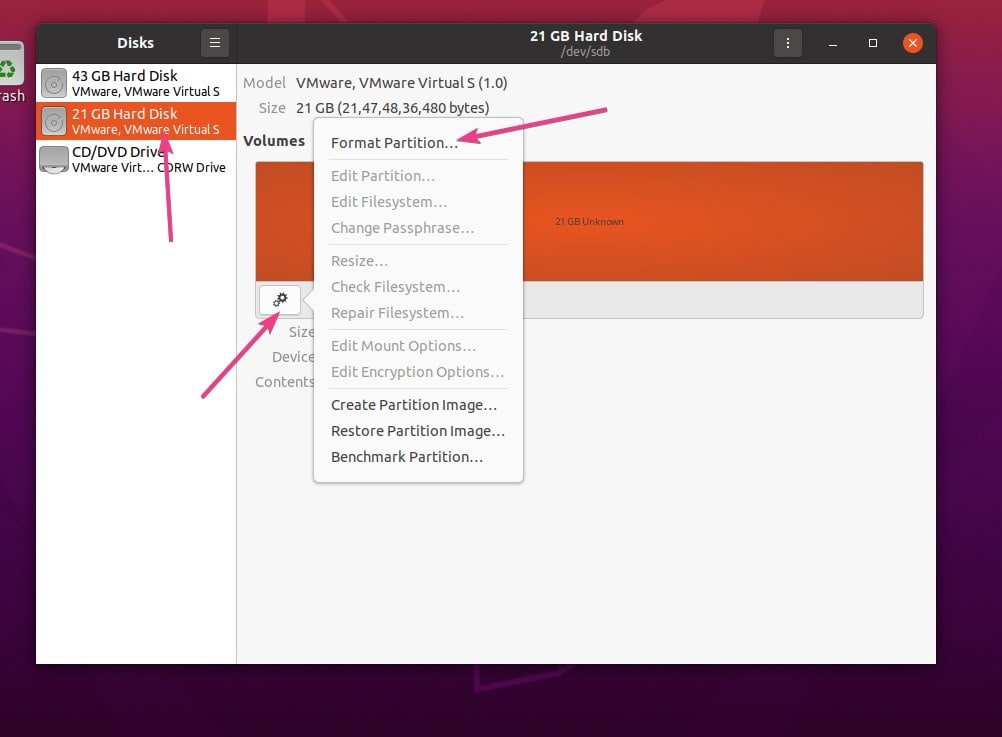
Now, click on the Setting gear icon and select the Format Partition option.
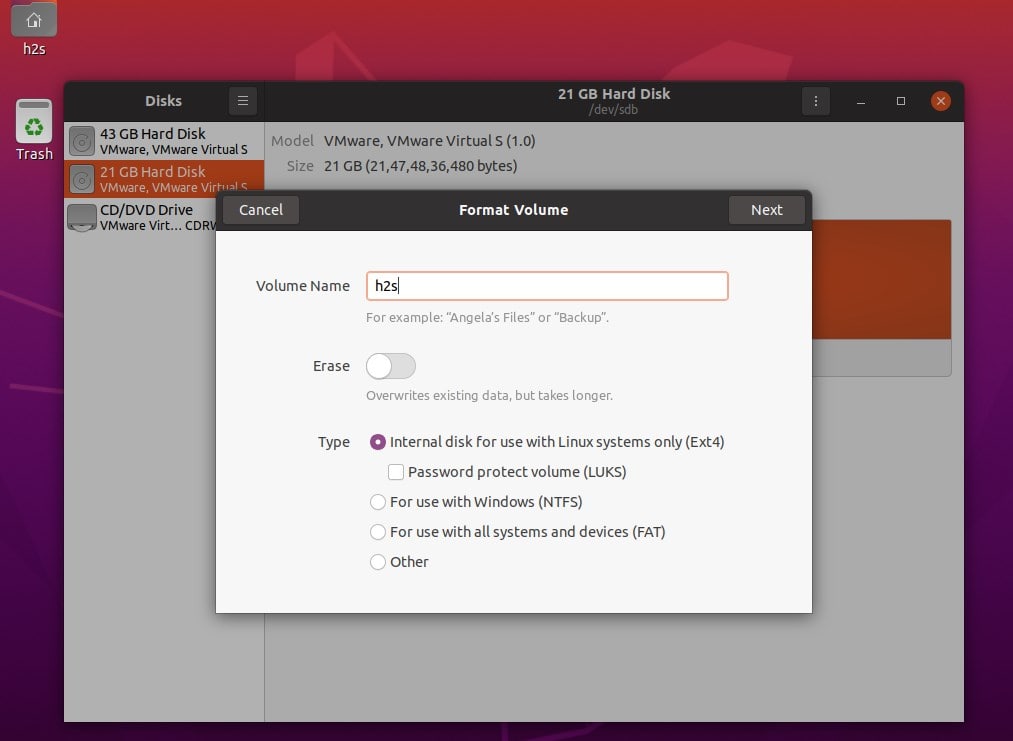
Given some name to your Volume that you are going to create, here we are simply using the ‘h2s’ label to recognize it easily after formatting and mounting. By default, it will use the Ext4 Linux file system to format the added drive. However, you can choose the other one as per your requirements.
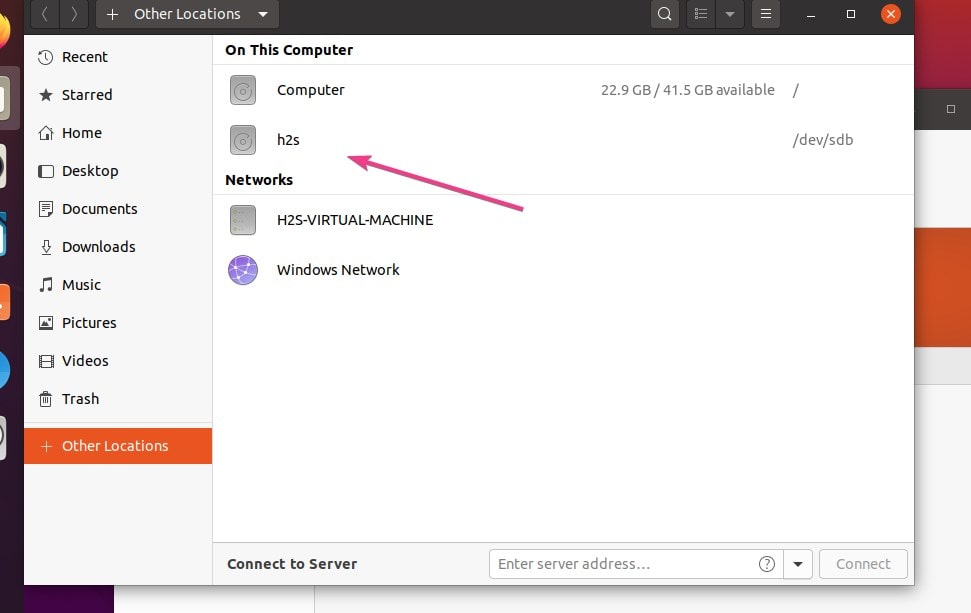
Now, open the File Manager on your Linux system and select the Other Location option. There you will see all the attached Hard disk to your Virtual machine including the one you added recently. That’s open it and start storing whatever extra data you have.
If you are using the Command line Linux Server on VMware Virtual Player then simply refer this official documentation to learn the commands.
