Free Unity Hub Editor can easily be downloaded & installed on Ubuntu 20.04 Linux using its APP Image, here we let you know how?
Although Unity Engine supports the Linux system for a very long time now, however the same was not true for the Unity editor, a GUI interface for it. Using Unity Editor developers can create various cross-platform games 2D or 3D content or games with the help of tools it offers for a wide range of devices.
Apart from Windows & macOS, Linux users can also download the Unity editor from the official website in a normal way, performing a similar process to Win or macOS users. Yet, here we are to make sure you won’t get stuck somewhere while starting with Unity Editor on Ubuntu or any other Linux system.
Steps to download Unity Editor and install on Ubuntu 20.04
Although the steps given here are performed on Ubuntu, they can be used for Linux Mint, Debian, Fedora, Rocky Linux, CentOS, MX Linux, POP!OS, Manjaro, and others.
Unity Hub system requirements
- Linux OS such as Ubuntu 21.04, 20.04, 18.04, 16.04, CentOS 7.
- Graphics card with DX10 (shader model 4.0) capabilities.
1. Downloading Unity Hub Linux to install the editor
To install the Unity editor for Linux, you must first download the Hub, which for the Open Source system is available in AppImage format. The best thing about the “App Image” format is that you can run it on all popular Linux distros regardless of their base. This means a single executable that can be run on Ubuntu as well as on Fedora.
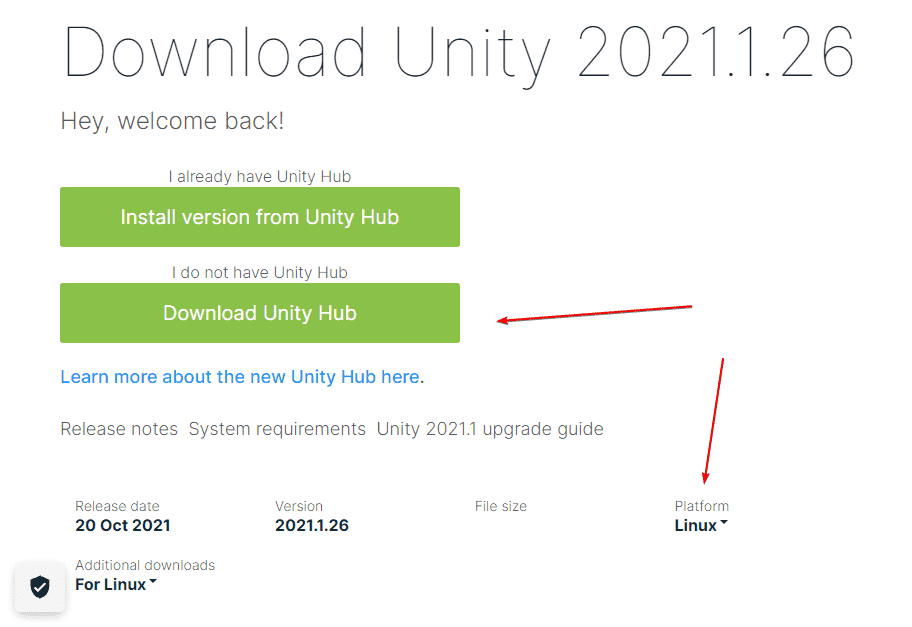
Use the given link – download the Unity Hub and from the page select Linux as a platform and then hit the Download button.
2. How to get started with Unity Hub
After downloading the AppImage package of Unity Hub, to run it, first, we have to make the file executable. For that, right-click on the UnityHub.AppImage, select Properties, and then go to Permission Tab. There, check the box meant for “Allow executing file as Program“.
Alternatively, those who are interested in the command line to give permission can use:
chmod a + x UnityHub.AppImage
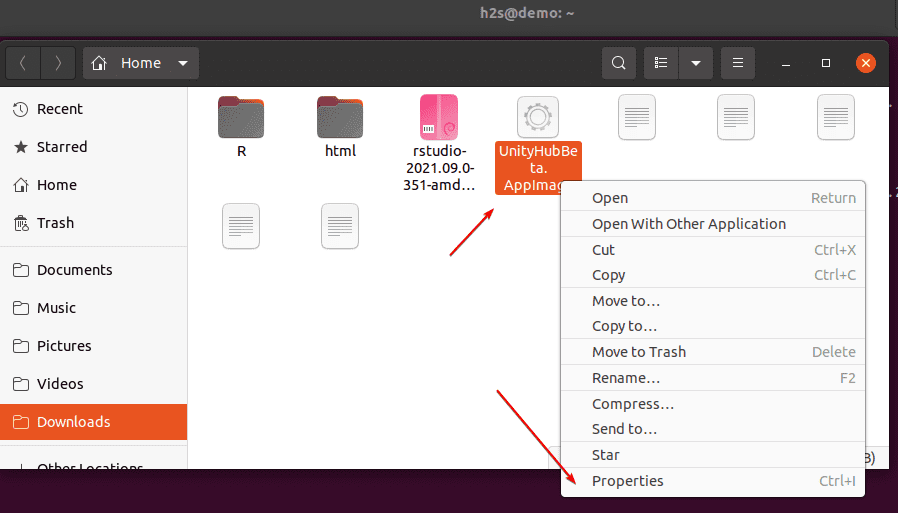
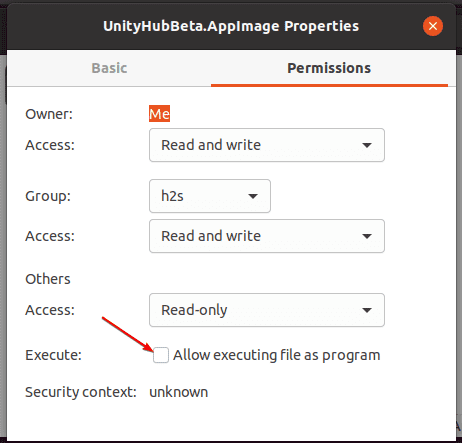
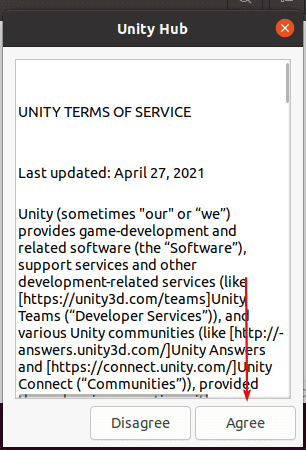
After assigning the permissions, you just have to double click on the file “UnityHub.AppImage” and accept the terms.
3. log in to Unity Technologies account
After Agreeing with the Terms, if you have an account with Unity Technologies then click on the Profile icon given on the right top side and then select “Sign in”.
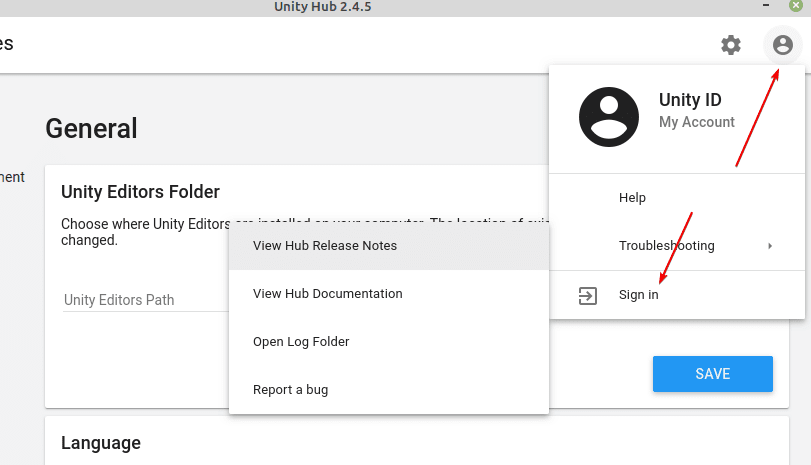
Enter your Unity account details. Those who don’t have an account can click the “Create One” link given there and register the one to activate the personal use license.
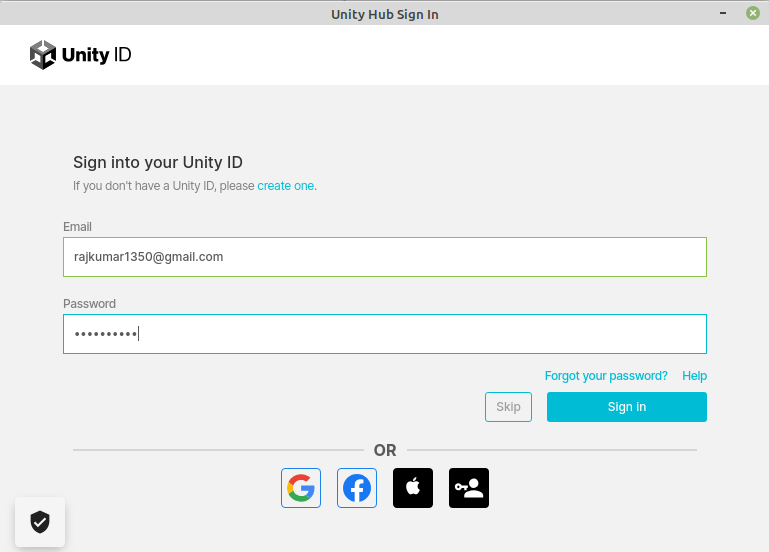
4. Activate License
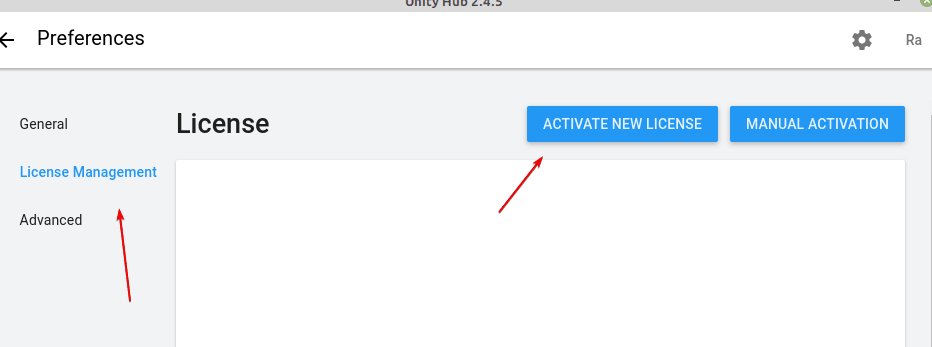
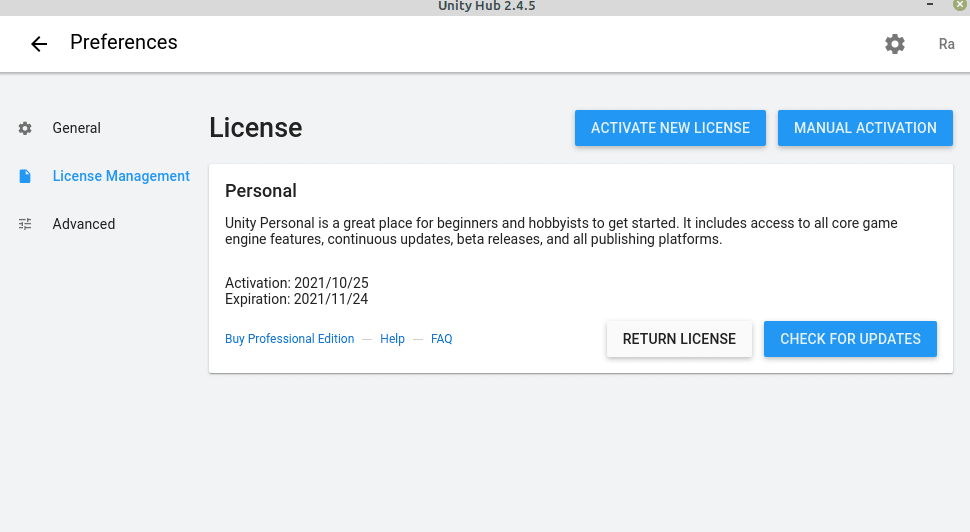
Once logged in, click on the Gear icon given on the top right side, then select License Management and click on the “Activate New License” button.
5. For Free Personal License
In the next step, check the “Unity Personal” option for a free personal license, and while activating it, also select “I don’t use Unity in a professional capacity ”.
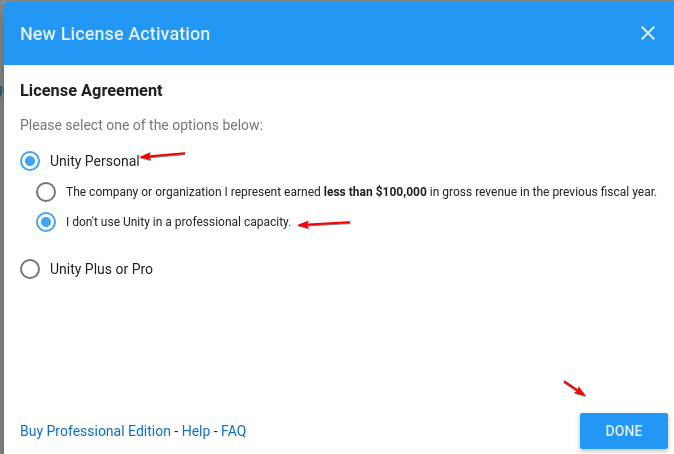
Once you have followed the above steps, the Unity personal license should already be activated, which will allow us to download and subsequent launch of the Unity editor.
6. Set Unity Editors Folder on Linux
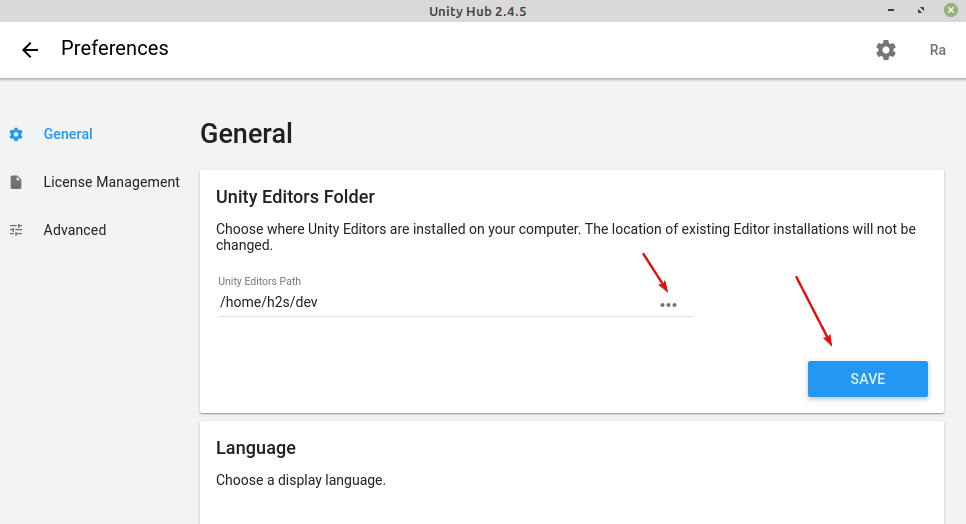
Finally, we reach the steps where we set the Unity Editor folder on Linux to install it. For that, on Unity Hub select the “General” section and then select the location or folder where you want to install the Unity Editors on your Linux system. For that click on the three dots. Further, you can also select the language, by default it will be English.
Note: Once done, click on the back arrow to get the main menu, given on the top left side.
7. Install Unity Editors on Ubuntu or other Linux
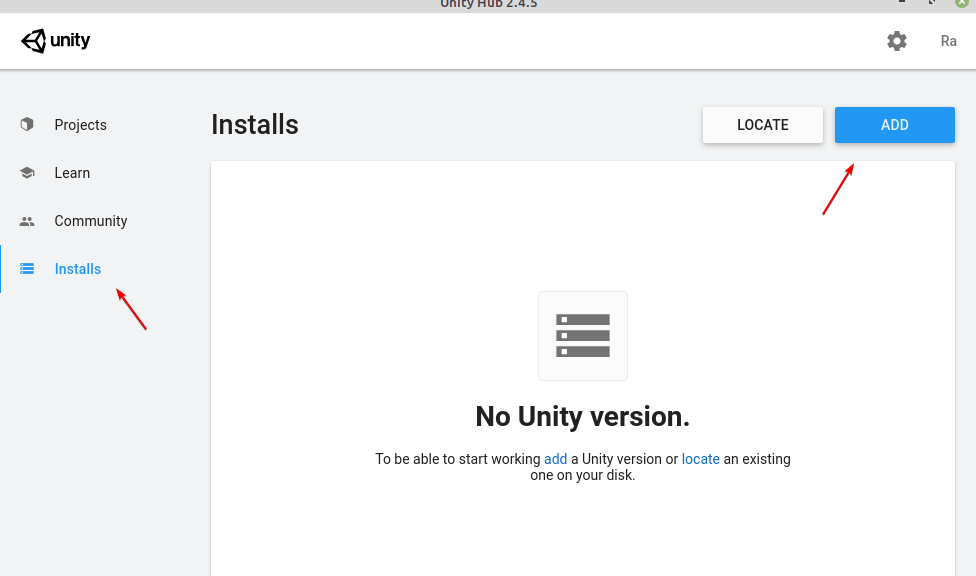
Once you are on the Main menu, go to the ” Installs ” section on Unity Hub, which allows adding different versions of the editor. To start the installation process of an editor, click on the ” Add ” button.
8. Add Unity Version
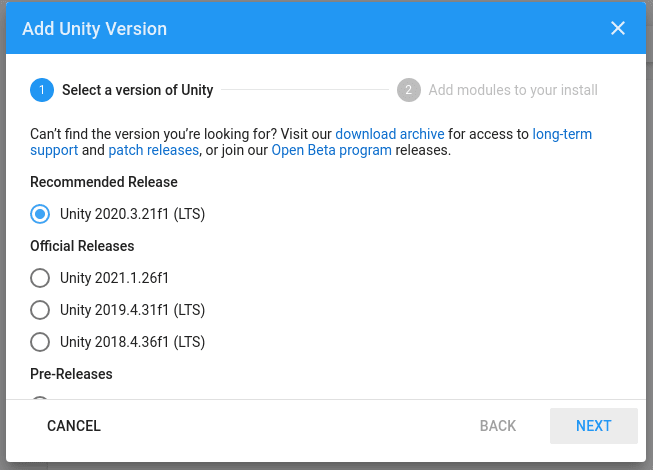
The user can choose between different versions of the Unity editor available for Linux. However, here we are going with the recommended release.
9. Add module to install
Once you have decided the version of Unity editor you want to download, in the next step select the components to cross-compile your app to Windows, Android, macOS, and/or iOS, in addition to the native compilation for GNU / Linux. The size of each Unity module download will also be there. This gives the idea of how much space is going to be used by this developing platform on your system.
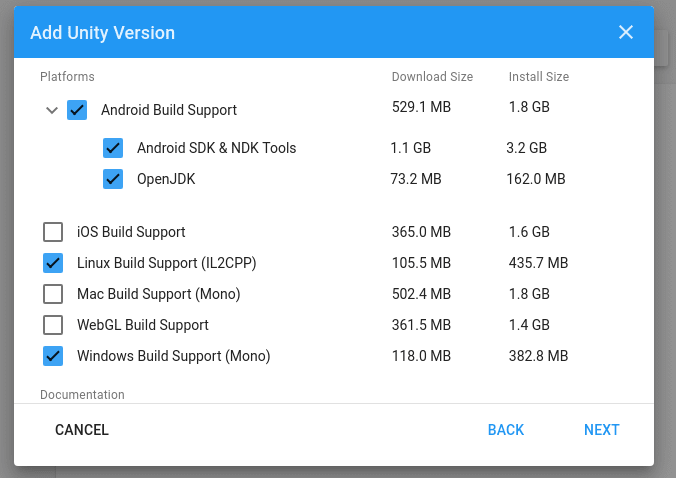
Soon the downloading will be started:
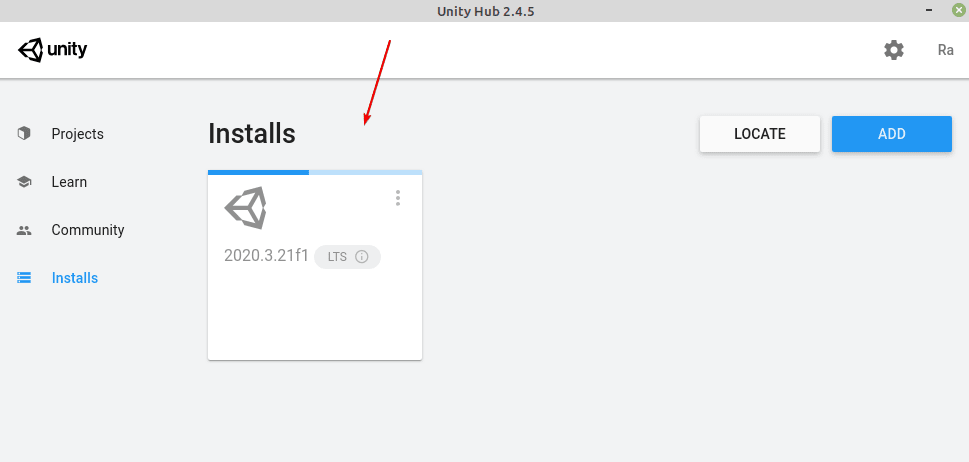
10. Create New project
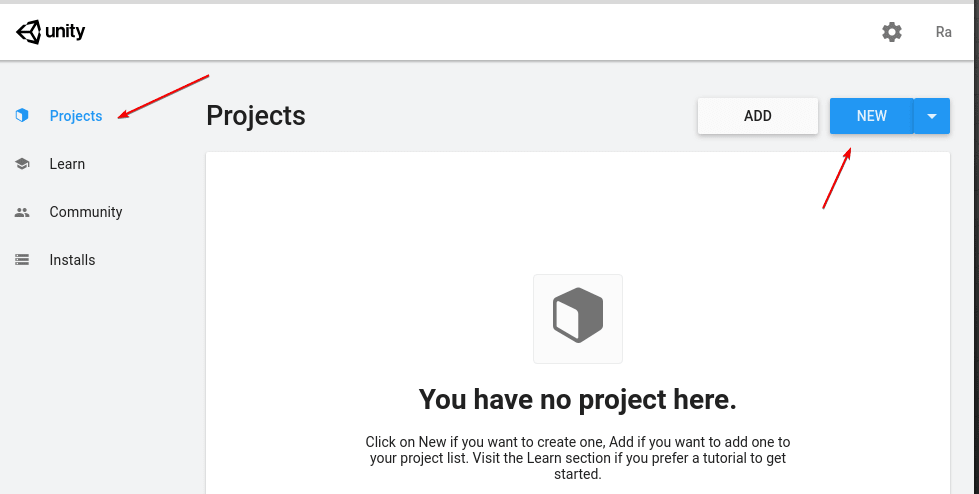
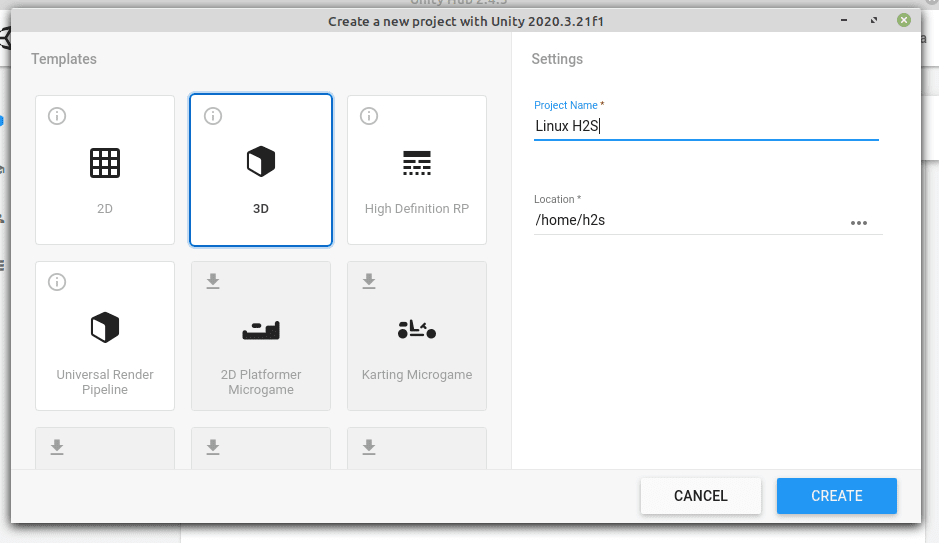
After downloading the selected Unity editor version, go to “Projects” in Unity Hub, click the “ New ” button (with the side arrow icon, the users can use the drop-down to select a particular Unity version, in case of using several versions), and then choose the type of project, given some name and then hit “Create” button.
Unity Editor Interface
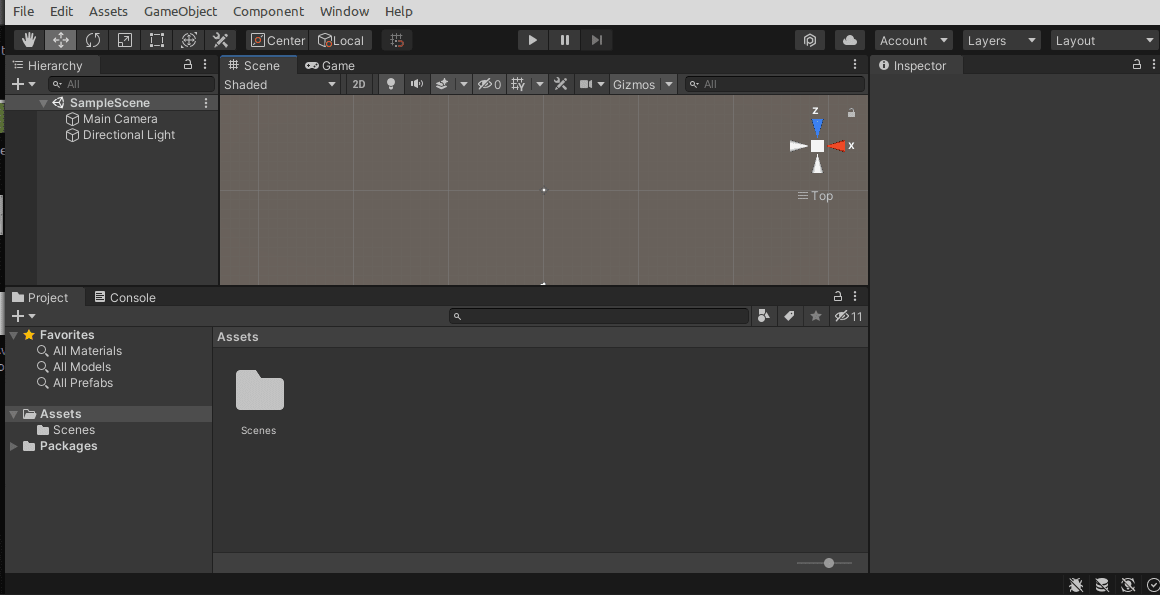
Once everything goes well, you will have the Unity editor interface to start developing your project using the graphical user interface.
Ending notes:
There are a few steps involved to completely install Unity editor on Linux such as Ubuntu, however, it seems difficult but not at all to get this developing engine working.
Other Articles:
- How to install Master PDF Editor on Ubuntu 20.04 LTS
- 5 Best free PDF editors for Ubuntu Linux in 2021
- How to Setup and use Google Drive on Ubuntu 20.04
