Learn the steps to create, launch and connect Amazon ec2 Instance from your browser to use various virtual machines based on Linux or Windows such as Ubuntu, CentOS, Amazon Linux, RHEL, Windows server, and more…
What is Elastic Compute Cloud or EC2?
Elastic Compute Cloud or EC2 is a cloud computing service offered by Amazon Web Services (AWS) from the Infrastructure as a Service (IaaS) segment. It allows users to run an unlimited number of virtual machines with various features including scalability.
To get the benefits of the Ec2 service, we first need to create a virtual machine using pre-built Amazon Machine Image (AMI) of various operating systems available there. Alternatively, we can use Linux or Windows Images with the pre-configured applications, for example, CentOS with pre-installed WHM Cpanel. After creation, the AMI is uploaded to the Simple Storage Service (S3) and registered using EC2. The system then generates an AMI identifier or AMI ID. Despite its complexity, EC2 is easy to use. The service can be used immediately with a preconfigured image. However, you can also create your own AMI.
Furthermore, EC2 not only provides tailor-made virtual machines, but is also very flexible when it comes to choosing between different operating systems, application packages, and instance types. It provides full control and root access over each server instance. Whereas, the company also guarantees one hundred percent availability for each of its regions.
Steps to create Amazon ec2 Instance Linux or Windows
1. login or Sign up for an AWS account
If you already have the AWS account, log in to it, or else if you are a new user then visit the AWS signup page and create a new Aws account. Once you have created a new account or logged in successfully moved to the next step.
2. Go to ec2 Dashboard
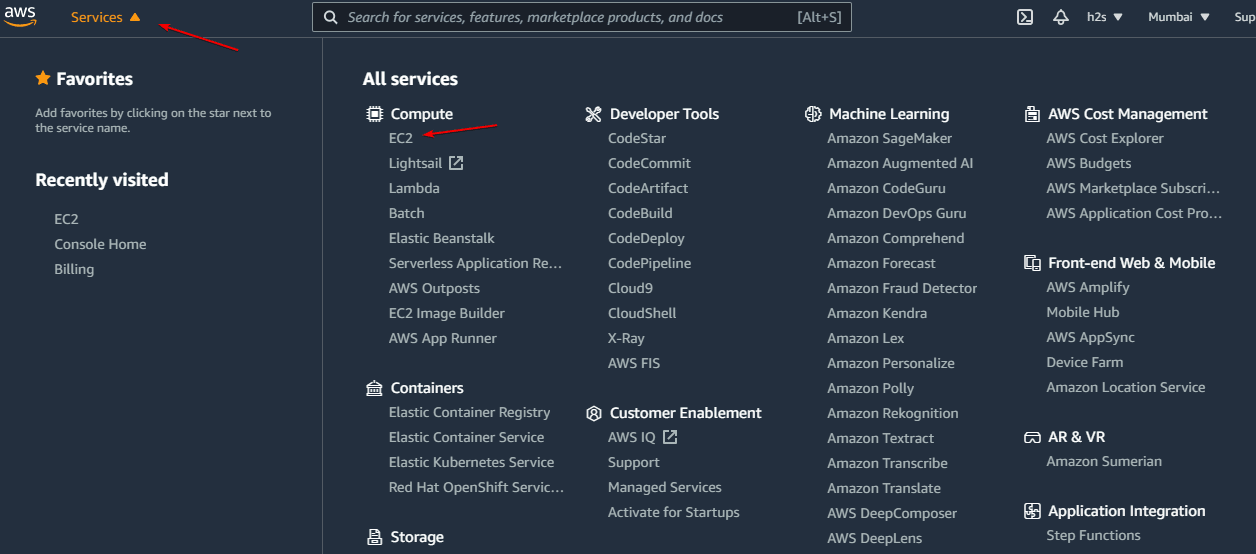
After log in to your AWS account you will see the AWS Management Console. On the left top side, click on the Service drop Menu to select EC2. Or else use this link
3. Launch a new Amazon Ec2 Instance
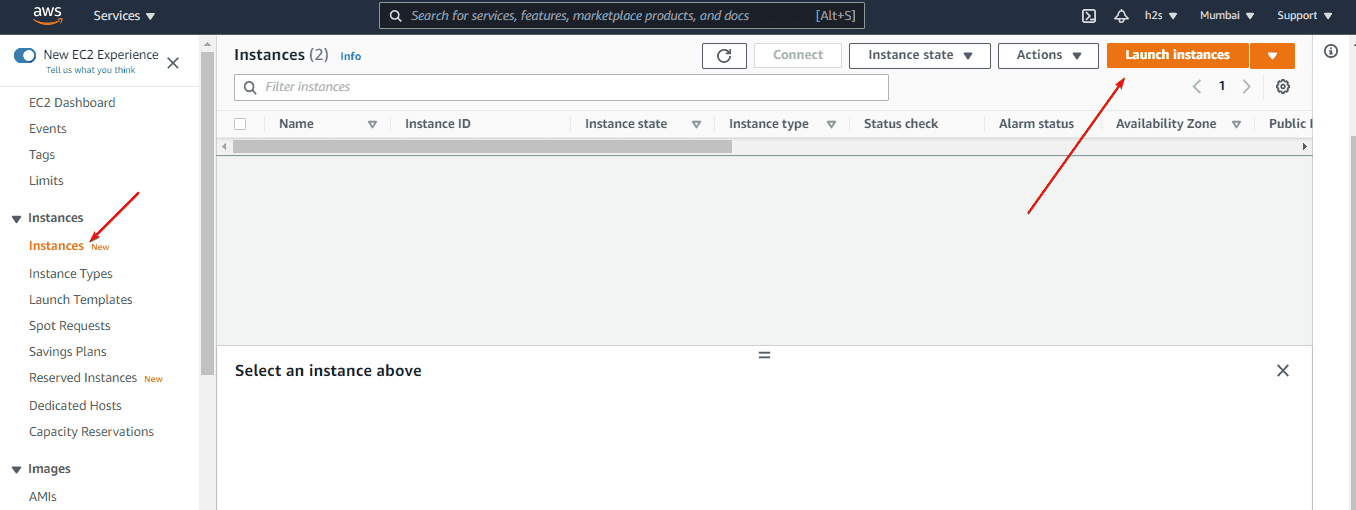
Once you are on the AWS ec2 Dashboard, click on the “Instances” option given on the left side. And then hit the “Launch Instances” button given on the top right side.
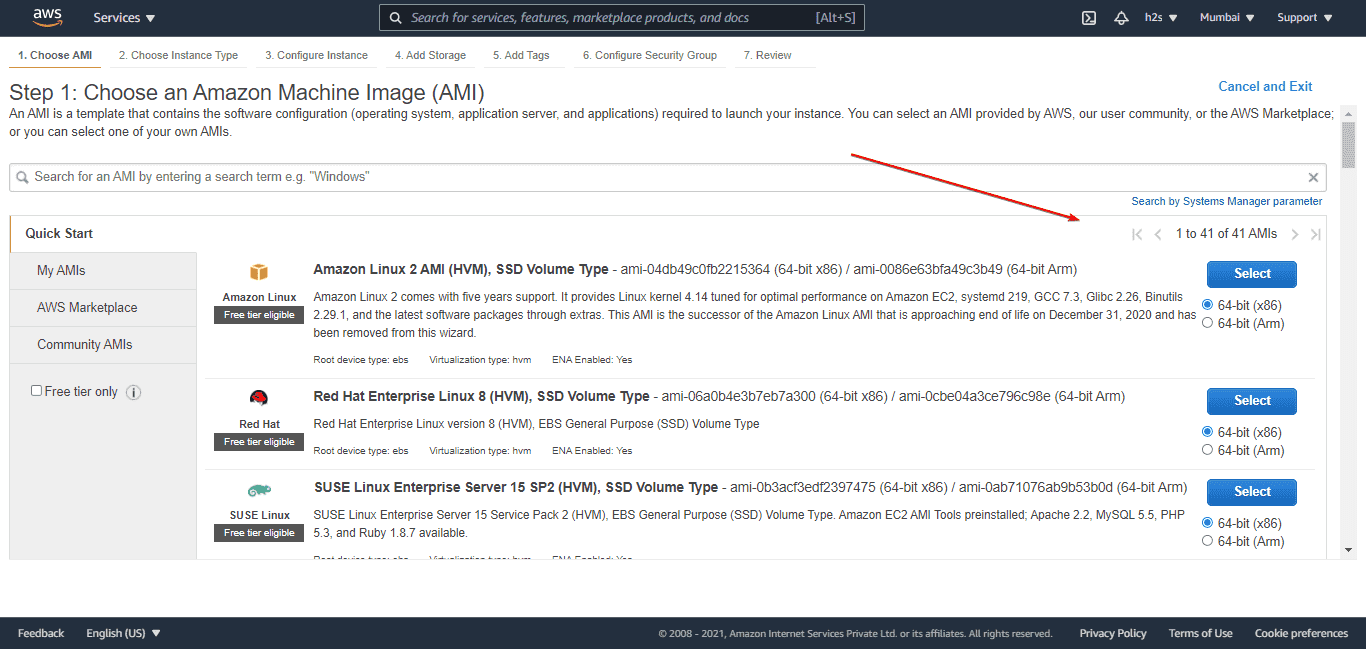
4. Choose an Amazon Machine Image (AMI)
On the next page, you will see a list of Virtual Images available to launch on Amazon ec2. Select one of your choices such as Amazon Linux, Ubuntu, Red Hat, OpenSUSE, Windows, and more… Once you are sure which AMI you want to use, click on the “Select” button given at the front of that particular Amazon Machine Image.
5. Choose the Instance Type
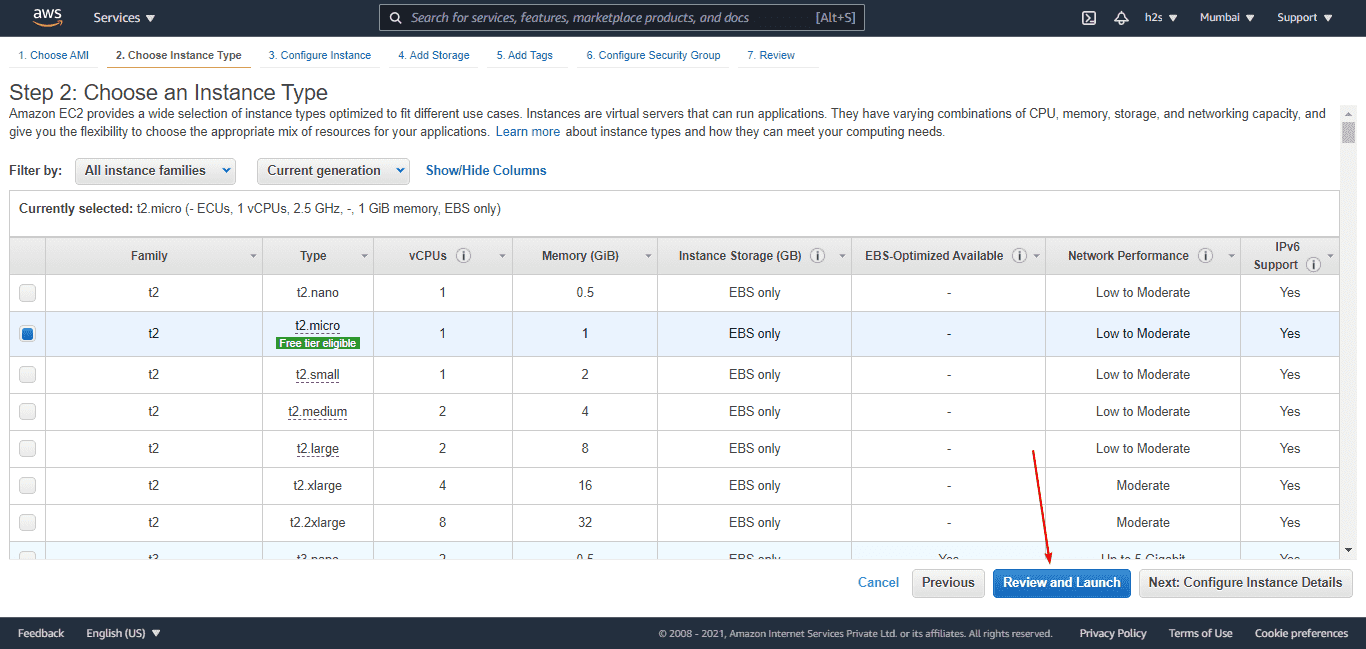
Amazon Ec2 service offers a wide range of virtual hardware or Instances to run the selected Machine Image. If you want are using the Free tier then let the default one be selected. Or else go for the one (CPU & Memory) that suits the application you are planning to install on your AMI Instance.
After selecting the Instance Type, click on the “Review and Launch” button.
6. Review Instance Launch
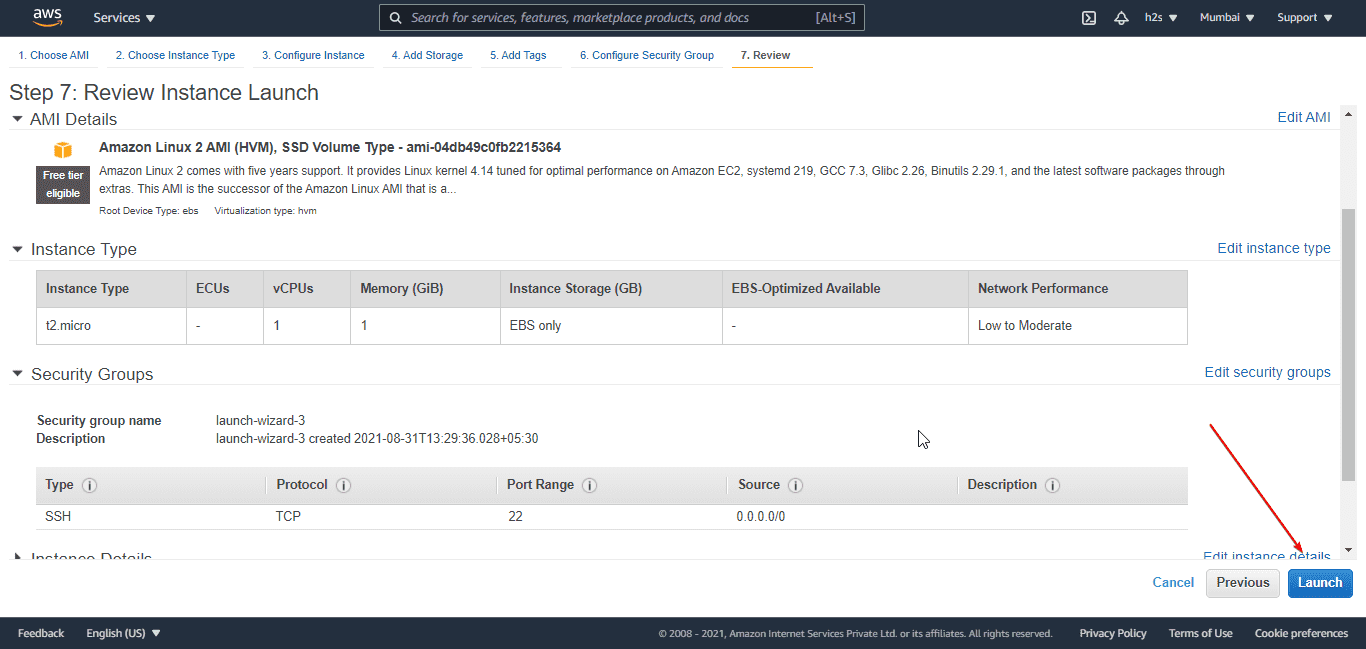
Finally, once again you will see all the details along with storage and security attached to your Ec2 Instance. Those who would like to change anything can simply click on the Edit option given in front of each Setting or Details.
Well, you can go with the default settings because we can change the theme later. Hence, simply click on the “Launch” button.
7. Create a new Key Pair (important)
Don’t skip this step if you want to connect your Instance remotely using any PC or laptop via SSH protocol.
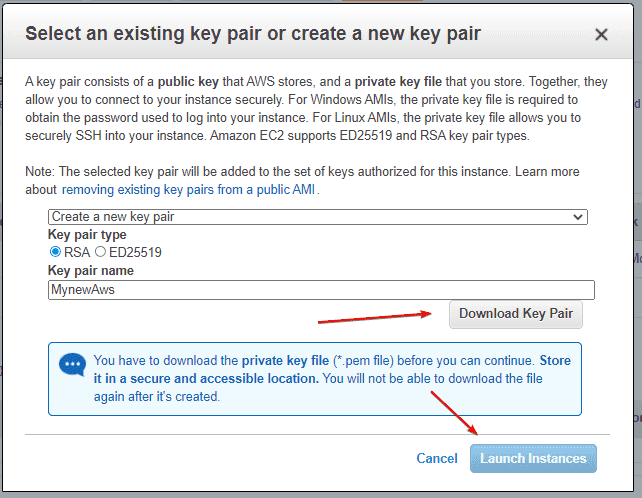
- From the drop-down box, select the “Create a new key pair” option and then give some name to your KEY.
- After that click on the “Download Key Pair” button and save the key on your system somewhere safe so that it would not fall in the wrong hands.
- Finally, hit the “Launch Instance” button.
8. Connect to your Amazon Ec2 Instance
There are two ways to connect the command-line interface with root access of your created Instance. One is via using the inbuilt Web console of Ec2 and the other is using your local machine via SSH.
Well, here we show how to use the web console; and how to connect it using the local PC command terminal or SSH client via SSh protocol see: How to SSH AWS ec2 Linux Instances remotely
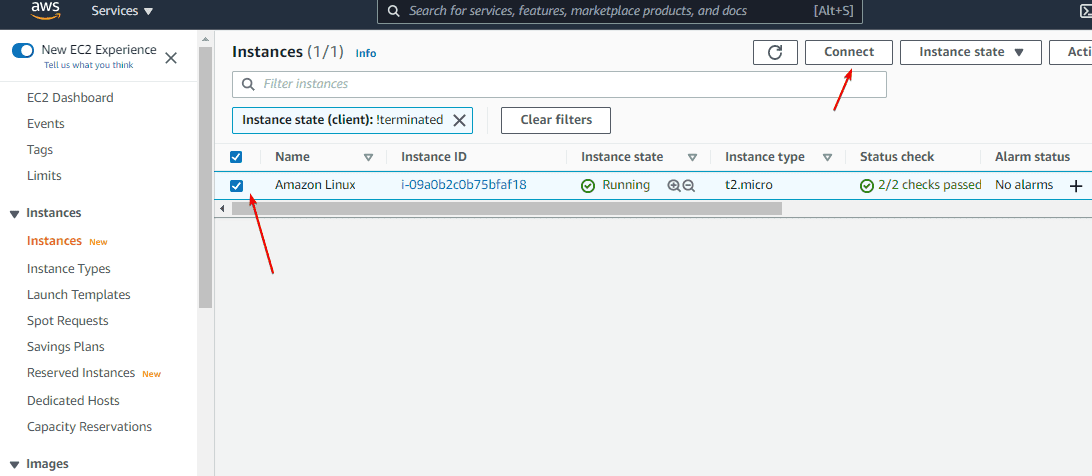
- Select the Created Instance
- Click on the “Connect” button.
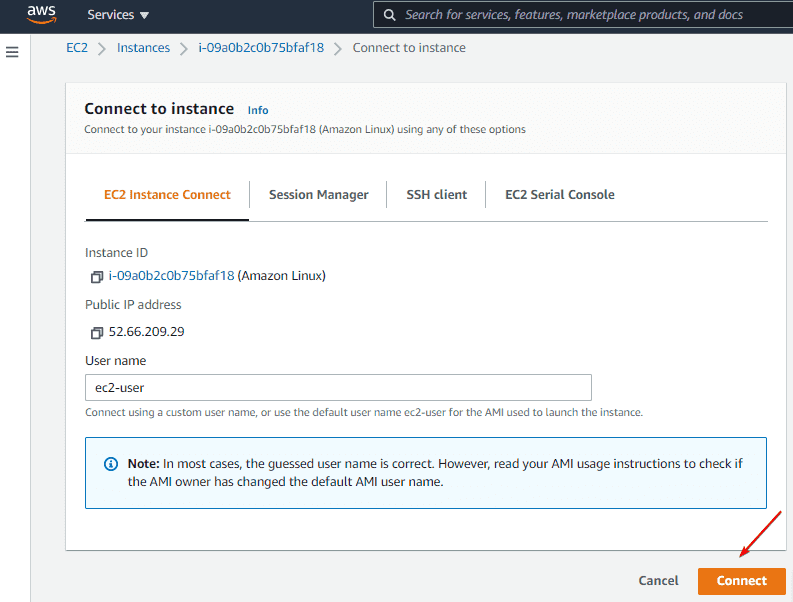
- Under “Ec2 Instance Connect” click the “Connect” button.
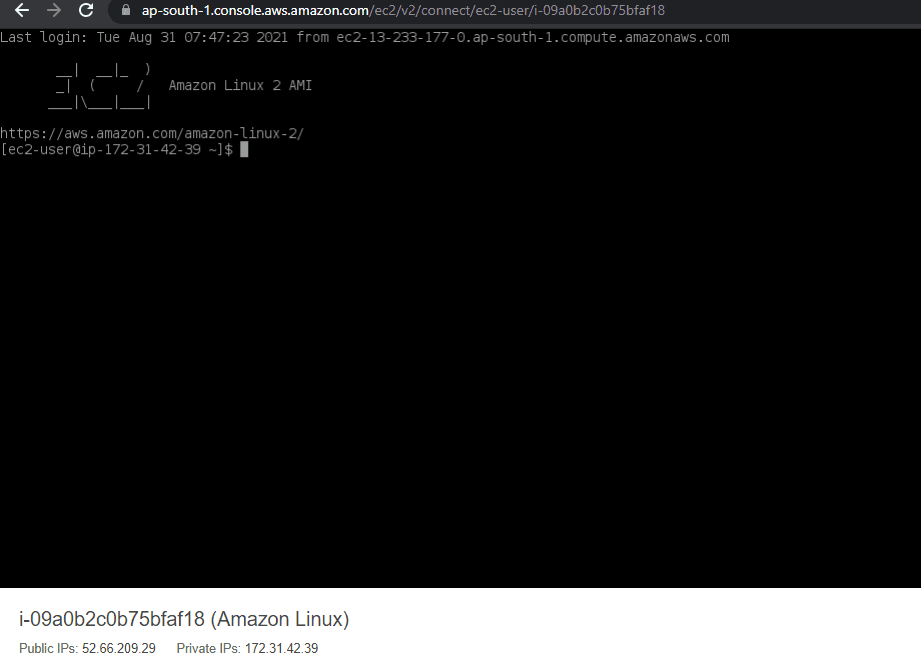
You will now have the web-based terminal to issue commands to your created Instance. In this way, we can create and connect as many as instances we want.
