Elasticsearch is an open-source search engine based on Apache Lucene and enables full-text searches in various types of structured and unstructured data such as text data, numerical data, or geodata. The search engine works very quickly, can be used to search large amounts of data (big data), and supports distributed architectures for high availability. Together with Kibana and Logstash, Elasticsearch forms the Elastic Stack.
Why Elasticsearch?
- Easy to deploy (minimal configuration)
- Scales vertically and horizontally
- Easy to use API
- Modules for the most popular programming/scripting languages
- Good online documentation
- Free of charge
Steps to install ElasticSearch on Ubuntu 20.04 LTS
1. Open a command terminal
If you are on the CLI Ubuntu server, then you are already using the terminal, whereas GUI users can use a keyboard shortcut to open it – CTRL+ALT+T.
2. Install Java – OpenJDK on Ubuntu 20.04
ElasticSearch needs Java installation for proper working and to install it on Ubuntu, we just need to use a single command. As Java is already in the official repository, thus run
sudo apt install default-jdk
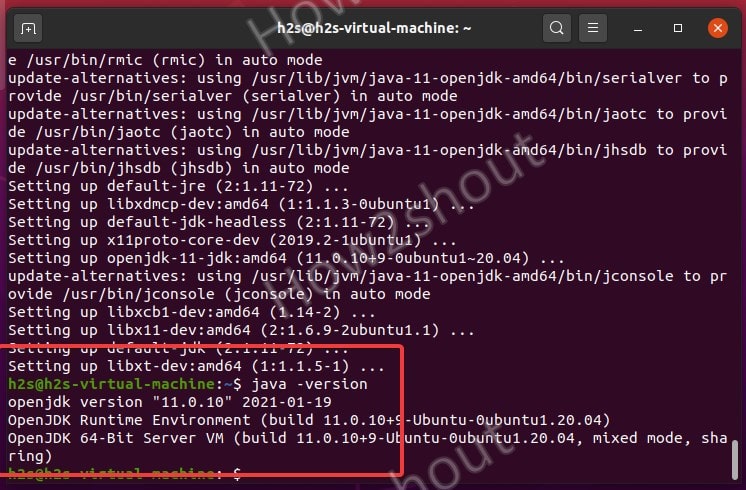
Check the Java version once the installation is completed-
java --version
In our case, it was OpenJDK 11
3. Add Elasticsearch GPG key
To make sure the packages we will get from the Elasticsearch repository are from the genuine source and signed by the Public key generated for it, add Elasticsearch GPG key.
sudo apt-get install apt-transport-https
wget -qO - https://artifacts.elastic.co/GPG-KEY-elasticsearch | sudo apt-key add -
4. Add Elasticsearch Debian repository
As Ubuntu is a Debian-based Linux, hence we can add ElasticSearch’s official repository available to download Debian packages meant for it.
sudo sh -c 'echo "deb https://artifacts.elastic.co/packages/7.x/apt stable main" > /etc/apt/sources.list.d/elastic-7.x.list'
5. Run system update
To flush the repository cache and rebuild it again, so that the system could recognize the packages available to download in the newly added repository.
sudo apt update
6. Command to install Elasticsearch on Ubuntu 20.04 LTS
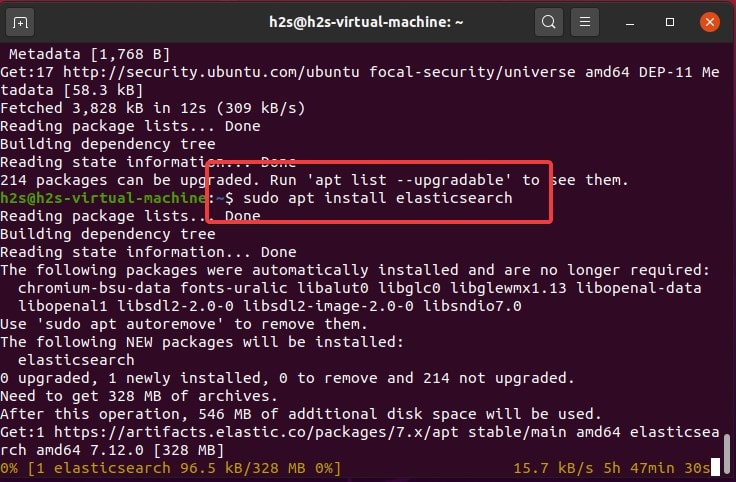
Finally, here is the command to download the required packages to set up ElasticSearch on Ubuntu 20.04 LTS server or Desktop using the command terminal.
sudo apt install elasticsearch
7. Enable and Start Elasticsearch Service
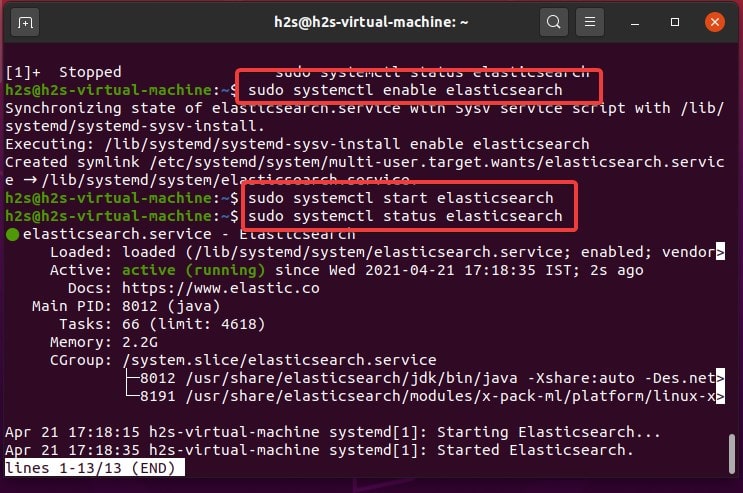
Once the installation is completed, let’s enable its service to start it automatically with system boot.
Enable
sudo systemctl daemon-reload
sudo systemctl enable elasticsearch
Start
sudo systemctl start elasticsearch
Check Status
sudo systemctl status elasticsearch
Note– In the future to stop the same service you can use this:
sudo systemctl stop elasticsearch
8. Verify Elasticsearch is working properly
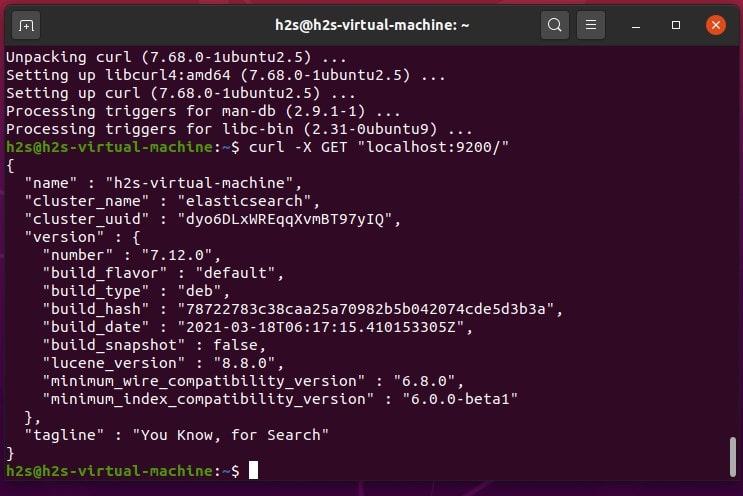
Now everything is up and running on your system for ElasticSearch, it’s time to check whether it is working fine or not. So, to test it we use CURL.
sudo apt-get install curl
Now test the Elasticsearch by sending an HTTP request with port number 9200
curl -X GET "localhost:9200/"
Uninstall (optional)
In the future, if you want to remove ElasticSearch from your Ubuntu Linux then use the below command to do that:
sudo apt-get --purge autoremove elasticsearch
To completely remove it from the system also delete its directory if there is any using the below command:
sudo rm -rf /var/lib/elasticsearch/
sudo rm -rf /etc/elasticsearch
These were the command to easily install ElasticSearch on Ubuntu 20.04 Linux, to know more check out the official Documentation.
Other tutorials:


Hello do you know how to fix this
“System has not been booted with systemd as init system (PID 1). Can’t operate.”
I got this when I run
sudo systemctl daemon-reload
Is your Ubuntu running on WSL or Docker?