Learn the steps to install and use Etherpad on Ubuntu 20.04 focal fossa /18.04 Bionic Beaver LTS/ Debian Linux distros for a free and open-source collaborative text editor.
EtherPad is a real-time collaborative web-based text editor in which several people can conveniently work together online on a document. It is an open-source web application, hence doesn’t need to pay anything. The application is scalable to thousands of simultaneous real-time users. It provides full data export capabilities, and runs on your server, under your control.
You can think about having your own Google Docs-like service but with plugins, support to extend the application capabilities. You can simply invite new users with the integrated share function or send them the link to the document via email.
Avoid annoying compatibility problems with the free EtherPad web app. In contrast to Google’s service Google Docs, for example, you do not need an account with the manufacturer to use the web app. Registration is no longer necessary, which makes working together even easier.
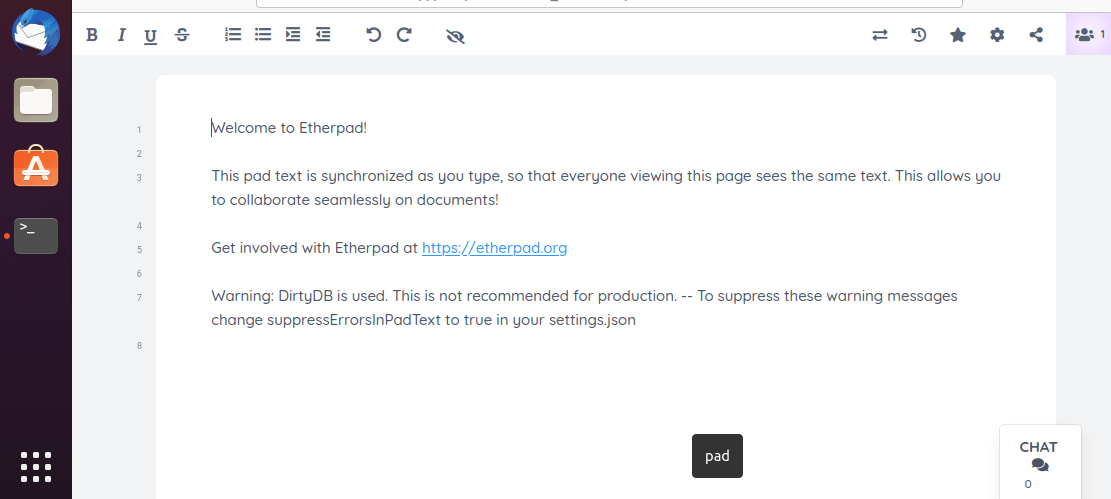
An Etherpad is created on the Internet by specifying a title on the corresponding page, the generated link is used to access the pad, including the editing function. The nice thing about working on an Etherpad is that the participants can be assigned a color so that you can see who wrote what. You also have a kind of ‘control function’ for the development of the pad through the clock symbol. Once clicked, all changes to the pad can be viewed in time-lapse. The editors of the document can communicate with one another via an integrated chat function.
Key Features:
- Rich Editing
- Minimalist editor
- Dark Mode
- Image support within a pad using a plugin.
- Video Chat
- Collaboration++
- Document Analysis –
- Scaleable – Scale to ∞ several Active Pads with up to ~20,000 edits per second, per pad.
Steps to install to Etherpad Lite on Ubuntu 20.04 or 18.04 LTS
1. Perform system update & add Git
If you haven’t updated your system yet, then run it once to refresh the system repository cache and update the installed packages.
sudo apt update
sudo apt upgrade
Also, Install Git
sudo apt install git -y
2. Install NodeJs on Ubuntu 20.04 or 18.04
Along with git, to install Etherpad we also need to have Nodejs on our Ubuntu system. Hence to install the latest version of Nodejs run the below-given commands:
Add Nodejs repository
curl -fsSL https://deb.nodesource.com/setup_current.x | sudo -E bash -
Installation
After adding the repository, let’s install its packages
sudo apt install -y nodejs
3. Install MariaDB server
By default, the Etherpad will save the data in a plain-text file, so to improve the security let use the MariaDB database server,
sudo apt install mariadb-server -y
Create Database:
sudo mysql
create database etherpad_db;
grant all privileges on etherpad_db.* to h2suser@localhost identified by 'password';

flush privileges;
exit;
Note: Change the database name, user, and password in the above command that you want to set.
4. Add a dedicated user
For safety just create a non-sudo user.
adduser ether
Now, switch to your newly created user:
su ether
5. Clone Etherpad files using Git
Download the required files we need to run the Etherpad on our Ubuntu server. And for that just use the git that will directly clone the file on your system.
git clone --branch master https://github.com/ether/etherpad-lite.git
6. Install Etherpad Lite in Ubuntu 20.04 or Debian
Once the cloning of files is completed switch to the directory and run the installation script under standard user, not root.
cd etherpad-lite
export NODE_ENV=production
src/bin/run.sh
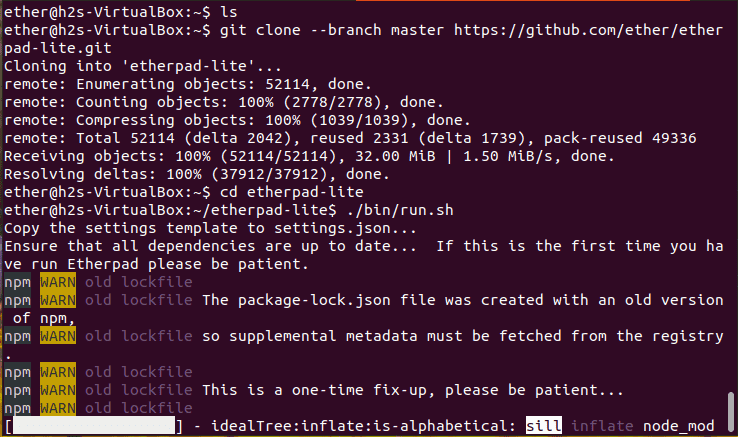
Once you get the below-like screenshot, stop the server by pressing Ctrl+C.
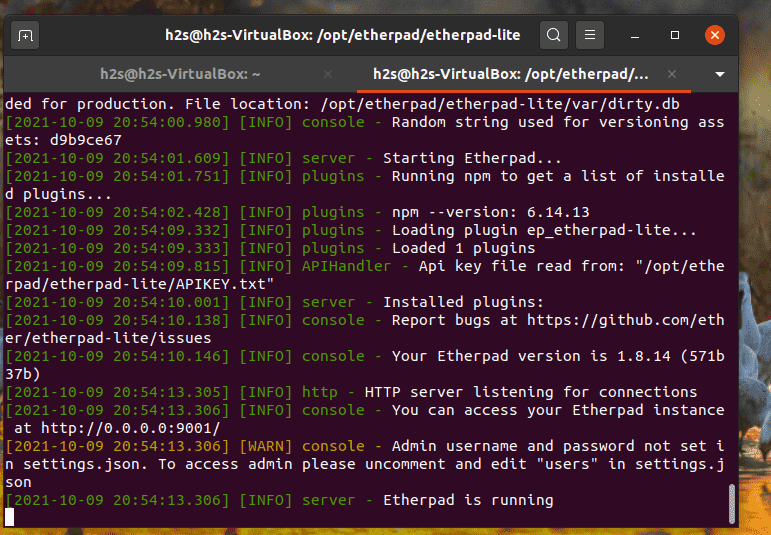
7. Set Database, username, a password for Etherpad
As we have created a dedicated MySQL database, thus we will use that one and also change the default admin password for the Etherpad instance.
Edit the settings.json
nano etherpad-lite/settings.json
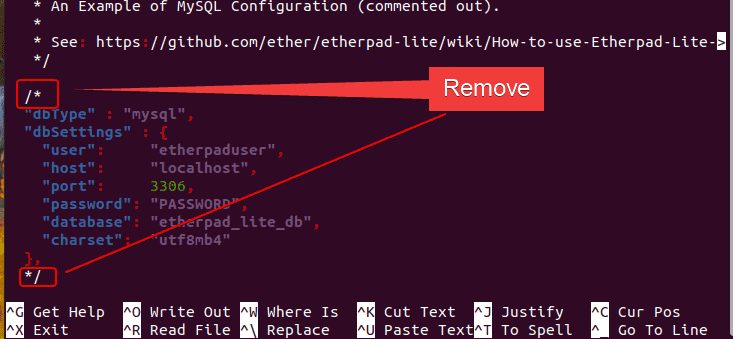
Find the line and add /* & */ symbols to comment the lines out as shown in the screenshot
/*
"dbType" : "dirty",
"dbSettings" : {
"filename" : "var/dirty.db"
},
*/

Also, remove the symbol /* and the symbol */ given at the beginning and end of the MYSQL lines.
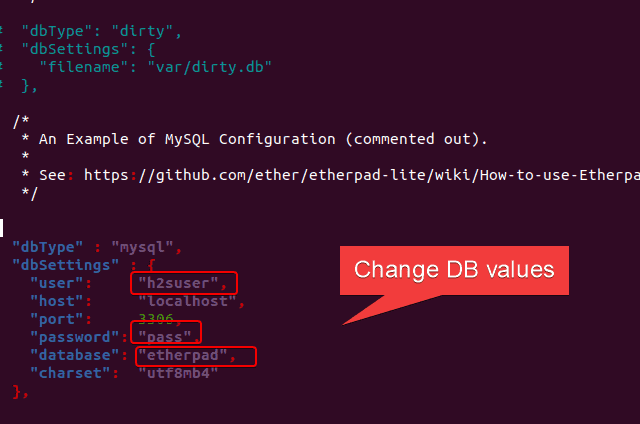
After that add the Database values such as user, database name, and password you have created in the MariaDB section.
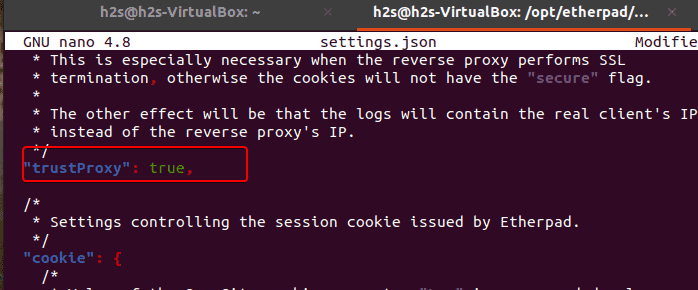
Also, find and set the trustProxy value to true, if a reverse proxy is performing as SSL, otherwise leave it to default.
"trustProxy": true,
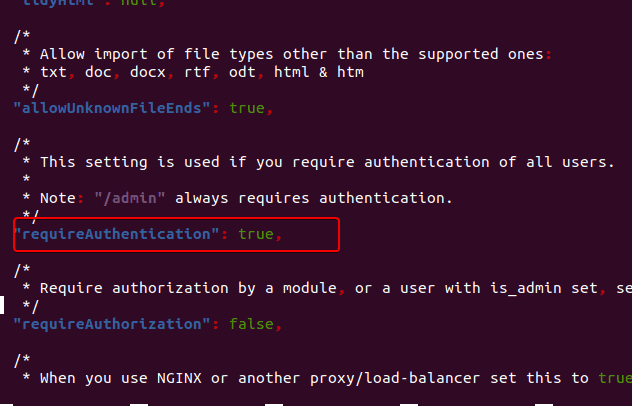
Find and Enable Authentication by changing "requireAuthentication": false, the value from false to true.
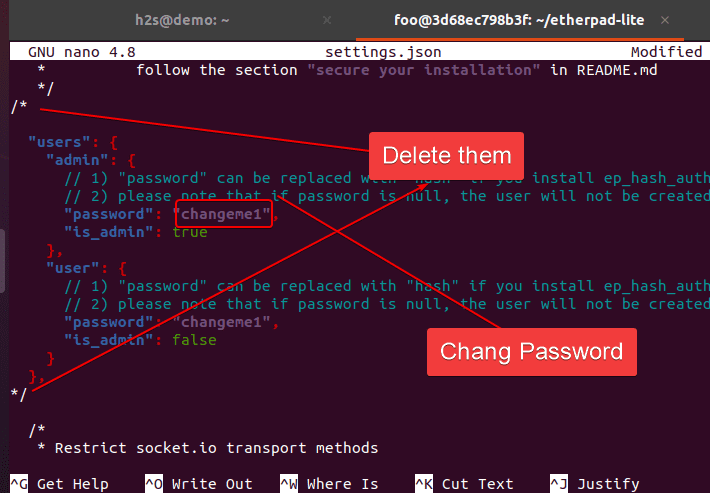
Next, find the user section, remove the /* and */ symbols and then change the password of the admin user.
Save the file by pressing Ctrl+O, hit the Enter key, and then Ctrl+X to exit.
Install dependencies:
./bin/installDeps.sh
Exit the etherpad user
exit
8. Create Service file to run Etherpad in background
Create a service file
sudo nano /etc/systemd/system/etherpad.service
Add the following lines:
[Unit]
Description=Etherpad-lite, the collaborative editor.
After=syslog.target network.target

[Service]
Type=simple
User=ether
Group=ether
WorkingDirectory=/etherpad-lite
Environment=NODE_ENV=production

ExecStart=/usr/bin/node /etherpad-lite/src/node/server.js

Restart=always

[Install]
WantedBy=multi-user.target
Save the file by press Ctrl+O, hit the Enter key, and the exit – CTRL+X.
Reload daemon:
sudo systemctl daemon-reload
Start and enable Etherpad service
sudo systemctl start etherpad
sudo systemctl enable etherpad
Check the status of the service to confirm
systemctl status etherpad
9. Access web interface
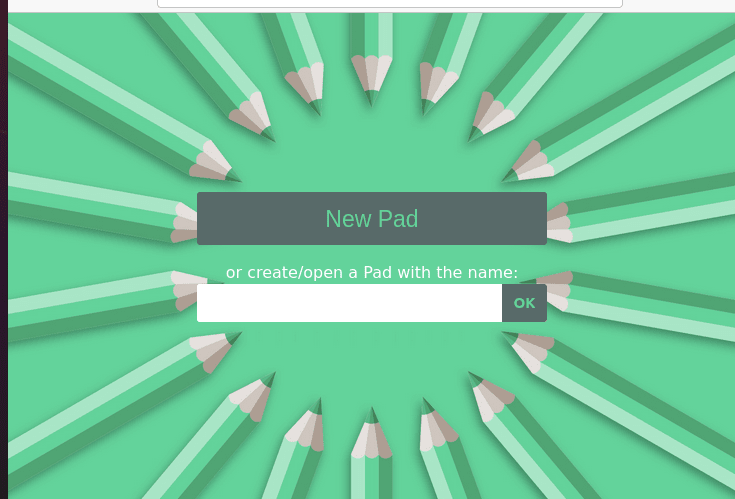
By default, the Etherpad Lite will run on the 9001 port number, hence open your browser and type your server address with port 9001.
Don’t forget to allow the port in the firewall
sudo ufw allow 9001
Other Articles:
10 Best Linux distro based on Ubuntu for laptops or PC 2021
How to install npm and nodejs 14. x on Kali Linux
How to enable ssh on Ubuntu 20.04 LTS
How to install WHM & CPanel on Ubuntu
Install i3 Window manager on Ubuntu


