Install and configure SAMBA server on Ubuntu 22.04 LTS Jammy JellyFish Linux to share files and folders with Windows 7/10/11 and Linux systems.
Samba is a free & open-source implementation of SMB protocol for integrating servers and desktops running Linux or Unix in environments with Microsoft’s Active Directory directory service. The software can be used as a controller for the domain or as a normal member.
Using SAMBA software the users can easily access the files, printers, and other shared resources on a company network or intranet, among other things. And the best thing in almost all Linux distributions, SAMBA is present in their repositories to install easily.
Samba uses the frequently used client/server protocols SMB (Server Message Block) or nowadays CIFS (Common Internet File System). The latter is an open variant of SMB. If applications are compatible with SMB or CIFS, they can communicate with the Samba Server.
Samba’s SMB/CIFS client is called smbclient. Some desktop variants of Linux have the Samba Client pre-installed whereas others need to install manually. The source code can be found under samba.org.
Steps to install SAMBA on Ubuntu 22.04 LTS
1. Run system update
Well, it is not a necessary step, however, run the system update command to rebuild the repo cache and make sure all the system installed packages are up to date.
sudo apt update
2. Install Samba on Ubuntu 22.04
Next, in your command terminal use the APT package manager to install Samba on your Ubuntu 22.04 LTS. The packages to set it up are already there in the system repository, thus we don’t need to add anything extra.
sudo apt install samba
Check its service is active and running:
systemctl status smbd --no-pager -l
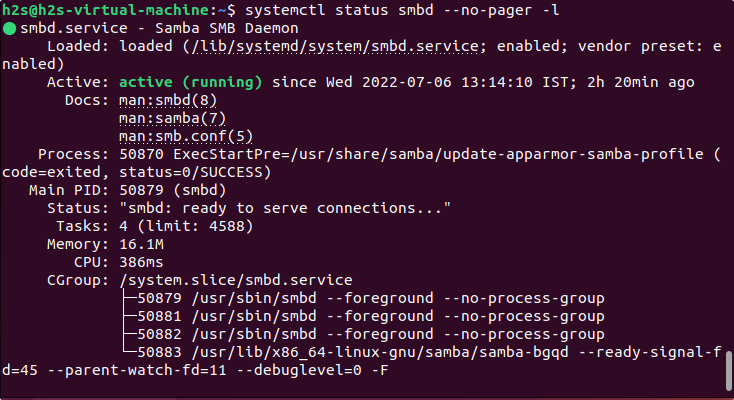
To make the service enabled to start automatically with system boot, here is the command:
sudo systemctl enable --now smbd
3. Allow samba in Ubuntu 22.04 Firewall
To connect and access the shared files over SMB protocol, we have to first whitelist and allow its service in the firewall to get accessed from the outside of the computer. Here is the command to follow.
sudo ufw allow samba
4. Add your user to the Samba group
Let’s add the current System user to the SambaShare group, so it can access all files and folders shared under it.
sudo usermod -aG sambashare $USER
set the password for share: This will be different from your system password.
sudo smbpasswd -a $USER
Note: $USER means your current user, if you want to set some other user then change $USER with the particular user name. Also, the file or folder you want to share must be accessible to that particular user.
Alternatively, if you want to add some other users to the SAMBA group use:
sudo usermod -aG sambashare your-user
To set a password:
sudo smbpasswd -a your-user
We have configured the user to use Samba, let’s test it. Let’s say you want to share the Pictures folder or any other that is owned by your current user.
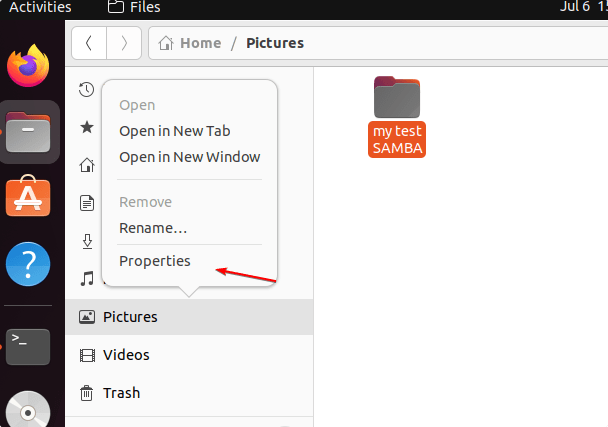
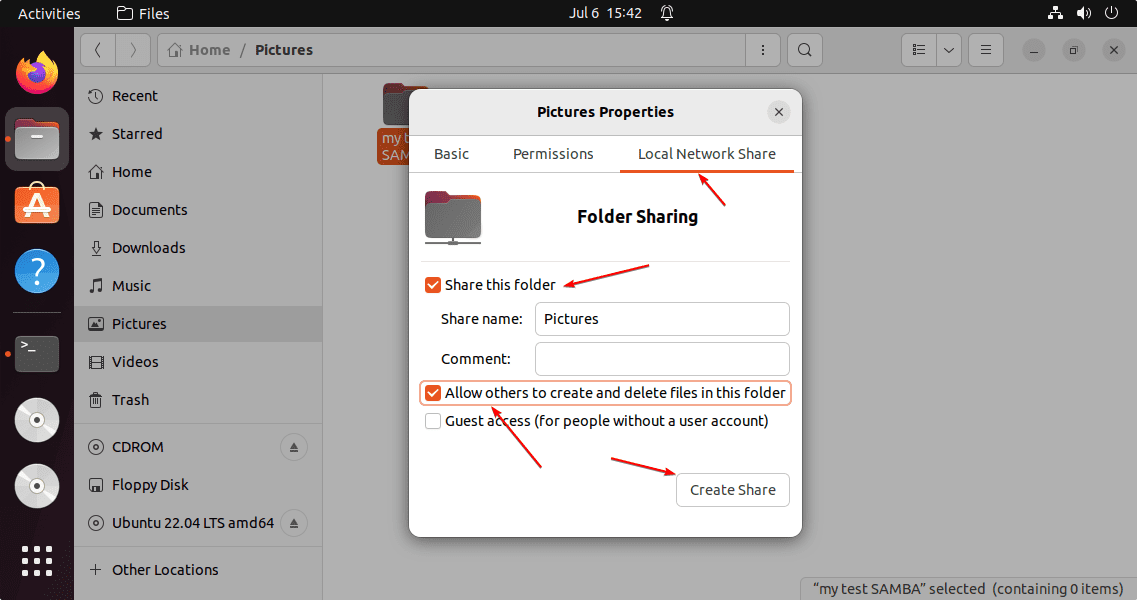
Once you have decided which folder you want to share over the network, then right-click on it and select Properties and then the Local Network Share tab. If you want the users to create or delete the files from the shared directory then check the box given for “Allow others to create and delete files in this folder“. Whereas, if you want any user to log in and access the shared folder then select the “Guest access” box otherwise don’t. Finally, to create the sharing point, click on the “Create Share” button.
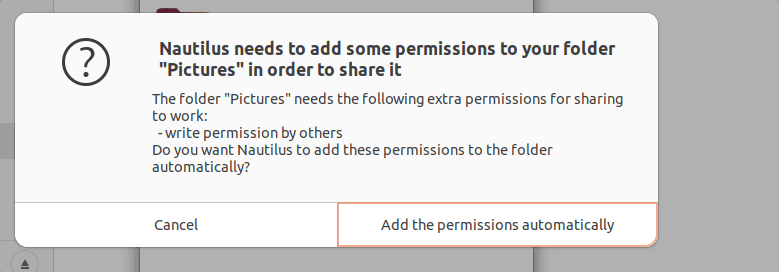
When Ubuntu’s Nautilus file manager asks to add some permission to the folder to share- Click on the: “Add the permissions automatically“.
Here we are using Debian and Windows 11 to access the remotely shared folder on Ubuntu 22.04. You can use macOS if you want.
#On Debian, Ubuntu, CentOS, and other Linux with Gnome
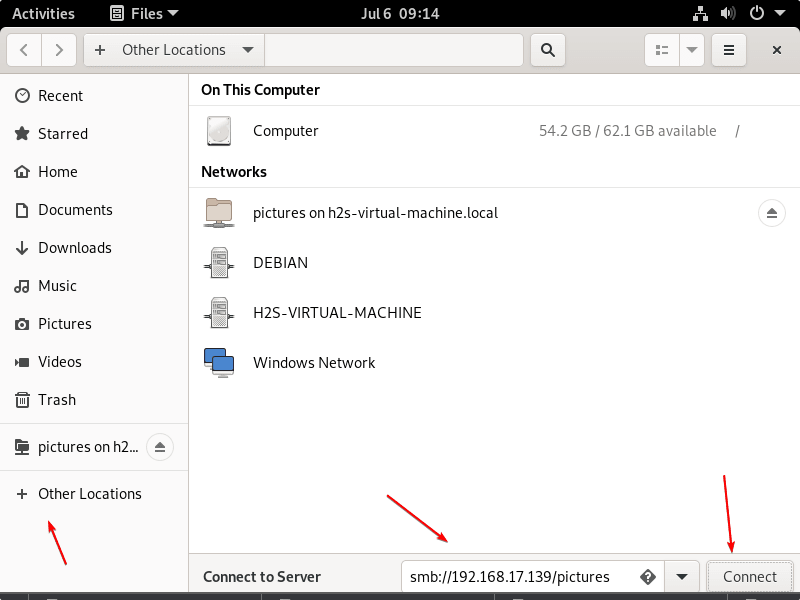
⇒ Go to File Manager and then click on the Other locations.
⇒ There go to Connect Server box and type your Ubuntu 22.04 Samba IP address in the following format:
smb://ip-address/shared-folder-name
In the above URL format: replace ip-address with your SAMBA server IP and Shared-folder-name with a folder that you have shared.
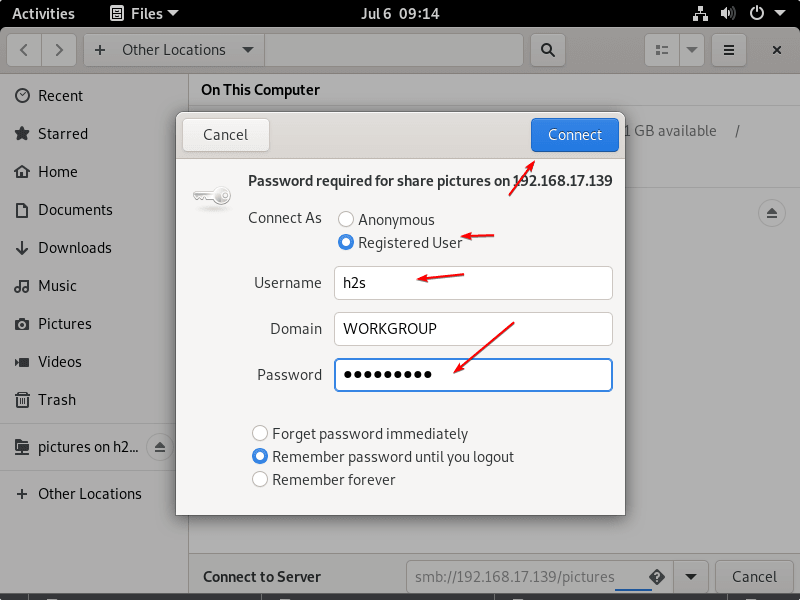
⇒ When the system asks for credentials, then select “Registered User” and give your Ubuntu system user and password set to use for SAMBA.
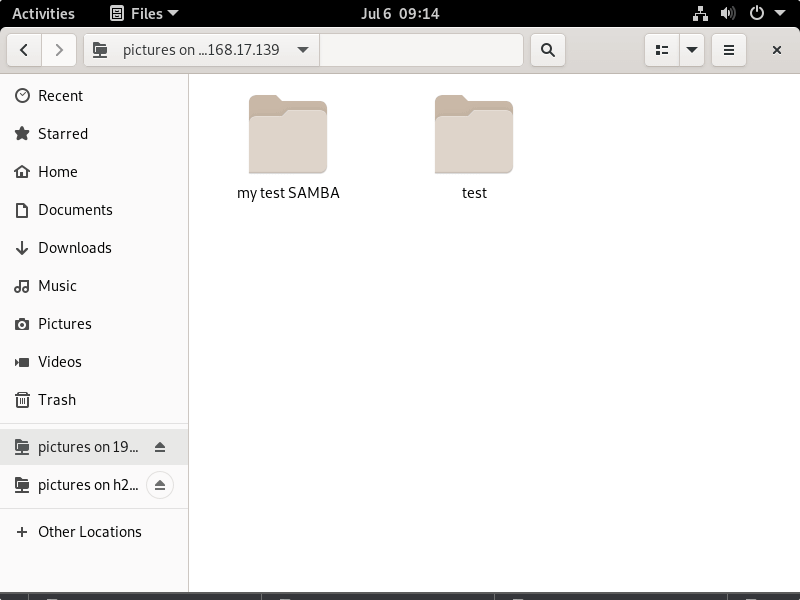
⇒ Soon, you will have the content of your remote Ubuntu server via SMB protocol.
#On Windows 11 or 10
If you are using the Windows system and want to mount the folder shared on Ubuntu 22.04 with the help of SAMBA, then here are the steps to follow.
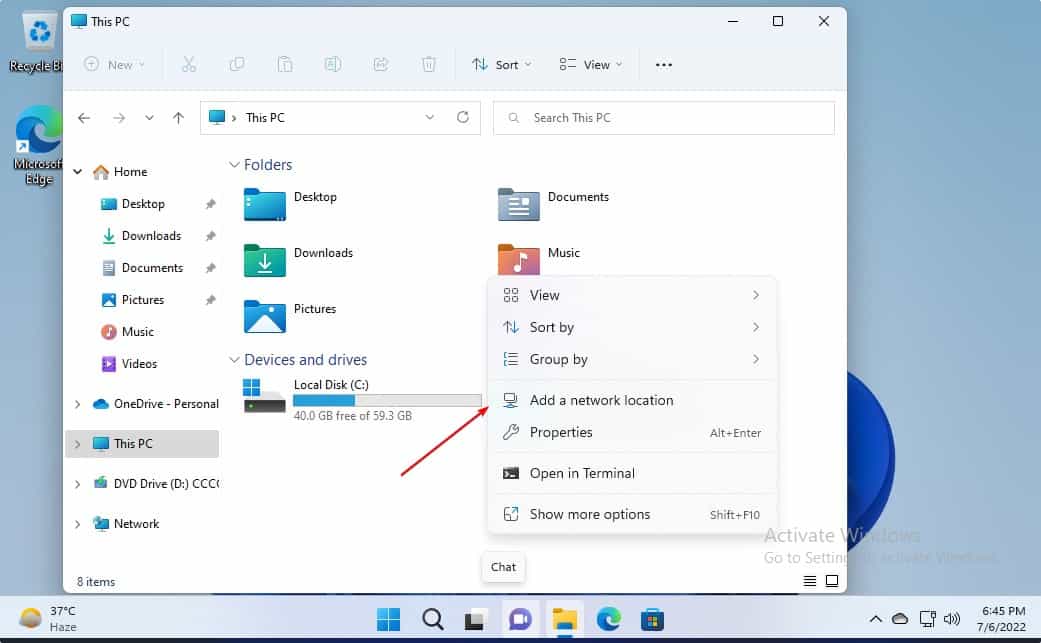
⇒ Go to This PC and right-click somewhere on the blank area to select “Add a network location” from the context menu.
⇒ Now, enter the Ip-address and shared folder name in the following format:
\\server-ip-address\shared-folder
Replace server-ip-address with your Ubuntu’s IP where you have configured the SAMBA, along with the shared folder name.
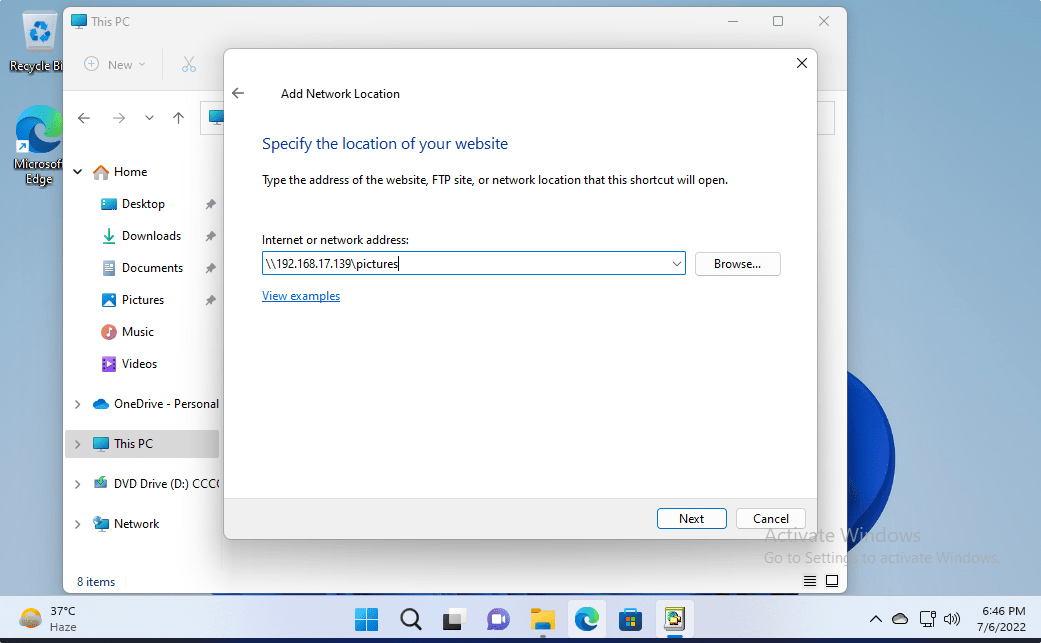
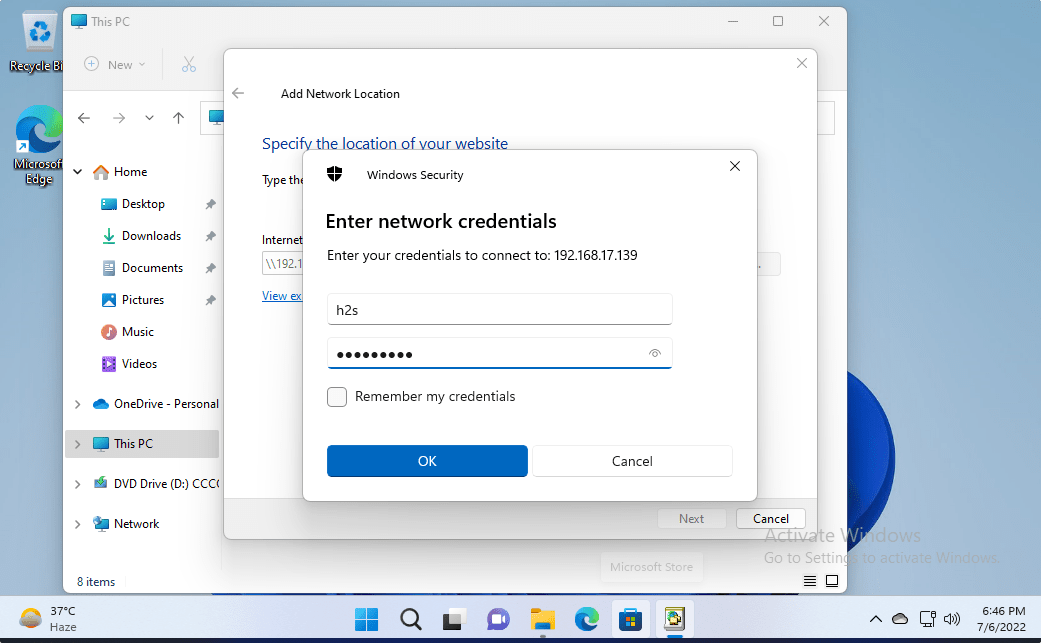
⇒ Soon, the system will ask you to enter the Username and password used to access the SAMBA share folders. Enter that and hit the OK button.
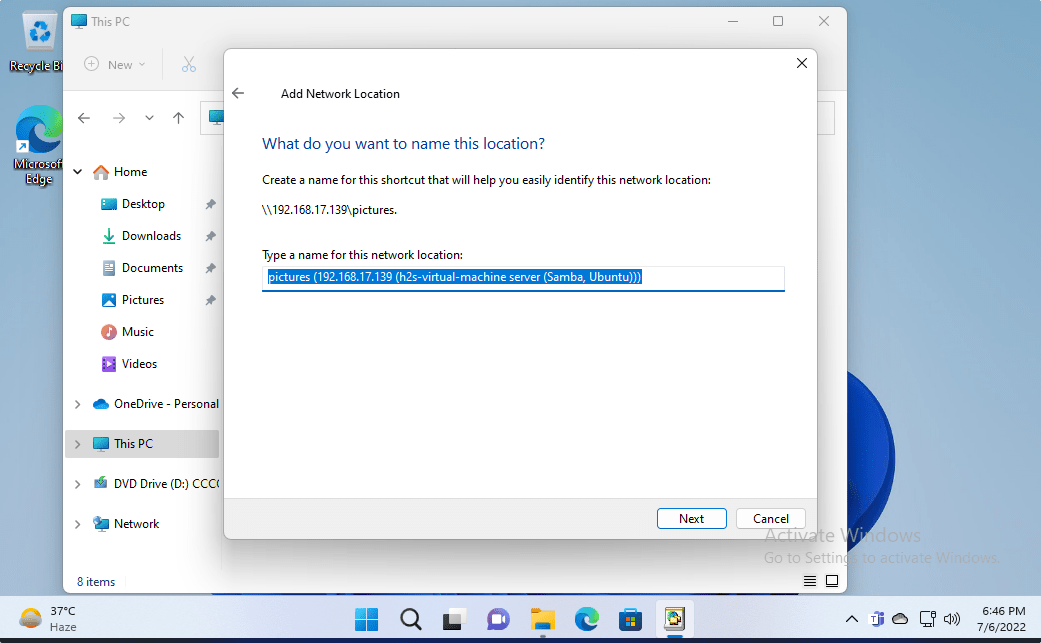
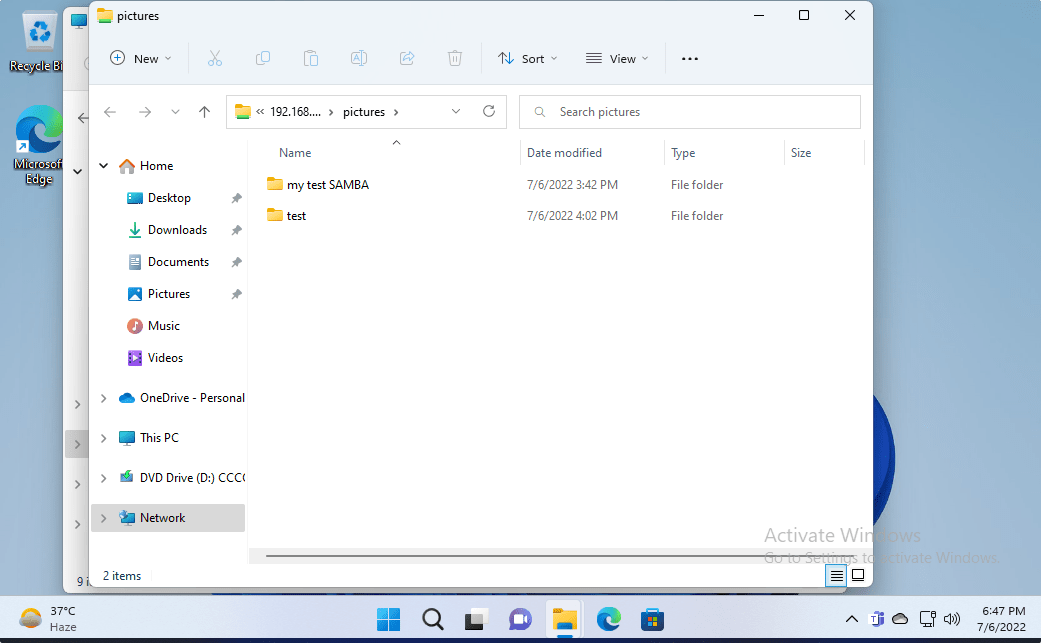
⇒ Finally, you have the remotely or locally Ubuntu’s shared folder mounted on your Windows 10 or 11 via SMB protocol.
Other Articles:
Install Samba on Linux Mint to share files with Windows
How to Change file, folder, or app Icons in Gnome Linux
Install XAMPP on Ubuntu 22.04 LTS
4 Ways to install GIMP on Ubuntu 22.04…


you mean: sudo systemctl enable –now smbd
right?
Super Thanks on ubuntu 22.04 desktop works for me.
Perfect, you are the best, thank you very much.
Good morning! With the Ubuntu 22.04 client already joined to the domain with Samba4. I can login with a nominal account normally, but with an account with only numbers it does not open this user’s session.
Thanks,
although when connecting to a windows share, why do we have to use an ip address, shouldn’t all the windows shares just show up in ‘files’ so they can be clicked?
Question, how can I now the local ip for samba?