Zoneminder is a free and open-source surveillance camera management software available for Linux only. Here we will learn the steps to install ZoneMinder on Ubuntu 20.04 Focal Fossa or Ubuntu 22.04 Jammy JellyFish.
What is ZoneMinder?
ZoneMinder is a software application meant to run on a Linux system for monitoring via closed-circuit television. It offers a web interface to easily use and control standard cameras (via a capture card, USB, FireWire, etc.) or IP -based camera devices.
We can operate the software in three modes:
• Monitoring (without recording)
• Recording after detected movement
• Permanent recording
Steps to install ZoneMinder on Ubuntu 22.04 | 20.04 LTS
The steps given here can also be used on other versions of Ubuntu as well as other operating systems based on it such as POP OS, Linux Mint, Elementary OS, MX Linux, and more…
1. Requirements for Tutorial
• Ubuntu 22.04/20.04/18.04
• Apache Web Server
• PHP & MySQL
• A non-root user with sudo rights at least
• Internet Connection
2. Run system update
As we required multiple packages to get installed using the system repository, hence let’s first run the system update command to ensure our system is up to date.
sudo apt update -y
3. Install the LAMP server on Ubuntu 20.04 | 22.04
We need an Apache web server, PHP, and MySQL to run ZoneMinder, hence first let’s set up the full LAMP server on our system.
sudo apt install apache2 mysql-server php
Enable service
sudo systemctl enable --now apache2 mysql
To check status
systemctl status apache2 mysql --no-pager -l
4. Add PPA for ZoneMinder’s latest version
Well, the best thing is that ZoneMinder is available to install using the APT package manager and base repository of both Ubuntu 20.04 and 22.04, hence we can run a single command to get it. However, the version from the official repository will not be the latest one.
To get the latest version of ZoneMinder use its PPA, available on launchpad. You can visit it to find the latest available PPA repo.
For example, in our case, it was 1.36. In the same way, you will also have one. Use that version with the above PPA repo to add the same-
sudo add-apt-repository ppa:iconnor/zoneminder-version
sudo add-apt-repository ppa:iconnor/zoneminder-1.36
Once you have added the repository, run the system update command:
sudo apt update && sudo apt upgrade
5. Install ZoneMinder on Ubuntu 22.04 | 20.04
Well, we have added the repository to get the latest version of ZoneMinder, now can easily use the APT package manager to install it with all required dependencies.
sudo apt install zoneminder
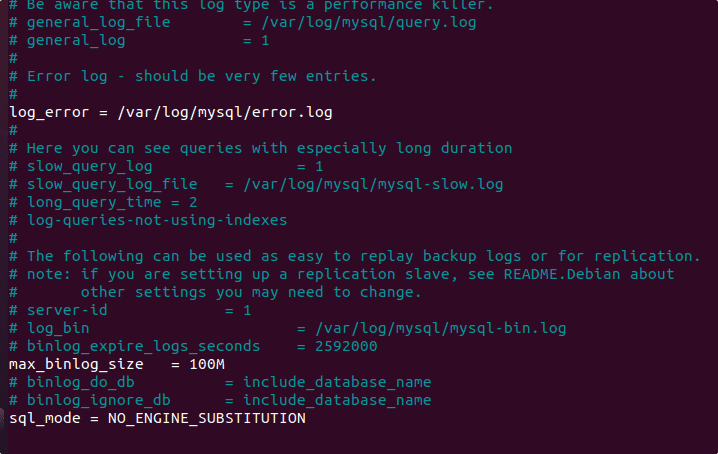
6. Set MySQL- sql_mode = NO_ENGINE_SUBSTITUTION
We already have installed MySQL, just set the sql_mode = NO_ENGINE_SUBSTITUTION using MySQL configuration file.
sudo rm /etc/mysql/my.cnf
sudo cp /etc/mysql/mysql.conf.d/mysqld.cnf /etc/mysql/my.cnf
Edit the file:
sudo nano /etc/mysql/my.cnf
At the end of the file, add the following line:
sql_mode = NO_ENGINE_SUBSTITUTION
Save the file by pressing Ctrl+O, hitting the Enter key, and then exiting- Ctrl+X.

7. Set Apache user permissions
Permit ZoneMinder files access to the apache-user so that it can access them.
sudo chmod 740 /etc/zm/zm.conf
sudo chown root:www-data /etc/zm/zm.conf
sudo chown -R www-data:www-data /usr/share/zoneminder/
Enable Apache modules:
sudo a2enmod cgi rewrite expires headers
Enable ZoneMinder virtual host configuration file
sudo a2enconf zoneminder
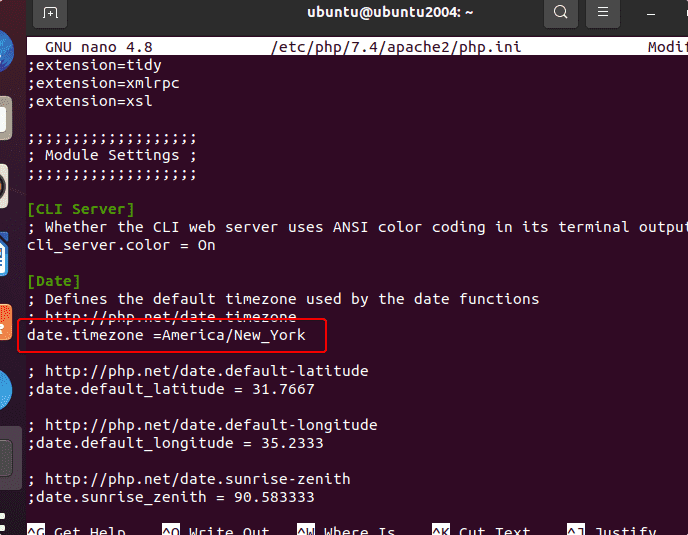
Set Date and Time zone in PHP.ini
sudo nano /etc/php/*/apache2/php.ini
Press Ctrl + w and then type – Date after that hit the Enter key. This will search and take you to the area from where we can configure the Time zone: You can see your TimeZone in the Official PHP doc.
Replace ; from the front of the line- date.timezone and after that add your timezone.

Save the file- Ctrl+O, press Enter Key, and then Ctrl+X.
8. Start and Enable ZoneMinder Service
We have configured almost everything, let’s start the ZoneMinder system service, also enable it to make sure it runs automatically with system boot or in case gets crashed.
sudo systemctl enable zoneminder
sudo systemctl start zoneminder
Also, reload the Apache service to apply the changes we have made so far.
sudo systemctl reload apache2
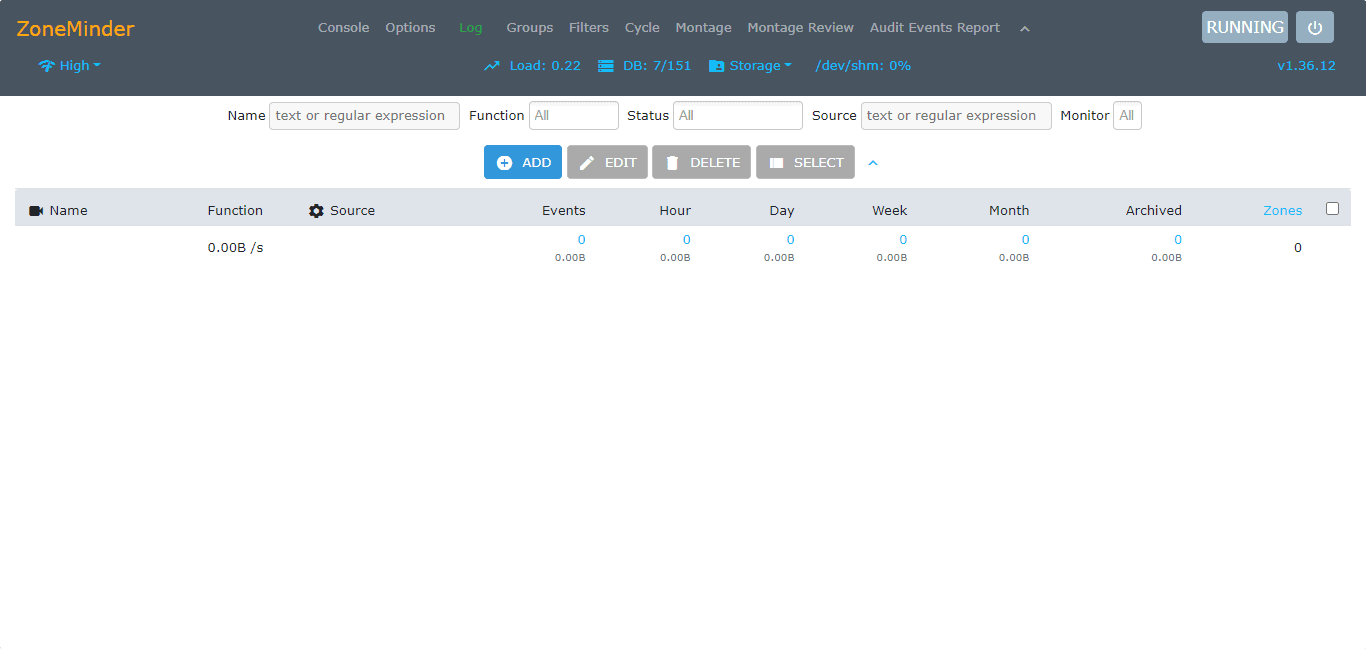
9. Access the Web interface
Let’s take the final step to access the web interface of ZoneMinder, simply open your browser on your system or the one that can access the IP address of the server where you have installed this monitoring & surveillance software.
Point it to :
http//:server-ip-address/zm
Note: Replace, the server-ip-address with the actual address of your Ubuntu system. If you don’t know the Ip-address then we can get that using the command – ip a


Uninstall or Remove
In the future, if you want to remove this Linux software then simply run the given commands to not only uninstall ZoneMinder but also its repository.
sudo apt autoremove --purge zoneminder
sudo add-apt-repository --remove ppa:iconnor/zoneminder-master
For removing Lamp Server:
sudo apt autoremove --purge apache2 mysql-server php
To know more about this tool further, refer to the official documentation.
Other Articles:
• Add repository to Install MySQL 5.7 on Ubuntu 20.04 LTS Linux
• Script to install LAMP & WordPress on Ubuntu 20.04 LTS
• How to install Deepin DDE on Ubuntu 20.04 | 19.04 | 18.04 LTS Linux


Nice instructions. Please note that the mysql engine substution stuff isn’t necessary anymore.
Also the timezone stuff can now be set in ZM options -> System -> TimeZone which might be easier for many.
Might also want to address that php default memory limits can be too low (128Mb) and some views like Montage Review might want more.
Thanks for instructions, I was able to follow, and I can start it up.
However I get and error when I’m trying to Add a monitor in “Console”: “Width must be set to a valid value. Height must be set to a valid value” when I try to save. I see no errors in the logs, it must be a UI issue.
Installed Ubuntu server 22.04. Unfortunately, there is no option in tasksel to install lamp-server
how did you guys get it working following these instructions? step 8 won’t work without setting up mysql. there is a zmuser that needs to be setup with a password.
If you set up mySQL first the ZoneMinder installer creates the user for you.
Excelent, good instructions,make the install very easy. Installed in Ubuntu (desktop 22.04) and ready for work! Thanks to Heyan Maurya, for this step by step guide.
I screwed-up my server yesterday, and I decided to reinstall. These instructions were honestly clearer and faster than the official ones. Thank you for taking the time to make this!
How to Install ZoneMinder on Ubuntu 22.04
Step 8: Access the Web page faults to a file and will not go to the ZM webpage. Any ideas.
Thanks for listening, Rick
AH00526: Syntax error on line 33 of /etc/apache2/conf-enabled/zoneminder.conf:
Invalid command ‘RewriteEngine’, perhaps misspelled or defined by a module not included in the server configuration
Any help, what did i do wrong
Hi, I got error on wsl Ubuntu while starting service zoneminder: cant connect to local mysql server through socket, pm line 110. Any suggestion?
good day!!
i full work for instruction top.
final afetr input hostname/zm
“<?php
/**
* The Front Controller for handling every request
*
* CakePHP(tm) : Rapid Development Framework (https://cakephp.org)
* Copyright (c) Cake Software Foundation, Inc. (https://cakefoundation.org)
*
* Licensed under The MIT License
* For full copyright and license information, please see the LICENSE.txt
* Redistributions of files must retain the above copyright notice.
*
* @copyright Copyright (c) Cake Software Foundation, Inc. (https://cakefoundation.org)
* @link https://cakephp.org CakePHP(tm) Project
* @package app.webroot
* @since CakePHP(tm) v 0.2.9
* @license https://opensource.org/licenses/mit-license.php MIT License
*/
"
page open but not site. this is text file.
sorry. text on display in browser after input “http://*****/zm”:
“<?php
//
// ZoneMinder main web interface file, $Date$, $Revision$
// Copyright (C) 2001-2008 Philip Coombes
//
// This program is free software; you can redistribute it and/or
// modify it under the terms of the GNU General Public License
// as published by the Free Software Foundation; either version 2
// of the License, or (at your option) any later version.
//
// This program is distributed in the hope that it will be useful,
// but WITHOUT ANY WARRANTY; without even the implied warranty of
// MERCHANTABILITY or FITNESS FOR A PARTICULAR PURPOSE. See the
// GNU General Public License for more details.
//
// You should have received a copy of the GNU General Public License
// along with this program; if not, write to the Free Software
// Foundation, Inc., 51 Franklin Street, Fifth Floor, Boston, MA 02110-1301 USA.
//
…."
i input ****/zm and see not site. I see text file from directory.
Thank you..!!
Have you thought about making an installation and configuration guide for Event Server hooks?
Hello, following my previous cry for help, I went back and purged zoneminder, ppa:iconnor/zoneminder-master and apache2 mysql-server php then, carefully and restarted the computer. Then, once again, went through your instructions with exactly the same results. If I type into the browser http://localhost or http://127.0.0.1 or the host name, the browser immediately responds with the apache2 success page but when I add /zm after the address I see just a blank page. Would be very grateful for some help/advice.
Thank you
John