Download Zorin 16 ISO and install it on Virtualbox Virtual machine to experience this latest launched Linux operating system features.
The newly launched Zorin OS 16 is based on Ubuntu 20.04, uses Gnome desktop software and software can be installed from the Ubuntu repository, the snap store, and Flathub. The user can switch between light and dark themes to match the time of day and the pre-installed active wallpaper subtly changes its color tones during the day, similar to what is known from macOS.
With Zorin Connect you can connect Android smartphones to the PC using the appropriate app. You can view cell phone photos on your PC, reply to SMS via the desktop, or exchange files and websites between the devices.
In addition to the paid “Pro” and the free “Core” version, there is also a “lite” version with Xfce as a desktop. With the help of pre-installed Wine, the user can install compatible Windows applications with few clicks.
Zorin OS 16 installation on VirtualBox Virtual machine- Steps
1. Download Zorin OS 16
Go to the official website of Zorin and get the free copy of this Linux available to download in the form of an ISO image.
2. Get VirtualBox
If you don’t have VirtualBox installed already on your system then go to Virtualbox.org and download the one. Even on Ubuntu and other similar Linux, it can be installed with just one command i.e sudo apt install virtualbox
3. Create Virtual Machine for Zorin OS 16
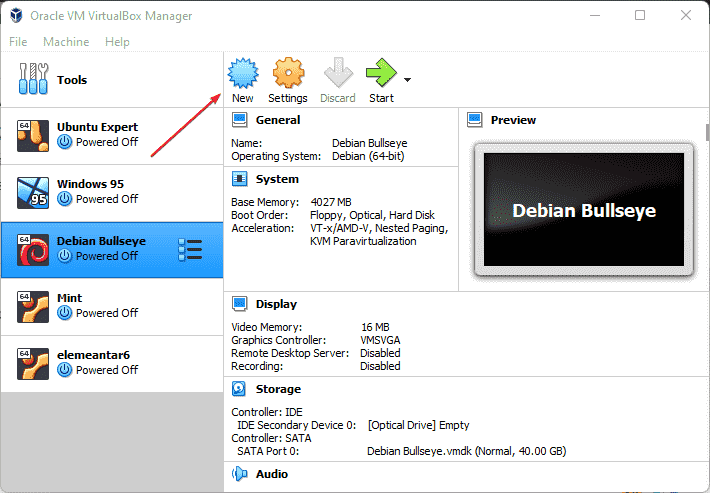
Run your Virtualbox, click on the New button to create a Virtual machine for Zorin OS 16 Linux.
4. Name Virtual operating system
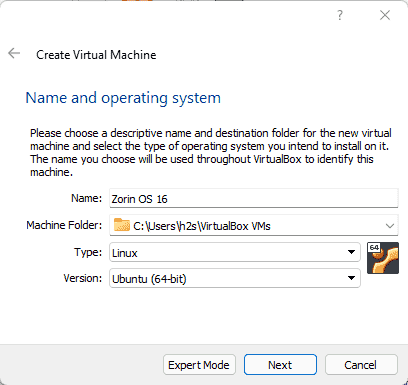
In the next window, you will see the VirtualBox will ask you to give some name to the virtual machine you are about to create. Select Type – Linux and Version – Ubuntu (64-bit).
5. Set Virtual RAM for Zorin OS 16
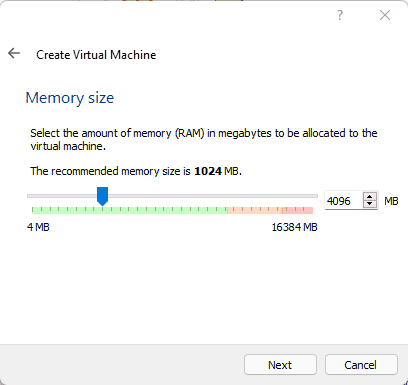
For optimal performance, it is recommended to set the Virtual Ram to 4GB using the slider given there on the Virtual Box Memory management section.
6. Create a Virtual Hard disk
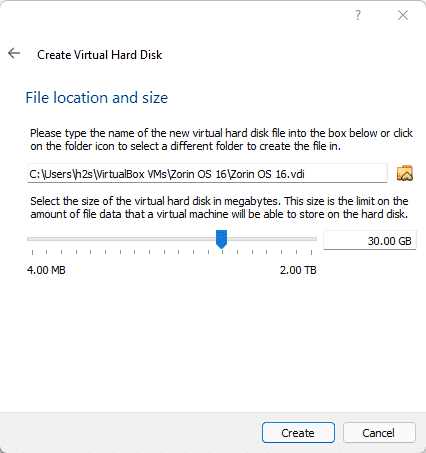
Let’s the default VDI option selected and move forward to select “Dynamically allocated” and later use the slider to select at least 30GB or more depending upon how long you are planning to use and amount of data is going to be stored on the OS.
7. Start Zorin OS 16 Virtual Machine
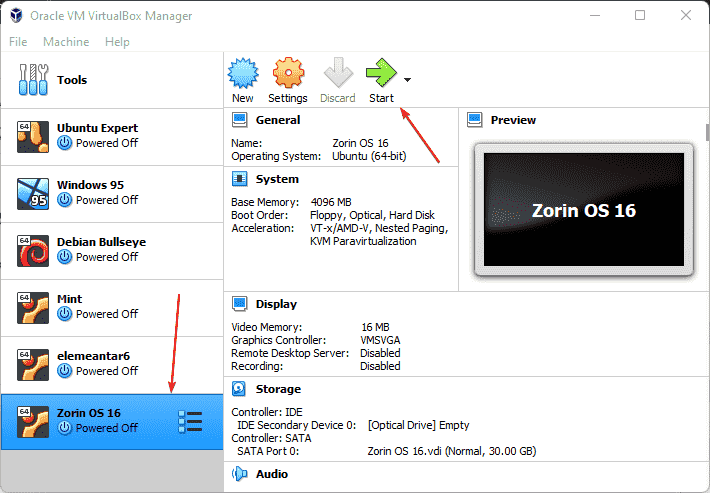
Now, select the created Zorin virtual machine and click on the “Start” button.
8. Add Zorin ISO in Virtualbox
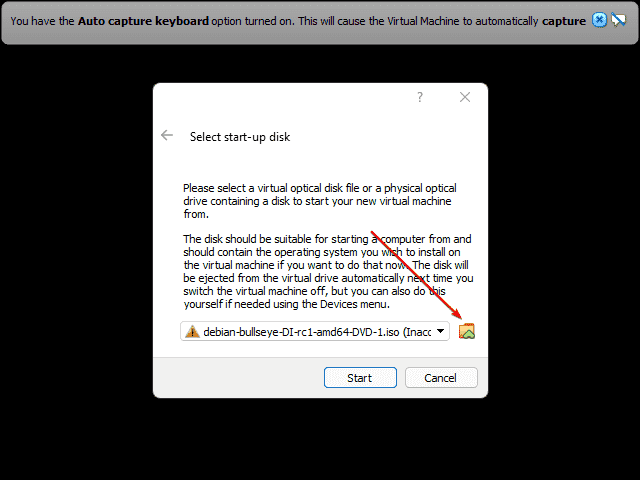
As you start the VM, the virtual box Startup disk selector will open. Click on the folder icon.
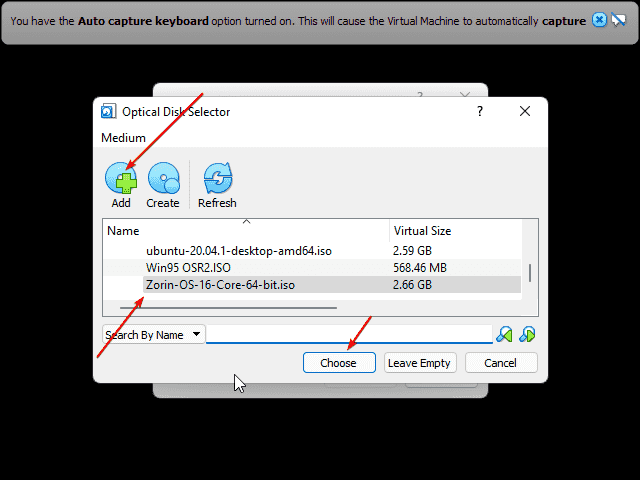
Now, click on the “Add” button. This will open the “File Explorer” select the downloaded “Zorin ISO” file. After that, it will appear in the Startup Disk Selector area, select it, and then click on the “Choose” button.
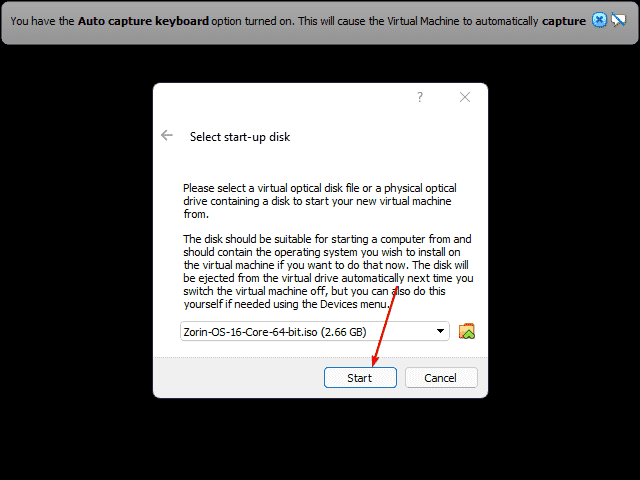
Finally, click on the “Start” button.
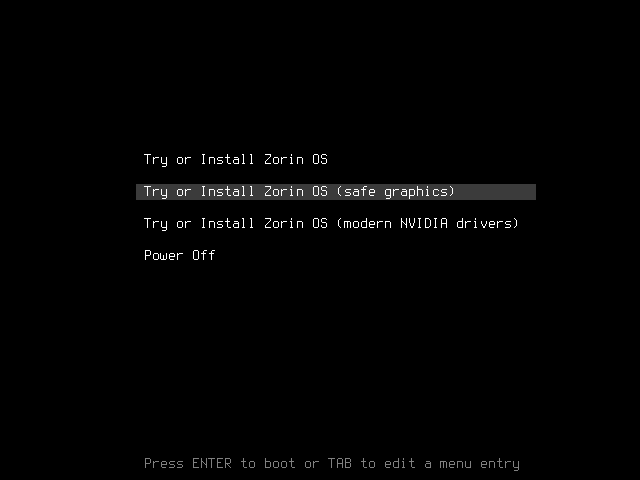
Select “Try or install Zorin OS”.
Zorin OS 16 Core Installation Wizard
Now, you will have the regular guided installation wizard, just follow it to select such as system language, location, username, and password, and more…
Once the installation is completed you will have the Zorin OS 16 working on your VirtualBox.
Eject ISO file
Weel, once the installation is completed, restart the Zorin OS, and before getting rebooted the OS will ask you to press the Enter key to eject the inserted installation medium i.e the ISO file.
Install VirtualBox guest addtions
#Ist Method
If you have an internet connection then simply open the command terminal and run the below-given command.
sudo apt install virtualbox-guest-additions-iso
#2nd Method:
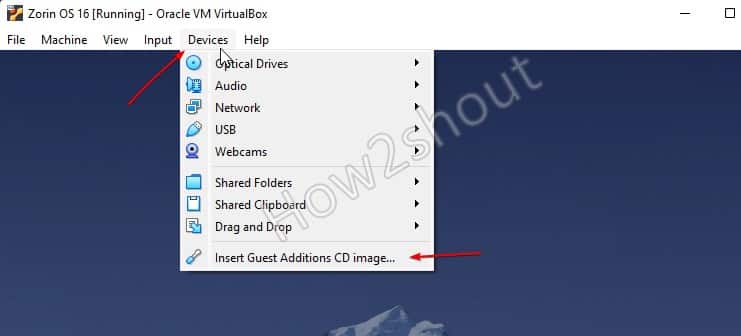
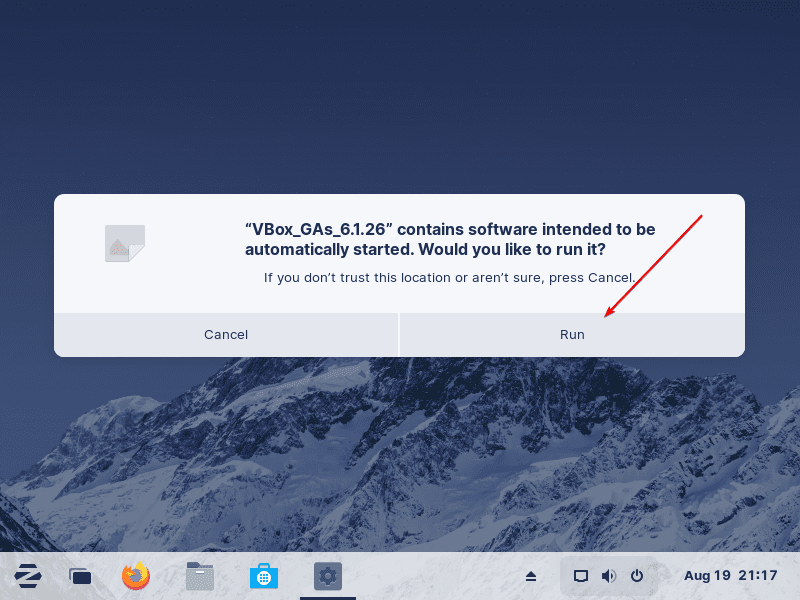
Whereas those who are without internet they can go for the offline method. Click on the Devices->select “Insert Guest Additions CD Image”
Once the installation is done, again click on Devices select “Shared folder” and then “Bidirectional“; also select Drag & Drop-> Select “Bidirectional: Once that is done restart the virtual machine.
