Secure your system’s sudo login by installing and enabling a two-factor authentication tool called Google Authenticator PAM module on Ubuntu 22.04 LTS Jammy JellyFish.
Although our accounts are protected with username and password login methods, however, to add an extra layer of protection we can use 2FA (Two-factor authentication method). This ensures without the supply of an additional security code the user won’t be able to log in.
In short:
Two-factor authentication – also known as two-factor authentication or two-way authentication – is a two-step security process in which you secure your accounts with a second password and thus reduce the risk of Data theft reduces. This means that if you want to log into your account on a new device, you will need a second code in addition to your self-chosen account password to confirm the login.
To enable 2FA on Ubuntu, we can use a simple tool known as Google Authenticator, the app generates a code on our smartphone that we must need to enter when we log in to our system Account.
Steps to enable Google Authenticator 2FA on Ubuntu 22.04 LTS Jammy
The steps given in this tutorial are not limited to Ubuntu Jammy, we can use them for old versions of Ubuntu such as 20.04 Focal or 18.04 Bionic. Including other Linux distros such as Debian, Linux Mint, Elementary OS, POP_OS, and more…
1. Update Ubuntu 22.04
First run the system update command to rebuild the APT package index cache, so that it could recognize the latest versions of available packages through the repositories of the system.
sudo apt update
2. Install the Google-authenticator PAM module
The Pluggable Authentication Modules (PAM) module offers a centralized authentication mechanism, here we are using the Google Authenticator PAM module by installing it on Ubuntu 22.04 LTS using the system’s default APT package manager. Know more about this project at its GitHub page.
sudo apt install libpam-google-authenticator
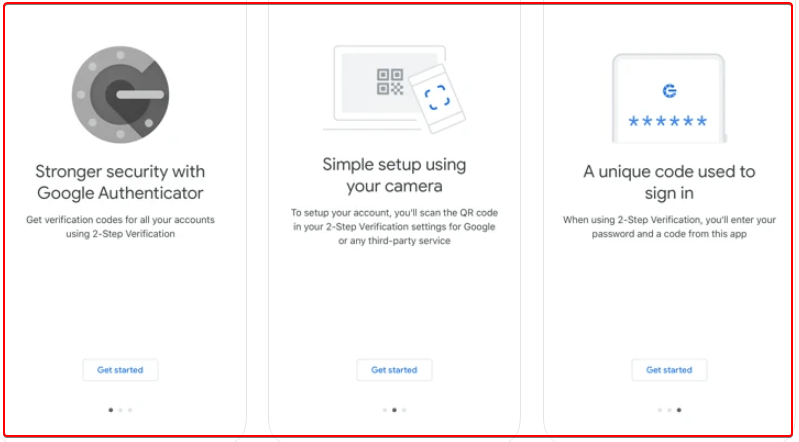
3. Download the Google Auth app on your Smartphone
Now, go to your smartphone Android or iPhone, and open its respective app store. Either use the links we already have given here or search for Google Authenticator app in your store and install it when the same appears for.
4. Generate and Scan QR Code
To integrate your system to Google Authenticator app so that it can generate codes needed to perform the two-factor authentication while logging into the system, run the following command:
google-authenticator
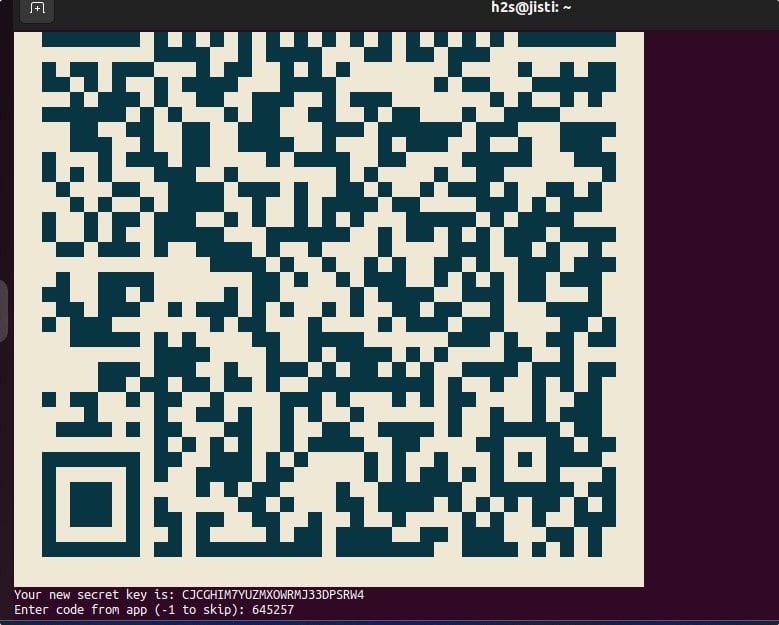
Step 1: As you run the above command, a QR code will appear.
Step 2: Now, open Google Authenticator app on your smartphone. Tap on the + icon given on the right bottom side.
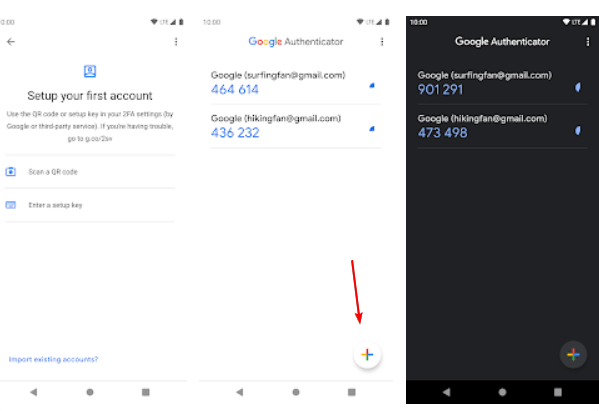
Step 3: Scan the QR code appearing on your Ubuntu’s Terminal.
Step 4: This will start generating 2FA coded on the APP for your system.
Step 5: Now, enter the code showing on your app for the system to confirm the integration.
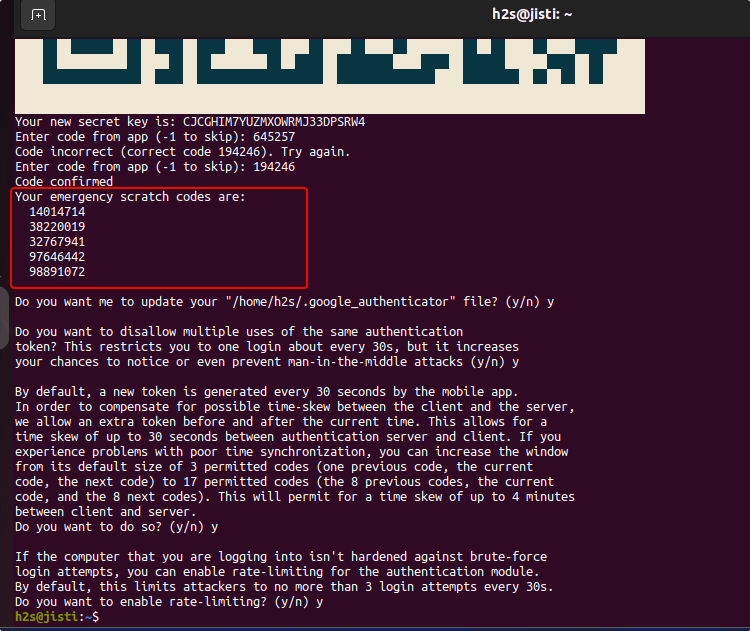
Once the confirmation is done. You will have the emergency scratch codes, which would require in case you don’t have Google Authenticator (GA) and its 2FA codes and you still want to log in to your Ubuntu account to recover. Unlike GA codes, these scratch codes will not expire.
After that simply follow the wizard. You can go Y (yes) for all options if you don’t know about them.
5. Enable 2FA on Ubuntu 22.04 for sudo
By default, your user will not ask for a Two-factor authentication code. To enable it we have to perform some manual settings.
Edit common authentication file:
sudo nano /etc/pam.d/common-auth
Add the following lines at the end of the file:
auth required pam_google_authenticator.so nullok
auth required pam_permit.so
Note: nullok at the end of the first line, make sure the users who yet haven’t registered for 2FA can use the sudo as they were doing. If you remove this line, all users need to enter a 2FA code to access sudo.
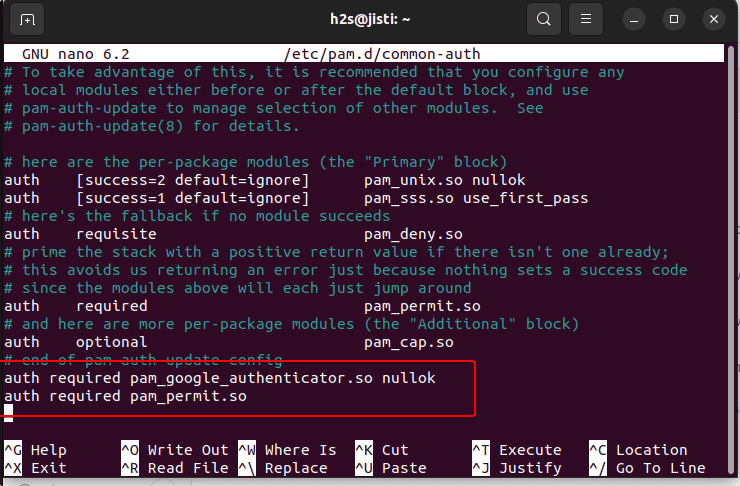
Save it using Ctrl+O, press Enter key, and exit using Ctlr+X.
6. Test Two factor login on Ubuntu
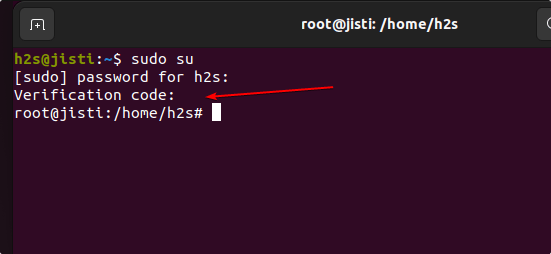
Let’s say you want to test what you have done above. So login to some user using sudo that has been enabled to use 2FA codes generated by the Google Authenticator app.
You will have an extra security step; apart from the user password, you also have to enter the code generated on Google Authenticator app on your smartphone.
7. To Configure SSH
Edit SSH configuration file available for PAM.
sudo nano /etc/pam.d/sshd
Add the following line at the end of the file:
auth required pam_google_authenticator.so
Save the file- Ctrl+O hit the Enter key and exit using Crtrl+X.
Next edit the SSH configuration file:
sudo nano /etc/ssh/sshd_config
Change No to Yes for the following line
KbdInteractiveAuthentication yes
Restart SSH server:
Restart the service of ssh by the following command:
sudo systemctl restart sshd.service
Other Articles:
• Install Jitsi Meet on Ubuntu 22.04 LTS Jammy Linux
• How to Install Ghost CMS on Ubuntu 22.04…
• How to Install WordPress on Ubuntu 22.04…
• Enable or disable the firewall on Ubuntu 22.04 LTS Jammy…


Omit the step sudo nano /etc/pam.d/sshd
This causes the Verification Code prompt to appear twice back to back!!!
I need google Gmail account for unbuntu!
I have found that google-authenticator does not work with plasma desktop if you logout you then cannot log back in, however I got it to work fine using gnome desktop.