Learn the steps and commands to install the latest version of Apache Tomcat on Debian 12 Bookworm or 11 Bullseye Linux to test various Java-based applications…
Apache Tomcat is an open-source web server that allows you to run web applications written in Java. Tomcat is developed and maintained by a free community of developers and our Apache license is published as open-source software.
Well, Tomcat is significantly different from the Apache web server, it was developed to primarily focus on Web applications. Tomcat does not understand URLs as a file specification but as a notification of a user action. This is comparable to event-driven programming in classic GUI programming: a click on a button generates an event that the window manager reports to the program. Calling up a URL is analogous, be it in the form of a link or a form called.
We can set up Tomcat on almost all popular operating systems because the key requirement of it is Java 8 or higher depending upon which version you are planning to use. It is available in both 32-bit and 64-bit.
Apache Tomcat 10 installation on Debian 12 or 11 Linux
1. Install OpenJDK- Java
As we know the key requirement to install Tomcat is Java, thus first we set up an open-source Java Development kit on Debian 11 using the terminal.
Before moving further, run the system update command once.
sudo apt update
The OpenJDK packages are available in the default base repository of Debian 12/11, thus use the given command to install it. The Java version supported is 8 or above. Here we are installing Java 11.
sudo apt install openjdk-11-jdk
To check and confirm, that Java has been installed successfully, see its version…
java -version
2. Download and Install Apache Tomcat on Debian 12/11
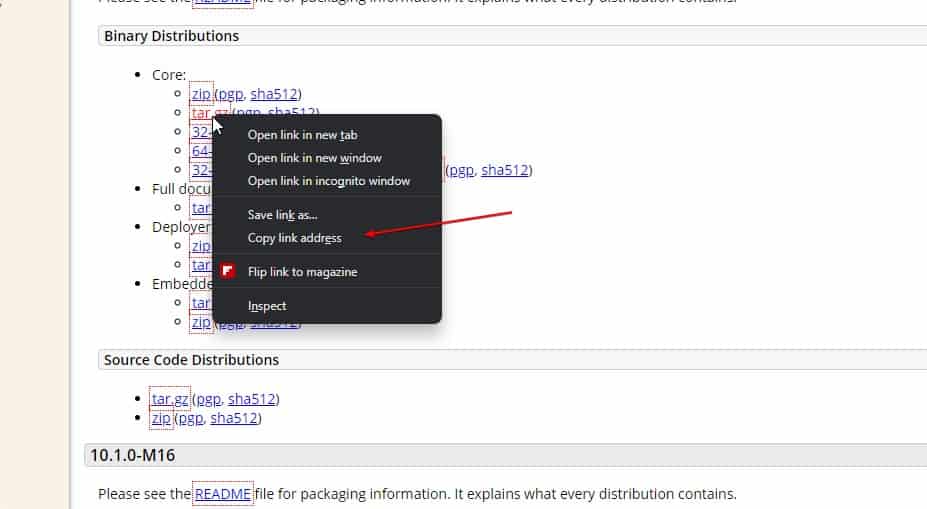
You can get the latest version directly from the official webpage of Tomcat. If you are using a GUI system then can download it by simply clicking on the Zip or Tar file. However, those who are accessing a remote server with CLI via SSH can use the wget. Simply, right-click on the Tart.gz file and copy the link address. After that type wget on your terminal and paste the link.
wget paste-link
Extract the downloaded file to /opt directory so that we won’t delete it accidentally.
1. Create a directory under /opt to extract files.
sudo mkdir -p /opt/tomcat
2. Now, extract the downloaded Tomcat Tar file into the created directory.
sudo tar xzvf apache-tomcat-10*tar.gz -C /opt/tomcat --strip-components=1
Create a dedicated user
To ensure the security of the system while testing various web applications, let’s create a non-root user that has only access to the created /opt/tomcat folder.
sudo groupadd tomcat
sudo useradd -s /bin/false -g tomcat -d /opt/tomcat tomcat
3. Assigning Tomcat user permissions
Well, we already have set up the files that require using this open-source web application server, now let’s assign the permission of the folder to the user we have created above for it.
sudo chown -R tomcat: /opt/tomcat
sudo sh -c 'chmod +x /opt/tomcat/bin/*.sh'
4. Create a Systemd service file
By default, we won’t have a Systemd unit file for Tomcat to run it in the background and to easily stop, start and enable its services. Thus, we create one, so that we could manage it without any issues.
Create a Systemd unit file
sudo nano /etc/systemd/system/tomcat.service
Paste the following block of code in it-
[Unit]
Description=Tomcat webs servlet container
After=network.target

[Service]
Type=forking

User=tomcat
Group=tomcat
RestartSec=10
Restart=always
Environment="JAVA_HOME=/usr/lib/jvm/java-1.11.0-openjdk-amd64"
Environment="JAVA_OPTS=-Djava.awt.headless=true -Djava.security.egd=file:/dev/./urandom"

Environment="CATALINA_BASE=/opt/tomcat"
Environment="CATALINA_HOME=/opt/tomcat"
Environment="CATALINA_PID=/opt/tomcat/temp/tomcat.pid"
Environment="CATALINA_OPTS=-Xms512M -Xmx1024M -server -XX:+UseParallelGC"

ExecStart=/opt/tomcat/bin/startup.sh
ExecStop=/opt/tomcat/bin/shutdown.sh

[Install]
WantedBy=multi-user.target
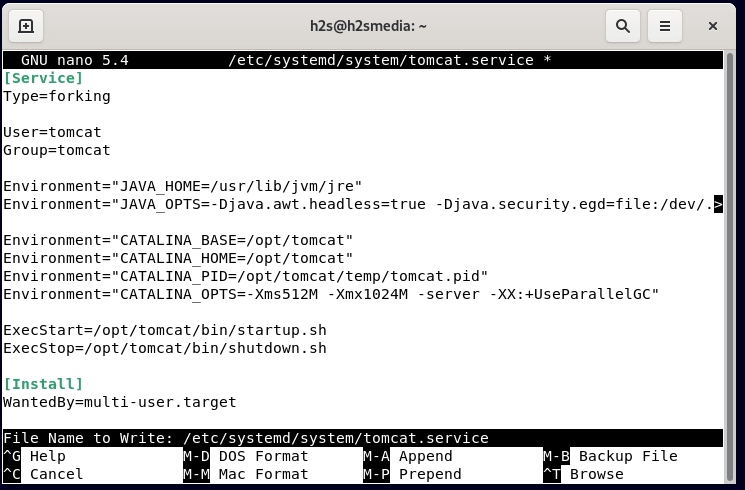
To save press Ctrl+X, type –Y, and hit the Enter Key.
Note: In the above-given code for creating a systemd file, we have to mention the path of Java. However, the given one in the above code is the default path, still, to confirm the same you can run the below command:
sudo update-java-alternatives -l

5. Enable and start Tomcat service on Debian 11/12
Finally, we have plugged in all the necessary things to start the Tomcat service in the background on Debian 11 Bulleye. Let’s enable and run the same.
sudo systemctl daemon-reload
sudo systemctl start tomcat
sudo systemctl enable tomcat
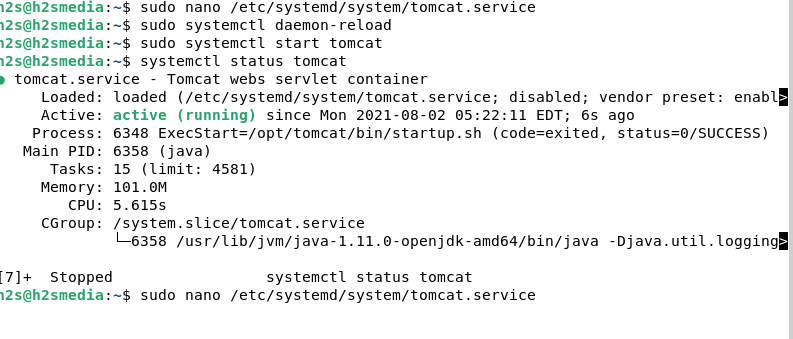
To confirm everything is working normally, check the status of service:
systemctl status tomcat
6. Add Roles and Admin username and password
This step is important, without performing it we will get an error: “403 Access Denied on Tomcat 10/9/8 error” as we click on “Server Status“, “Manager App” and “Host Manager” links on the Apache Tomcat Web interface.
Edit the user configuration file.
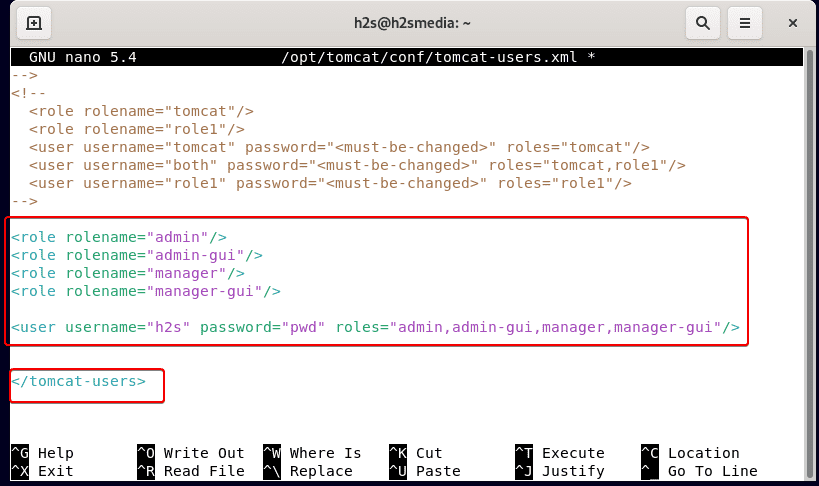
sudo nano /opt/tomcat/conf/tomcat-users.xmlAt the end just before </tomcat-users> tag, copy and paste the following lines.
Note– Change the username and password values with whatever you want to set for your Tomcat.
<role rolename="admin"/>
<role rolename="admin-gui"/>
<role rolename="manager"/>
<role rolename="manager-gui"/>

<user username="h2s" password="pwd" roles="admin,admin-gui,manager,manager-gui"/>
Save the file and exit- Ctrl+X, type- Y, and hit the Enter key.
7. Enable Tomcat and Host Manager Remote access
By default, you won’t be able to access your installed Tomcat Manager sections (web interface) outside the local system. For that, we have to enable it by editing individually the context.xml file available for Tomcat Manager and Host Manager.
For Tomcat Manager’s remote access:
Edit the Context file
sudo nano /opt/tomcat/webapps/manager/META-INF/context.xmlIn the file, scroll and go to the end and comment out the following block of text-
<Valve className="org.apache.catalina.valves.RemoteAddrValve"
allow="127\.\d+\.\d+\.\d+|::1|0:0:0:0:0:0:0:1" />
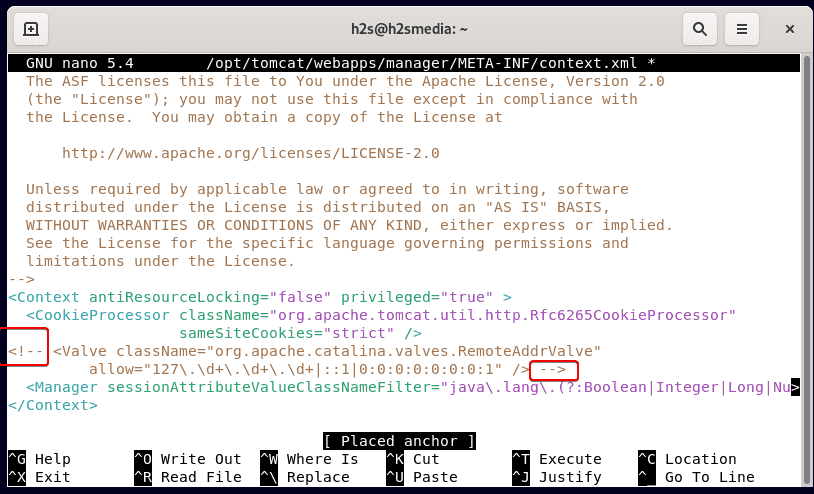
Just add <!-- at the beginning and --> in the end, after that, this will look something like this-
<!-- <Valve className="org.apache.catalina.valves.RemoteAddrValve"
allow="127\.\d+\.\d+\.\d+|::1|0:0:0:0:0:0:0:1" /> -->
Save the file and exit- Ctrl+X, type- Y, and hit the Enter key.
To get an idea see the below-given screenshot:
For Host manager remote access:
sudo nano /opt/tomcat/webapps/host-manager/META-INF/context.xmlJust like above, also add <!-- at the beginning and --> at the end of the text given below in the file, after that, this will look something like this-
<!-- <Valve className="org.apache.catalina.valves.RemoteAddrValve"
allow="127\.\d+\.\d+\.\d+|::1|0:0:0:0:0:0:0:1" /> -->
Save the file and exit.
Note-: By commenting out, the Tomcat will not be able to read this and let the user access the Manager backend using a remote PC.
Restart Tomcat service-
sudo systemctl restart tomcat
8. Open port 8080 in Debian 11 Firewall
The service to access the web interface via browser is available on port 8080 and to access the same remotely using any other system, we have to allow its outgoing connection in the firewall.
sudo ufw allow 80809. Access the Tomcat Web interface
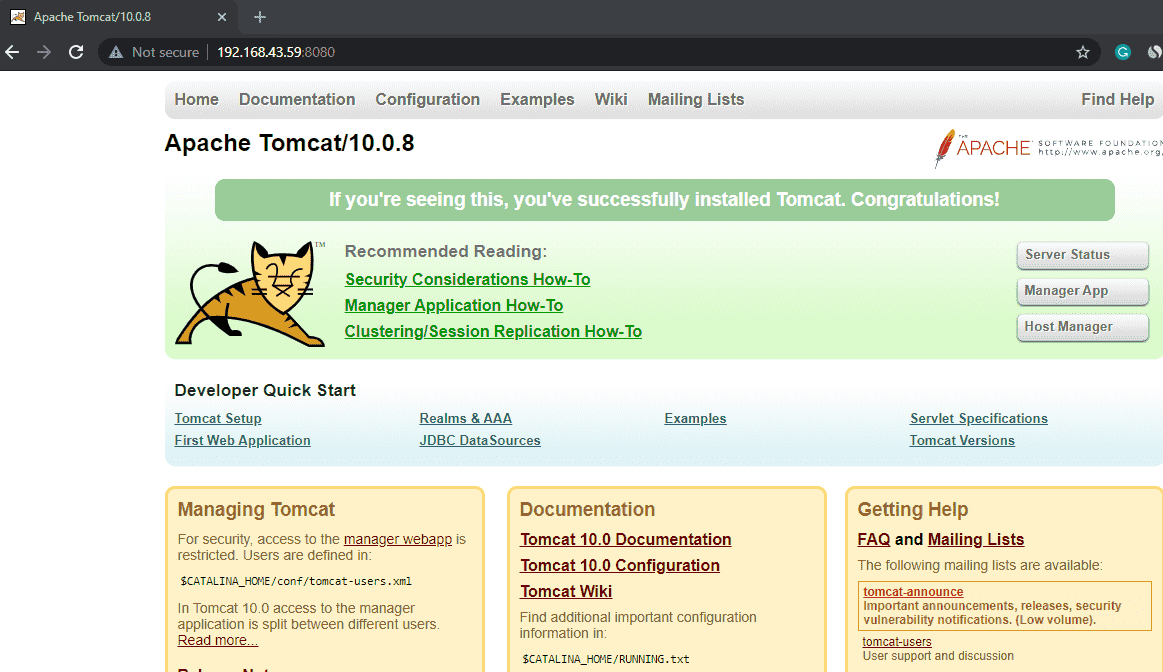
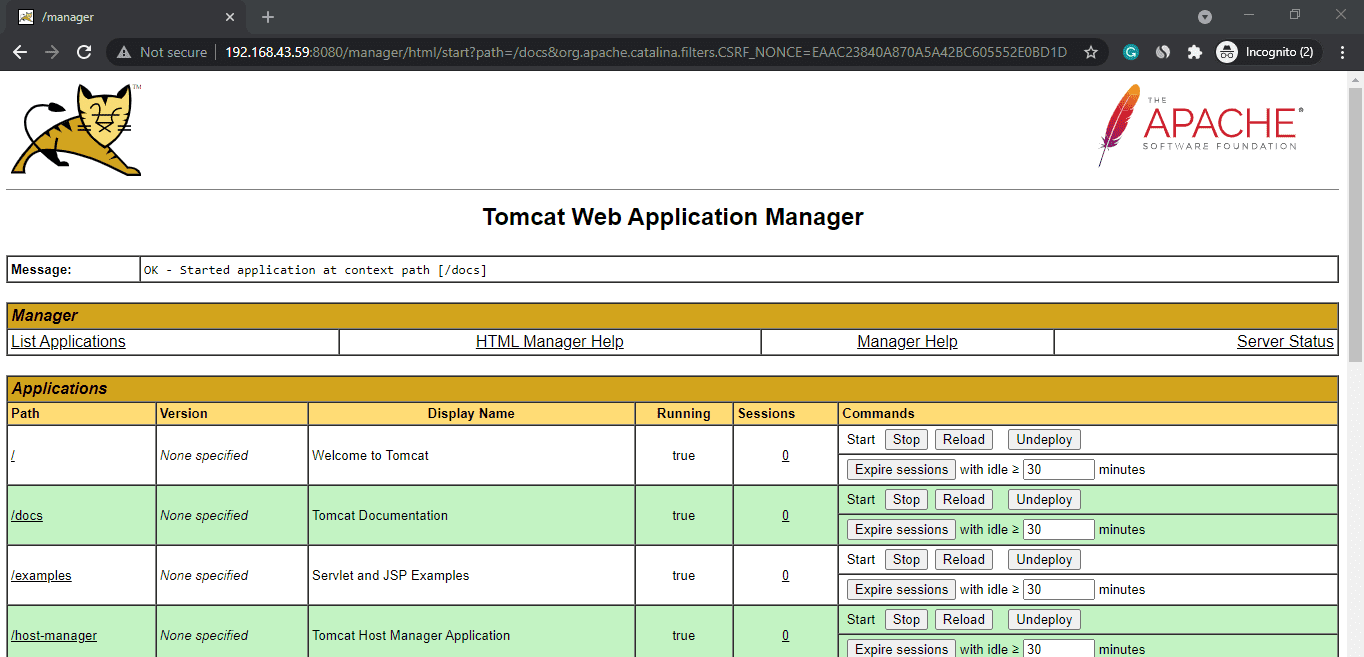
Open any browser on the local or remote system and point it to the IP address or domain of the server where you have installed the Apache Tomcat.
For example:
http://server-ip-addres:8080
or
http://youdomain.com:8080
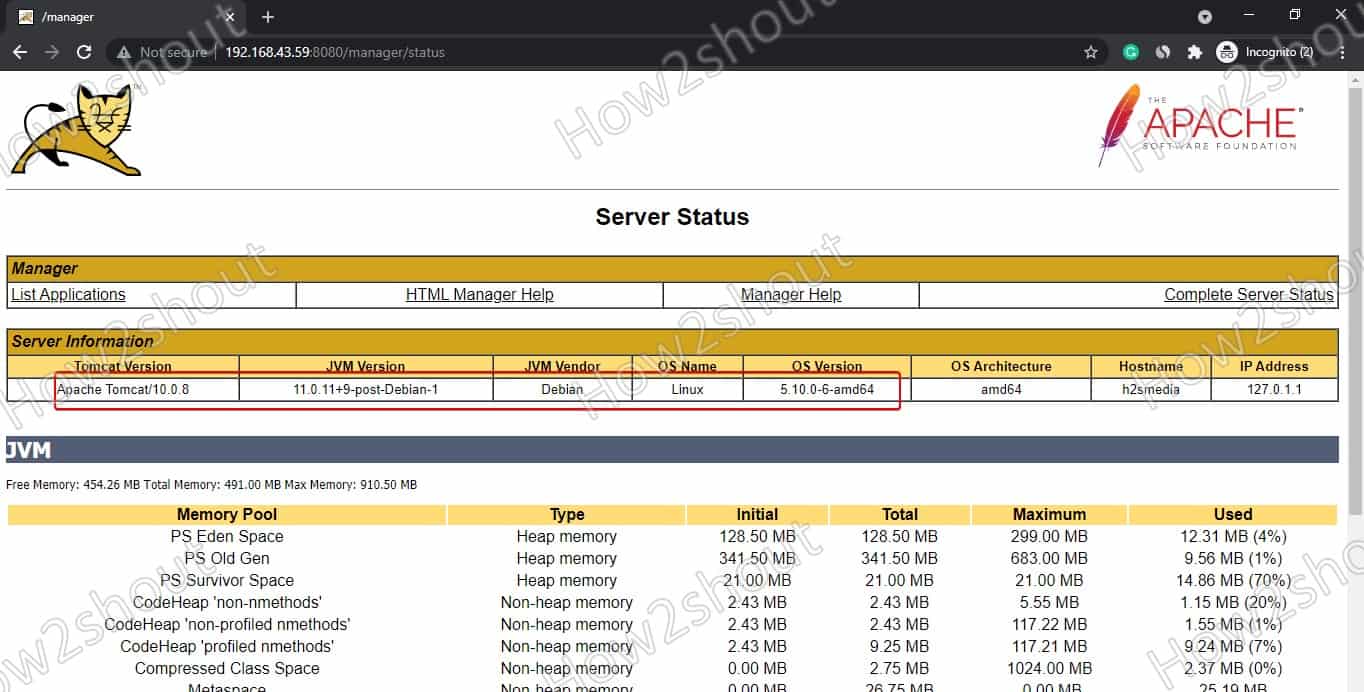
Web Application Manager
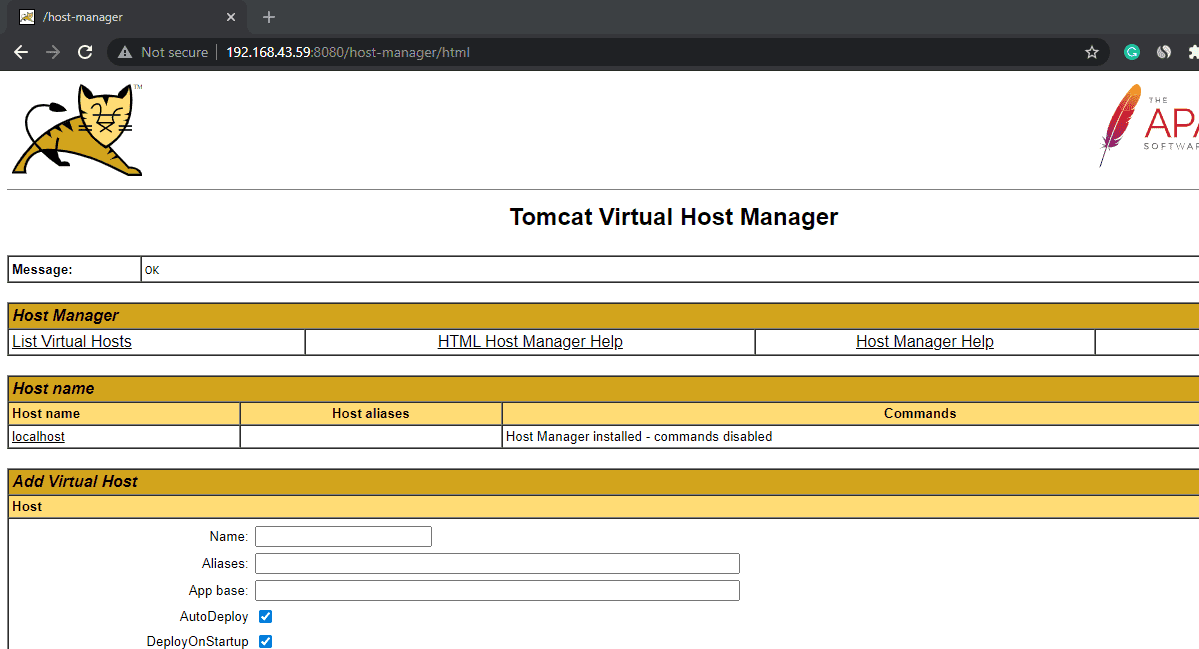
Virtual Host Manager
In this way, we can deploy the Apache Tomcat on Debian 12Bookworm or 11 Bulleye without any error. In case you are facing any problems while performing the above tutorial, the comment section is all yours!!

SQalu
Je confirme salut a toi
Yeah you’re right confirm
Thanks for this excellent tutorial !!!