Filezilla server which is only available to install on Windows 10 or 7 can also be installed on Ubuntu Linux desktop or servers with the help of Wine.
FileZilla Server is the open-source application available to create an FTP server on a local or server machine for downloading and uploading files remotely over a network but in a secure way. Although the client version is available for Windows, macOS, and Linux, the server one is just limited to Windows. However, we still can install it on Linux just like we do on Windows, however, slightly more work needs to be done for the Linux systems as compared to Windows.
Install FileZilla Server on Ubuntu 20.04 or 18.04 Linux
The below give method to user FileZilla server to create FTP FIle server is not only applicable to Ubuntu 20.04/20.10 but can also be used on older version such ubuntu 19.04, 17.04, 16.04 including Debian, Linux Mint and other similar Linux OS.
Enable 32-bit Architecture
As we need Wine to install FileZilla Server on Linux, thus first enable the supports for 32-bit architecture as there are many old applications that don’t work on 64-bit. Thus, if your system is 64-bit, first enable the 32-bit architecture support using the below command:
sudo dpkg --add-architecture i386
Add Wine Repository
Here we are adding GPG and Wine repository as the packages to install it are not available in the official repo of Ubuntu.
wget -O - https://dl.winehq.org/wine-builds/winehq.key | sudo apt-key add -
sudo add-apt-repository 'deb https://dl.winehq.org/wine-builds/ubuntu/ focal main'
sudo apt update
Install Wine on Ubuntu 20.04
Finally, run the command to get the Wine Windows package installer.
sudo apt install --install-recommends winehq-stable
Setup Wine
export WINEARCH=win32
export WINEPREFIX=~/.wine32
sudo winecfg
When you run winecfg to configure Wine it will ask you to download a couple of packages… Download them. More information on how to set up Wine can be seen in this tutorial.
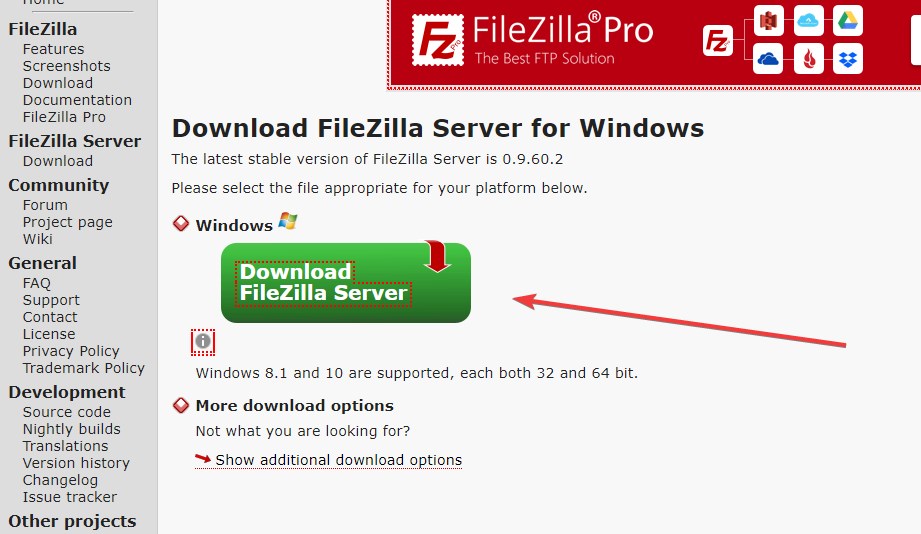
Download FileZilla Server
Open your browser and go to the FileZilla website to download the Server version. Here is the link.
Install FileZilla Server on Ubuntu Linux
Whatever we download using the browser will go to the Downloads folder of the system by default. Therefore, on your Command Terminal switch to that directory.
cd Downloads
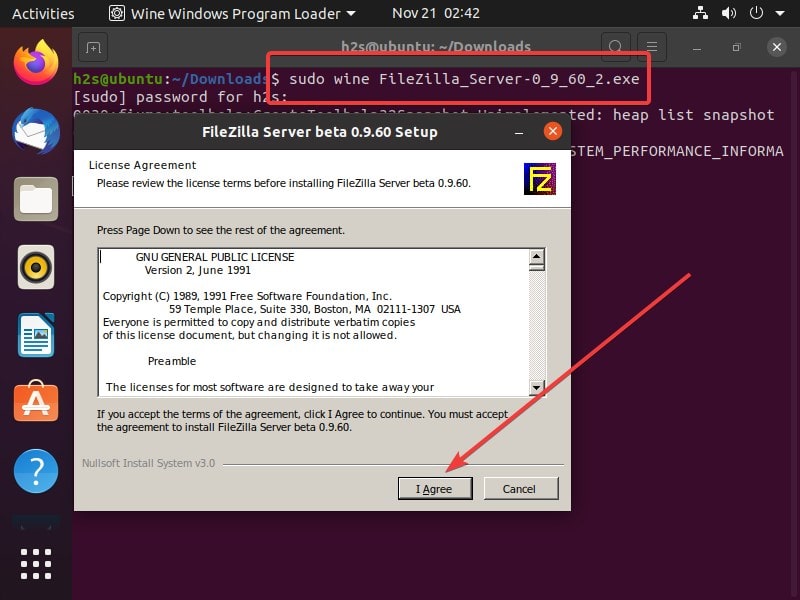
Now, use the wine to install the FileZilla server edition.
sudo wine filename
In our case, the downloaded file name was –FileZilla_Server-0_9_60_2.exe
Thus, the command will be
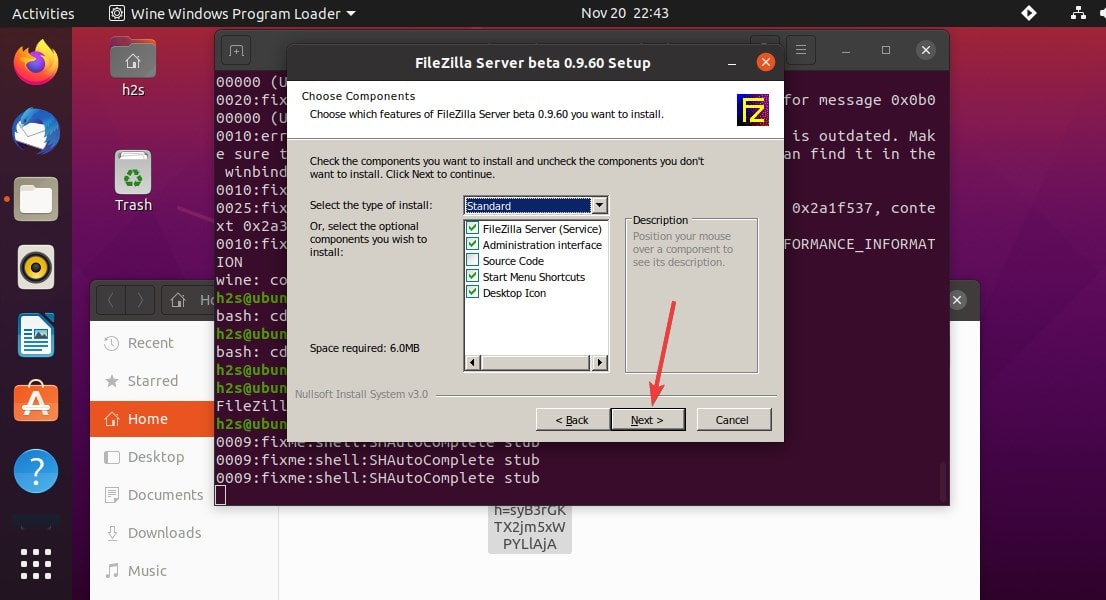
sudo wine FileZilla_Server-0_9_60_2.exe
Restart the system
Once the installation is done, restart the system.
Desktop Shortcut
The installation setup of the FileZilla server on Ubuntu will also automatically create a shortcut on the Desktop of Ubuntu or Linux you are using. Now, to make it executable, right-click on it and select the “Allow launching” option.
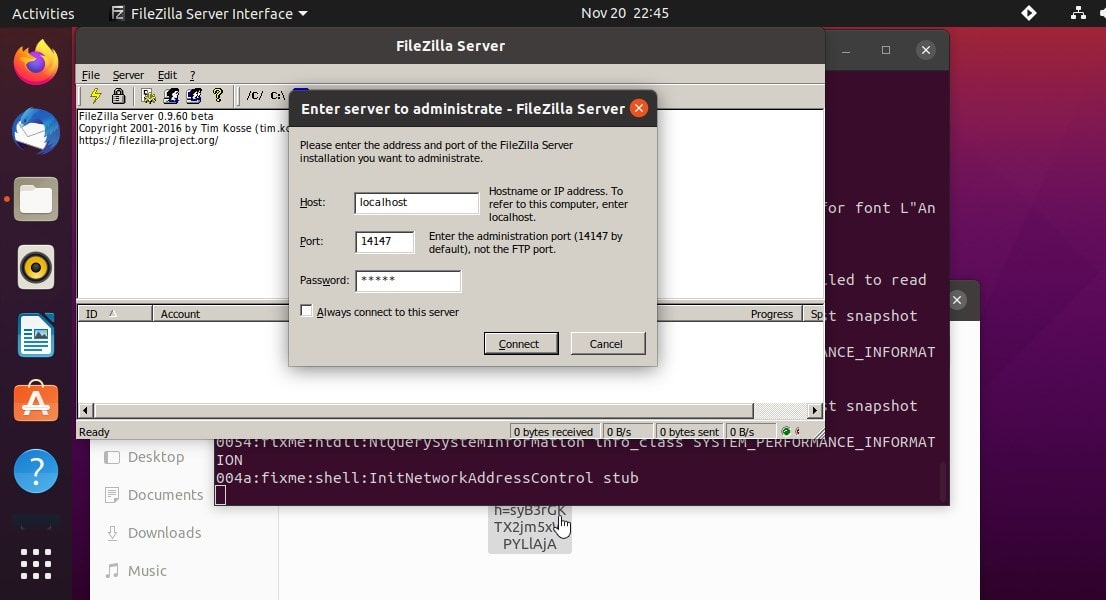
Create an Administrator password
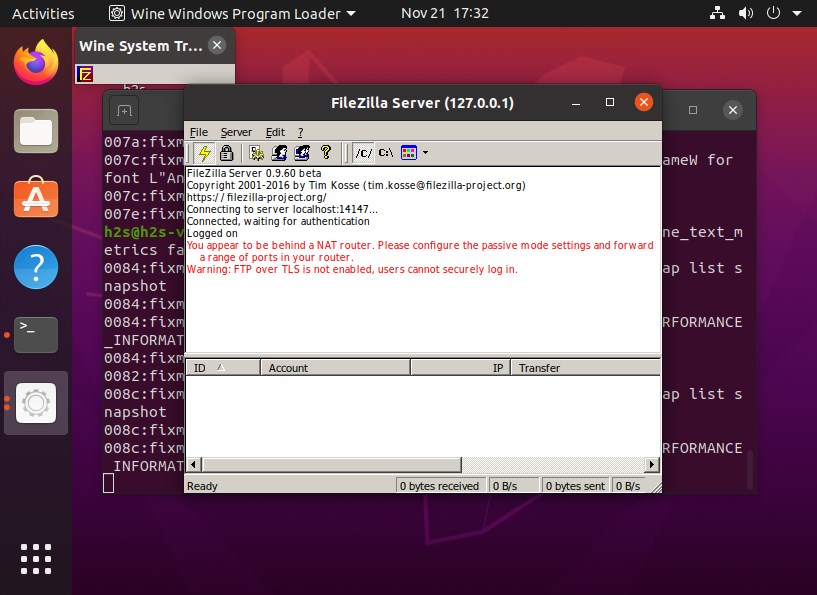
By default the FTP server will be created by the FileZilla on the localhost on port number 14147, the user can assign a password for the same as well or leave it blank if you are just testing it.
Then click on the Connect button.
Once the server started, it will show the connection has been established successfully.
Enable FTP over TLS
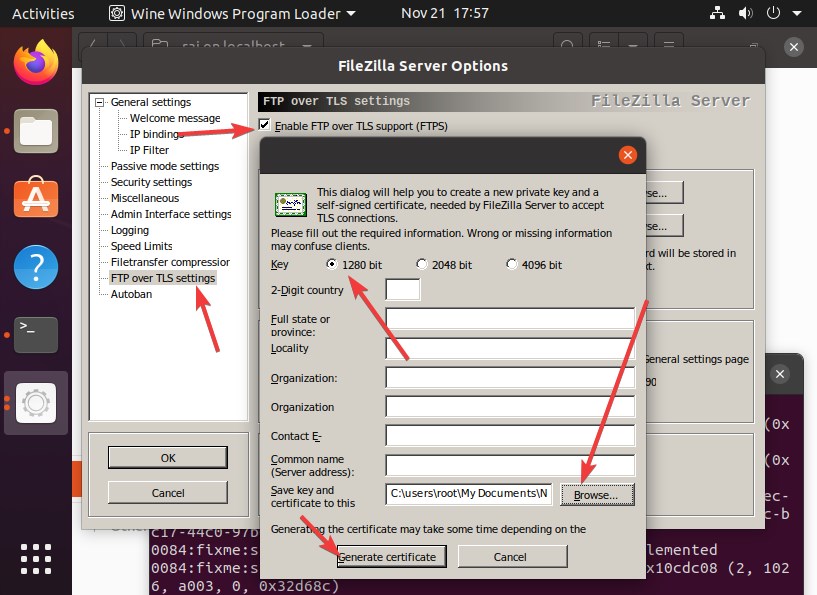
- Go to Edit and select Settings then select FTP over TLS settings.
- Check the box given in front of the option “Enable FTP over TLS support (FTPS)“.
- Click on Browser and select any folder where you want to save the Generated keys.
- Hit the Generate Certificate button.
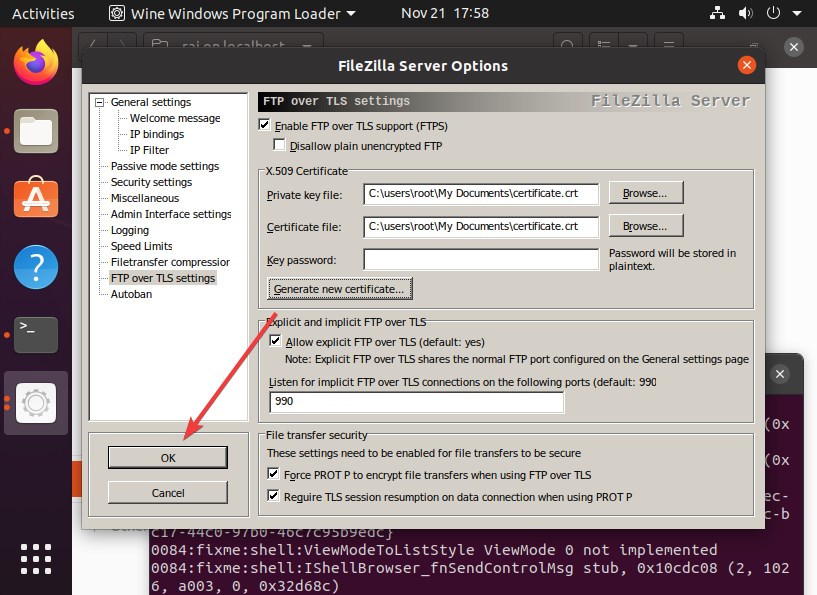
- And then finally the OK to save the settings.
- This will remove the error “FTP over TLS is not enabled, users cannot securely log in”
Create an FTP Group and User
Add Group
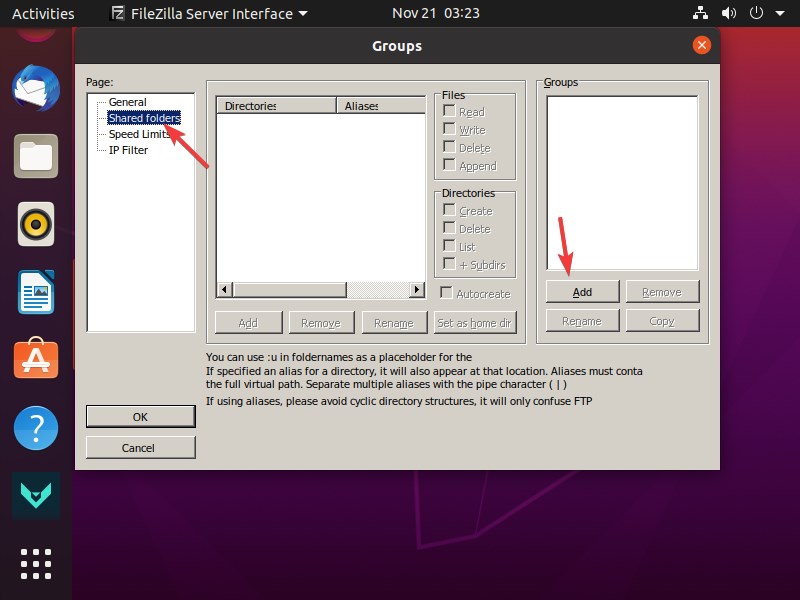
- Again go to click on the Edit option and select Group.
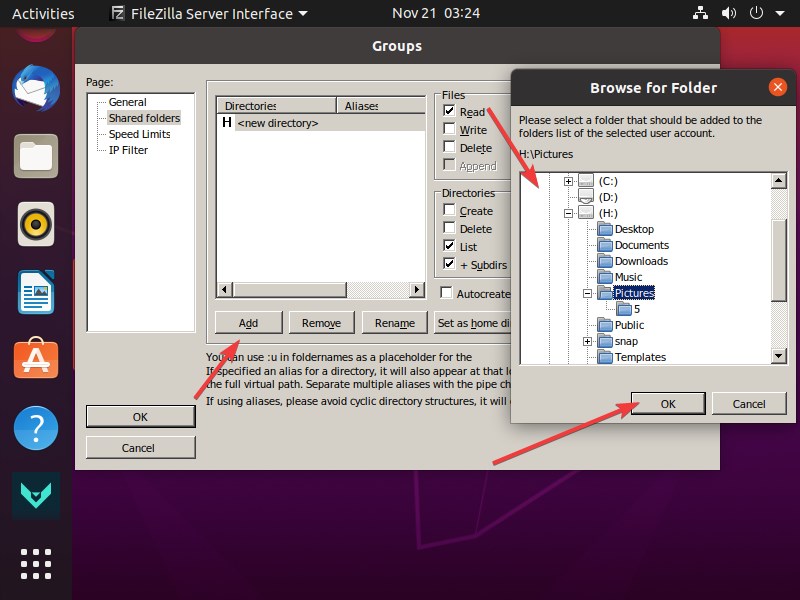
- Select Shared Folders and click on the Add option.
- Once the Group has been created, add the directory which you want to share over the network over the FTP server.
- Click on the Add button
- Select the Folder, here we are using Picture.
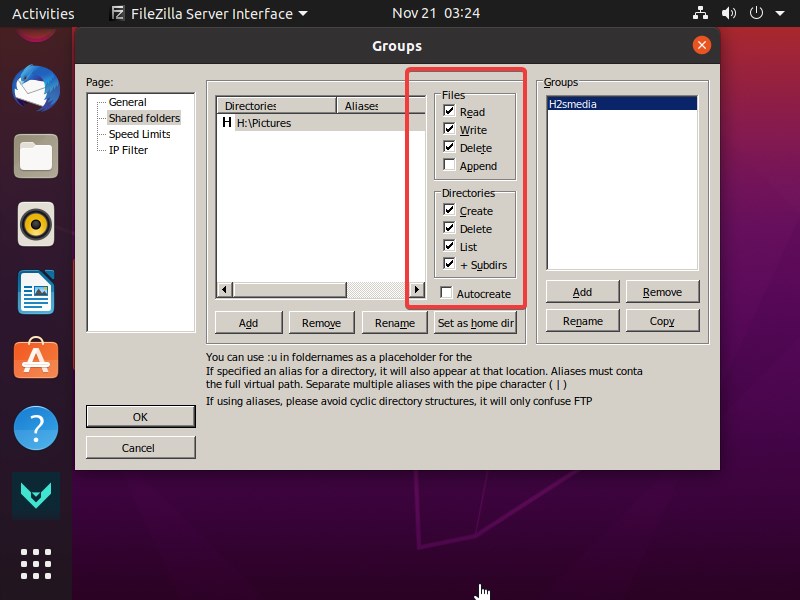
Assign the rights that a user inside the group can perform over files that reside under the shared directory of the folder.
Add user
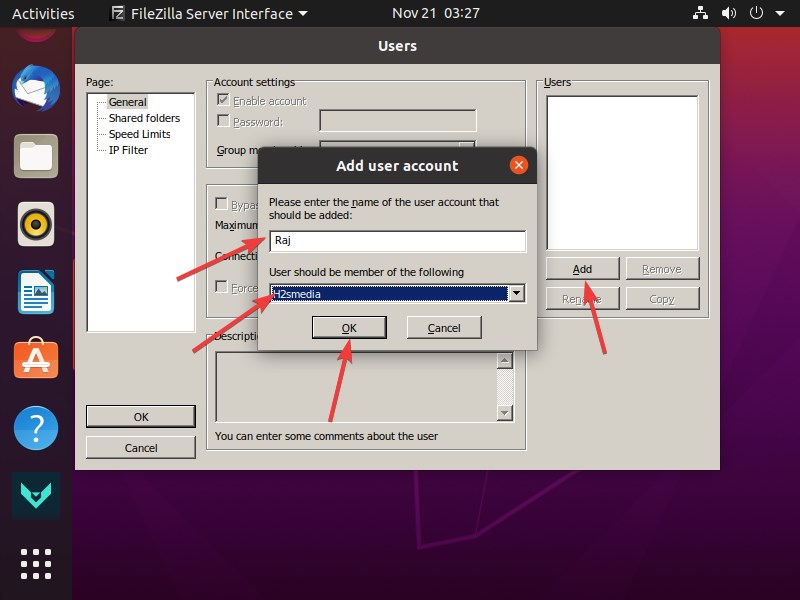
- Click on Ubuntu running FileZilla server’s Edit option and select the Users.
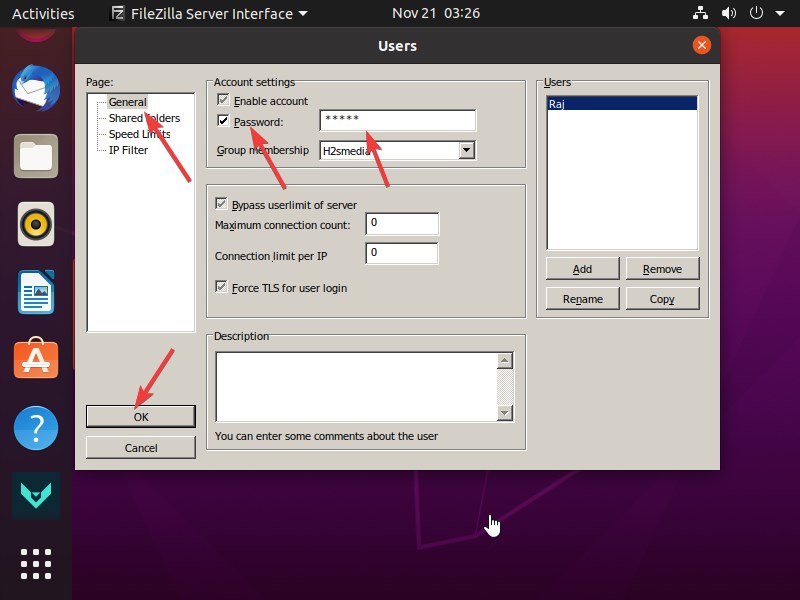
- Select General.
- Click on the Add button, type the name of the user you want to create.
- From the drop-down box select the created group.
- If you want to use a password with the user then, select the Password box.
- Type the password and OK button.
Everything is done, now let’s move to connect the created FTP server.
Connect FTP server on Windows and Ubuntu
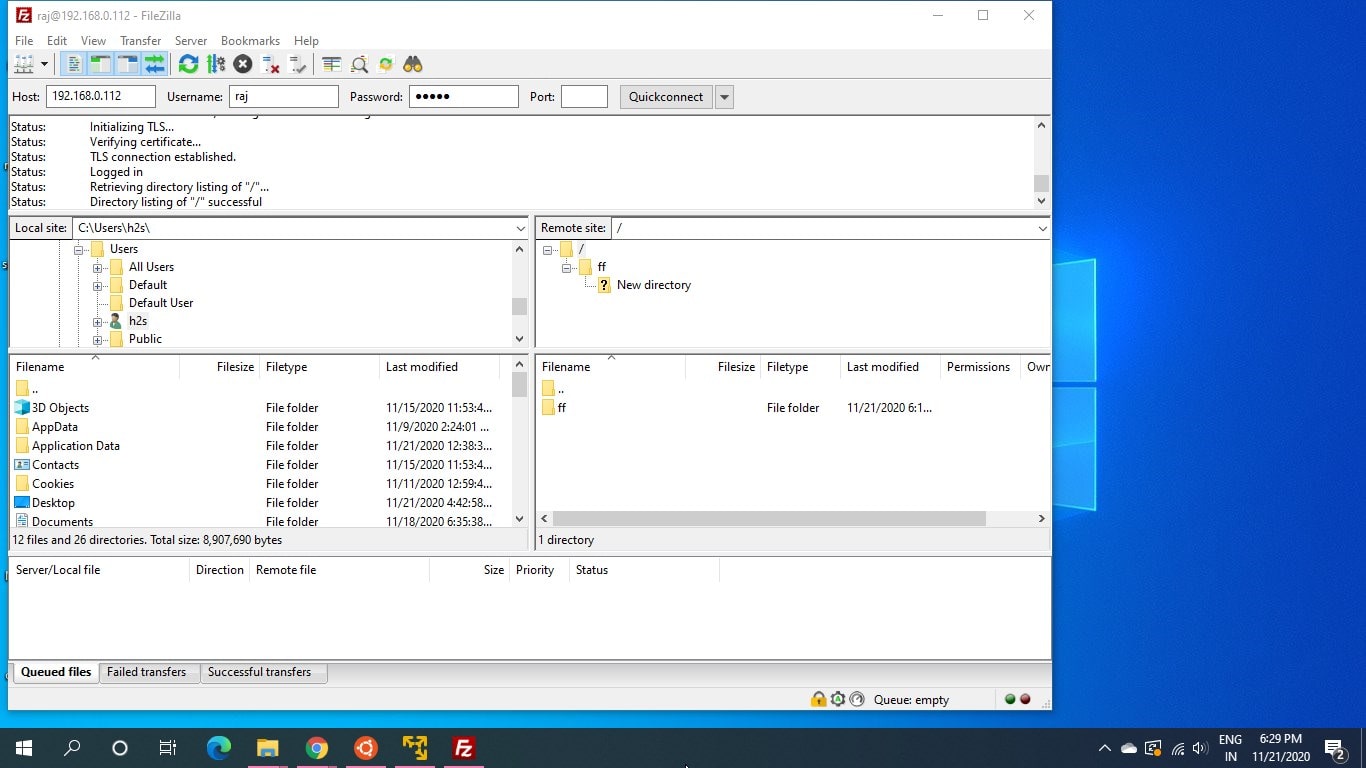
FileZilla is available for both Windows and Ubuntu Linux, thus simply go to its website and download the client. To know the steps for installing the client version of FileZilla on Ubuntu, see our tutorial-How to install FileZilla Client on Ubuntu 20.04 LTS Linux
Enter the FileZilla server running the PC’s IP address and then the user with a password.
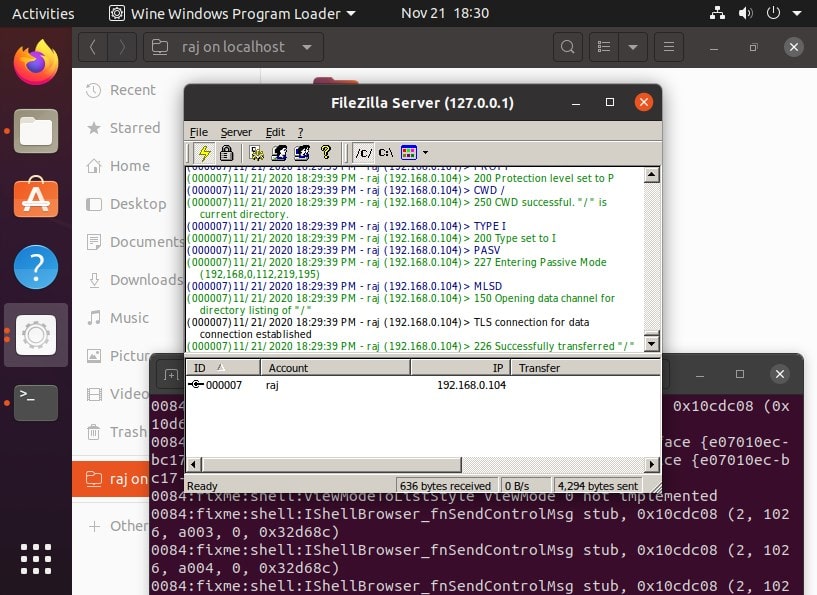
The connection logs will appear on the FileZilla server screen.
Closing thoughts- Filezilla server on Linux
In this way we can install and use this best open source FTP server on the Linux operating system, In case you are facing any problem while installing then the comment section is all yours. Let’s know.




you are a hero
It did not create a shortcut for me…
Can someone help?
See this tutorial- https://www.how2shout.com/linux/how-to-create-desktop-shortcut-for-any-app-in-ubuntu-20-04-lts/
In the Shortcut file, change the Exec value to start wine Filezilla server