Recently, the Linux 5.8 version has been released with multiple fixes and updates. This tutorial will show the way to install the latest Linux kernel 5.8 on Ubuntu 20.04 LTS to test it. This means we are here manually upgrading the Ubuntu Linux kernel when it is not officially upgraded by the OS developer.
A kernel is the core layer not only in Linux but also in other operating systems that allow us to efficiently manage the hardware. For Linux it had developed by a developer Linus Torvalds and the same has been continued with the help of other community members. In the gap of a few months, they release a new version of Linx Kernel with bug fixes, newly added features, and devices support.
However, as we know most of the stable and popular Linux operating systems such as Ubuntu are not going to provide the latest kernel immediately unlike Arch-based Linux distributions. This also makes sense because when mainstream Linux OS that are powering so many home users, servers, and hosting services, they cannot just upgrade the existing kernel out of nowhere. They need to test their existing system regressively with the new and update Linux kernel, so that they can make sure the stability of the system and avoid any unwanted kernel panic or glitches.
This is the reason why most of them opt. long term supported kernel updates. However, that doesn’t mean we are bound not to update it manually our own system kernel version, yes we can absolutely do that.
In this article, we will show the same. We have Ubuntu 20.04 LTS the current latest version of the Ubuntu Linux and we will upgrade the base Linux kernel of the system to mainline one, for the same. The tutorial is also applicable for Ubuntu 18.04/18.10/19.04/19.10.
Note: Recommend to perform this tutorial first on a testing machine, for example, the one that is running on Virtual Machine to make sure nothing important will lose in case something wrong would happen.
Step to install Linux 5.8 kernel on Ubuntu 20.04 LTs
1. Open Command Terminal
On your Ubuntu 20.04 LTS PC or Laptop open command terminal either from the Applications or using the shortcut key Ctrl+Alt+T. If you are using the CLI version then you already there.
2. Update system
Before moving further just make sure all the existing packages on your system are up to date.
sudo apt update
3. Check the current Ubuntu kernel version
Well, before upgrading the Linux kernel, we should at least know on which version we are actually running our current system. For that simply on terminal run a command:
uname -sr
The out for the above command in our case was:
h2s@h2smedia:~$ uname -sr
Linux 5.4.0-42-generic
4. Download Latest Linux 5.8 kernel
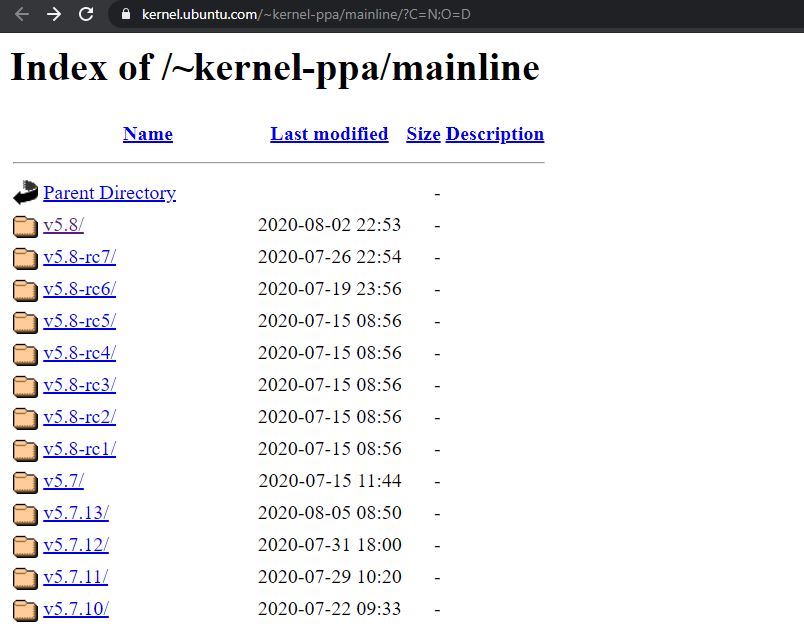
Open your system browser and use this link to see the latest available mainline kernel packages for Ubuntu. You will see all the available kernel-PPA, the latest one while writing this article was v5.8. Thus, we are going for that.
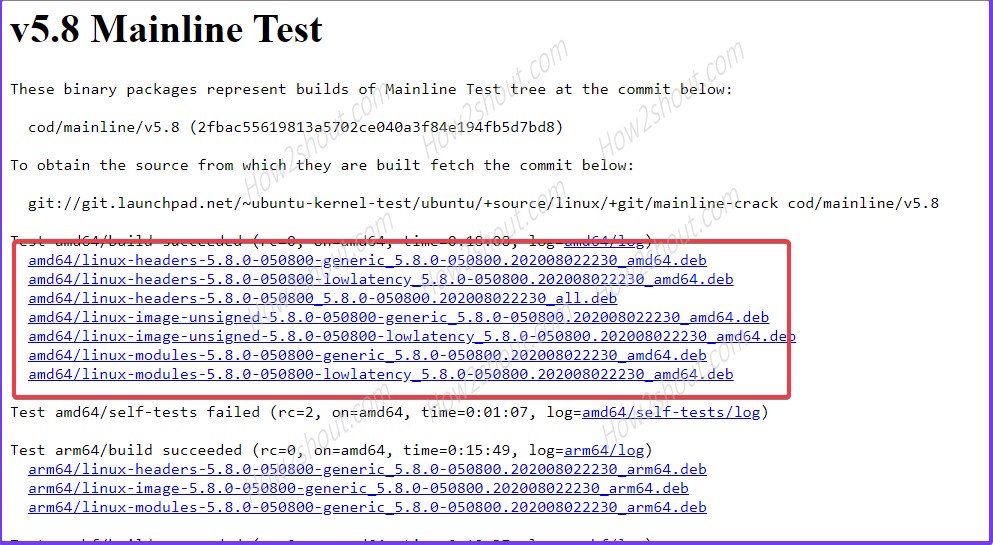
Now one by one click on the files showing for amd64 and download them on your system.
Note: You can opt between low-latency and generic files. If you don’t want the low-latency kernel than don’t download that, instead go only for generic files such as :
- linux-headers-5.8.0 * generic
- linux-headers-5.8.0 *_5.8.0_all.deb
- linux-image-unsigned-5.8.0 * generic
- llinux-modules-5.8.0 * generic
For low latency instead of downloading the generic one just get only the low-latency Debian packages for the kernel.
- linux-headers-5.8.0 * low-latency
- linux-headers-5.8.0 *_5.8.0_all.deb
- linux-image-unsigned-5.8.0 * low-latency
- llinux-modules-5.8.0 * low-latency
However, one will be common in both generic and low-latency is the Linux-headers-5.8.0*_all.deb
Well, if you want both the generic and low-latency then download all files and install them as we are doing here.
5. Install the Kernel Deb packages
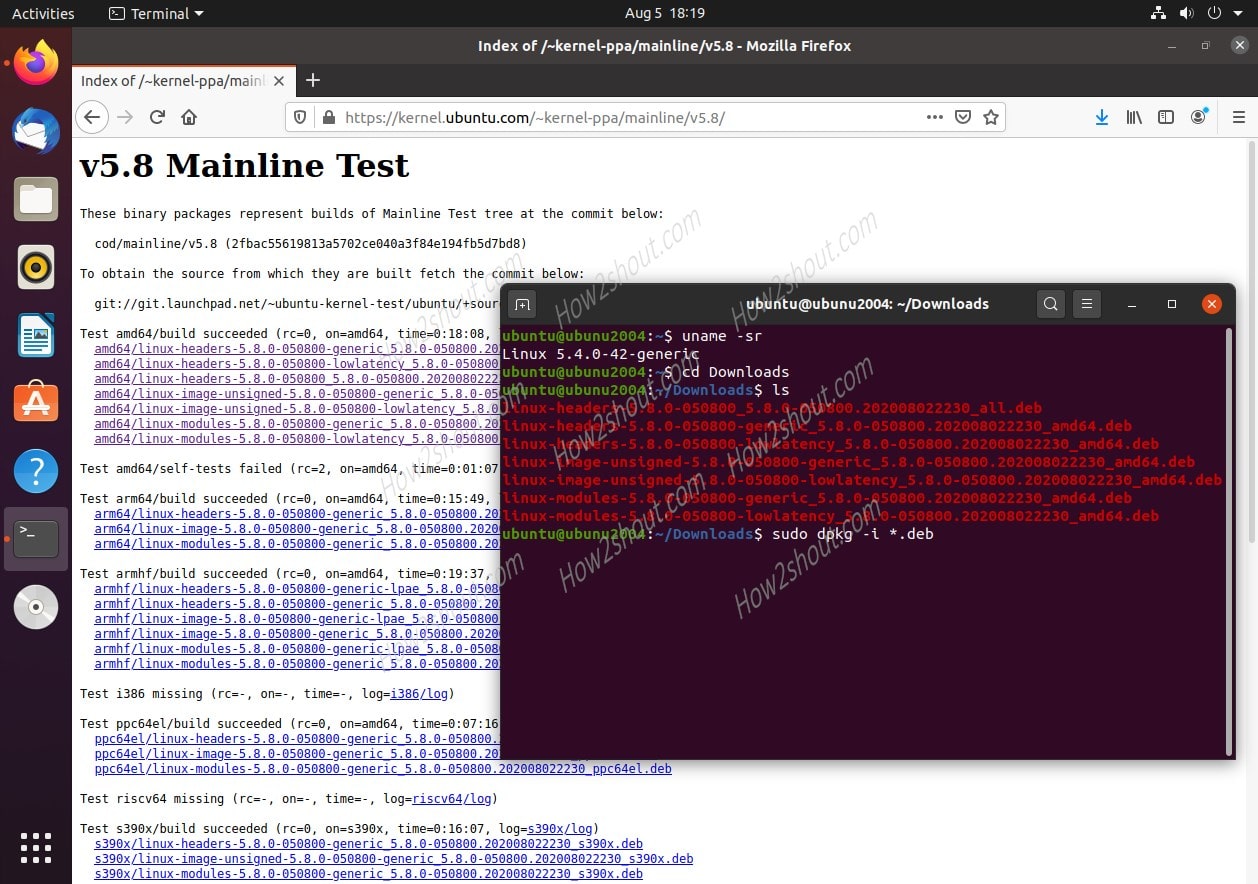
As we have downloaded it via browser, then by default it will be in Downloads folder unless and until you didn’t select any other. So, switch to the directory and install the Linux kernel packages.
cd Downloads
Instead of installing them one by one, here we are installing all the Kernel deb packages using a single command. Therefore, make sure apart from them there must not be any other deb package file otherwise it will install as well.
sudo dpkg -i *.deb
Wait for a few minutes, the installation process will take some time. Once done, then reboot the system to finally upgrade the current Linux kernel to the latest one.
reboot
6. Check updated Linux kernel Version
Once the system gets rebooted, again using the Command Terminal check the current Kernel version of the system. The command is:
uname -sr
So, this was the way to upgrade the current Ubuntu system Linux kernel, in case you want to rollback to the previous version then follow the further steps.
Downgrade the Linux Kernel on Ubuntu 20.04 LTS (optional)
In case you are facing some problem and want to get the default stable long term Linux kernel on your Ubuntu 20.04 system again then follow the steps.
Open Ubuntu 20.04 LTS Grub Menu
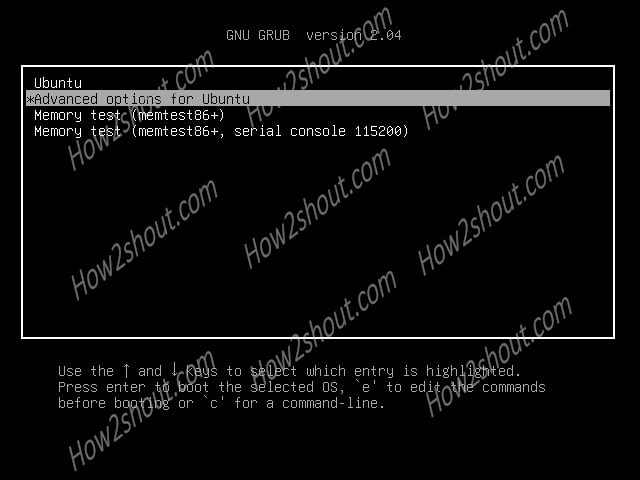
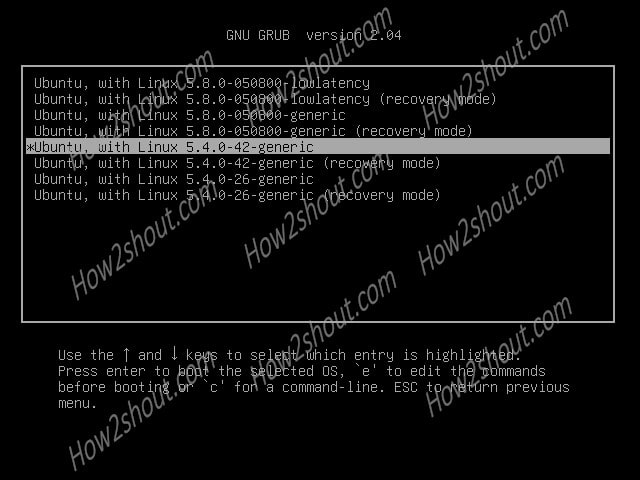
Reboot your system and open the Ubuntu Boot Menu. In case you due to fast boot you won’t able to get that then press the F8 Key immediately after restarting to access the Ubuntu GNU Grub Menu.
Select the “Advanced options for Ubuntu”.
Select the earlier default Ubuntu kernel
You will see the latest installed and the previously available Linux kernel, thus select the older one instead of the latest. Here, the default Linux kernel before installing the new one was 5.4-generic, thus we are selecting that.
Note: Don’t select recovery mode one.
Uninstall the installed Linux Kernel
So, the system would be booted in the older version of the Linux Kernel that you have selected on your system in our case it was v5.4. Therefore, to remove the v5.8 simply open the command terminal and run the following commands:
sudo apt remove linux-headers-5.8.0*
sudo apt remove linux-image-5.8.0*
sudo apt remove linux-modules-5.8.0*
Note: This will remove all files associated with this kernel version. If you want to remove any other one then replace the v 5.8.0 with that version number.
Again reboot the system. That’s it.
