If you already have a NextClouud server and now want to sync your files using Linux; then here are the steps to install the NextCloud sync client app on Rocky Linux 8 or Almalinux 8 using the command terminal.
Just like Google Drive or Dropbox, NextCloud also offers a dedicated app for both Pc and smartphones; to offer an easy way to manage and sync files. The app has a pretty nice interface, easy to use and operate. It offers the possibility to synchronize local files with the Nextcloud server. The easiest way to do this is using the client program available for Windows, macOS Linux, Android, iOS, or via the WebDAV protocol. By using Nextcloud-client, nothing changes for you in your daily work, since all files are still on your PC or the local data server as usual. If you are working from a location or with a device where your files are not available locally, you can access the files via a website. So you always have the access to your important on your own hardware without the interface of any third party.
Steps to install NextCloud Client app on Almalinux | Rocky Linux 8
The steps given here are also applications for all RedHat-based systems such as CentOS, Fedora, and more…
1. Download NextCloud client App Image
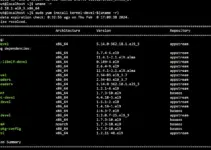
Unlike the server part, the NextCloud client is available as AppImage. Of course, we can install it using the EPEL repository but when we tried it, we got an error:
 Problem: conflicting requests
- nothing provides libQt5Gui.so.5(Qt_5.12.5_PRIVATE_API)(64bit) needed by nextcloud-client-3.2.4-2.el8.x86_64
Moreover, the version provided by the repository is also not the latest one. Hence we will go for the AppImage for the client available on its official website. Visit and click on the Linux AppImage.

2. Make AppImage Executable on AlmaLinux 8
By default the AppImage we have downloaded is not executable, for that, we have first need to make the file executable.
Switch to the Downloads folder, it is because whatever we get from the browser goes to this directory.
cd Downloads
to check whether the file is there or not, run.
ls
Once you confirmed, it is there, makes the AppImage executable:
chmod u+x Nextcloud-*-x86_64.AppImage
To run AppImage simply run:
./Nextcloud-*-x86_64.AppImage
—————————————–For creating shortcut———————————
3. Move AppImage to /opt
Well, to make sure we don’t delete the NextCloud App Image accidentally from the Downloads folder, let’s move it to /opt directory.
sudo mv Nextcloud-*-x86_64.AppImage /opt/nextcloud.AppImage
Download icon:
https://www.how2shout.com/linux/wp-content/uploads/2022/01/nextcloud-icon.png
sudo mv nextcloud-icon.png /opt/
4. Create NextCloud App Shortcut on Rocky Linux 8
Well, we cannot install AppImage like any other application that creates a Desktop and Application launcher shortcut. Hence, we have to create the shortcut manually.
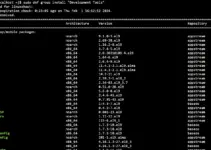
sudo dnf install nano -y
sudo nano /usr/share/applications/NextCloud.desktop
Add the following lines:
[Desktop Entry]
Name=Nextcloud
Exec=/opt/nextcloud.AppImage
Icon=/opt/nextcloud-icon.png
comment=cloud
Type=Application
Terminal=false
Encoding=UTF-8
Categories=Utility;
Save the file- Ctrl+O hit the Enter key, and then exit Ctrl+X.
If Desktop icons are enabled on your system then you can create the shortcut on the Desktop as well. Just run
sudo cp -r /usr/share/applications/NextCloud.desktop ~/Desktop/
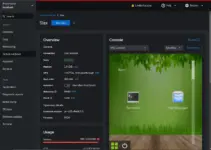
5. Run your NextCloud Sync client
Once all the above steps are completed. We car run the application from the launcher. Go there and search for Nextcloud, as its icon appears click to run the same.

6. Connect your cloud Server
Select “Login to your NextCloud” and enter the Ip-address or domain of the server where you have installed the Nextcloud. After that, the setup will open your system browser automatically.


7. Connect to your account
The setup will automatically open the system browser to get the Login page, click on the button given for that.

Enter the username and password of your NextCloud to log in.

Once you log in then hit the “Grant Access” button.

Soon your client application will show you the window to select the folder that item you want to sync automatically to your cloud server.

8. Sync Dashboard
Finally, you will have your client application ready to sync files and folders.

9. Uninstall or Remove
If you want to remove the NextCloud client in the future then execute the given commands:
sudo rm /opt/nextcloud.AppImage
sudo rm /opt/nextcloud-icon
sudo rm /usr/share/applications/nextcloud.desktop
Other Articles:
• Install NextCloud server on AlmaLinux 8 – Open Source personal cloud
• How to install NextCloud server on Rocky Linux 8
• Enable Minimize & Maximize buttons on Almalinux or Rocky…