vTiger is an enterprise CRM system based on the well-known SugarCRM. Also available in open source edition. And here we learn the steps and commands involved to install Vtiger CRM on Almalinux 8 Linux.
It is a web-based, platform-independent and modular Customer Relationship Management (CRM) software that is particularly characterized by good integration into existing systems and convinces with a clear process orientation. The professional and enterprise versions hosted by vTiger are paid, however, there is a free plan without some limitation, if some want to try out the CRM before going for the paid features. Whereas, if you have the expertise, or a team that can handle the CRM back-end, then go for the self-hosted open-source version of it.
Vtiger’s open-source edition is 100% free and developers can modify the source code as needed. In order to be able to use the software, the software must be installed either on hardware or on a virtualized machine. Many companies fail at this step because the necessary know-how is not available. If you are of those, here we are with the Vtiger CRM installation tutorial, which certainly helps you.
Steps to install Vtiger CRM on AlmaLinux 8
1. Requirements
• A fresh Almainux 8 server
• Not-root user with sudo access at least
• Apache, MySQL 5.1+ (default storage engine = InnoDB), PHP 5.2+
• 4 GB RAM, 250 GB Disk
2. Almalinux – DNF Update
Let’s run update and upgrade commands on your system to make sure all the installed packages are up to date. Along with that install some additional tools.
sudo dnf update && sudo dnf upgrade -y
sudo dnf install nano git
Also, don’t forget to disable SELinux:
sudo setenforce 0
sudo sed -i 's/^SELINUX=.*/SELINUX=disabled/g' /etc/selinux/config
Finally, restart:
sudo reboot
3. Install Apache (httpd)
We need a webserver to serve vTiger files, so for that, we will use the popular Apache webserver on AlmaLinux. For that use the DNF package manager.
sudo dnf install httpd
Start and enable Apache service
sudo systemctl enable --now httpd -y
Check status:
sudo systemctl status httpd
4. Get MySQL on AlmaLinux 8
As per the official documentation provided by the vTiger CRM, it required a MySQL Database along with PHP. Here we are using MySQL as a database because using MariaDB will give errors. However, if you already have a Database on some remote server and want to use that, then skip this step.
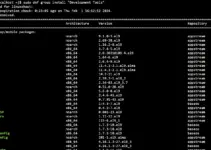
sudo dnf install mysql mysql-server -y
Start and enable the service
sudo systemctl enable --now mysqld
Secure Database
To disable the remote database login, anonymous user, and demo database.
sudo mysql_secure_installation
Follow the text-based wizard it offers to secure your database instance.
5. Create Database for vTiger CRM
Once you have the MariaDB up and running, we can create a database and user to use with vTiger for storing data.
Login:
mysql -u root -p
Note: Replace yourdatabase with whatever name you want to give the database. And youruser and yourpassword with username and password respectively, you want to use.
Create Database:
CREATE DATABASE yourdatabase default charset utf8;
Create user:
CREATE USER 'youruser'@'localhost' IDENTIFIED BY 'yourpassword';
Assign user to Database and give all permissions:
GRANT ALL PRIVILEGES ON yourdatabase.* TO 'youruser'@'localhost';
Exit:
FLUSH PRIVILEGES;
EXIT;
Now also edit
sudo nano /etc/my.cnf
Add the following line at the end of the file:
[mysqld]
sql_mode=ERROR_FOR_DIVISION_BY_ZERO,NO_ENGINE_SUBSTITUTION
Save the file Ctrl+O, hit the Enter key, and then press Ctrl+X to exit.
6. Install PHP 7 and its extensions
The latest PHP version available in the AlmaLinux 8 repository is Php 7.x, however, to get all extensions without any error, let’s use the Remi repository. Follow the given commands:
Enable Remi Repo
sudo dnf install -y https://rpms.remirepo.net/enterprise/remi-release-8.rpm
sudo dnf update
sudo dnf module reset php
sudo dnf module -y install php:remi-7.2
Install PHP
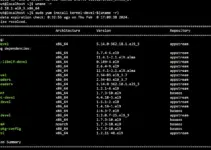
sudo dnf install php php-common php-mysql php-xml php-imap php-mbstring php-mcrypt php-gd
Change the PHP values:
sudo nano /etc/php.ini
Find and set the values for the following values as given:
memory_limit = 256M
upload_max_filesize = 64M
display_errors = On
log_errors = Off
Save the file Ctrl+O, hit the Enter key, and then Ctrl+X.
7. Download vTiger CRM on AlmaLinux 8
Well, we already have configured the LAMP server for installing vTiger on AlmaLinux. The next step is to obtain the files required to run open-source vTiger CRM.
git clone https://code.vtiger.com/vtiger/vtigercrm.git
Once the download is completed, move the files to var/www/html/ directory:
sudo mv vtigercrm/* /var/www/html
Give Apache user permission of the folder:
sudo chown apache:apache -R /var/www/html
Disable default welcome page:
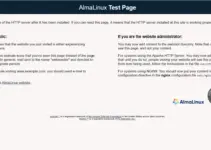
sudo sed -i 's/^/#&/g' /etc/httpd/conf.d/welcome.conf
Disable directory listing:
sudo sed -i "s/Options Indexes FollowSymLinks/Options FollowSymLinks/" /etc/httpd/conf/httpd.conf
Restart Apache:
sudo systemctl restart httpd
8. Open port 80 in order to allow outside access:
sudo firewall-cmd --zone=public --permanent --add-service=http
sudo firewall-cmd --reload
9. Start VTiger CRM Installation on AlmaLinux 8
Once you are down with all the above-given steps we can start the web-based configuration to complete the VTiger CRM installation.
Open your browser and point it to the IP address of the server where you have installed the VTiger CRM instance.
http://your-server-ip-address
Installation Wizard
If everything goes well, you will have the welcome page with the button “Next” to start the installation process.

Check for PHP Settings for vTiger CRM
On the next page, the setup will check that all the required PHP extensions and required values are in place. If you see all the values are present then click on the “NEXT” button.

Connect MySQL and create Admin User
This one is important because many people get errors at this point. So, First, go to Database Information and fill in the values of the Database you have created on Step 3 of this article such as Hostname, Username, Password, and DB Name. Well, if you are using MySQL on the same server where the vTiger CRM is running then the Hostname will be “localhost”.
After that add Admin user information you want to create for future login to CRM.


Select the Industry
Well, this can be done later, however, if you want then choose the type of industry you want to use the VTiger CRM on Almalinux 8.

Select Modules:
Few modules will appear, select all or the ones you want to enable by default on your vTiger CRM.


Conclusion:
In this way, we can install VTiger CRM on AlmaLinux 8 using the command terminal. If you get any error while configuring, let’s know the same, will try to give some solutions for the same. Don’t forget to Check the official vTiger documentation for more information.
Other Articles:
• How to install and use Firewalld on Almalinux
• How to Install VS Code-Server on AlmaLinux
• Install Centreon Monitoring on AlmaLinux 8
• How to install Vivaldi Browser on AlmaLinux