This tutorial will show the simple steps to install the MySQL Database Server on Ubuntu 22.04 LTS Jammy JellyFish using the command terminal.
Oracle MySQL is the popular open-source database server common to have in LAMP or LEMP environments. This relational database management system is used for many content management systems that are used to store the data, for example, WordPress.
The abbreviation “SQL” means Structured Query Language and the abbreviation “My” stands for the first name of the daughter of a developer of MySQL. There is no separate graphical user interface within MySQL, but this can be implemented using external programs. There are numerous free programs for this, which provide a graphical interface for administration and operation such as Workbench.
How to Install MySQL on Ubuntu 22.04 LTS
The steps given here to install the MySQL Server package and MySQL Client, on Ubuntu 22.04 LTS will be the same for previous versions of this Linux.
1. Update Apt Package Index
As we are about to use the system’s default repository to install the MySQL package, hence before moving further let’s run the update command.
sudo apt update && sudo apt upgrade
2. Install MySQL Server & client on Ubuntu 22.04
We don’t need to add any repository manually on our Ubuntu 22.04 because the packages to install MySQL Server are already available to download and set up using the standard repo of the system.
sudo apt install mysql-server
Note: The above command will install the both Server and client on your Ubuntu machine. However, if you are looking for a command to install only the MySQL client to connect remote database server using the command line, then here is the way to get it:
sudo apt install mysql-client
3. To Check the version
Once the installation is completed to check which version of the MySQL server is on your system, run the given command:
mysql --version
4. Run the Security script to secure MySQL
By default, after installation, our MySQL is insecure, to increase its security we can remove the demo database, limit remote access, and can set a root password. Here is the command to run:
sudo mysql_secure_installation
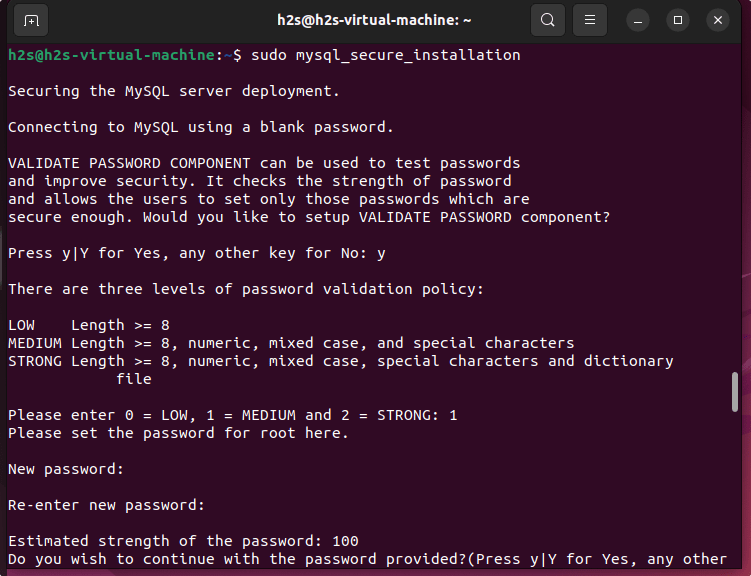
As you run the above command, it will give a text-based wizard to secure your Database server. Here are the questions it will ask for:
VALIDATE PASSWORD COMPONENT : Y
There are three levels of password validation policy:
LOW Length >= 8
MEDIUM Length >= 8, numeric, mixed case, and special characters
STRONG Length >= 8, numeric, mixed case, special characters, and dictionary file
As per the strength of the password you want, select the value and hit the Enter key.
0 = LOW
1 = MEDIUM
2 = STRONG
After that, enter the password you want to set for the MySQL root user.

If you get an error:
SET PASSWORD has no significance for user ‘root’@’localhost’ as the authentication method used doesn’t store authentication data in the MySQL server. Please consider using ALTER USER instead if you want to change authentication parameters.
Then first exit the script by pressing Ctrl+C.
Login to MySQL first:
sudo mysql
Set root password:
ALTER USER 'root'@'localhost' IDENTIFIED WITH mysql_native_password by 'MyPassword@123';
Note: Change MyPassword@123 with some strong password, you want to set.
Exit:
exit;
Run the Secure Installation script again.
sudo mysql_secure_installation
The script will ask these questions.
Enter the password for user root: type your set password and then press ENTER.
Change the password for root? Press N, then ENTER.
Remove anonymous users? Press Y, then ENTER.
Disallow root login remotely? Press Y, then ENTER.
Remove test database and access to it? Press Y, then ENTER.
Reload privilege tables now? Press Y, then ENTER.
5. Login Database Server as the root user
Once the installation and securing of the same is completed, we can log in to our MySQL server with a root user for creating database tables or users.
sudo mysql -u root -p
Enter the password you have set for it.
6. Manage MySQL service
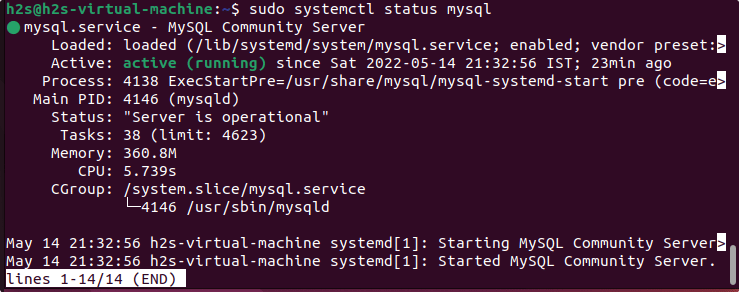
First, let’s see the command that we can use to check whether the service of MySQL is running perfectly fine in the background without any error. For that use:
sudo systemctl status mysql

To stop the service:
sudo systemctl stop mysql
To restart:
sudo systemctl restart mysql
To Enable with OS boot:
sudo systemctl stop mysql
To Disable:
sudo systemctl disable mysql
7. How to update?
If there is the latest version of MySQL is available for Ubuntu 22.04, then we can have it by simply running the system update and upgrade command i.e
sudo apt update && sudo apt upgrade
8. Uninstall or Remove MySQL from Ubuntu 22.04
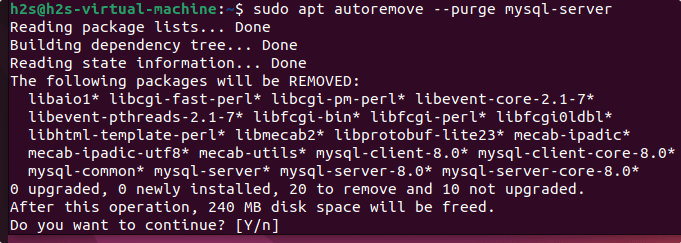
Due to some reason, if you don’t require the MySQL server on your system, then we can remove it completely from our Ubuntu 22.04. However, before that make sure you have a backup of your databases if something important is there.
sudo apt autoremove --purge mysql-server

Other Articles:
• 4 Ways to Check MySQL or MariaDB version on Linux
• How to install phpMyAdmin on Ubuntu 22.04
• Install Backdrop CMS on Ubuntu 22.04
• Install PostgreSQL Server & Client on Ubuntu 22.04
• How to install VirtualBox on Ubuntu 22.04 LTS


After I completed Step #4 I typed the command in Step #5 and I got the following error that I cannot resolve:
ERROR 1045 (28000): Access denied for user ‘root’@’localhost’ (using password: NO)
Can you please provide some help/direction on how to resolve this error? Thanks.
Use
sudo mysql -u root -p
I got my problem resolved. Thanks.
Got the “has no significance” error, followed instructions to work around. But now there is no auth_socket from sudo. Password required every time.
How can I turn auth_socket back on for the sudo user or root?
Hey aharown, I got the same problem and solved by this:
sudo MySQLUNINSTALL COMPONENT 'file://component_validate_password';in case you run sudo mysql_secure_installation during the installation. This will allow you to set an empty string to any user’s password.
ALTER USER 'root'@'localhost' IDENTIFIED WITH mysql_native_password BY '';exit mysql and restart the service=
sudo service mysql restartYou should be able to login using your root by
mysql -u root -pand just hit ENTER if afterbeing asked for the password.
Thanks. I found a discussion somewhere that offered this option also, which worked for me:
Log into mysql with password, then
ALTER USER ‘root’@’localhost’ IDENTIFIED WITH auth_socket;