Once we install Rocky Linux on Virtualbox, it is not going to adapt the screen size automatically. Also, you won’t be able to access some other features such as Host to Guest clipboard and drag & drop of files. For that, we have to install VirtualBox guest additions ISO on Rocky Linux 8.
Furthermore, VirtualBox Guest Additions installation will also help in improving the performance of Virtual Machines.
VirtualBox Guest Additions installation on Rocky Linux 8
Well, set up Guest Additions on the Rocky Linux we need EPEL repo & DNF manager, purely command line.
Step 1: Add Epel Repository
Open Command terminal and first-run system update command that is:
sudo dnf update
After that add the Extra Packages for Enterprise Linux, in short, known as EPEL using a simple command:
sudo dnf install epel-release
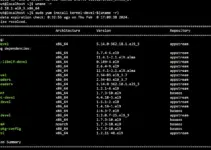
Step 2: Install Kernel headers and DKMS
The next thing is with the help of the EPEL repository we will install several tools; kernel and DKMS (Dynamic Kernel Module Support) to build and install the Kernel module required to install the Guest Addition feature VirtualBox on AlmaLinux 8 distro.
sudo dnf install gcc make perl kernel-devel kernel-headers bzip2 dkms
Give your permission to install by typing Y and hit the Enter Key.
Step 3: Update Rocky Linux Kernel
Although, the system will perform the update of the kernel automatically to make the changes, however, sometimes it may not. Thus, it is better to run the Kernel update command before restarting the system
sudo dnf update kernel-*
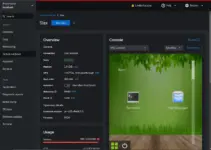
Step 4: Insert Install Guest Additions CD Image
Go to the Virtualbox menu >> Device and then select the “Install Guest Additions CD Image…” option.

Step 5: Install VBoxLinuxAdditions.run
Now, in your terminal mount the CDROM that contains the script to install Virtual Guest Additions on Rocky Linux
sudo mkdir -p /mnt/cdrom
sudo mount /dev/cdrom /mnt/cdrom
cd /mnt/cdrom
sudo sh ./VBoxLinuxAdditions.run --nox11
Click on the Devices given in the Oracle VirtualBox menu and then click Share Clipboard and select “Bidirectional”. In the same way, select Drag & Drop and choose the Bidirectional option.

Step 7: Restart Rocky VM
Finally, to apply the changes made by the Virtualbox Guest Additions and getting its features on the Guest, simply restart the system. You can use the below command for that.
sudo reboot
Step 7: Confirm Guest Additions
After restarting the Rocky Linux virtual machine, check whether the VBox guest additions have been installed successfully or not:
lsmod | grep vboxguest


good documentation
thx
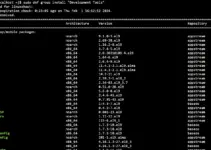
also had to run sudo yum groupinstall “Development Tools”