
Windows 10 Pc’s automatically updates itself without your permission as soon as it get any new updates. With the launch of the Windows 10 the Microsoft regularly forcing these updates on the user. Unlike the Windows 7, it is very tricky for a common user to disable Windows 10 update manually. Because they don’t know how to stop or find the Windows 10 update disable option. It’s like Microsoft has hidden the option that can use to disable Windows 10 update processing.
Unwanted updates of Windows 10 can consume your valuable internet data packs without your consult. I have been facing this problem from very long time and finally got some methods to manage and disable Windows 10 update. Here’s how to stop Windows 10 automatically downloading updates.
There are different methods to stop the Windows 10 updating process but it depends on the version of Windows 10 you are using. Like if you are using the Windows 10 professional, Enterprise and Educations editions you can turn off the updates using some advance options such as the group policy and registry settings and if you are using the Home edition of Windows 10 you can simply disable Windows 10 Update from automatically downloading.
Method 1: Set Metered on Specific connection to prevent Windows 10 Automatic downloading updates
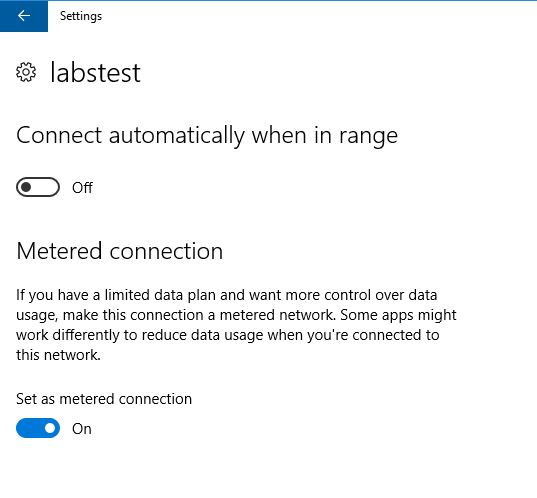
If you are using cellular internet data connection or just want to save your Ethernet or Wifi bandwidth then just ‘Turn on‘ the metered connection option. When the metered connection setting is on for a particular connection, it will control the data usage and automatically stops the Windows 10 updates. To set metered connection here are the ways:
Enable Metered connection on Wifi:
Step 1: Go to setting select the Network & Internet > Wi-FI, and click “Manage Known Networks”.
Step 2: Now select the Wifi network and click on the properties and set the metered connection on.
Note: If you are using the Ethernet connection then first you have enabled the metered connection using the registry hacks.
How to enable Metered connection on ethernet or Cellular connection in Windows 8 and 10
Step 1: Go to search panel and search for Regedit and run it.

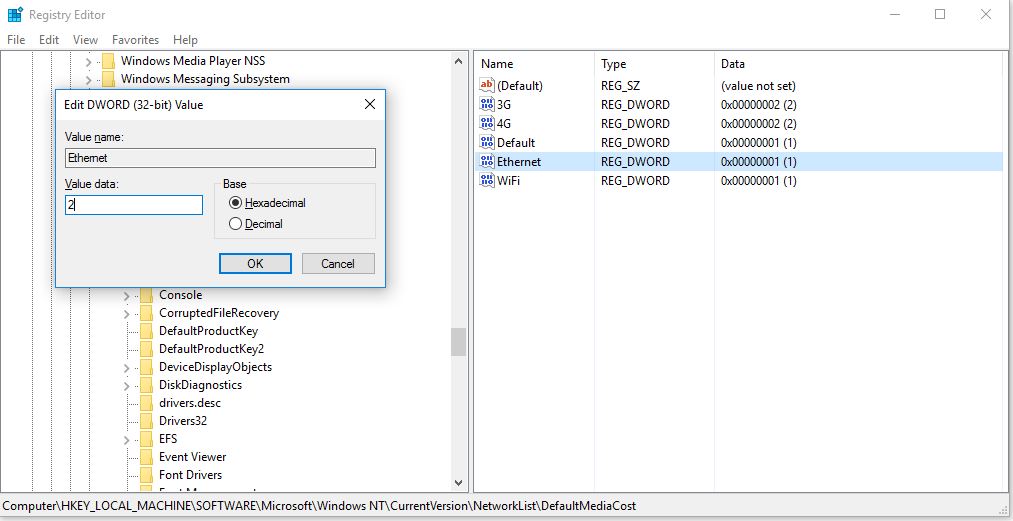
Step 2: In the registry navigate for the DefaultMediaCost
HKEY_LOCAL_MACHINE\SOFTWARE\Microsoft\Windows NT\CurrentVersion\NetworkList\DefaultMediaCost
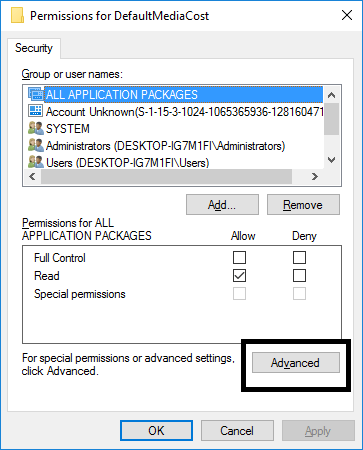
Step 3: Now on the DefaultMediaCost key, right click and select Permissions. A permission windows will open, now click on Advance option as shown in the screenshot.
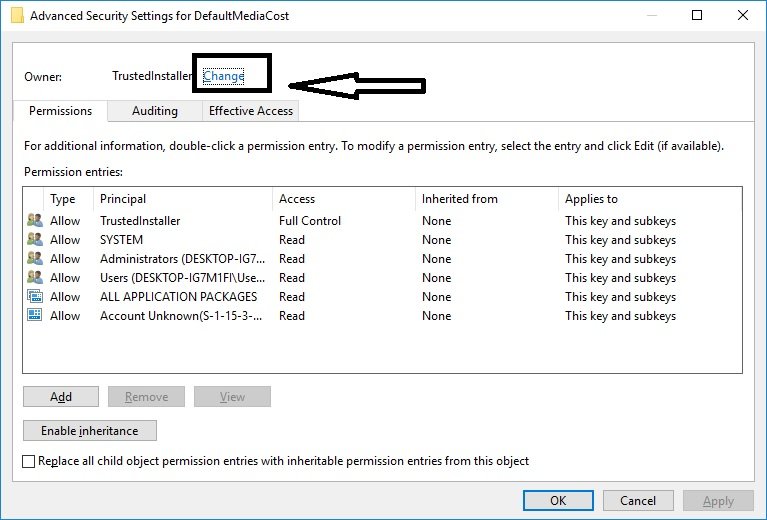
Step 4: The Advance security settings for DefaultMediacost will open. At the top, you will see an option called TrustedInstaller, click on change Link.
Step 5: The Select User or Group windows will open and click on Advanced option, then click Find Now from search results select the Administrators user and click on OK.

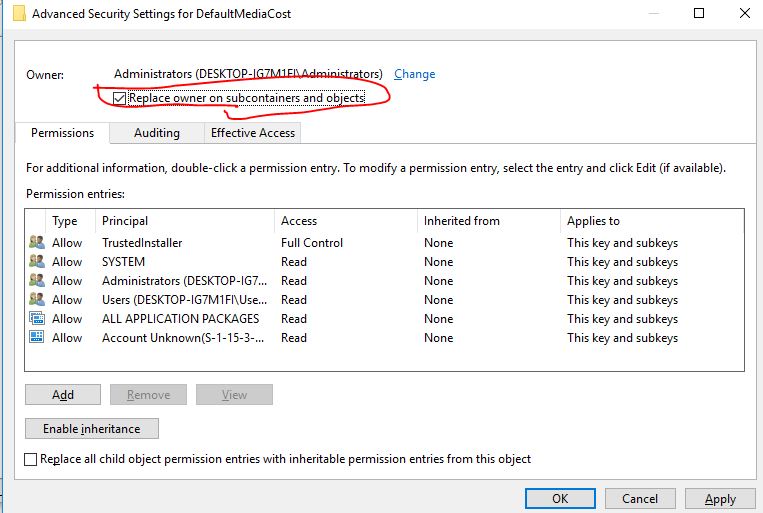
Step 6: Now at the top check the Replace owner on subcontainers and objects option and click ok.
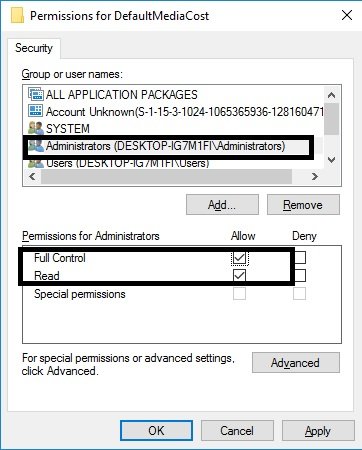
Step 7: Select the Administrators group and then make sure to check the allow Full Control box from Permissions for DefaultMediaCost Window and click Ok.
Step 8: Now from the DefaultMediaCost key double click on the Ethernet entry to change the value. Change its value from data value 1 to 2. Click OK
- The Data Value 1 means non-metered connection
- The Data Value 2 means metered connection
Method 2: How to disable Windows 10 Update Service
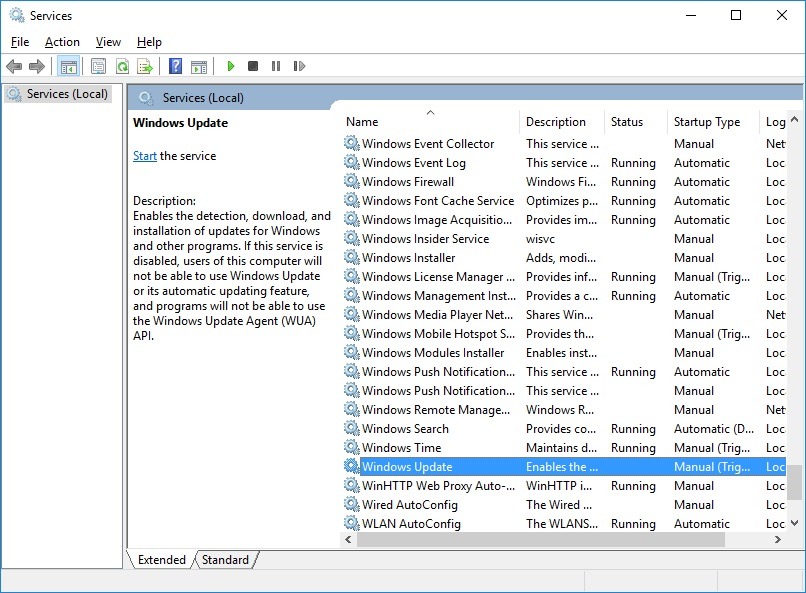
Step 1: The Windows 10 update is a process just any other windows 10 process, so you can stop it manually. Press Win+R keys simultaneously to open the Run Command service and type services.msc and press enter.

Step 2: The all services list available on Windows 10 will show. Now find out the Windows Update service and double-click to open it.
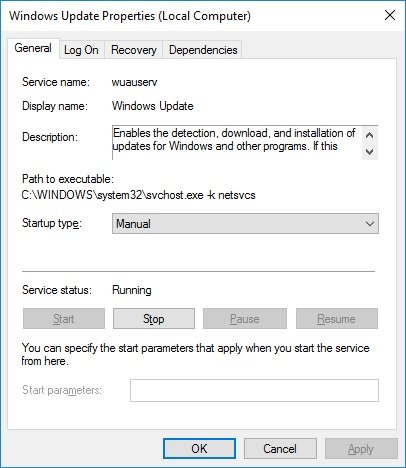
Step 3: A Windows update properties window will open, under the General tab, you will the ‘Startup Type‘ change it to Disabled. If in future you want to enable the Windows automatic update service just change the ‘Startup Type: to ‘Automatic’.
Method 3: Disable Automatic Update Using Group Policy only for Windows 10 Pro users
Step 1: Open the Run command and type:
gpedit.msc
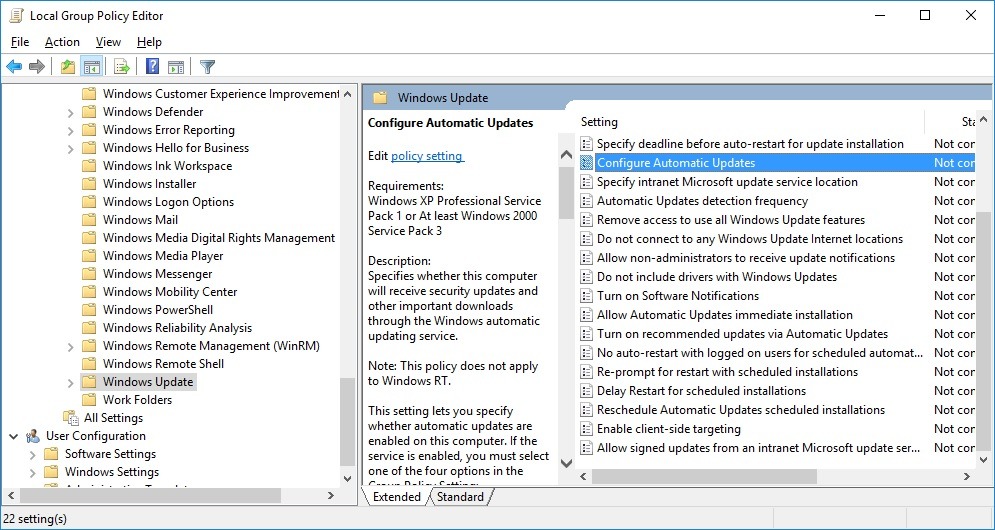
The Group Policy editor can access only by Professional, Enterprise, and Education editions of Windows 10 users. Now go to Administrative Templates->Windows Components->Windows Update and from the next window as shown in the screenshot select the Configure Automatic Updates option double click to open the settings.
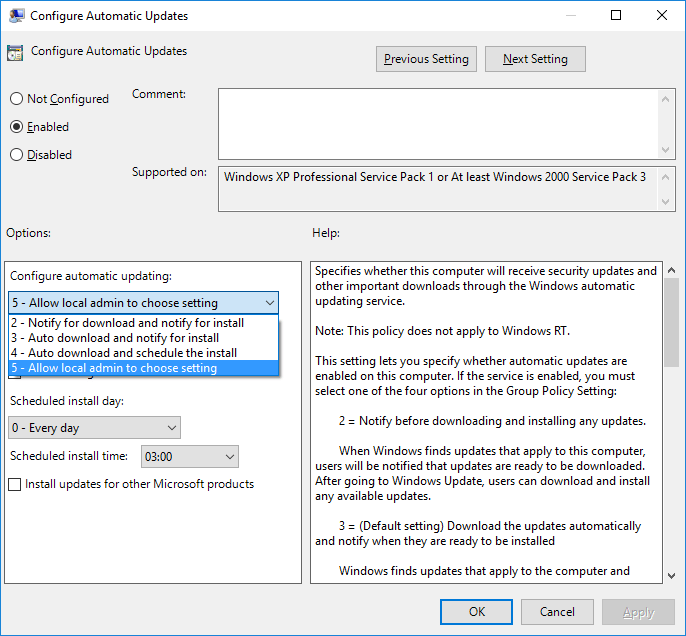
Step 2: A Configure Automatic Updates will open, now you will see an option called ‘Enabled’ select that. Now come to options and select your preferred settings. It provides four type of settings
- Auto download and notify for install
Windows finds updates that apply to the computer and downloads them in the background (the user is not notified or interrupted during this process). When the downloads are complete, users will be notified that they are ready to install. After going to Windows Update, users can install them.
- Notify for download and notify for install
When Windows finds updates that apply to this computer, users will be notified that updates are ready to be downloaded. After going to Windows Update, users can download and install any available updates.
- Auto download and schedule the install
Specify the schedule using the options in the Group Policy Setting. If no schedule is specified, the default schedule for all installations will be every day at 3:00 AM. If any updates require a restart to complete the installation, Windows will restart the computer automatically. (If a user is signed in to the computer when Windows is ready to restart, the user will be notified and given the option to delay the restart.
- Allow local admin to choose the setting
In this option, the local administrators will be allowed to control the Windows Update. Local administrators will not be allowed to disable the configuration for Automatic Updates.
Other options to disable windows 10 update
You can also set the status of the Configure Automatic Updates to Disabled. After selecting this option, any updates that are available on Windows Update must be downloaded and installed manually.
If the status is set to Not Configured, use of Automatic Updates is not specified at the Group Policy level. However, an administrator can still configure Automatic Updates through Control Panel.
Method 4: Disable Automatic Updates Using Registry only for Windows 10 Pro users
The method is a very advanced method and works on disable the Windows updates using the registry. This method seems to work only in the professional version of Windows 10. Just download these Windows 10 registry hacks and double click to install them in the registry file.
Disable Windows 10 update is not a wise thing as each update meant to secure and stable the Windows. But if you have limited data or want to save the bandwidth you can follow one of the suitable methods mention above. We recommend using the Metered connection option, as it is easy to use and control.


I think that it would be better if we choose to configure our active hours. Completely disabling updates will probably make us a bit more vulnerable to things like zero day attacks.