Amazon AWS has already an official tutorial on deploying a WordPress on AWS Elastic Beanstalk, which is a little bit perplexed for noobs. Thus, we thought to create a new article “WordPress on AWS Elastic Beanstalk” in a simple manner as we could.
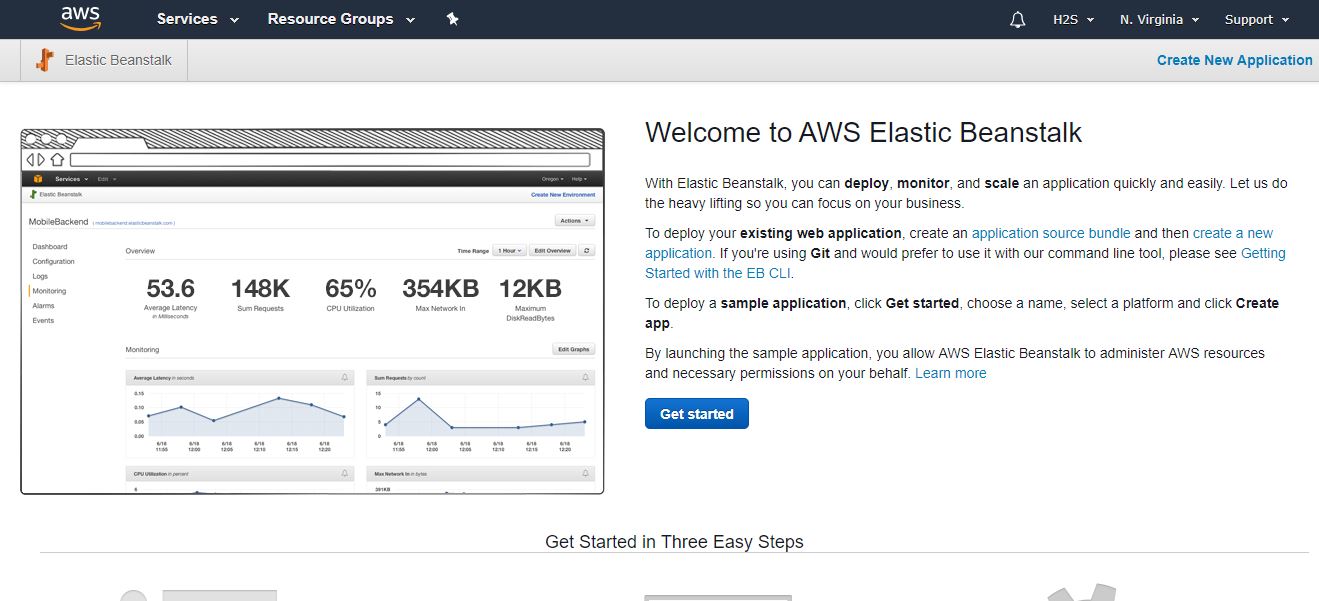
What Is AWS Elastic Beanstalk?
Amazon Web Services (AWS) is a behemoth public cloud that offers a wide range of cloud computing services; each of them meant to accomplish tasks in different areas. One of them is AWS Elastic Beanstalk; it is meant to quickly deploy applications in the AWS Cloud which is less intricate as compared dealing with regular cloud computing stuff. One can use AWS Elastic Beanstalk with less restricting choice and more control.
We can upload applications of our choice such as WordPress to Elastic Beanstalk to run them efficiently and in a scalable model. Another benefit of using Beanstalk, it reduces the admin burden by automating the application monitoring, handling other details such as storage load balancing and scaling.
While establishing or creating an app, the platform which one can choose to install his codes are Go, Java, .NET, Node.js, PHP, Python, and Ruby. Docker option is also there. Apart from AWS Management Console one can handle or install the application using the AWS Command Line Interface (AWS CLI), or eb, a high-level CLI designed specifically for Elastic Beanstalk.
Here we are specifically talking about WordPress installation on AWS Elastic Beanstalk. See the step by step guide.
Step 1 Sign up to AWS Elastic Beanstalk to install WordPress
The first thing which we need to install WordPress on Elastic Beanstalk is an account of Amazon Web service. If you already have an AWS cloud account then move to the next step. Whereas those are new to it and just want to experience or learn Beanstalk they need to create an account. The first 12th month of basic Amazon AWS cloud tier is free; yes, you must have a credit card to sign up.
Step 2: Create a New Application on Elastic Beanstalk
AWS Elastic Beanstalk has two types of environment tiers to support different type of web application. Web server environment meant for those want to install standard web applications that listen for and process HTTP request, typically over 80. On the other hand, the Worker environment is there for those applications that process long-running workloads on-demand or performs tasks on a schedule.
Here is the ElasticBeanstalk page (link); use this link to Create a New Application for WordPress.
Step 3: Create Environment for Elastic Beanstalk
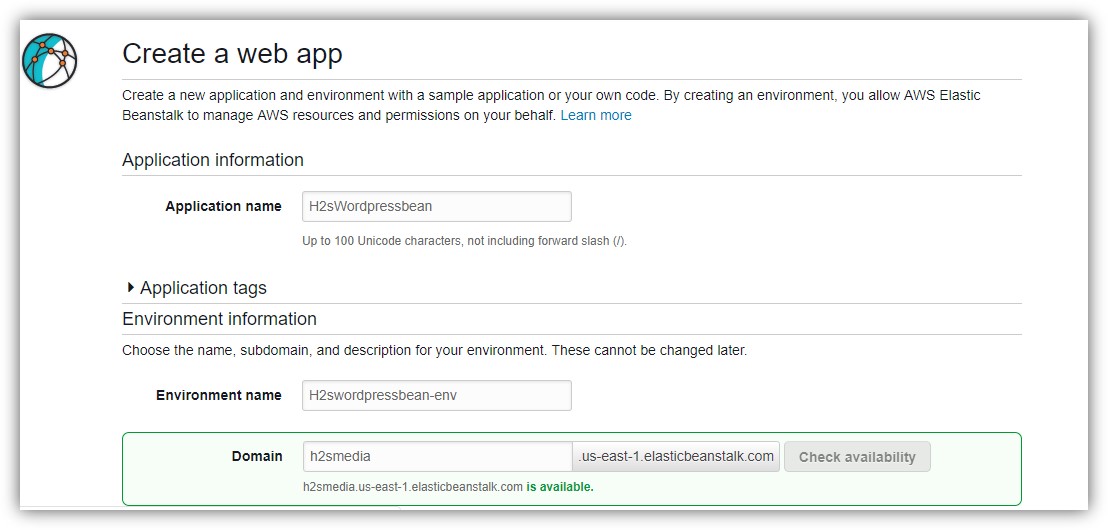
When you click the above-given link, immediately a section will open from where we can easily create a Web app for our WordPress.
Give some Application name.
Some domain name that you want to use as subdomain initials on the elasticbeanstalk.com.
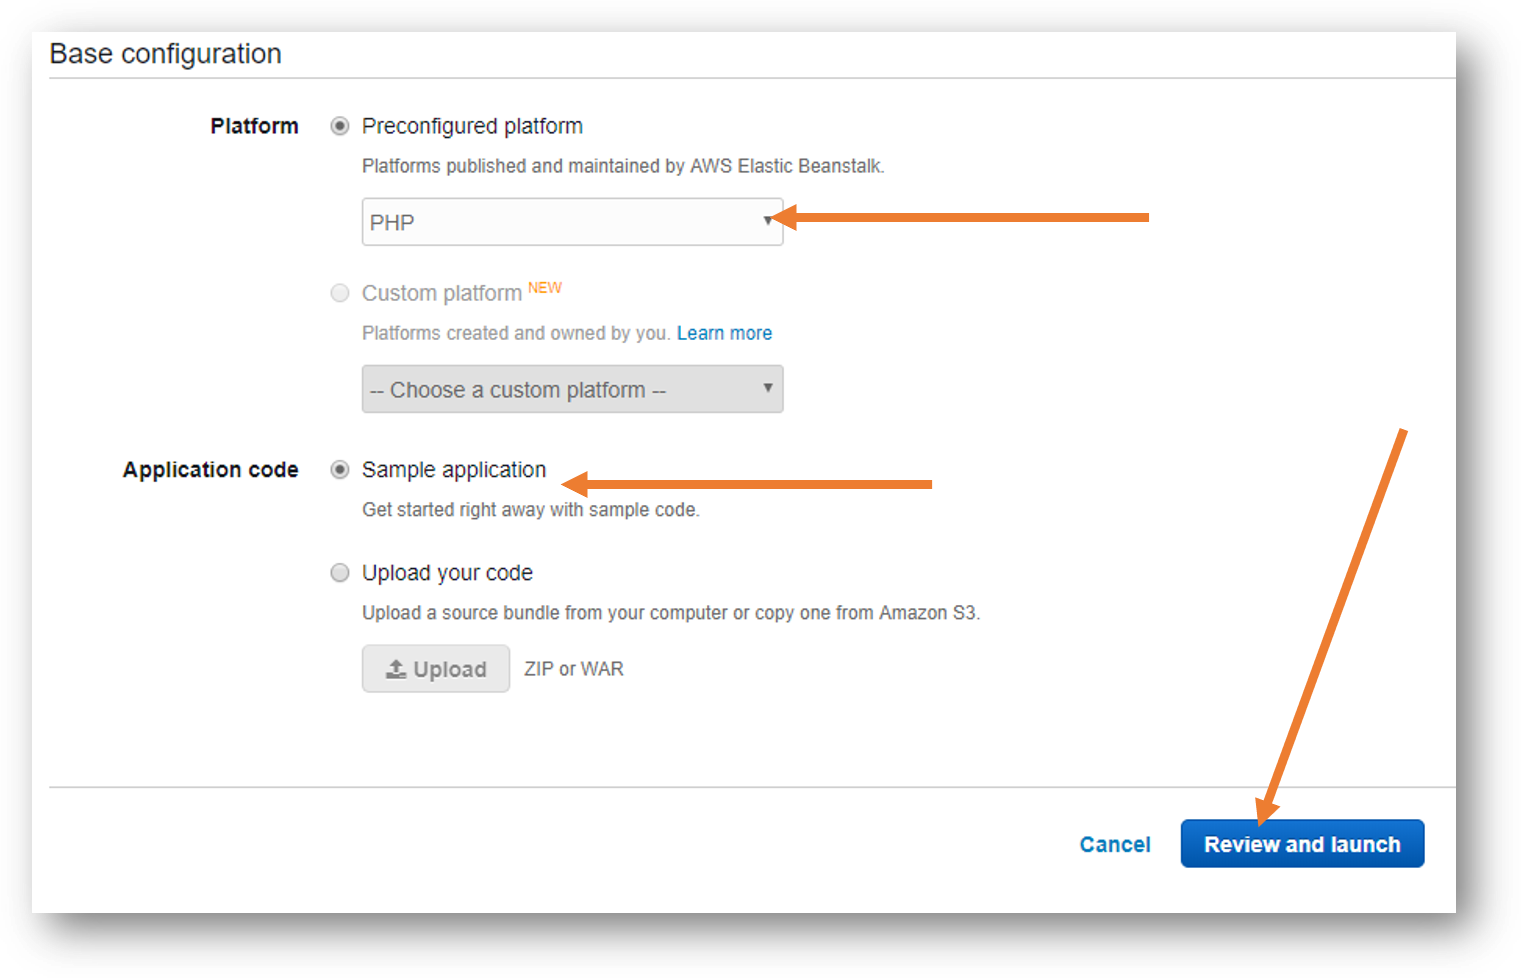
Now scroll down to Basic Configuration
Therefrom click on the drop-down box and choose PHP as a preconfigured platform.
Finally, Click on Review and Launch button.
Step 4: Additional AWS Elastic Beanstalk settings for WordPress
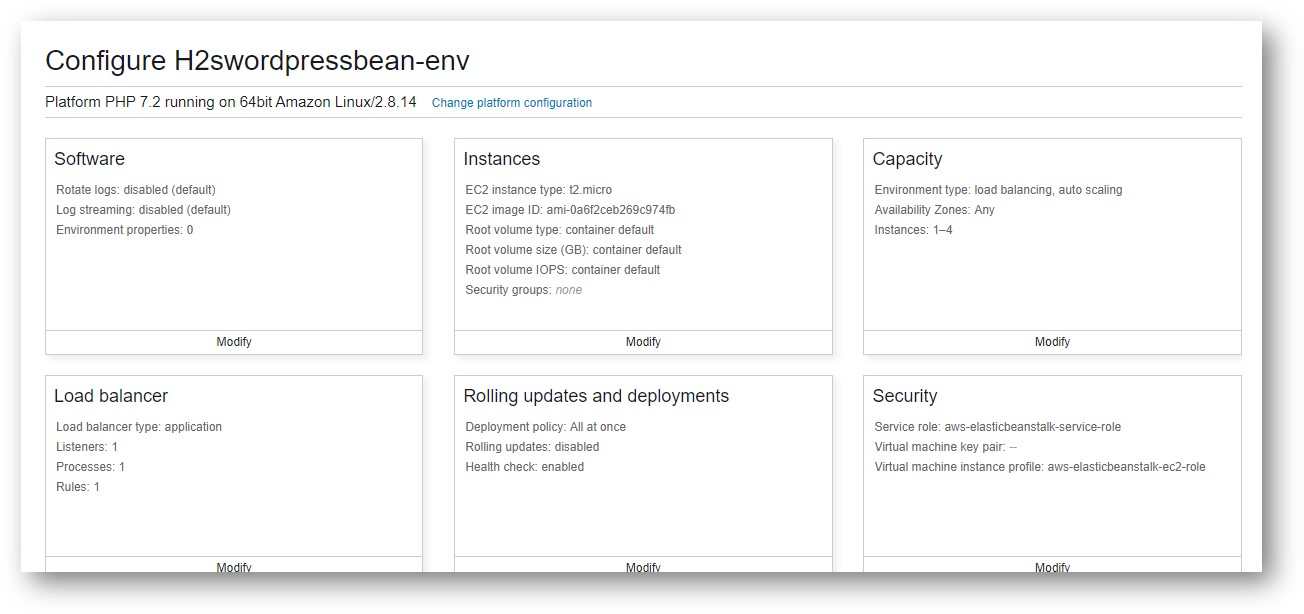
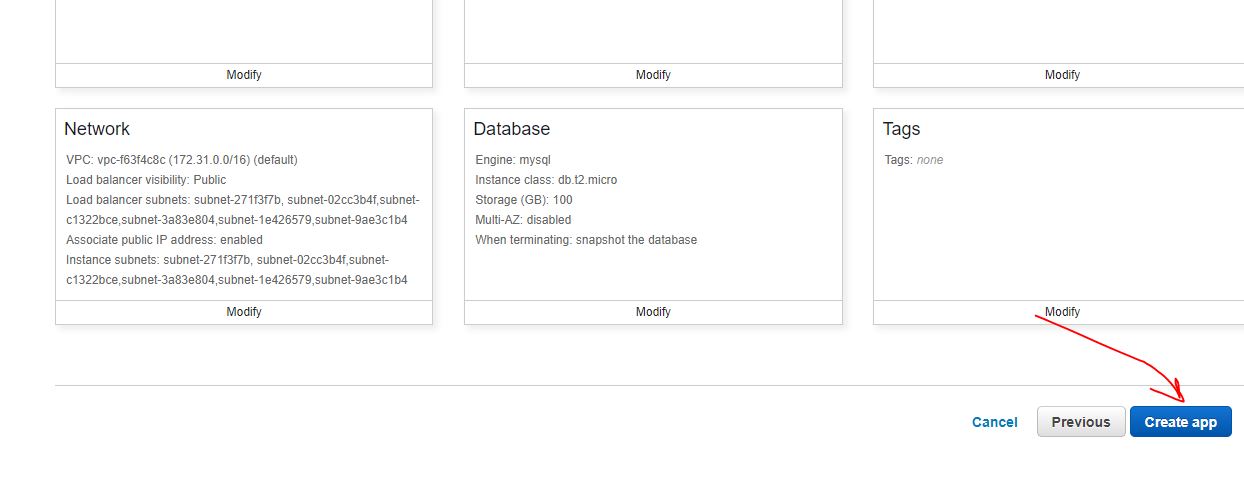
The moment we click on Review and Launch button, an additional configuration page will open which is very important. This is the section from where we can configure, network, storage, security, Database, monitoring and more for WordPress that we intended to install on Beanstalk.
Go to sections given below which we need to set up to install WordPress on Beanstalk. To modify them just click on the Modify link given below of every card of different configuration verticals.
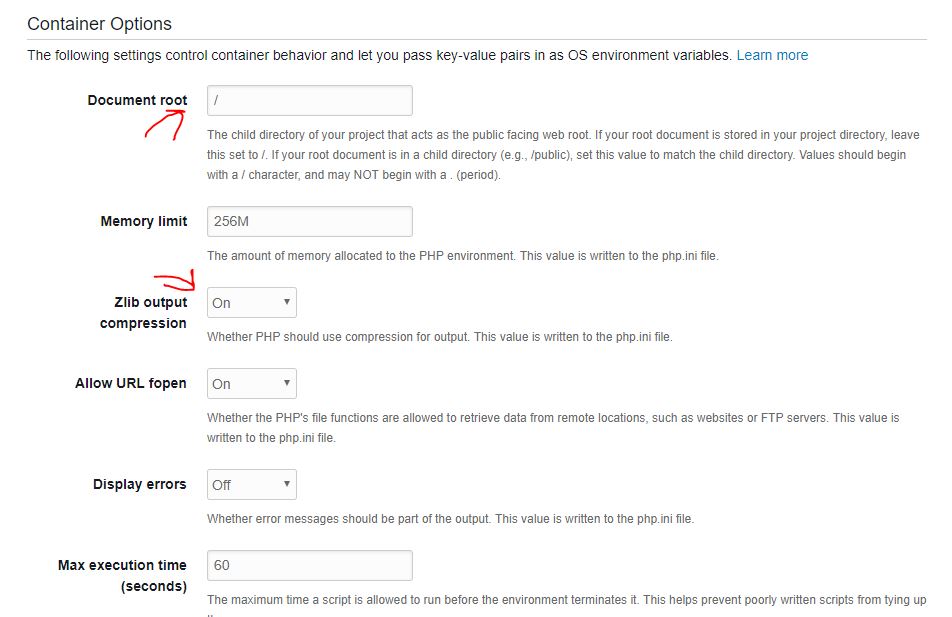
Software
Document root: The child directory of your project that acts as the public-facing webroot. If your root document is stored in your project, leave this set to /. If your root document is in a child directory (e.g. /public), set this value to match the child directory. Values should begin with a / character and can’t begin with a . (a period).
Thus, if you want to install your WordPress CMS in some directory, for example, www.example.com/wordpress then set Document root directory to /wordpress. And if you want WordPress or any other project to root directory then type / only.
- Here we are installing WordPress to root directory i.e / you can see in the below screenshot.
- Turn on the Zlib output compression.
Leave the rest of the settings as it is and click on the Save button.
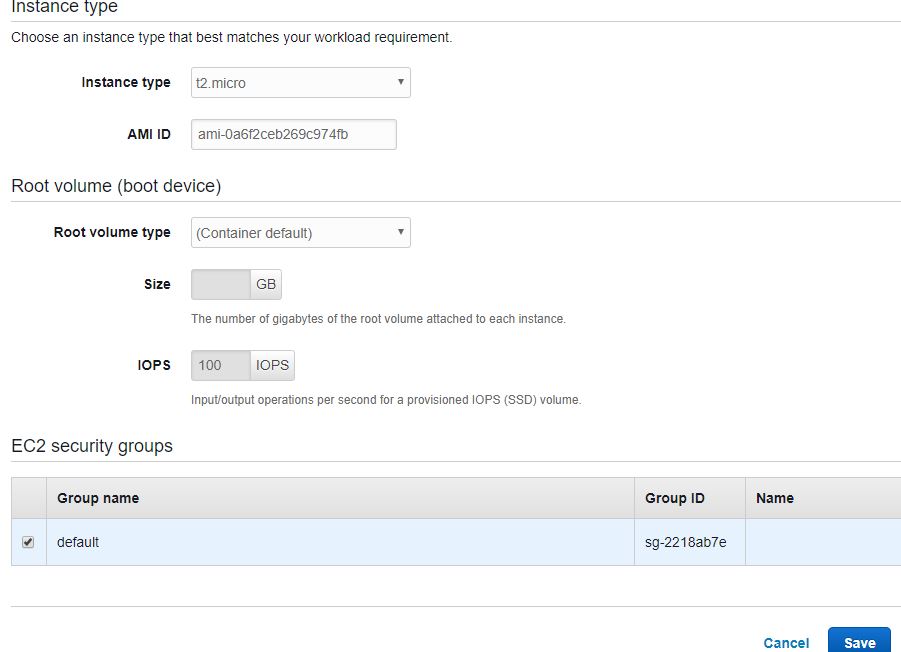
Instances
Under instance, you change the instance type according to your workload or traffic you about get on your WordPress website. By default for free AWS plan, the t2.micro will be selected.
Click on Default security group checkbox and save the configuration.
Security
Leave the Beastack configuration page opened as it is.
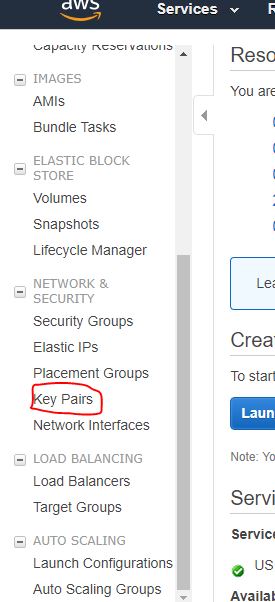
In order to access the Elastic Beanstack from SSH, we have to assign a private SSH key to it. Thus, click on this link.
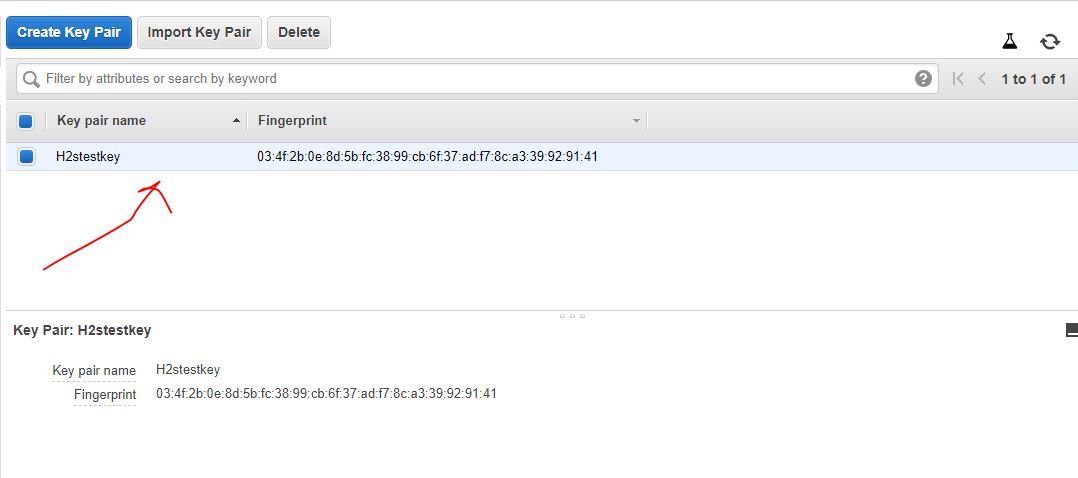
From the left side panel, click on the Key pair given under Network and Security section.
Now click on the Create Key Pair.
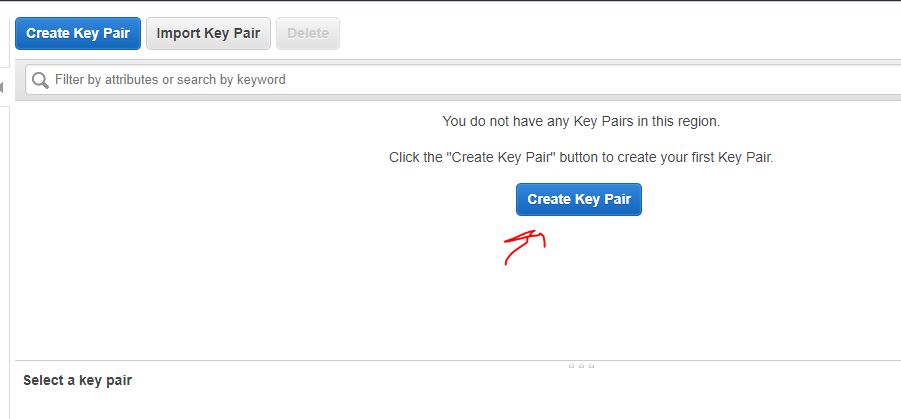
Give some name to Key pair, here we are giving it an H2stestkey. As you generate a private key on AWS elastic, it will automatically pop-up to download. Save it somewhere securely, we will need it to connect Beanstalk later using SSH.
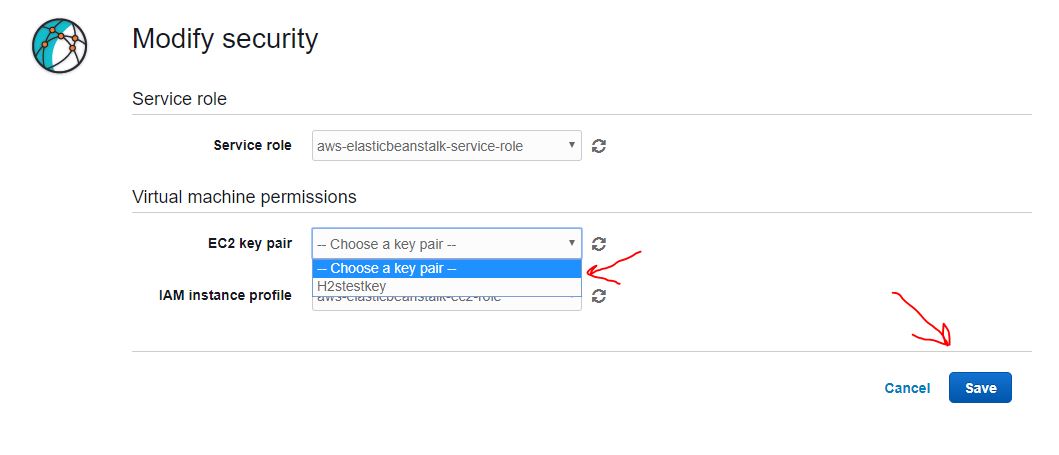
Get back to the Elastic Beanstalk configuration page and click on the Modify button given under the Security Card. Now under the Virtual machine permissions there will an option EC2 key pair, click on drop-down box given in front of it and select you created SSH private key to attach it with Elasticbeanstalk Virtual instance.
Click on the Save button.
Notifications
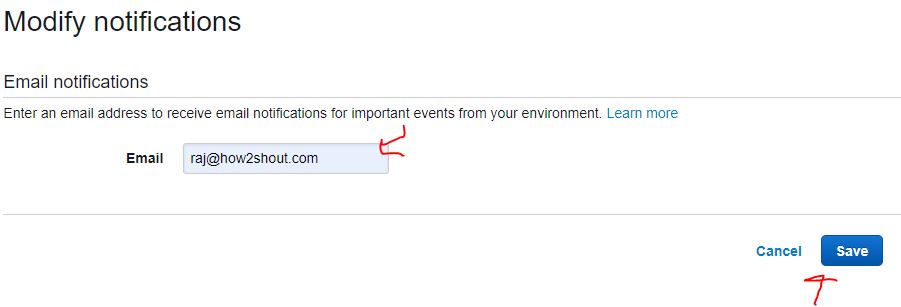
To get the notifications for your instance, application or updates events from your environment, modify the Notifications setting card and type the email ID which you want to assign to it. And Save the same.
Network
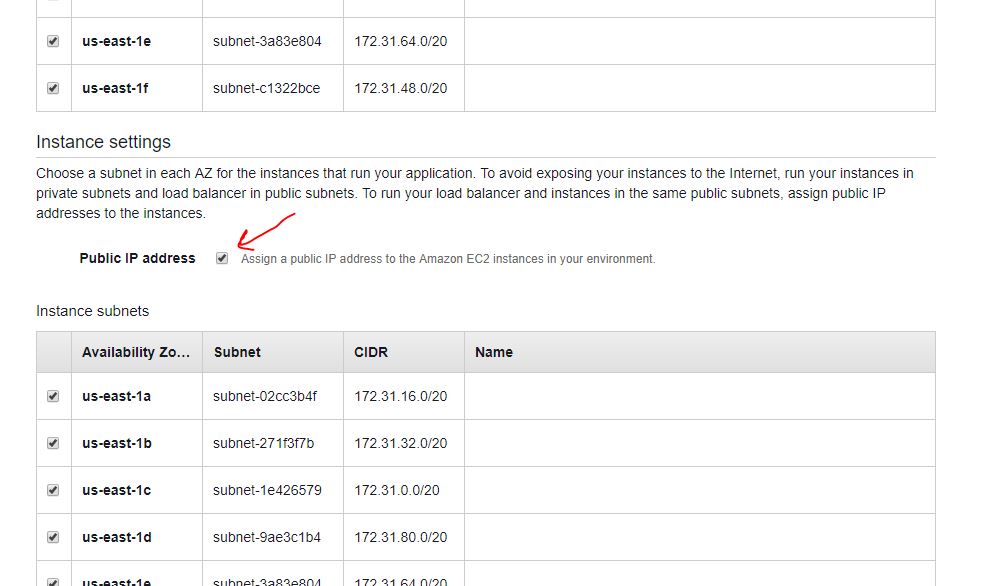
When you Modify the Network settings, it will offer pre-defined Virtual private cloud (VPC) adapter and subnets. Select all subnets and an option to assign or attach a Public IP to the installed Elastic Beanstalk instance and save it.
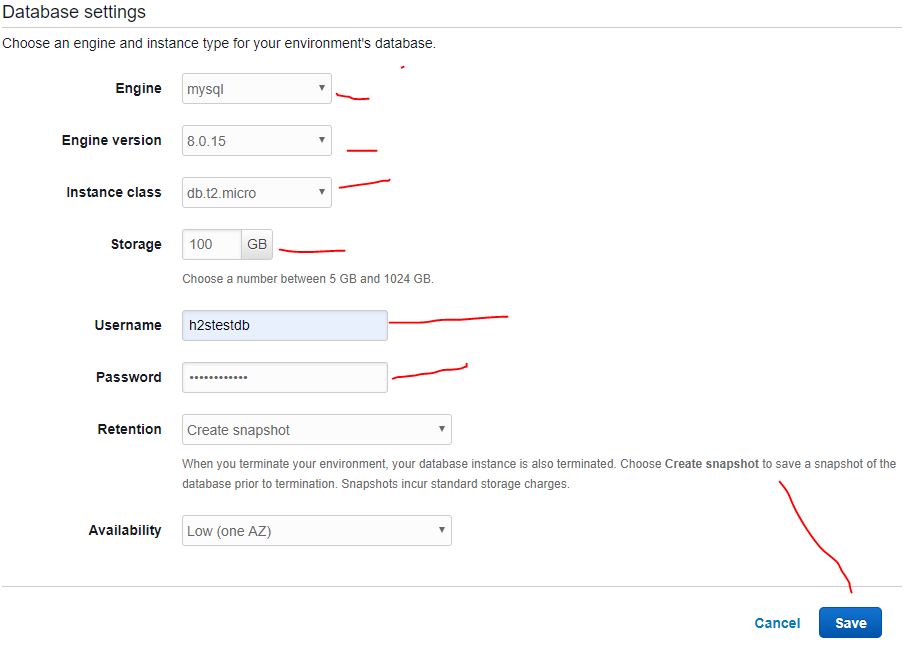
Create Database for WordPress on Amazon Elastic Beanstalk
Now, go to Database card and modify it. The setup will fetch available Amazon RDS SQL databases available for configuration. AWS Elastic Beanstalk provides database hostname, username, password, table name, and port.
1. Select the type of Database you want to use for your WordPress, here we are selecting the command one MySQL’s latest version.
2. Engine Version: Multiple versions of MySQL database, select the one which you needed in case you are importing some old database. However, here we are using the latest available MySQL version that is 8.0.15.
3. Instance Class: It means what kind of resource you want to choose for your Database. In case the database is going to store a very large amount of data and a high number of requests. Choose accordingly.
4. Storage: Amount of space you would like to assign to the database.
5. Username: Create a Database username that we will use later to connect it.
6. Password: Create a strong password for the above-created database username.
Click on the Save button.
Create App
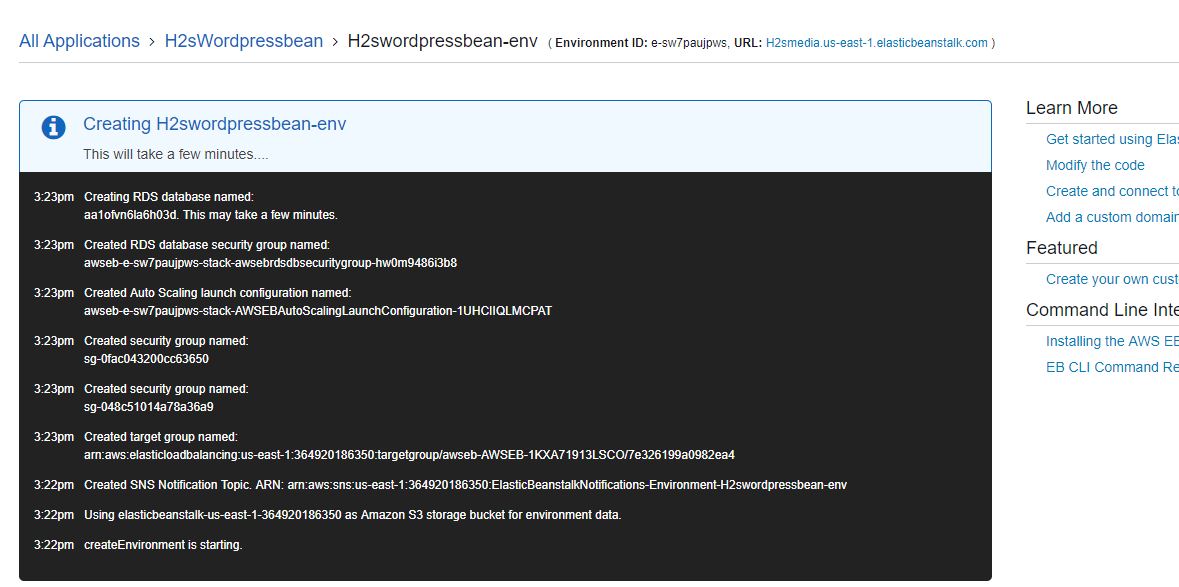
After clicking on the Create App button, the process will talk a few minutes, relax.
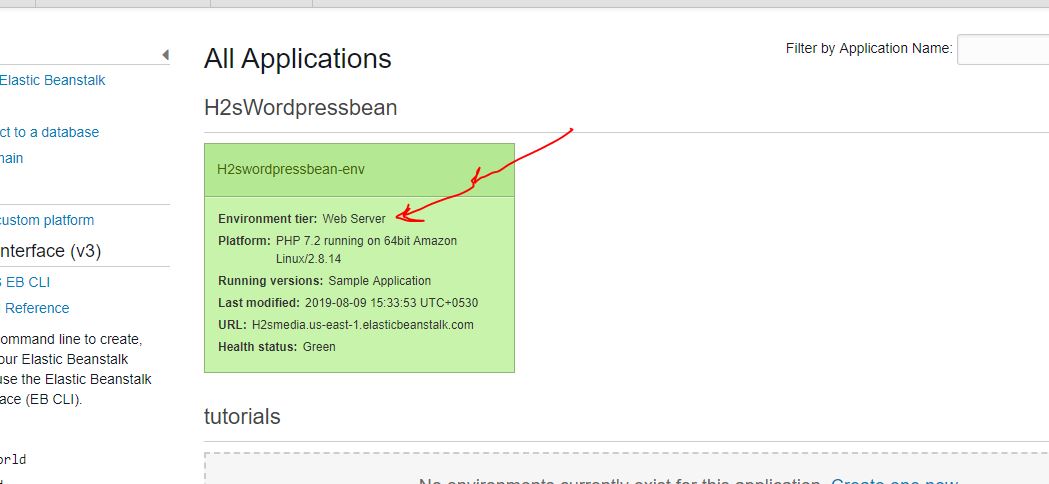
Step 5: Access created PHP for WordPress on Elastic Beanstalk
Once the process of creating the PHP app would get completed, click on it to access further setup options.
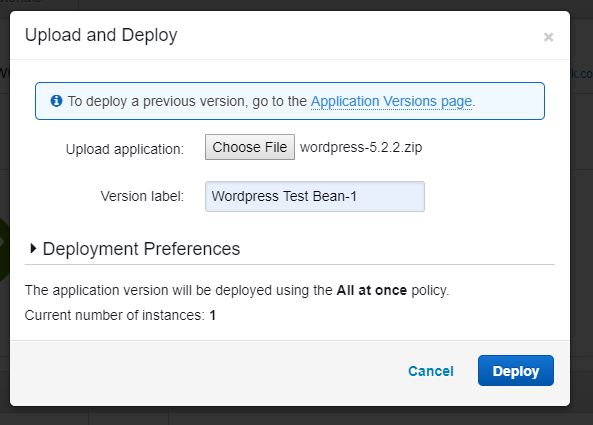
Step 6: Upload and Deploy WordPress
Now its time to upload our WordPress files to Beanstalk for Deploying purpose. Here is the link to download the latest version of WordPress. Once it is on your local system, click on Upload & Deploy button from the Amazon Elastic Beanstalk created App’s section.

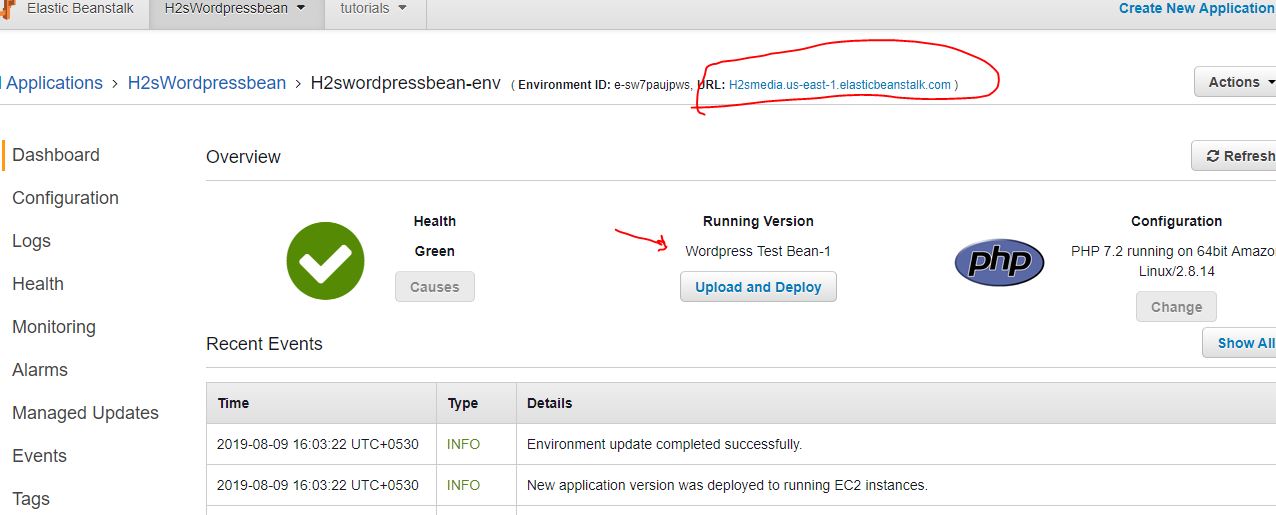
Step 7: Access Deployed WordPress on Amazon Elastic Beanstalk
The WordPress has been deployed successfully now its time to access it. For that right above the Overview of the Beanstalk Environment, you will see a subdomain URL for installed WordPress. Click on that.
The link will get opened automatically in new browser windows but with an error, that you can’t access the root directory.
Error: Forbidden
You don't have permission to access / on this server.

The error is because we have selected the Document root / in the Software section while configuring the APP. But the WordPress files we uploaded was in a directory called WordPress.
Thus, we have to move its files to the main root directory in order to access it. However, if you put/WordPress at the end of the URL you will be able to access WordPress. In case, you want it to be worked on root directory without any child directory then access the Elastic Beanstalk (EB) via SSH.
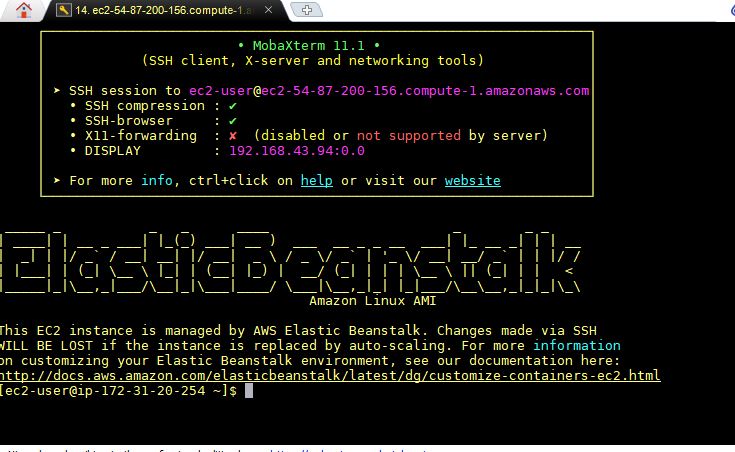
Once you connected your EB instance via SSH, use the following commands:
sudo -i
cd /var/www/html/
mv wordpress/* /var/www/html
rm -r wordpress
This above command will move all the files of WordPress which resides inside the html directory to html root directory itself.
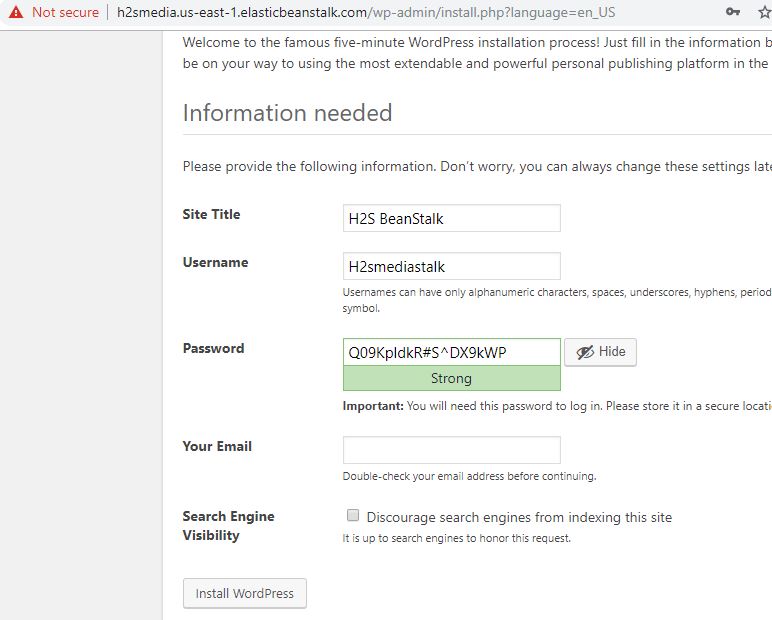
Step 8: Setup Deployed WordPress on Amazon (AWS) Elastic Beanstalk
Now again open your Environmental URL which shown in Step 7 of this tutorial. This time you will get the setup screen of WordPress.

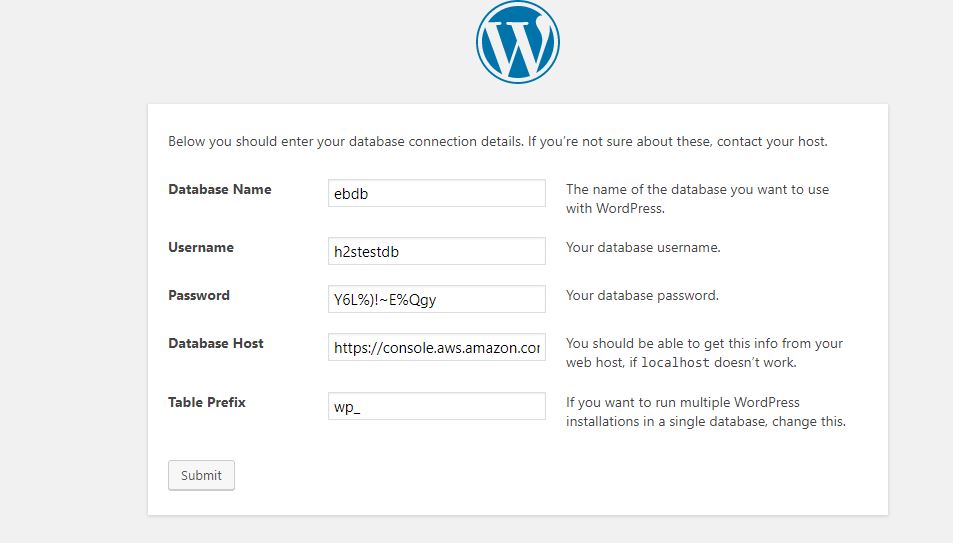
Connect Amazon MySQL Database with WordPress
This is a crucial task because most the users do mistake here, as the name of the database is created automatically by Elastic Beanstalk i.e edbd.
Default Database Name: ebdb
Username: Enter your username that you have created while creating a database on Beanstalk app for WordPress.
Password: Same the password you have chosen while creating the Database
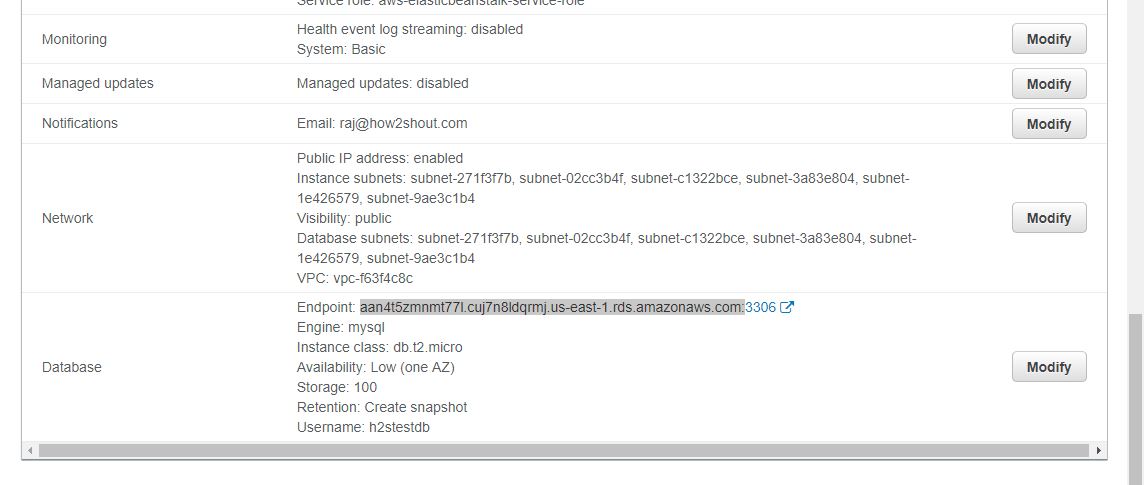
Database Host: To find out your database hostname or URL, go to the configuration of Environment you have created above for WordPress. Scroll down and there in the Database section you will see Endpoint copy the link without the port number.
Thus, in our case it is aan4t5zmnmt77l.cuj7n8ldqrmj.us-east-1.rds.amazonaws.com
Change the prefix of Database, if you want and then finally, click on Submit button.

In this way, we can install WordPress Content management system on Amazon Elastic Beanstalk.


How it compares to pricing for low traffic wordpress blog on Beanstalk vs EC2?