Gnome System monitor in Ubuntu meant to give insights about all the process running on your Ubuntu Linux operating system. Ubuntu’s system monitor works in the same we have Task Manager on Windows. A user can perform multiple things to manage process running on Ubuntu using a Graphical user interface. Such as access to properties, Memory Maps, Open Files- Shows files using a particular running process, Change property, Stop, Continue, End and Kill process.
The Gnome System monitor app comes as a default System monitor in Ubuntu. However, in case you don’t have it then here is the process to install and uninstall Gnome System monitor in Ubuntu. Along with info on how to open system monitor via Graphical and command line interface.
Note: This tutorial will work for all active versions of Ubuntu Linux such as Ubuntu 19.10. 19.04, 18.04, 16.04. 14.04… along with Debian and Linux Mint.
Step 1: Open Command Terminal
The first thing to install the Gnome System monitor in Ubuntu is to run the command Terminal, for that you can directly search for it in Applications or use the Terminal keyboard shortcut key i.e CTRL+ALT+T.
Step 2: Command to Install Gnome System Monitor
After opening command terminal, here is a command to download and install Gnome System monitor on Ubuntu, if it is not available on your system.
sudo apt-get install gnome-system-monitor
Step 3: Open Gnome System Monitor
You can run Ubuntu’s System Monitor using both GUI (Graphical user interface) and CLI (Command line interface).
If you want to use Command Terminal to open system monitor, use this command:
gnome-system-monitor
From Graphical user interface, first, go on Applications and then in the search box type system monitor. When the System Monitor icon will appear, click to open it.

Step 4: How to use System Monitor in Ubuntu
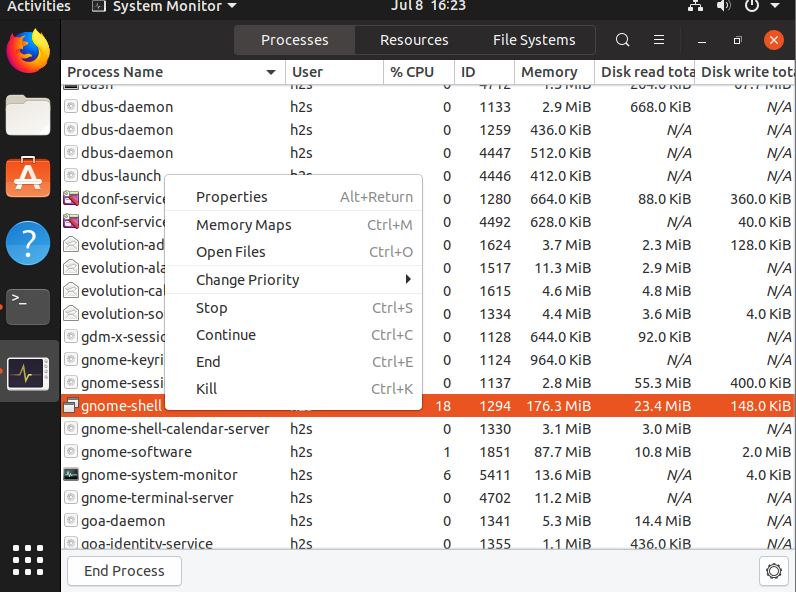
After opening the system monitor you will get a list of all process running on your Ubuntu system. If some of it not behaving well and you want to kill it; then simply select the process right click on it and select Kill option.
Shortcuts for the Gnome system monitor options are as follow:
- Properties: Alt+return
- Memory Maps: Ctrl+M
- Open Files: Ctrl+O
- Stop: Ctrl+S
- Continue: Ctrl+C
- End: Ctrl+E
- Kill: Ctrl+K
The Process Tab of the Monitor provides information about the Process Name, the user uses some particular process, Percentage of CPU consumed by any process, its ID, Memory consumption, Disk read in total and Disk writes in total.
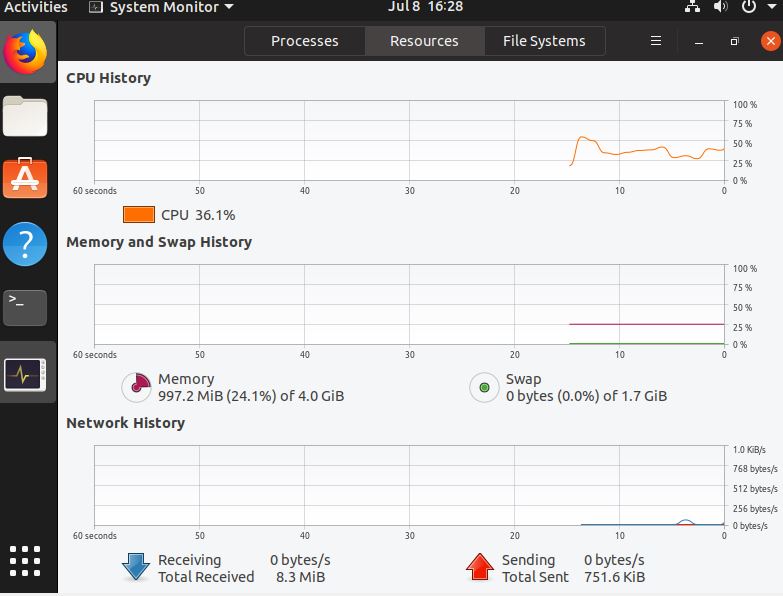
Resources Tab
In the Resources of the Ubuntu Gnome system monitor, you will get to know about the performance history of the system by CPU, Memory and Network wise but in a Graph representation.
It shows:
- CPU History
- Memory and Swap History
- Network History
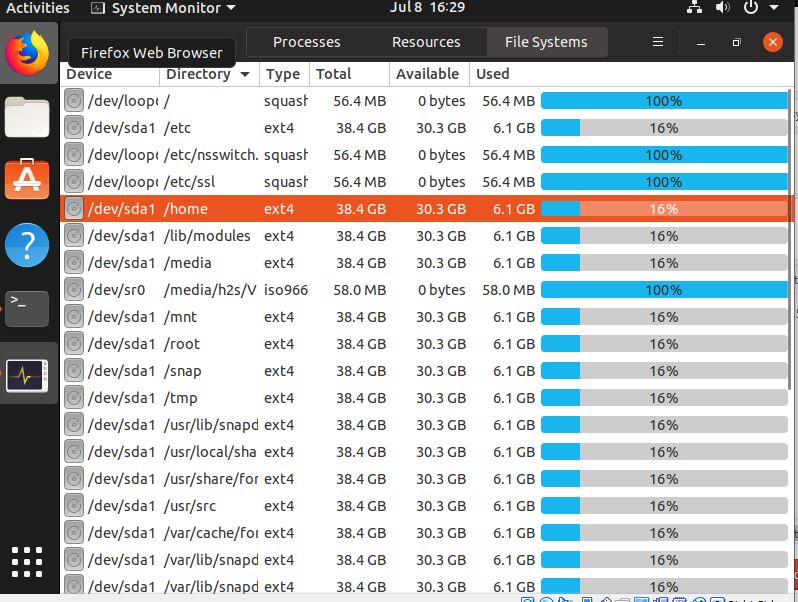
File Systems
It is the last tab in the row of Gnome system monitor, which work as per its name and shows all about the currently available system on your Ubuntu computer.
It is divided into different columns that are:
- Device: Shows the name of the partition.
- Directory: Give the path of the directory where the particular partition has been mounted.
- Type: Which kind of file system it is.
- Total: Amount of storage a partition has.
- Available: How much space is left to use in some partition.
- Used: Amount of storage has been occupied.
At the end it also provides a graphical representation to denote the percentage of space has been used by a corresponding device.
Uninstall Gnome System monitor
If you have installed the System monitor manually then you can remove it easily using the following command:
sudo apt-get remove gnome-system-monitor
Set a keyboard shortcut for Monitor
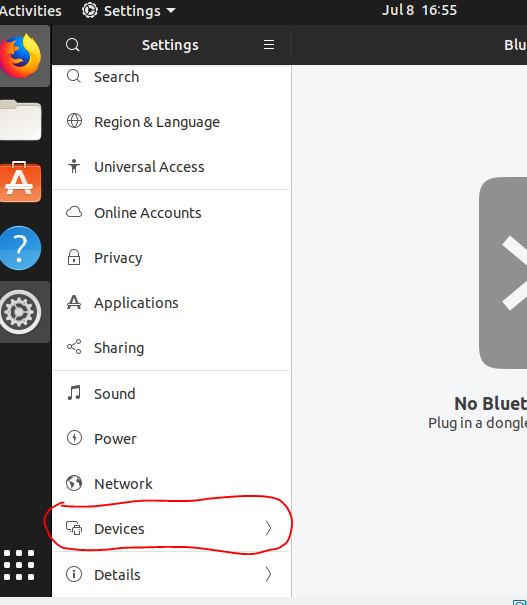
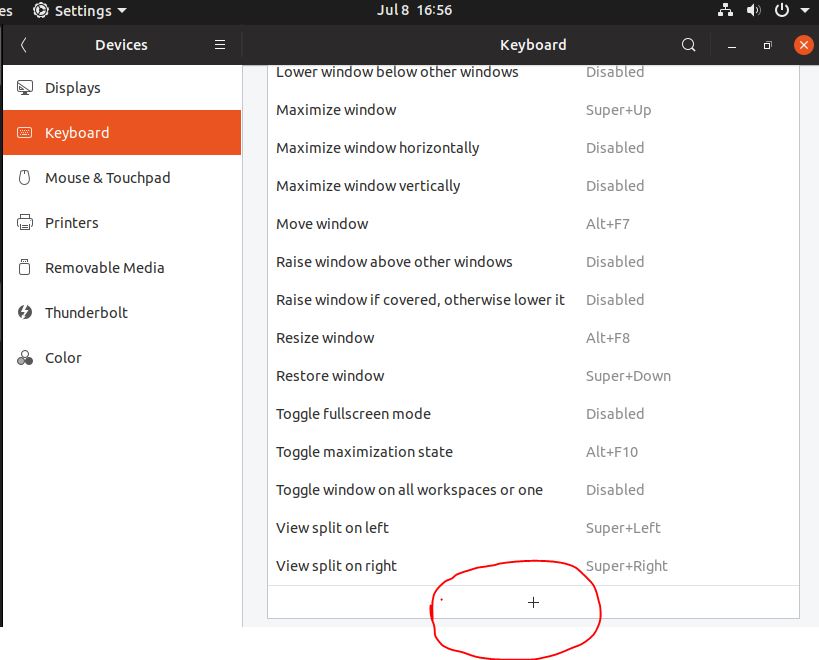
If you don’t want to go different steps in order to access Gnome system monitor then simply set a keyboard shortcut for it on Ubuntu. Here is the way to do that:
- Go to System Settings of Ubuntu
- Click on Device option of Settings
- Select Keyboard
- Scroll down to the end and click on the + icon.
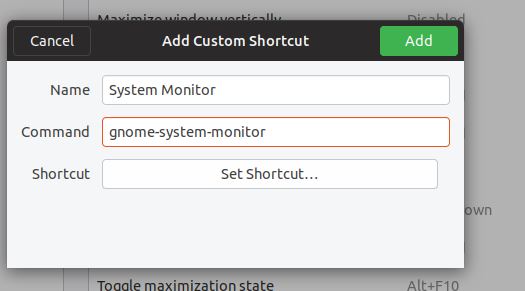
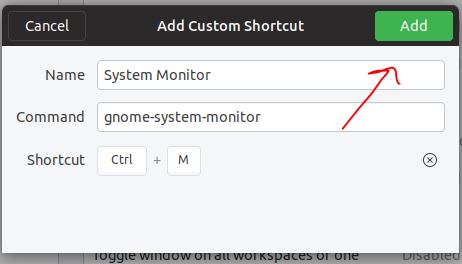
- Give some name and a command to your shortcut:
- System Monitor
- gnome-system-monitor
- Click on Create shortcut button
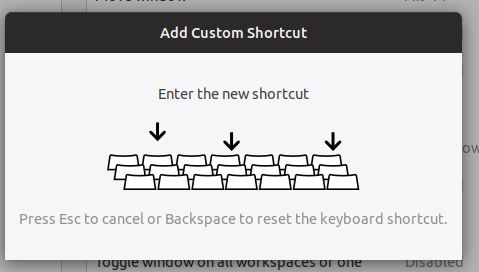
- Press the Keyboard Keys which want to assign as a shortcut. Here we have used Ctrl+M. You can use the same or of your choice.
- At last click on the Add button.
Now, whenever you want to access the Monitor tool on Ubuntu just use your assigned keyboard shortcut keys.
In this way, we can open and run System monitor on Ubuntu or its based Linux operating system using a single command; to help users to manage the process of the system.
Related Posts
How to create email groups in Gmail? Send one email to multiple recipients in a matter of seconds.
Getting the right dashcam for your needs. All that you need to know
How to Install 7-Zip on Windows 11 or 10 with Single Command
How to Install ASK CLI on Windows 11 or 10
How do you install FlutterFire CLI on Windows 11 or 10?
How to create QR codes on Google Sheets for URLs or any other text elements