If free and open source Linux Apache web-server software + MySQL and PHP collection in one stack to test various PHP based applications is your need then you should think about XAMPP on Ubuntu or Windows.
XAMPP is a single package contains complete LAMP stack that we need to set up and run a different kind of web projects quickly. XAMPP is developed by the Apache itself and being a cross-platform application it is available for windows 10/8/7, Linux and MacOS. It is a perfect alternative to WAMP ( Windows, LAMP for Linux) software which works same like XAMPP. It comes with comfortable pre-configured web servers based on Apache. Along with a database program- MariaDB and the scripting languages PHP and Perl combined in an installation routine.
The modules are conveniently operated via the XAMPP Control Panel in Ubuntu.
Step 1: Open Command Terminal
Go to your Ubuntu or Debian based Linux systems and open the command terminal. You can open it either by using keyboard shortcut CTRL+ALT+T or directly by searching for it in Applications.
Note: Although here we are using Ubuntu 19.04, the steps will be the same for Ubuntu 18.04, 16.04, 14.04… It can also be a KALI, Linux Mint, Elementary OS.
Step 2: Update your Ubuntu System
To make sure all the packages are up to date and in upgrade state run the following commands:
sudo apt-get update
sudo apt-get upgrade
Step 3: Download XAMPP latest Version on Ubuntu
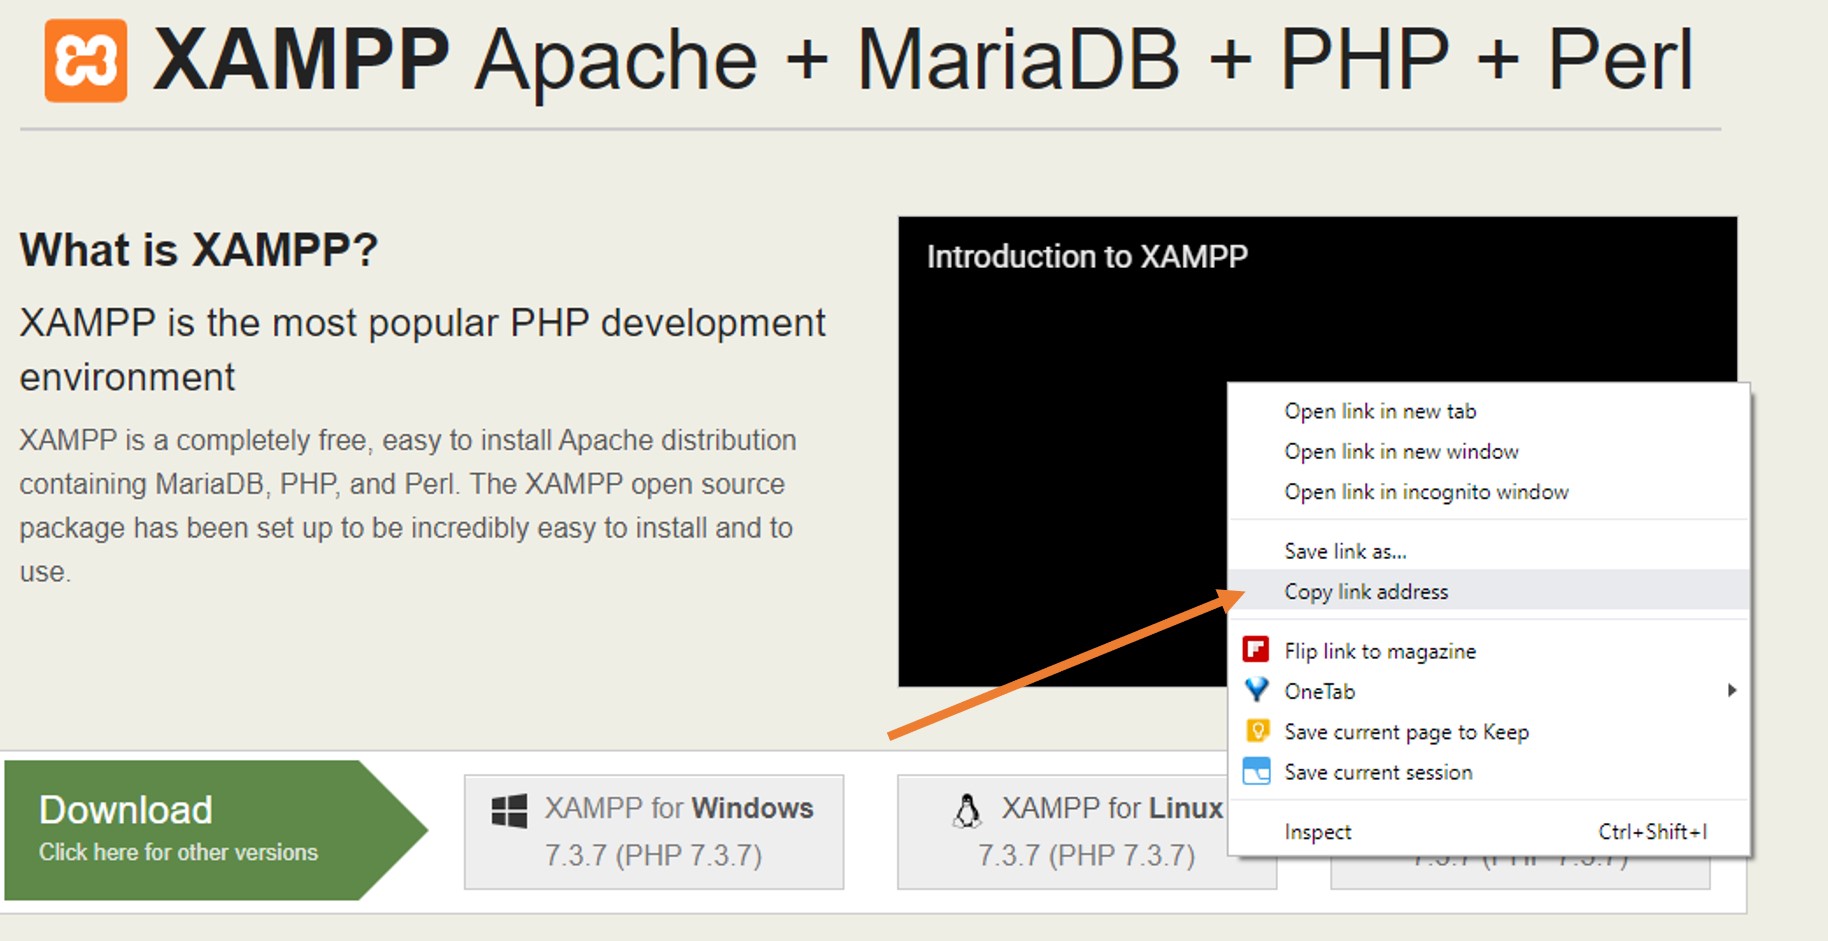
To install XAMPP on Ubuntu, first, we need to download its latest package or installer, for that just go to its official website. On the Download page, click on the Linux version to download it on your system.
Or Alternatively you can download it using the wget command directly in your command terminal just copy the download link and use it with wget command:
For example:
wget https://www.apachefriends.org/xampp-files/7.3.7/xampp-linux-x64-7.3.7-0-installer.run
Step 3: Change the Permission of installer
Go to your command prompt:
If you have downloaded the XAMPP installer using browser then it will reside in the Downloads folder.
To access the Downloads folder in your system use the CD command:
cd Downloads
ls
However, if you have used the wget command to download XAMPP on Ubuntu using Command Terminal then simply type:
ls
the above command will show the downloaded file in Terminal
Once you get the file use Chmod 755 command along with your downloaded file name:
In our case:
chmod 755 xampp-linux-x64-7.3.7-0-installer.run
Step 4: Install XAMPP in Ubuntu
After changing the permission of the file on Ubuntu, install the XAMPP on Ubuntu by running the installer.
sudo ./[your file name]
sudo ./xampp-linux-x64-7.3.7-0-installer.run
Step 5: Run XAMPP on Ubuntu
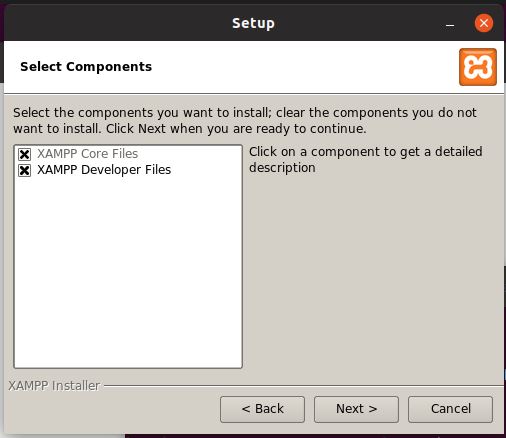
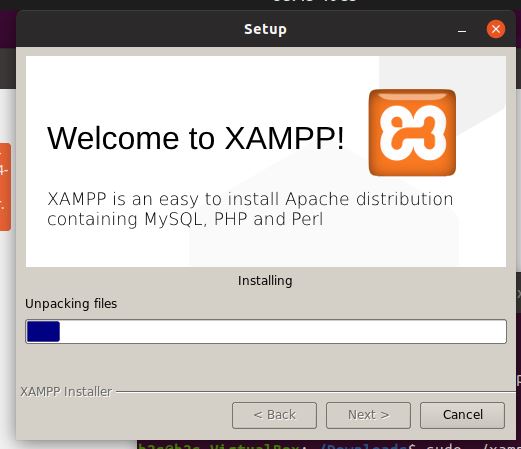
As soon as you execute the installer command of XAMPP on Ubuntu, the installer will start running on your system. Just like any other software installation, we do in Windows, follow the installation wizard here too.

Select XAMPP Components
Extracting Files to install on Ubuntu
Step 6: Start Xampp services using a command
sudo /opt/lampp/lampp start
To stop in future
sudo /opt/lampp/lampp stop
Step 7: Manage Services Graphically
If you don’t want to manage XAMPP service using command then you can simply run the graphical interface using below command:
cd /opt/lampp
For 32-bit version PC:
sudo ./manager-linux.run
For 64-bit version PC
sudo manager-linux-x64.run
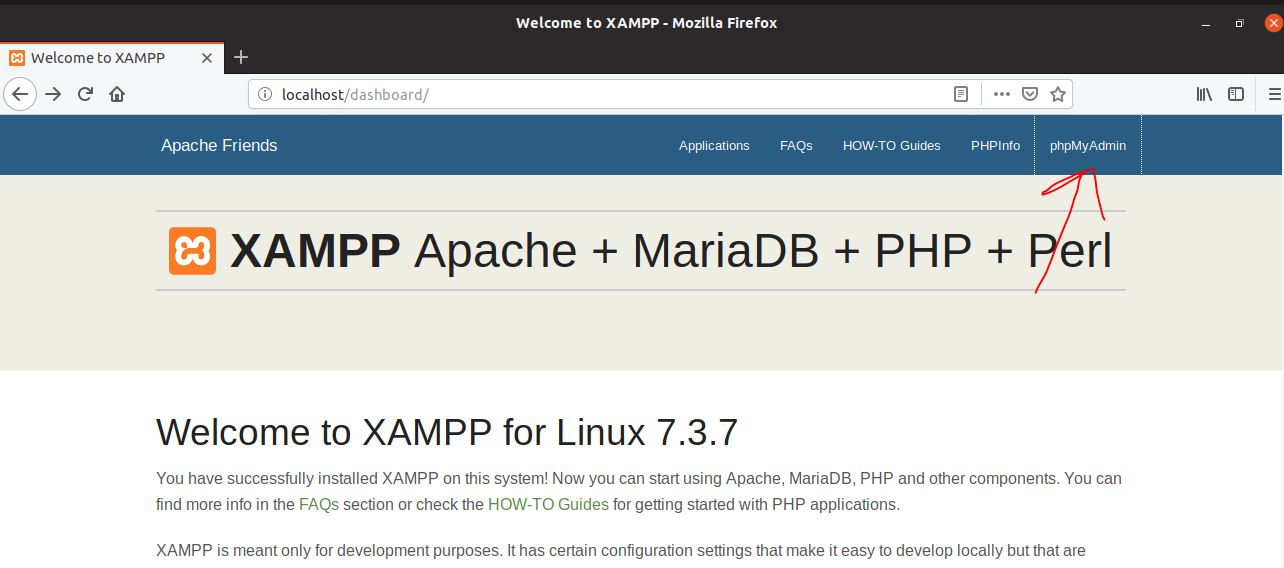
Step 8: Acess XAMPP phpMyAdmin in Ubuntu
If you want to access phpMyAdmin then simply open your browser and type http://localhost and you will get XAMPP Dashboard, there click on the phpMyAdmin option.
XAMPP configuration files locations
Apache configuration file: /opt/lampp/etc/httpd.conf, /opt/lampp/etc/extra/httpd-xampp.conf
PHP configuration file: /opt/lampp/etc/php.ini
MySQL configuration file: /opt/lampp/etc/my.cnf
ProFTPD configuration file: /opt/lampp/etc/proftpd.conf
Configure it as boot start app (optional)
If you want that XAMPP should automatically start in background as service, the moment your Linux PC get booted use this command:
sudo ln -s /opt/lampp/lampp /etc/init.d/lampp
Access phpMyAdmin outside your local system
By default, the phpMyAdmin can only be accessed using the localhost or system where the XAMPP has been installed. If you want to access it from some other system then first you should allow that in Apache configuration file.
On Command terminal
nano etc/extra/httpd-xampp.conf
Find these lines and replace Require local with Require all granted.
Alias /phpmyadmin "/opt/lampp/phpmyadmin/"
<Directory "/opt/lampp/phpmyadmin">
AllowOverride AuthConfig
Require local
Restart the Apache server using the XAMPP control panel.
sudo /opt/lampp/lampp restart
Create a Shortcut to start XAMPP on Ubuntu (optional)
Install Gnome Panel package:
sudo apt-get install --no-install-recommends gnome-panel
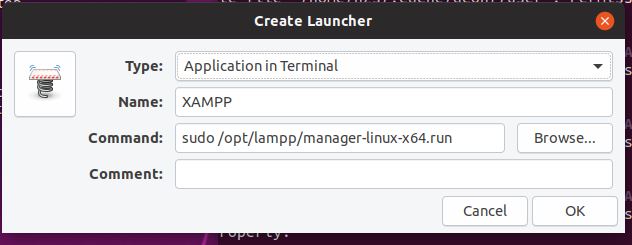
gnome-desktop-item-edit --create-new ~/Desktop
Enter the following command into the command field:
sudo manager-linux-x64.run
And click on OK button.
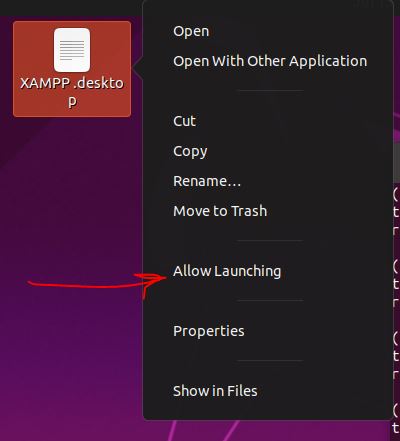
Now right click on the created shortcut and select Allow launching.
Thus, XAMPP on Ubuntu or Windows provides a quick and easy way to set up a server environment. However, the software package is not suitable for productive use on the Internet, as it does not provide sufficient security measures against hacker attacks during pre-configuration and is therefore intended only for test purposes.


This was so helpful !!!!