One of the best ways to keep your online accounts secure is to use two-factor authentication. If you are a tech-savvy user, you might already know about two-factor authentication, however, if you do not know about, let me explain it briefly. It is another secure way of keeping your online accounts safe with an extra level of protection. If you try to login with your user ID and password, you will have to enter one more one-time password or key, which is typically received through SMS, or email. However, if you often visit places, where the internet connection and the cellular network is not always available, you can depend on an offline method of getting one time passwords without the need of depending on SMS messages and emails for one-time passwords.
It is by using the Authenticator app, which is offered by a number of developers like Google, Microsoft, and many more. One problem though with Authenticator apps is that each time you change your phone, you have to set up the Authenticator app from scratch that might be inconvenient for most users. If you have multiple accounts, say 10 or more, setting up your two-factor authentication for every single account will take a lot of time, and most users might skip setting authenticator up, and that will definitely leave the users and their accounts vulnerable to several threats. So, to address this issue, Google Authenticator app has recently introduced an option to export accounts so that you do not need to go through setting up an Authenticator for every account to use the same on your new smartphone. It is easy to do, and I will discuss that here.
Transfer Google Autherneticator accounts from old to a new smartphone
So, without any further delay, let’s get started with how you can export the accounts and import them on a new smartphone in the easiest possible way.
On the old smartphone or device
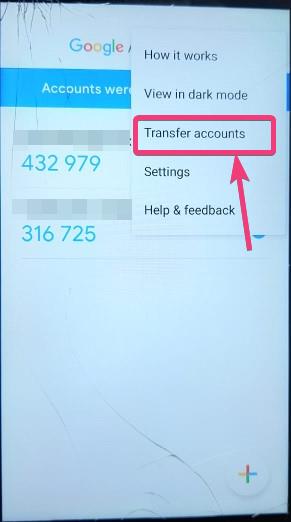
Step 1: Open the Google Authenticator app, tap on the triple-dot icon, and finally, tap on ‘Transfer accounts’. If you can’t find the option in the menu, you should update the Authenticator app, and the option should be available.
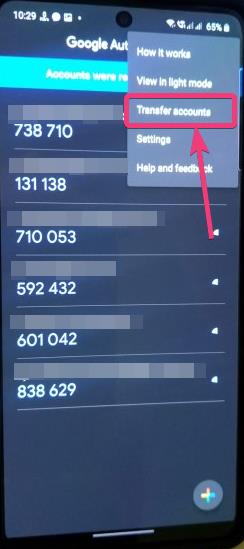
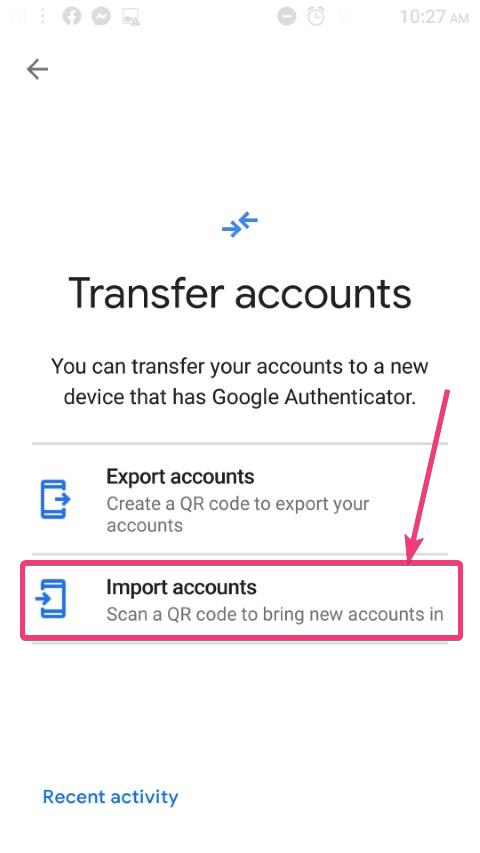
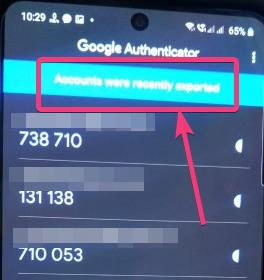
Step 2: Now, as this is the old device, you will have to tap on ‘Export accounts’.

Step 3: In the next step, you will have to authenticate with your biometrics, like a fingerprint, your pattern, or with the pin. After authentication, select the accounts that you want to export and tap on ‘Next’. All the accounts will be selected by default, however, you can deselect certain accounts as per your requirements.

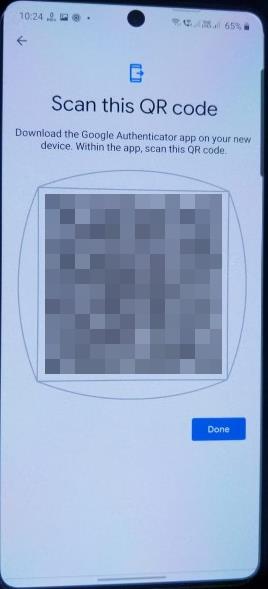
Step 4: Now, a QR code will be displayed to you. Keep the QR code open, and move to your new device.
On the new device
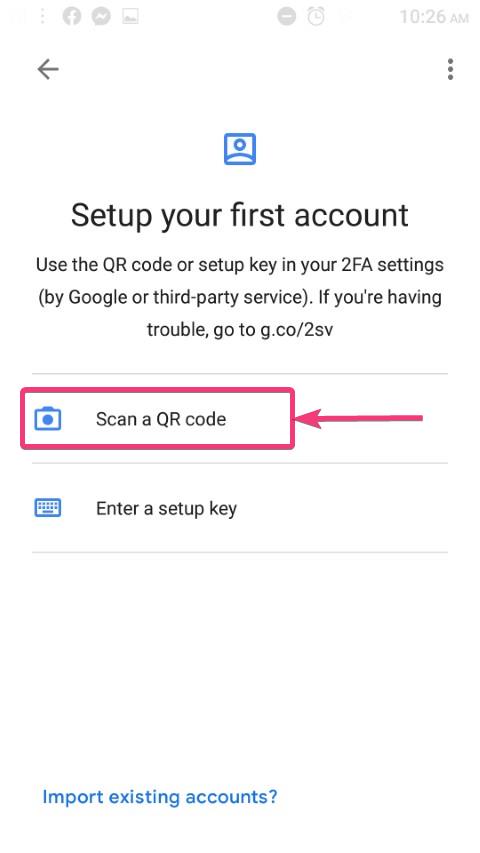
Step 5: Download the Google Authenticator app, and after it is installed, tap on ‘Get started’.

Step 6: Now, you have two options. Tap on the option that says ‘Scan a QR code’.
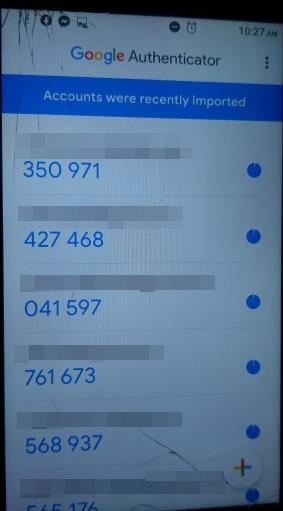
Step 7: Now scan the code on the previous or the old handset. After you scan the handset, all the accounts and the codes will instantly be displayed to you.
However, you can delete individual accounts if you want, in the usual way. Additionally, if you already have certain accounts added to Authenticator, on the new device, you can keep both the old, as well as the new or imported accounts. To be able to do that, tap on the triple-dot icon, and then tap on ‘Transfer accounts’.
Step 8: Tap on ‘Import accounts’.
Step 9: You will find an option to scan the QR code from the old handset. Just tap on ‘Scan QR code’ on the new handset.
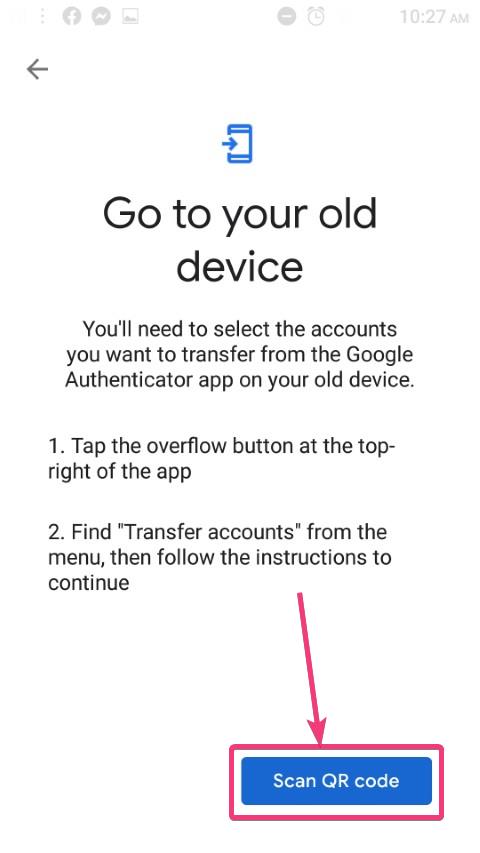
Step 10: Now you will have to scan the QR code from the old device, and the old accounts will be added to Google Authenticator on the new device.
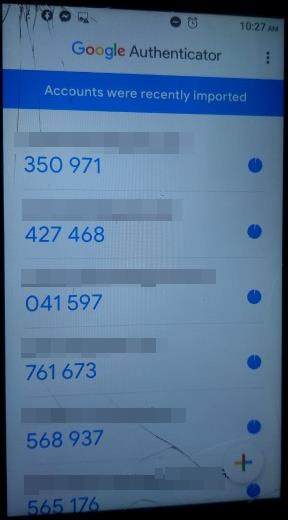
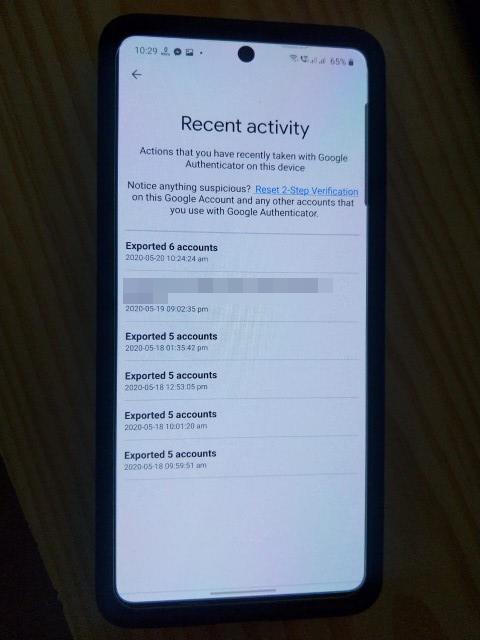
Step 11: After you transfer the accounts from the old handset to the new one, you will see a persistent message on the Authenticator app of both the devices, for security reasons. That way you can be informed if somebody gets access to the codes and transfer them without your permission.
Step 12: You can tap on the persistent message to find out, how many accounts were imported at different times.
However, you can also use Authenticator on both the devices at the same time, even after you transfer the codes on Authenticator from one device to the other.
You should scan the QR code only at the time of exporting the codes. As the screen, where the QR code is displayed can’t be captured, it is not possible to take a screenshot of the QR code and save it at someplace. So, it is better that you don’t try capturing the screenshot of the QR code in some other way. The following option to transfer accounts and the codes is only possible in the Google Authenticator app. If you frequently change your phone, and you also want to keep your accounts safe and secure, Google Authenticator is for you. By using Google Authenticator, you will never have to set up 2-step verification on all the accounts individually, each time you get a handset. This is really a big relief, I must say.
So, that was all about, how you can transfer accounts on Authenticator from one device to the other. Did you face any problems? Feel free to comment on the same below.
Related Posts
How to create email groups in Gmail? Send one email to multiple recipients in a matter of seconds.
Getting the right dashcam for your needs. All that you need to know
How to Install 7-Zip on Windows 11 or 10 with Single Command
How to Install ASK CLI on Windows 11 or 10
How do you install FlutterFire CLI on Windows 11 or 10?
How to create QR codes on Google Sheets for URLs or any other text elements