Safe mode in Windows 10 or earlier versions is the way to load minimal drivers but with full admin rights to analyse the system along with the deletion of file and drivers which we couldn’t in normal mode.
However, also one needs to know that in safe mode, all the services of our Windows operating system are not going to load. Thus, as I said one can find out what kind of problem is effecting or causing our system to misbehave in safe mode. Now, let’s see the different ways to start Windows 10 in Safe mode.
Enable Safe Mode in Windows 10
To enable Windows 10 safe mode directly from the normal mode, follow the steps given below:
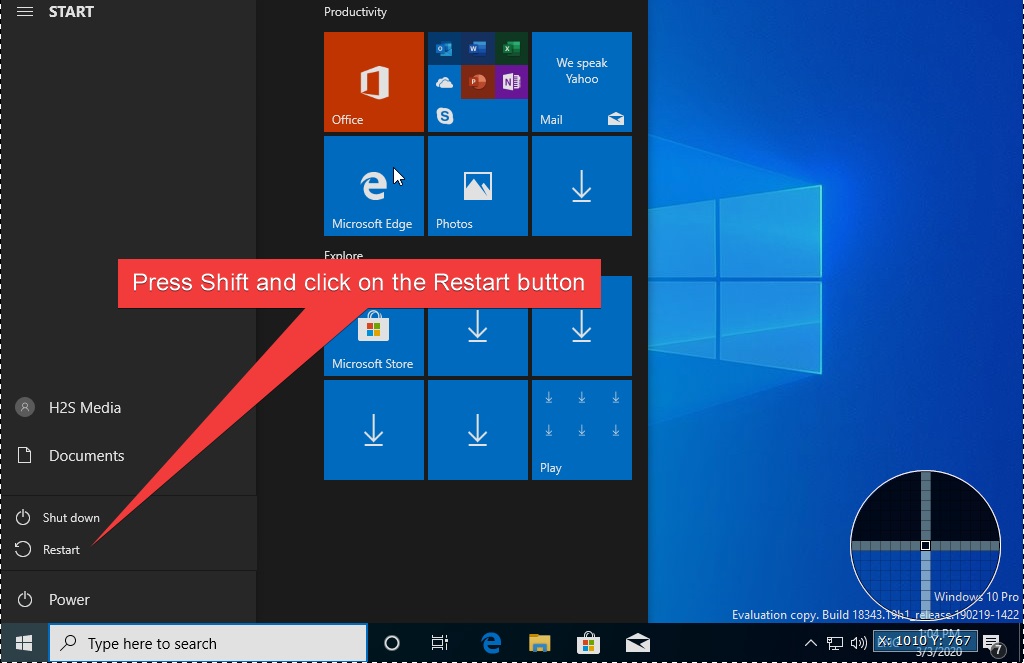
Step 1: Click on the Windows 10 start button and press & hold the Shift button. After that click on the Power and then select the Restart buttons.
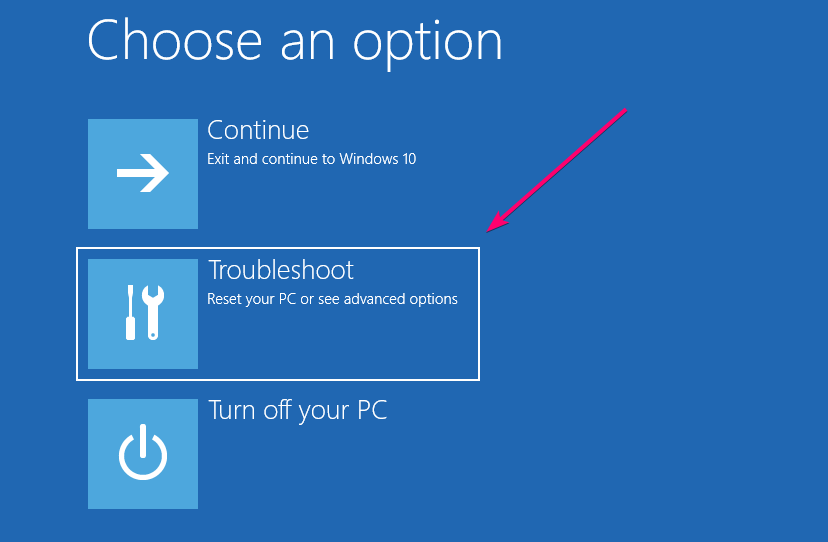
Step 2: The computer will attempt to restart but before that, it will give you some options such as continue to Windows restart, Troubleshoot and Turn off your PC. Use the mouse or Keyboard and select the Troubleshoot option.
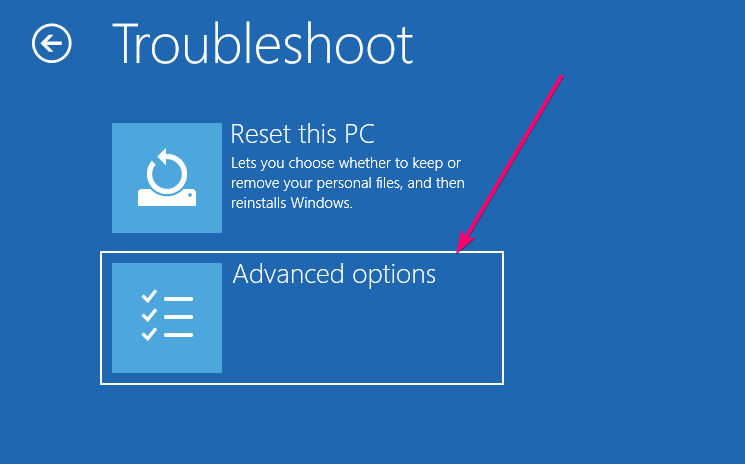
Step 3: Under the Troubleshoot, select the Advanced options to get further Windows 10 repair and boot like Settings.
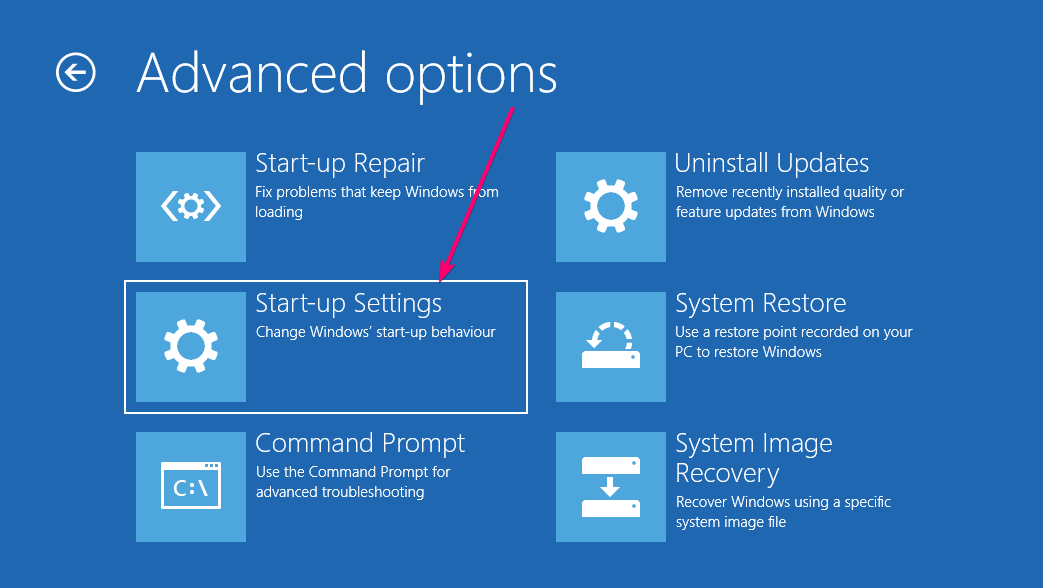
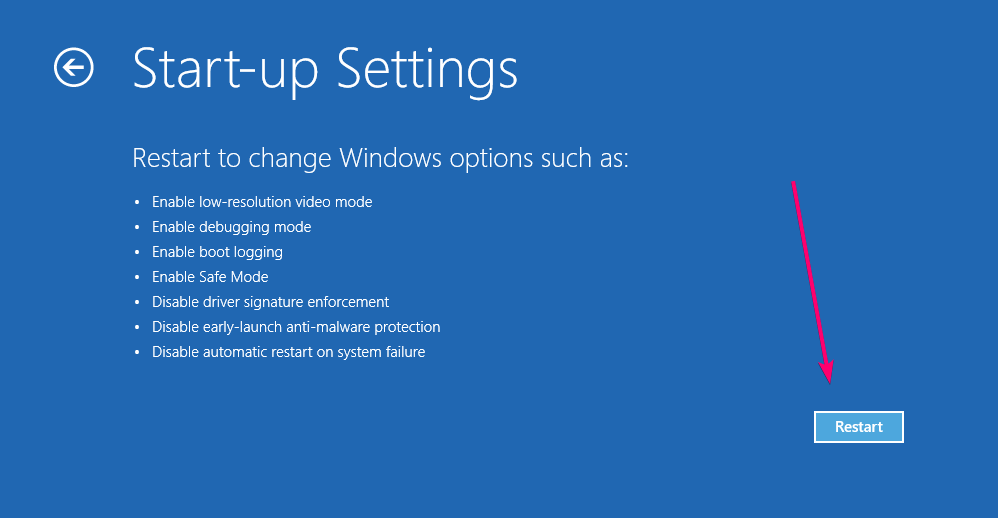
Step 4: Among six Advanced options, select the Start-up Settings to change the Windows start-up behaviour.
Step 5: Now, the setup will ask you to restart the system in order to access the Windows 10 options such as:
- Enable low-resolution video mode
- Enable debugging mode
- Enable boot logging
- Enable Safe mode
- Disable drive signature enforcement
- Disable early-launch anti-malware protection
- Disable automatic restart on system failure
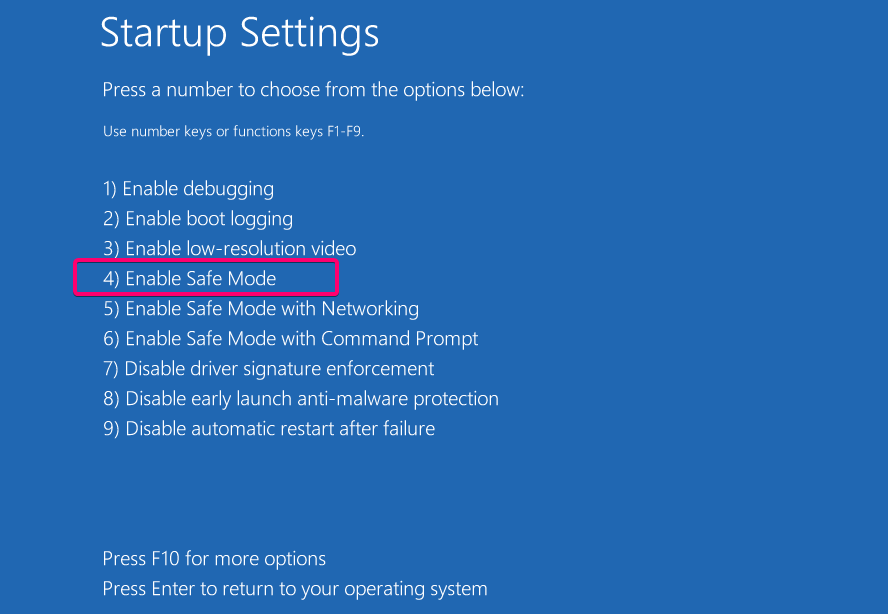
Step 6: Finally, the Startup Settings will appear with all above-mentioned options; use the number keys or function keys F1 to F9 to select the corresponding given startup options. Here to access the safe mode of Windows 10, we will press the F4 or 4 key on the keyboard.
Step 7: At last, the Windows 10 will boot up in Safe mode, to inform you the same a written text will be on all the corners of the screen instead of wallpaper.
To get out of Safe mode simply restart the PC.

Enable Safe mode in Windows 10 via MSConfig settings
Apart from the above method, there is one more simple way to access the Windows 10 Safe mode that is via MSConfig.
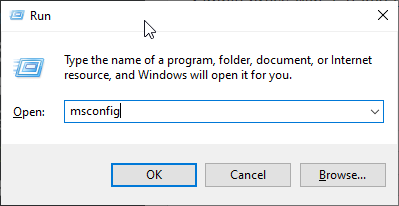
Step 1: Simply press Win + R key to the open RUN box and inside that type msconfig followed by the ENTER key.
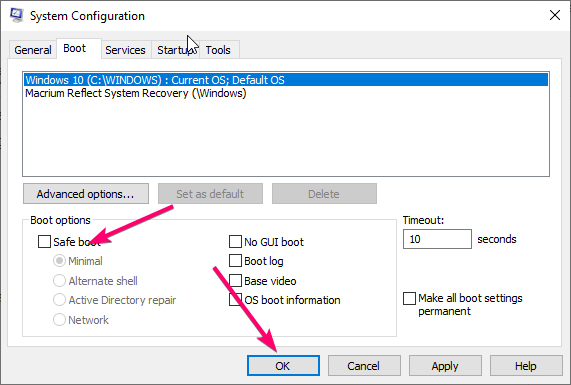
Step 2: On the Msconfig window select Boot tab and check the Safe boot box. Then click on the OK button to save the settings.
Step 3: After that when you start the PC you will drop into Windows 10 safe mode. This method is applicable to Windows 8, 7, Vista and XP as well.
Note: To disable the Safe mode enabled from MSConfig, you have to uncheck this option before leaving the safe mode again using the above steps, so that you can again use the Windows in standard mode.
Related Posts
How to create email groups in Gmail? Send one email to multiple recipients in a matter of seconds.
Getting the right dashcam for your needs. All that you need to know
How to Install 7-Zip on Windows 11 or 10 with Single Command
Install Google Earth on Windows 11 or 10 Using a Single Command
How to install Gaming Services on Windows 11
How to Install Telnet Client on Windows 11 Using PowerShell