
Using a Windows system for a long period will accumulate temporary files, which not only consumes our precious storage space on the PC but also affects the system’s performance. Although, we can clean the temporary files manually from time to time, making this process automated will save us time. So, learn the steps to automate deleting temporary files in Windows 11 or 10, ensuring your system stays clean and optimized without manual intervention.
1. Importance of Deleting Temporary Files:
- Temporary files, such as cached data and installation leftovers, can accumulate over time.
- Deleting these files regularly prevents clutter and improves system performance.
2. Using the Built-in Disk Cleanup Tool:
Here are the steps that allow setting automatic deletion of Temporary files using the Windows “Disk Clean-up” tool.
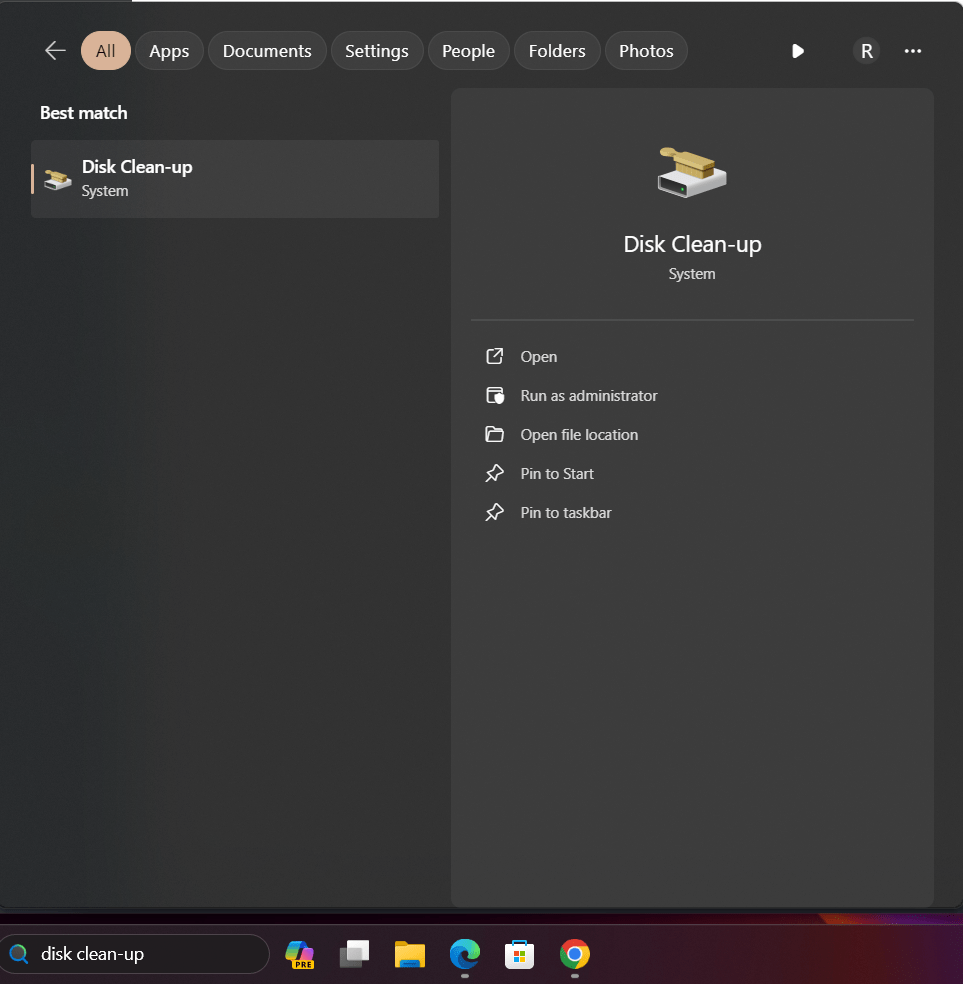
Step 1: Open Disk Cleanup
Click on the Windows start button or use the keyboard shortcut i,e Win+S to open the search bar. There type “Disk Cleanup.” As the search result appears, click “Disk Cleanup” and select “Run as administrator“.
Step 2: Select Drive and Files
Next, you will see the system will ask you to choose the drive to clean which by default will be C: drive because our Windows is installed in it. Let it be selected and press the OK button. The Disk Cleanup will calculate the amount of space you can free up.

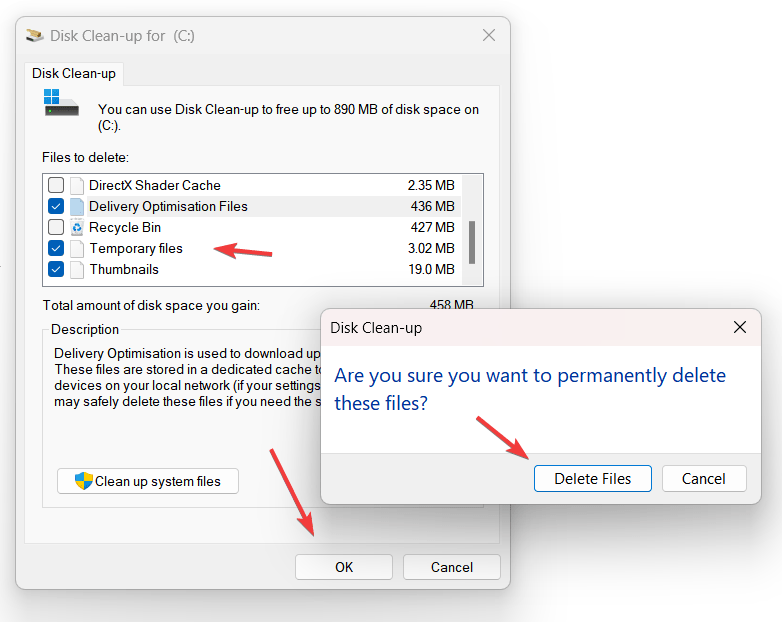
Step 3: Select Temporary Files
After calculating the space used by different Windows features, Disk Clean-up will list them all, and the amount of storage that can be freed. Scroll down and select the “Temporary files” option. Optionally, select other file types you want to delete. After that click “OK” and then “Delete Files” to confirm.
Task Scheduler:
Step 4: Automate Disk Clean-up to delete files
Now, to automate the “Disk Clean-up” we can use the “Task Scheduler” tool of Windows. It allows users to run specific apps or commands at a specific interval of time automatically without human intervention.
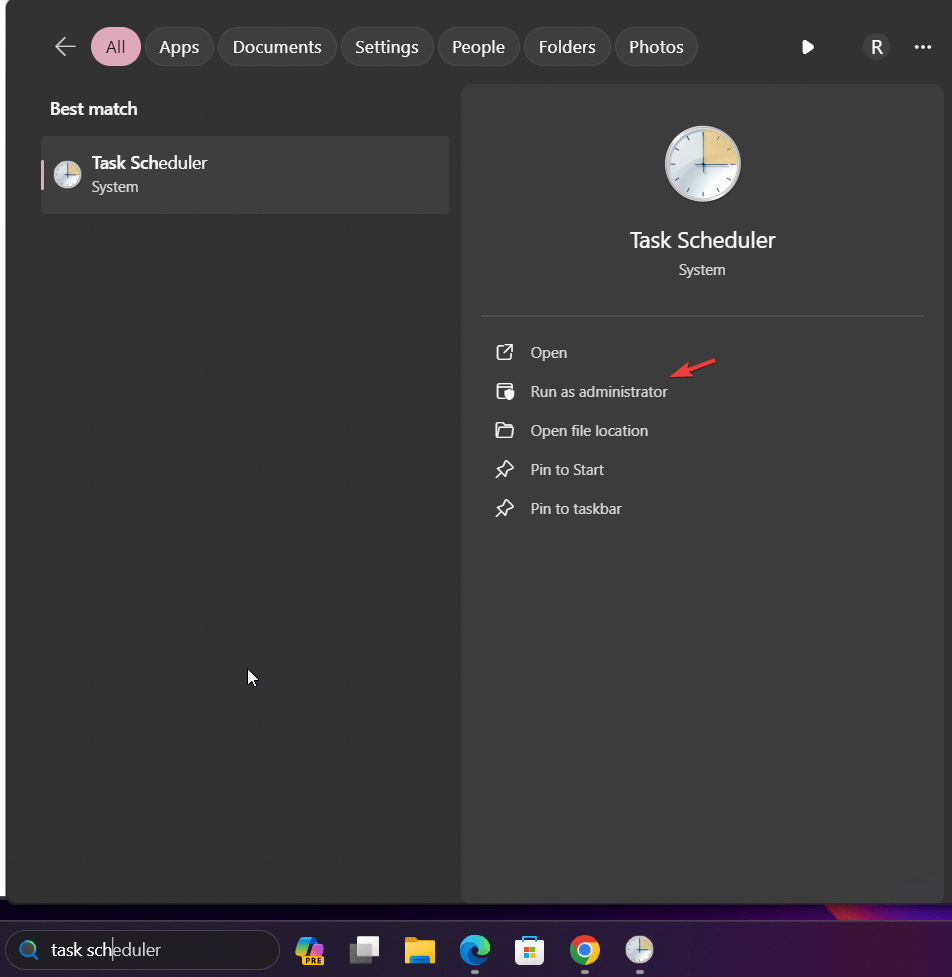
So, in your Windows Search box type – Task Scheduler, click it from the search result, and select the Run as Administrator option.
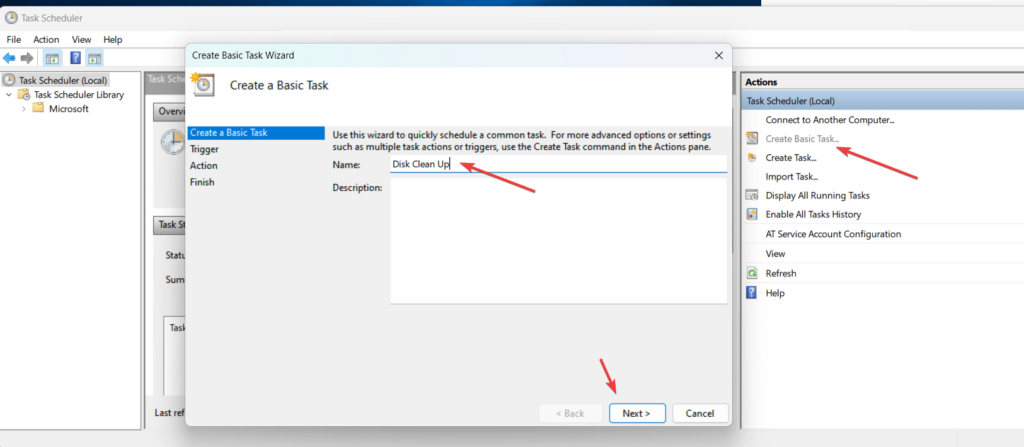
After that select the “Create Basic Task…” option and in the Name column write –Disk Clean Up, you can write something else, if you want. After that press the “Next” button.
Select the frequency or when to start the Task that triggers the “Disk Clean-up” to perform the Temporary file removal process.
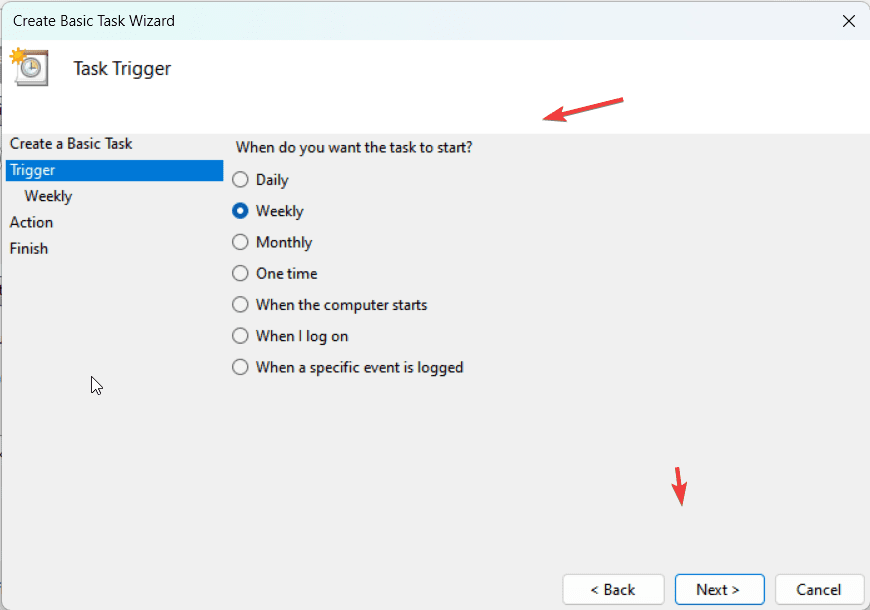
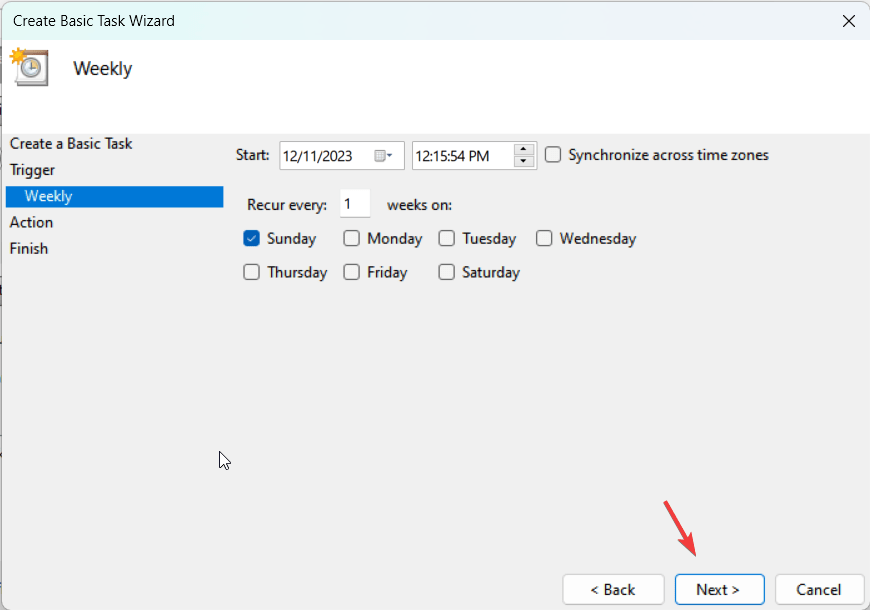
As you selected the frequency to repeat the Task you have created, in the next step it will ask to configure exactly on which day or time, the system should execute it.
Now, we also need to set the program or script that the Task scheduler should execute. So, in the program column type:
C:\Windows\system32\cleanmgr.exeAnd for “Add argument (optional)” type this:
/sagerun:100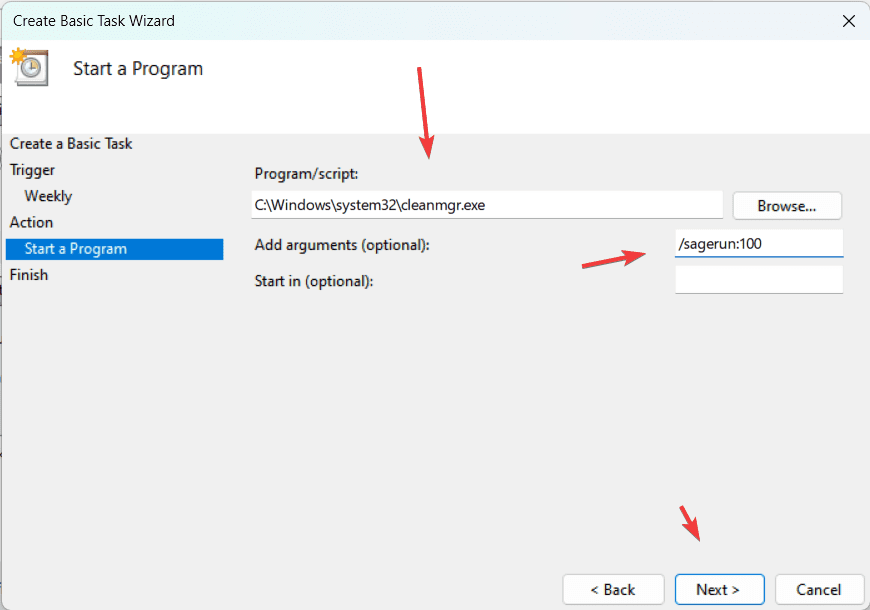
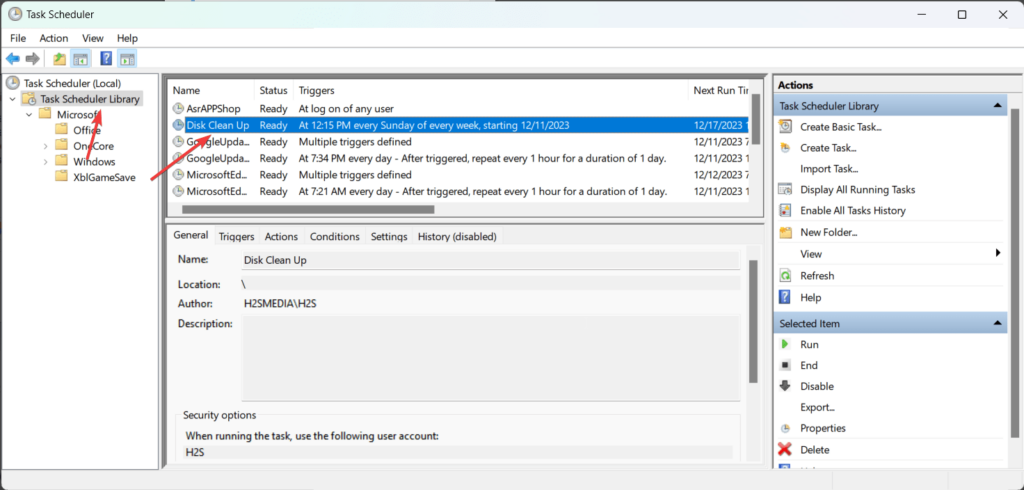
Finally, use the library section to see the created job. If you want to check it manually, then right-click on the Task we just have created and select the “Run” option.
3. Automating with Storage Sense:
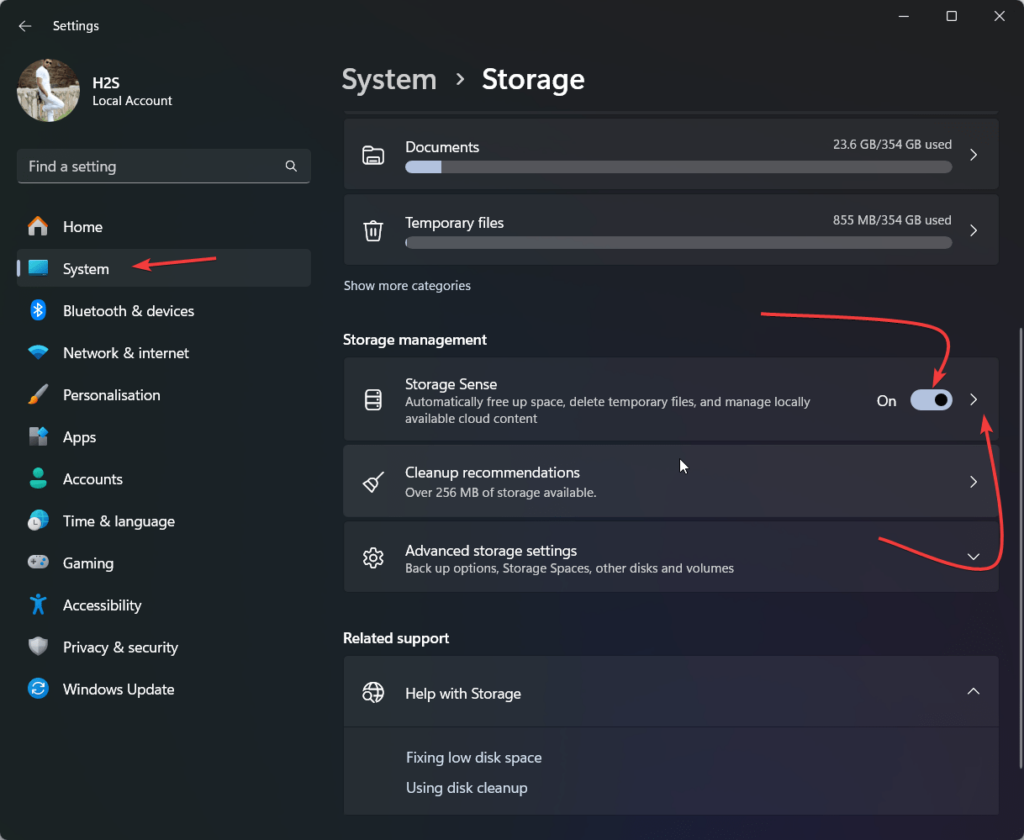
Step 1: Open Settings
Press Win + I to open Settings.
Go to “System” and then “Storage.”
Step 2: Enable Storage Sense
- Toggle on the “Storage sense.” button, if not already to turn it ON.
- After that click on the “arrow” icon to reveal further options.
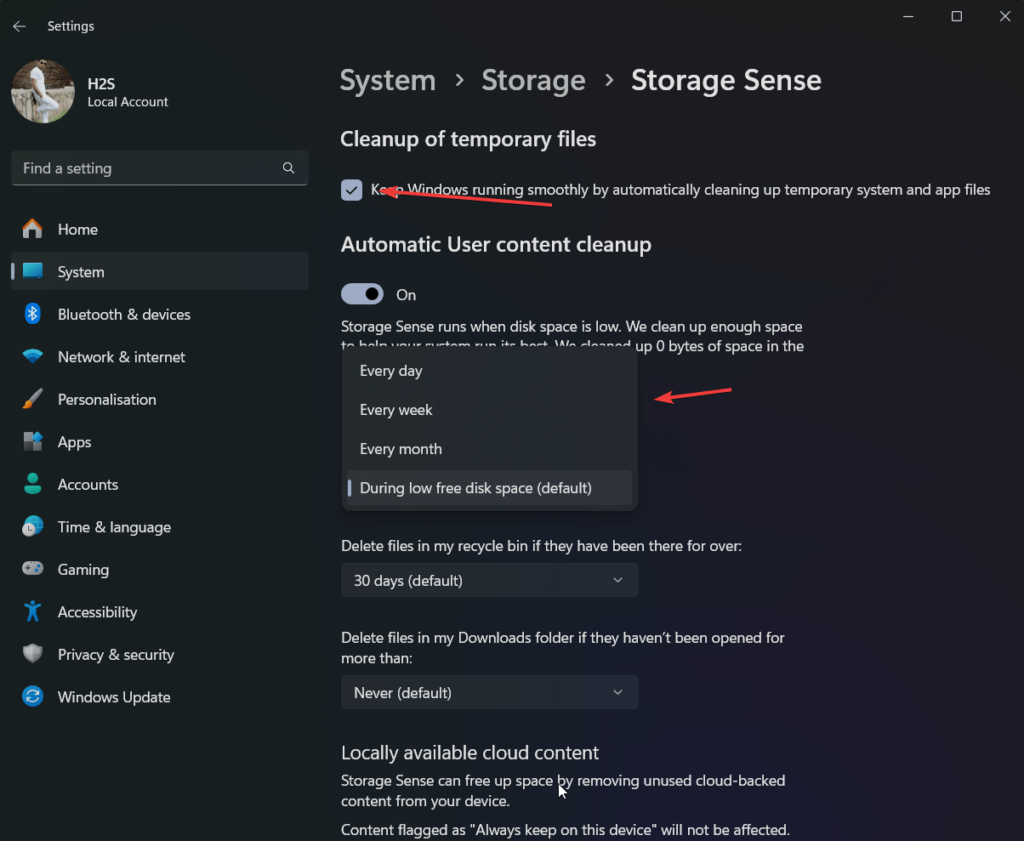
Step 3: Configure Cleanup of Temporary file settings
Check the box given for “Keep Windows running smoothly by automatically cleaning up the temporary system and app files.” After that choose how often you want Storage Sense to run. You can also run the cleaning immediately by pressing the “Run Storage Sense Now” button given at the bottom.
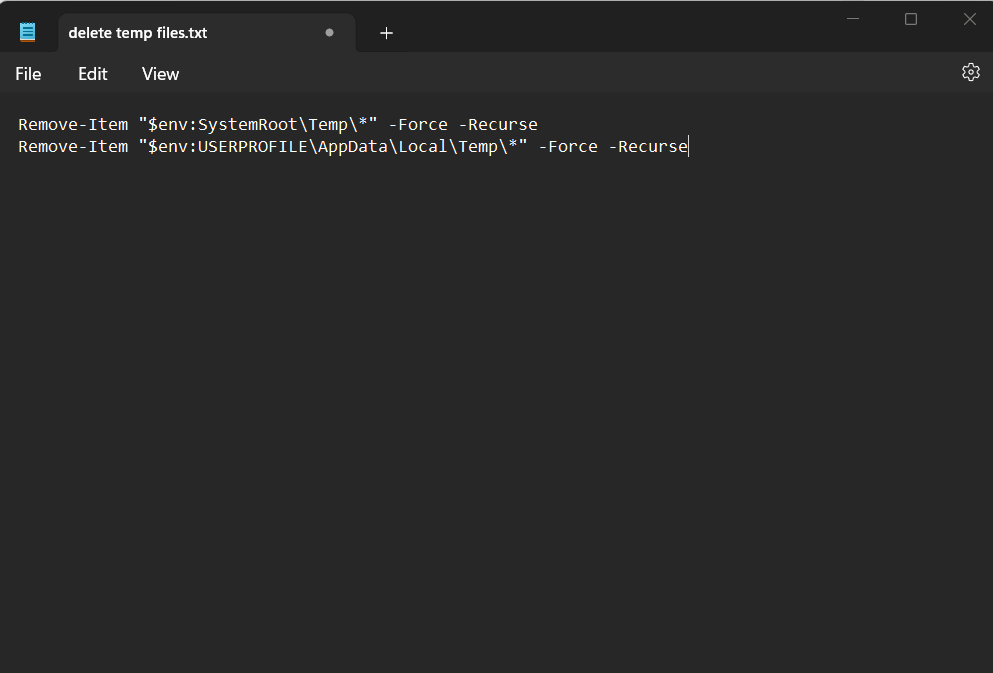
5. PowerShell Scripting to delete Temp files:
Step 1: Open PowerShell
Press Win + X and select “Windows PowerShell (Admin)” or Terminal (Admin).
Step 2: Run Script
Run the following PowerShell script to remove user and system temporary files that are not currently used by any other active program.
Remove-Item "$env:SystemRoot\Temp\*" -Force -Recurse
Remove-Item "$env:USERPROFILE\AppData\Local\Temp\*" -Force -RecurseNote: Files that are temporarily used by any other program will not be deleted instead through an error in the PowerShell. However, the rest of the files will be deleted.
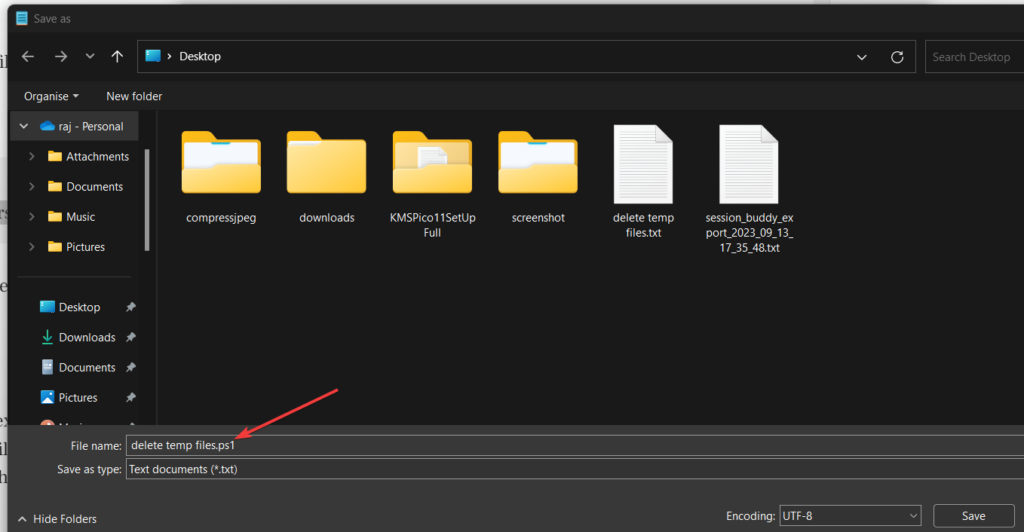
Step 3: Save as a Script
You can save the above two given commands as a script. For that, create a text file on your Desktop and paste these two commands into that.
After that Save As that text file with .ps1 extension.
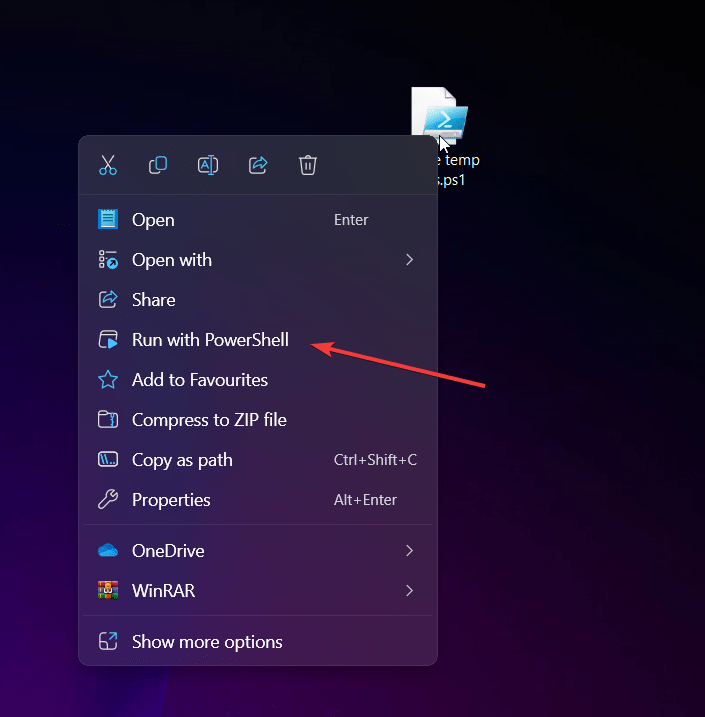
Then right-click on the file and select “Run with PowerShell” every time whenever you want to delete the “Temporary Files“.
Moreover, you can create a scheduled task to run the script at desired intervals as we did for Disk cleanup at the beginning of this tutorial using “Task scheduler”.
Conclusion:
Windows installed on fast drives like M.2 with limited storage, automating the deletion of temporary files in Windows 11 or 10 is a necessary and proactive step to make sure your system is clean and works efficiently. Towards this, Microsoft tools like Storage Sense and Disk Cleanup are quite useful and easy to understand while incorporating Task Scheduler and PowerShell Scripting you can automate these solutions. This will ensure your system runs smoothly with minimal manual intervention.
Other Articles:
Related Posts
How to create email groups in Gmail? Send one email to multiple recipients in a matter of seconds.
Getting the right dashcam for your needs. All that you need to know
How to Install 7-Zip on Windows 11 or 10 with Single Command
Install Google Earth on Windows 11 or 10 Using a Single Command
How to install Gaming Services on Windows 11
How to Install Telnet Client on Windows 11 Using PowerShell