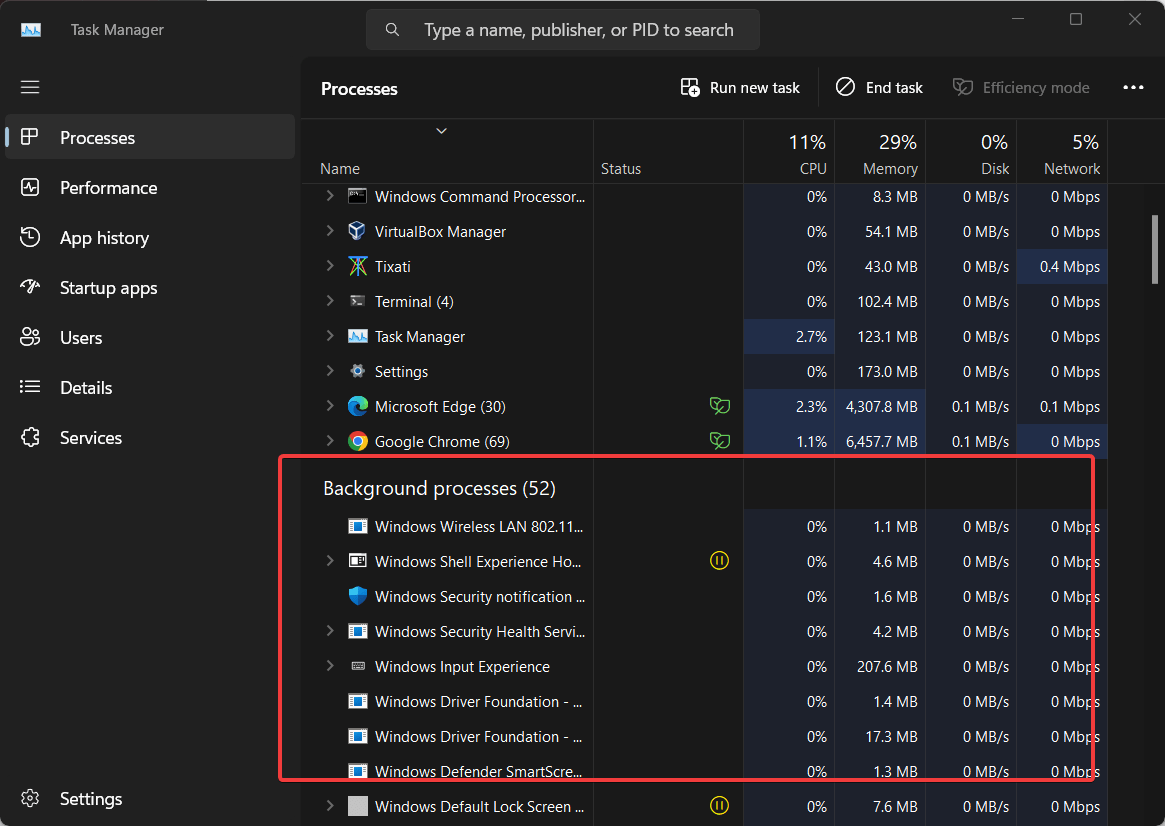
Monitoring Windows applications running in the background is not a difficult task and also we don’t need any third-party application to do that. Whether it is Windows 10 or 11, both come with a built-in app called Task Manager. The purpose of it is to allow users to identify and view applications along with services running in the background. It helps users troubleshoot performance issues or ensure efficient resource allocation. However, if you don’t know how to do that then in this article we understand the steps involved in accessing and operating the Windows Task Manager.
1. Opening Task Manager:
The first step is to access the Task Manager app, well there are multiple ways to open it, we have given three easy and widely used ones. You can go for any of them.
Method 1: Keyboard Shortcut
To quickly open Task Manager, the best way is to use a keyboard shortcut that is Ctrl + Shift + Esc, press them simultaneously and you will have it.
Method 2: Taskbar Context Menu
Another most common and standard way is to right-click on the taskbar, and select “Task Manager.”
Method 3: Ctrl + Alt + Del Menu
This is a less commonly used way to access the Task Manager on Windows, however, it is there if somebody wants to use it, just press Ctrl + Alt + Del and choose “Task Manager.”
Once you have opened the Task Manager, you will find several tabs on the left side such as Processes, Performance, App History, Start-up Apps, Users, Details, and Services. By default, the Processes tab will be selected and if not then do it manually. Also learn: How to always see the CPU usage on Windows 10 system tray using the Task Manager

3. Identifying Background Applications:
All the background running services and foreground active applications will be listed by the Task Manager under the Processes Tab. However, if you want to group them to know what services are running in the background, we can do that as per their type.
For that click on the Processes tab, click on the Three-dots given on the right top side, and select View. There select the “Group by Type” option.

Background Processes Section: Scroll down or navigate to the “Background processes” section. Here, you’ll find applications and processes running in the background.
Status and Resource Columns: Whereas, to get an idea of how much computing power and RAM a particular app or service is consuming you can check the “CPU” and “Memory” columns for resource usage. Also, you can keep note of the “Status” column for running or suspended processes.
4. Sorting and Filtering:
Sorting by Name:
Well, the list of applications and services will be large in Task Manager, however, we can sort them alphabetically just by clicking on the “Name” column header.
Sorting by Status or Resource Usage:
Similarly, you can club the apps as per their running status or by CPU and Memory consumption by clicking on their respective column headers.

5. Ending Background Processes:
Identifying the background apps or services in Windows using Task Manager is quite easy as we have seen in the previous steps, now what if some of them are consuming high resources and you want to END them?
Yes, we can end any background process directly from Task Manager but before that make sure it is not some critical one because stopping some essential service causes Windows to behave abnormally. Nevertheless, if you have ended any system service accidentally then restarting your Windows will automatically start that. So don’t worry.
- Locate the application’s name you want to end in the “Processes” tab.
- Right-click on that service or app’s process.
- Select “End Task”
Note: Don’t forget only end tasks for applications you are certain about.

6. Enable or Disable Background Applications in Windows 11:
If you want a background application in Windows 11 or 10 not to run automatically in the background you can disable it.
- For that press the “Win + I” keys on your Keyboard to open Settings.
- There go to “Apps” then “Installed apps”
- Search for the app that you want to disable from running in the background.
- Click on the “Three-dots” given in the form of the application and select “Advanced options“.
For example, let’s say we want to disable the “Microsoft Cortana” service from running in the background. Then we first search for it and select “Advanced Options“

- After that find the Background Apps permissions section and click on the drop-down box.
- There select the “Never” option to disable the app from running in the background.
- Whereas, to enable the app to run in the background again, select the “Always” option.

Conclusion:
By following the steps we have discussed in this tutorial you will not only be able to identify the background application process on Windows 10 or 11 using the Task Manager even can stop them. Monitoring the system’s activity, ensuring optimal performance and resource allocation.
Other Articles:

Related Posts
How to create email groups in Gmail? Send one email to multiple recipients in a matter of seconds.
What is a juice-jacking attack? How can we be safe from such attacks?
Getting the right dashcam for your needs. All that you need to know
How to Install 7-Zip on Windows 11 or 10 with Single Command
Install Google Earth on Windows 11 or 10 Using a Single Command
How to install Gaming Services on Windows 11