Windows 10 Safe Mode is an option that users can use if there is a kind of problem or error such as the screen of death BSOD, malware, problems with installed applications or drivers is preventing them to start their PC in the standard boot, so that repair or backup process can be initiated.
This troubleshooting method is available in Windows almost since the beginning of Microsoft GUI operating systems. Safe mode doesn’t allow the full load of the system instead offers a minimalist interface, with only the essential services and the minimum drivers for its operation. Once we are in the “failsafe boot” it is easier to use functions to repair errors or recover the system.
How to enable safe mode in Windows 10
In Windows 7, we were able to access this special mode by simply pressing F8 at the beginning of the computer boot. However, since the new UEFI firmware and increase in booting speed, it doesn’t work on modern Windows 10 computers. Fortunately, there are other methods that we are going to remind you of.
Shift + F8
Although it is the fastest way to access safe mode in Windows 10, however, it doesn’t work for all computers. Especially on PCs that are coupled with high-speed SSDs and UEFI BIOS, where the system doesn’t give time to interrupt the normal boot process and enter safe mode. Nevertheless, if you are using a regular drive then it could work for your Windows 10, yet there is no surety for it.
Shift + Reset- to enable Windows 10 Safe mode
Well, this works on Windows 10 without any problem. What you have to do is- click on Windows 10 Start menu, press Shift Key, click on the Power icon, and Restart your System.
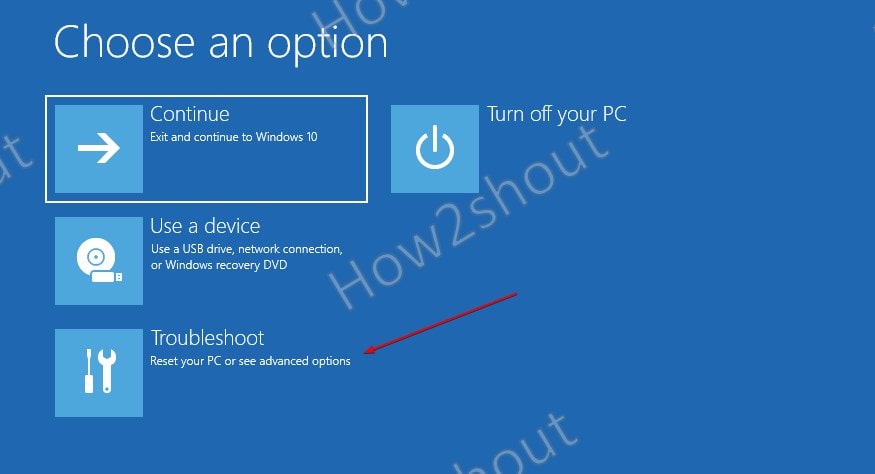
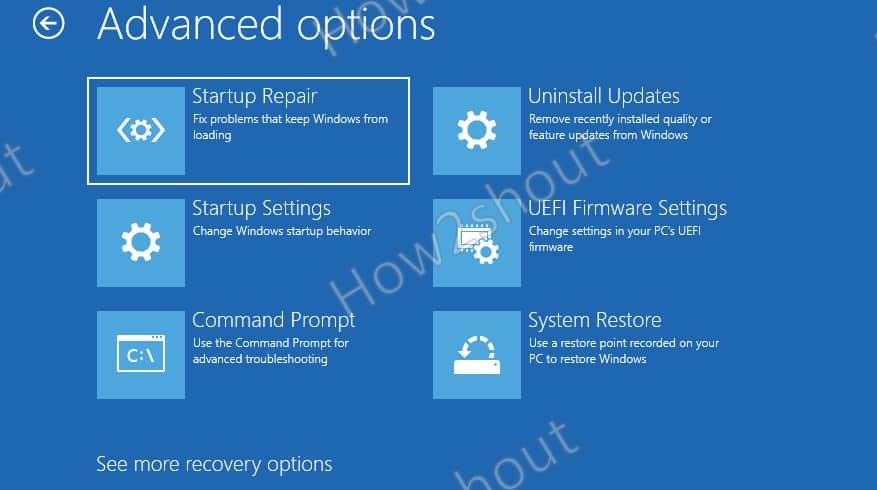
Remember you have to hold the pressed shift key while clicking on the Restart option. After that wait for few seconds and you will access another configuration screen that will allow you to access safe mode, through “Troubleshooting>> Advanced Options >> Startup Settings”.
Select Advanced Options.
Click on TroubleShoot.
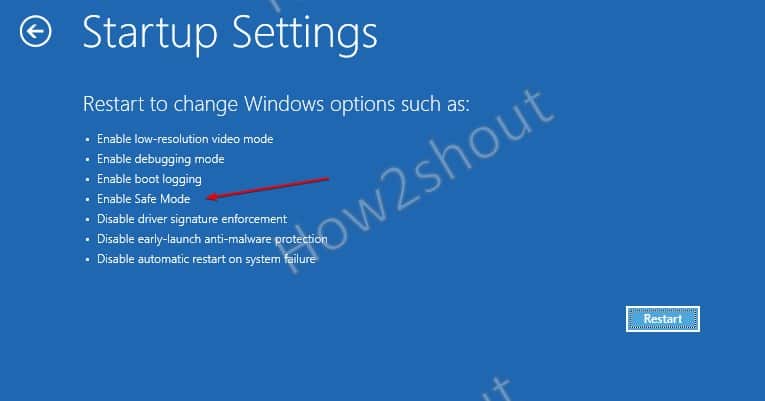
Go to Startup Settings and click to open it.
Now, click on the Restart button to further options to enable them.
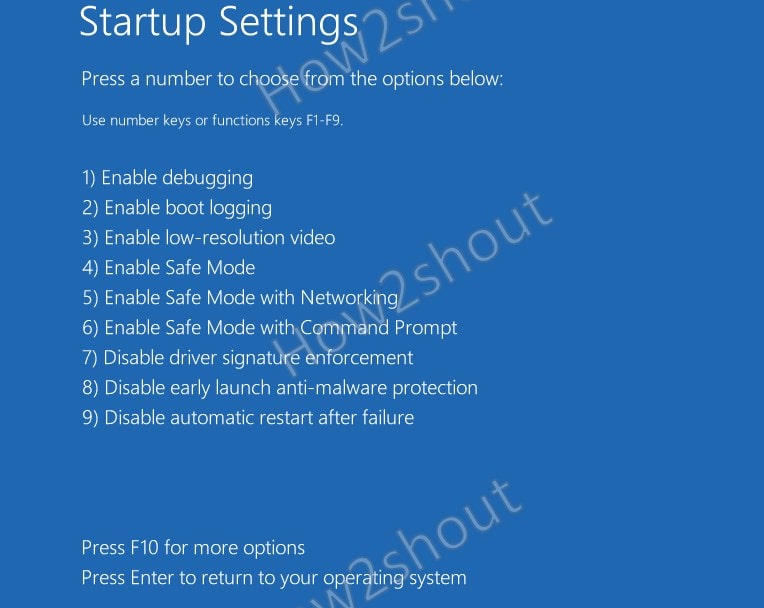
As the system restarts, it will give some Startup settings, to enable them, use the number key or function key F1-F9. For example– To enable “Windows 10 Safe mode” simply press F4.
Msconfig
If none of the above given options to enable Safe mode on Windows 10 worked, then this Msconfig will not let you down. The Windows system configuration tool ‘msconfig.exe‘ can easily be accessed using the Windows Run box. For that type- Win+R keys together and its box type – msconfig
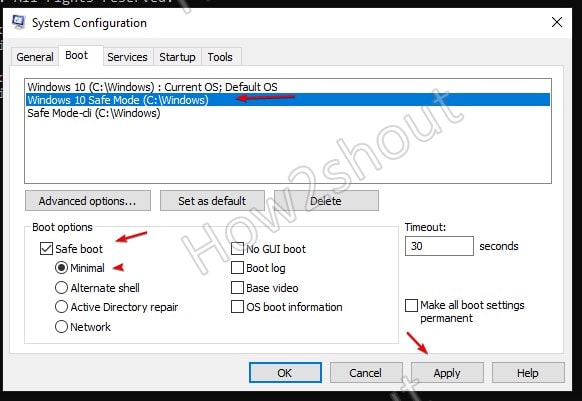
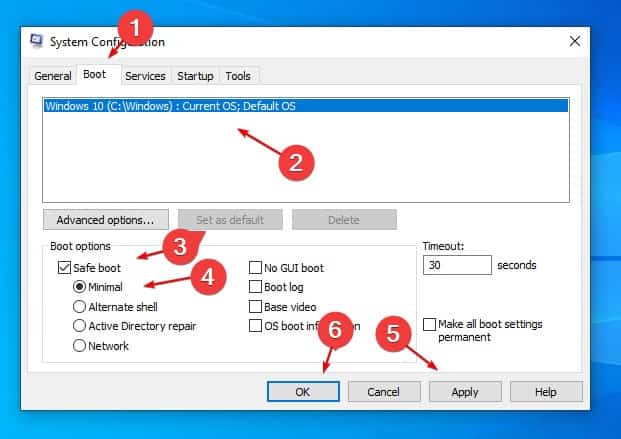
On the Windows 10 System configuration, select Boot tab and then default OS entry. After activating the ‘safe boot‘ along with options such as the basic ‘minimal‘. The application will offer you to restart the system and when you do that, you will automatically enter the safe mode of Windows 10.
USB / DVD Recovery Drive
In this option, the users need a recovery USB drive or DVD of Windows 10 that can be created using the ” Recovery Drive ” tool on DVDs or external USB drives. Once created, it includes recovery tools, and using them we can access the safe mode of Windows 10, via “Troubleshooting>> Advanced options>> Startup Settings” like we did in the above Shift+reset method.
Windows 10 Safe Mode manual Boot Entry
Well, we don’t require Safe mode access on regular basis, however, yet if someone does, then we can create a permanent boot entry for it in Windows 10 boot menu (it works the same way in Windows 8 and Windows 8.1). Here are the steps to follow.
- In the Windows 10 start box type CMD and when it appears run it as Administrator.
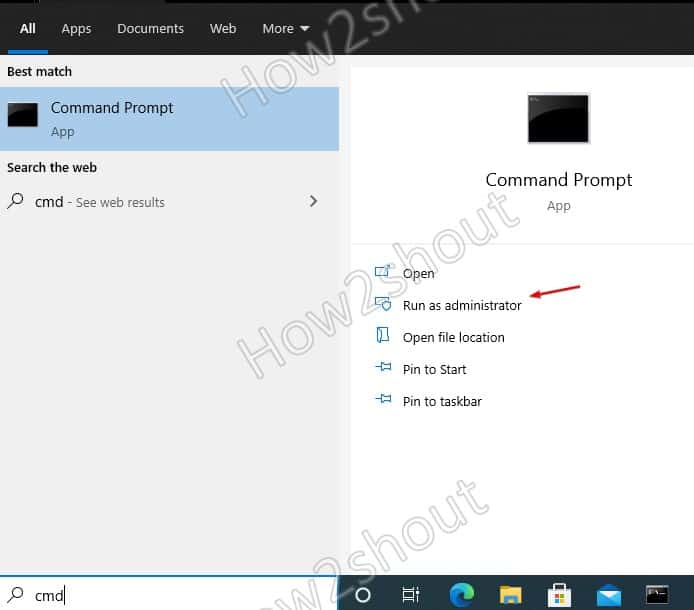
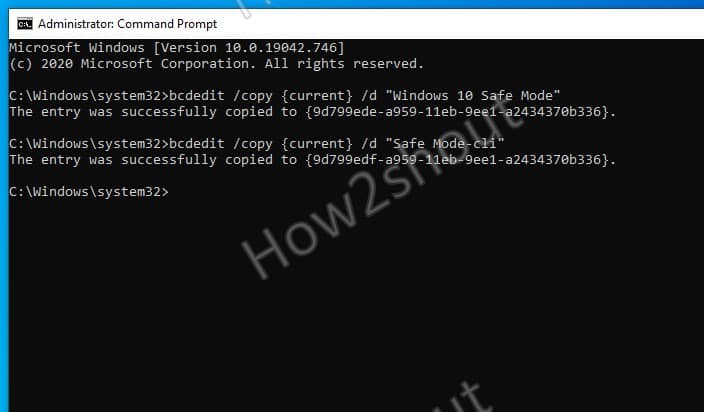
- Copy and paste the following command and press enter:
bcdedit /copy {current} /d "Windows 10 Safe Mode" - Additionally, with the same command, you can create other entries allowed in safe mode, for example, to access safe mode through the command prompt without a graphical interface. Thus, add one more entry with different name:
bcdedit /copy {current} /d "Safe Mode-cli"
Once you have created the boot entries successfully, let’s activate Safe mode for them from the Windows System configuration settings tool.
- Open the Run box by pressing “Windows + R” keys and in the box type msconfig.
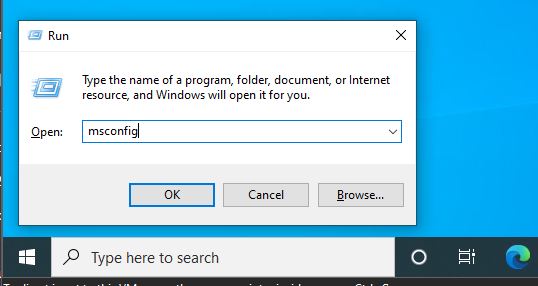
- Go to the Boot tab and as you will see, we will already have available the two new entries added using the command line bcdedit tool.
- You will see two new entries, we have created, now select the one with the “Windows 10 Safe Mode” name and select “Safe mode“. To configure it further mark the “Minimum” option.
- Click on the second added entry and configure it in the same way. But instead of the selecting Minimum option, we can go for others as per our requirements. For example with alternate shell, only with network functions or with the parameters that interest you. Once done also activate the option “Make all the boot configuration permanent“.
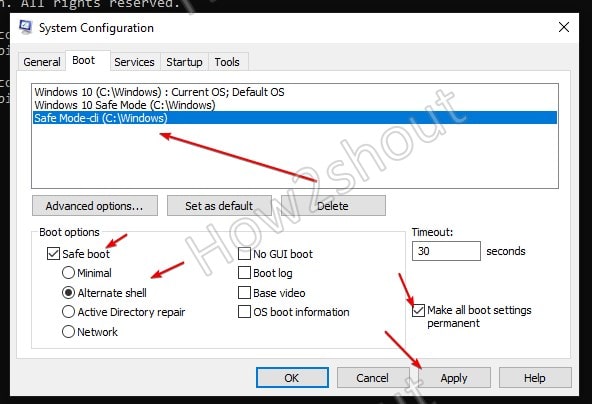
- That’s it, Apply Changes and press the Ok button to save the configuration.
- Now, next time you boot your system you will have Safe mode options too in the Windows Boot Menu.

Note: In case you don’t want Safe mode entries in the Boot menu anymore, then simply open System configuration using the MSConfig command again. Select the entries and hit the Delete button.

Related Posts
How to create email groups in Gmail? Send one email to multiple recipients in a matter of seconds.
Getting the right dashcam for your needs. All that you need to know
How to Install 7-Zip on Windows 11 or 10 with Single Command
Install Google Earth on Windows 11 or 10 Using a Single Command
How to install Gaming Services on Windows 11
How to Install Telnet Client on Windows 11 Using PowerShell