Here are the commands to install and setup both Node.js and its package manager NPM on CentOS 8 Linux or Stream. It will work for RHEL 8 too.
Nodejs is a cross-platform JavaScript run-time environment available for Windows, Linux, FreeBSD, macOS, Android and more. It basically makes developers capable of writing server-side Javascript which will run outside the client browser. It helps them to create dynamic web pages, furthermore it has eliminated the usage of different languages for creating server-side and client-side scripting, instead it can be done alone by node.js.
It comes with NPM package manager which enable Node.js developers to publish and share their code using Node.js libraries. Here in this tutorial, we will show you how to install it on CentOS 8 Linux.
How to install Node.js and NPM on CentOS 8 Linux
Step 1: Install some Development Tools first.
First, we need to install some developing tools to support the installation and working of NodeJS development environment.
sudo dnf groupinstall "Development Tools"
or
sudo yum groupinstall "Development Tools"
Step 2: Update the System
Just update the system so that it can make every installed package to its latest state.
sudo dnf install update
Step 3: Search for the available Nodejs Redhat App stream repo
The best thing this time in the latest CentOS 8, we don’t need to add an extra repository to install Nodejs. It is already available in the AppStream official repo of this Linux 8. Thus first we search and see what is the version that is available to download an install.
For that use this command:
sudo dnf module list nodejs
The output for the above command:
[root@localhost ~]# dnf module list nodejs
Last metadata expiration check: 0:08:15 ago on Wed 02 Oct 2019 09:26:20 AM EDT.
CentOS-8 - AppStream
Name Stream Profiles Summary
nodejs 10 [d] common [d], development, minimal, s2i Javascript runtime

Hint: [d]efault, [e]nabled, [x]disabled, [i]nstalled
So as per the above result, the current version which available is the latest long term supported version of the NodeJS i.e v 10.x. Let’s install it in the next step.
Step 4: Install Nodejs and NPM on CentOS 8 Linux
Here is the single command that will install both Node.js along with NPM on your server or desktop CentOS 8 Linux system.
sudo dnf module install nodejs
or
sudo dnf install @nodejs
Those are developers can install nodejs with developer profile so that libraries will available for them to build dynamically loadable modules. (optional)
sudo dnf module install nodejs/development
If you don’t want full Nodejs then instead of that you can install its minimal version (optional):
sudo yum module install nodejs/minimal
However, here we are installing the full stable version that means the first command of this step and here is its Output:
[root@localhost ~]# dnf module install nodejs
Last metadata expiration check: 0:11:37 ago on Wed 02 Oct 2019 09:26:20 AM EDT.
Dependencies resolved.
===============================================================================================================
Package Arch Version Repository Size
===============================================================================================================
Installing group/module packages:
nodejs x86_64 1:10.14.1-1.module_el8.0.0+14+a5a48e73 AppStream 8.6 M
npm x86_64 1:6.4.1-1.10.14.1.1.module_el8.0.0+14+a5a48e73 AppStream 3.6 M
Installing module profiles:
nodejs/common
Enabling module streams:
nodejs 10

Transaction Summary
===============================================================================================================
Install 2 Packages

Total download size: 12 M
Installed size: 57 M
Is this ok [y/N]: y
Step 5: Check the install Nodejs & NPM version
After the successful installation of this javascript language, let’s check its version as well as the directory where they have been installed.
node-v
npm -v
which node
which npm
Output for the above commands
[root@localhost ~]# node -v
v10.14.1
[root@localhost ~]npm -v
v6.4.1
[root@localhost ~] which node
/usr/bin/node
[root@localhost ~]# which npm
/usr/bin/npm
Your Node Javascript is installed start doing what you want. However, if you are new to this language then you can try out the below example:
Step 6: Let’s test Node is working or not using a tiny webserver
To test it, let’s create a demo web server and see its working…
Create a javascript file
nano nodetestfile.js
or
vi nodetestfile.js
Note: If nano is not on your system then use this command: dnf install nano
Add the following code it that file:
#!/usr/bin/node
var http = require('http');
var port = 8000;
var laddr = '192.168.43.85';
http.createServer(function (req, res) {
res.writeHead(200, {'Content-Type': 'text/plain'});
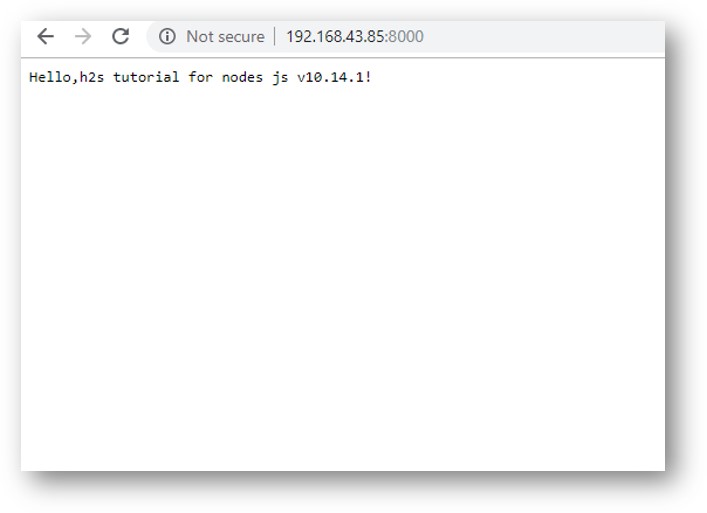
res.end('Hello, h2s tutorial for nodes js ' +
process.version + '!\n');
console.log('Processed request for '+ req.url);
}).listen(port, laddr);
console.log('Server running at http://' + laddr + ':' + port + '/');
Save the file. If you are using ViM (vi) then press Esc button and then type :wq and press the Enter button to save the file.
For Nano user simply press Ctr+X and then type Y and hit the Enter button.
Run the script we created above
./ nodetestfile.js

Now, Open your browser type 127.0.0.01:8000 or server-ipaddress:8000
If you are accessing the Nodejs web server on a browser outside your local machine then don’t forget to open 8000 port in your firewall:
sudo firewall-cmd --permanent --zone=public --add-port=8000/tcp
sudo firewall-cmd --reload
Related Posts
How to create email groups in Gmail? Send one email to multiple recipients in a matter of seconds.
Getting the right dashcam for your needs. All that you need to know
How to Install 7-Zip on Windows 11 or 10 with Single Command
How to Install ASK CLI on Windows 11 or 10
How do you install FlutterFire CLI on Windows 11 or 10?
How to create QR codes on Google Sheets for URLs or any other text elements