Connecting the Synology via a router and using the Synology Assistant is so easy but what happens when you don’t have a router and external DHCP to provide an IP address to your NAS but still, you want to connect it directly with your personal Windows Laptop or PC. What will you do at that moment to access the files resides on your NAS?
Recommended: First, try the alternate method given at the bottom and then the first.
So here in this tutorial, we will let you how to directly connect your Windows PC with Synology using Ethernet cable but without a router.
- For this tutorial, we are using the Synology DS218j NAS.
- Look at the backside of Synology NAS you will find an Ethernet LAN port.
- Now use an ethernet cable to connect the NAS with your PC.
- Once connected Switch ON the NAS box.
- Wait until you get a beep that means the NAS system successfully booted up.
- The Game starts now. Actually, as soon as you connect the NAS to your computer it starts looking for an IP address from a DHCP server. But unfortunately neither we have a router nor any external DHCP server. So, we need to create one on our own Windows operating system.
- When you connect the Synology NAS directly to the PC, both NAS and your Windows PC need unique identification or IP address in order to communicate with each other. And if you manually entered an IP address for your own Windows PC network adapter, it got the IP but still the NAS system not. So, we need to download an open-source portable DHCP software called DHCP server for Windows. You can download it from this link.
- The open-source DHCP server for Windows works for all Windows version such as Windows 10, 7, 8 and Vista. After downloading the DHCP server portable software which is in ZIP format; unzip to extract the files.
- After extracting, go to Start-> Control Panel- Network & Internet-> Network and Sharing from the right side click on the Change Adapter Settings option.
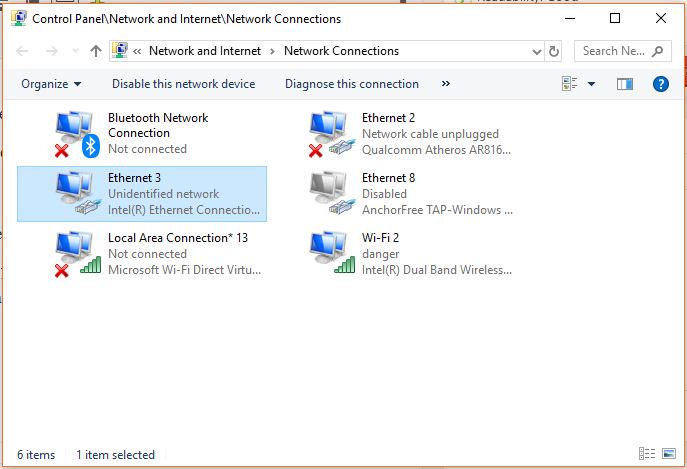
- Now identify the Ethernet Adapter for which you have plugged the Ethernet cable from your Synology NAS box. Like in my case it is Ethernet 3 and might be different in yours.
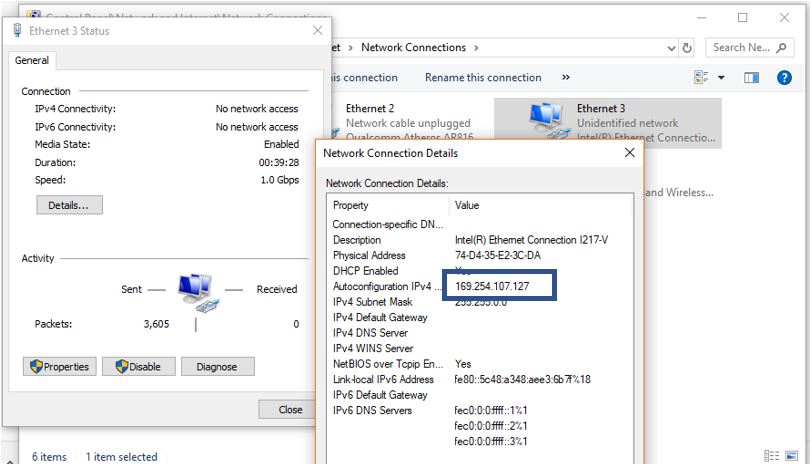
- Double click on that ethernet adapter after than on the Details button and you will see under the IP address section you are getting the APIPA ( Automatic Private IP Addressing).
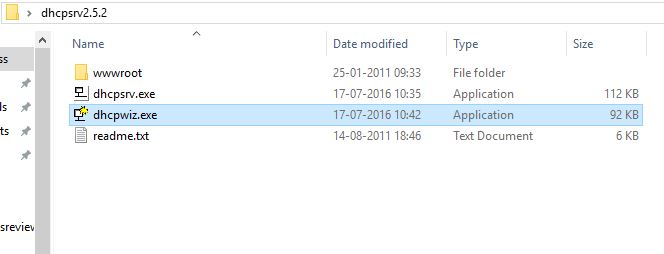
- Now get back you to the downloaded and extracted DHCP for Windows software folder and open it. Inside the folder, you will find the three files and folder. Right-click on the dhcpwiz.exe file to configure the DHCP server on your Windows system.
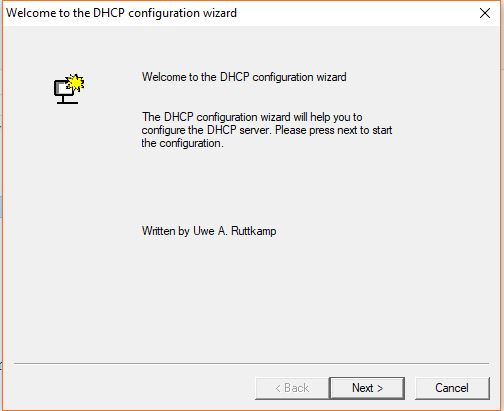
- After running, the DHCP configuration file clicks on the Next button.
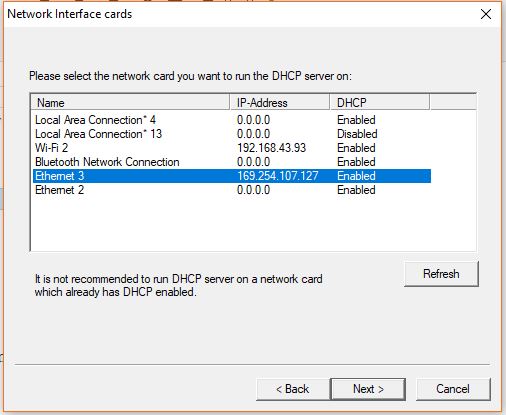
- Select the Ethernet card interface that you used to connect the Synology NAS and click on the Next button.
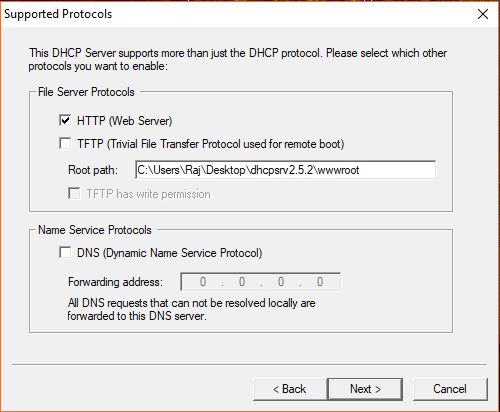
- Check the HTTP Web server box to get the webserver protocol compatibility.
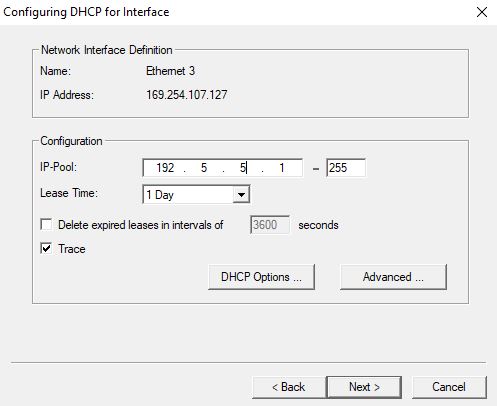
- Now you need to give some random IP address pool series to your DHCP from which it assigns an IP to your computer system ethernet card interface and to Synology NAS box. You can give the same I have used 192.5.5.1. Now click on the Next button.
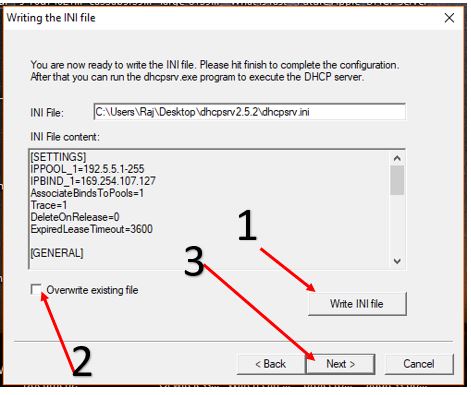
- It’s time to write the configuration file which is INI. For that just click on the Write INI file Button. In case you already using this software then also need to check the box given before the text Overwrite existing file. Once you are done click on the Next button.
- Now click on the Configure button to add a firewall exception and then Finish button.

- Now again go the DHCP server software folder you downloaded and unzipped. From there right click on the dhcpsrv.exe file and run it as administrator.
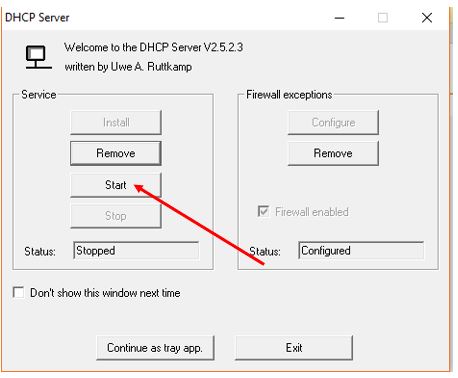
- Once it runs, click on the Start button in order to run the DHCP server on your Windows PC.
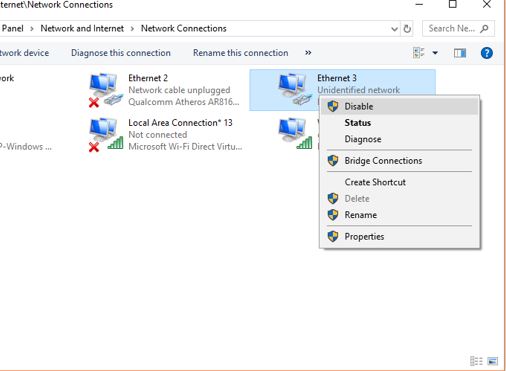
- After performing all the above steps. Go to the Network connection, select the above assigned Ethernet adapter, right-click and disable it.
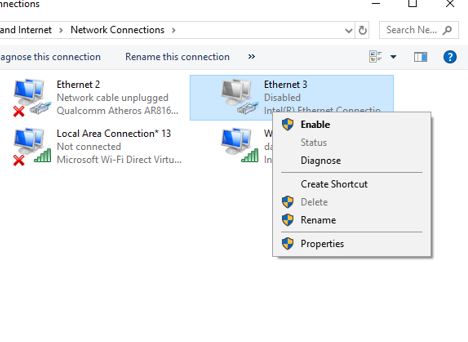
- Once it disables, again right-click on it and enable it.
- Double click on the Ethernet network adapter and then Details button. This time you find under the IPv4 section, the APIPA has gone and you got the proper IP address from the DHCP pool you assigned above.
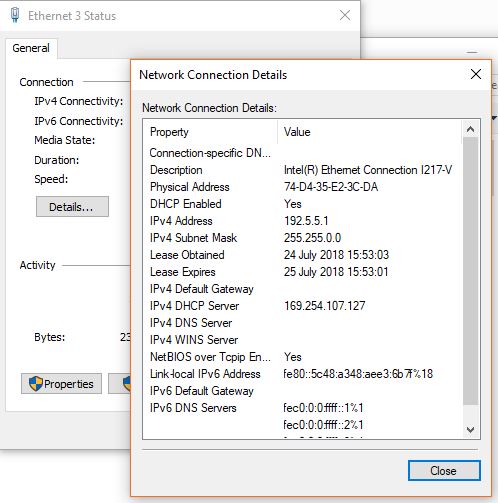
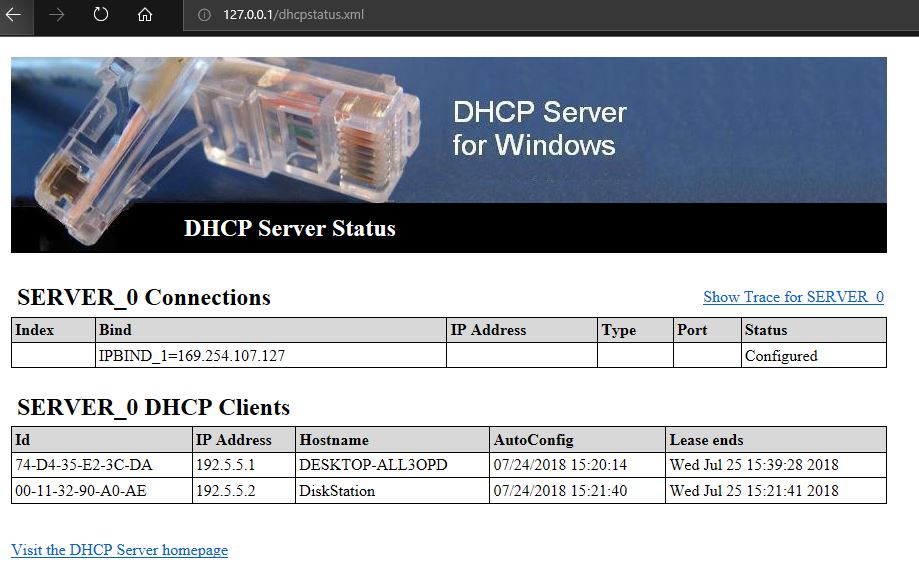
- You can see the IPv4 address we got for our PC from our Windows DHCP server is the 192.5.5.1. Now open the web browser and type http://127.0.0.1/dhcpstatus.xml. This should show the configured and be operating connections and also all currently active clients.
- You can see in the screenshot, the devices those assigned an IP address using the DHCP server for Windows software; One of them is for Synology DIsk station and other is for our Windows PC.
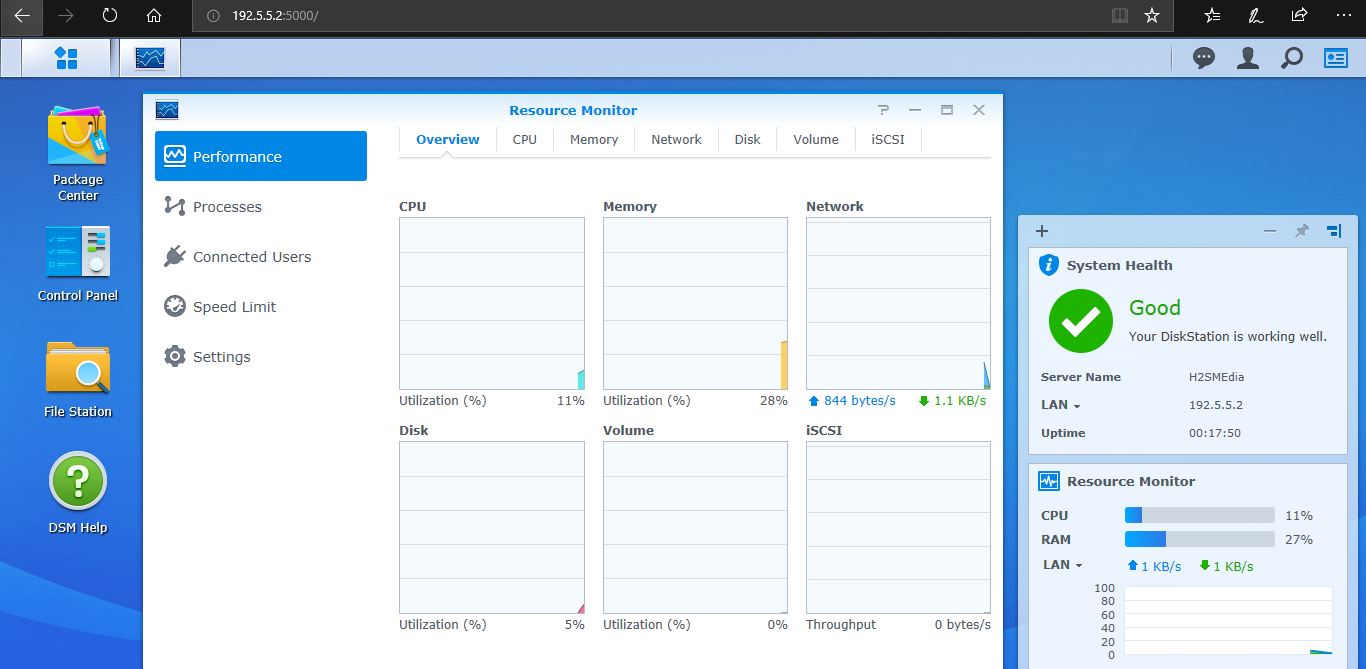
- Once you got the assigned IP address for your Synology Nas box, its time to access that. Go to your browser and type the Synology assigned IP address with port number 5000. For example, our IP address is 192.5.5.2 then in the browser we will type 192.5.5.2:5000.
- And finally, you can access your Synology NAS directly via PC without any router.
Alternate Method to connect Synology directly on System
If you don’ want to install the DHCP server software on computer and to save your self from all above steps simply create a bridge connection between the adapter that has an internet connection and adapter where you have connected the Synology NAS: bridge WiFi/Ethernet to Ethernet adapter to share internet
I hope this tutorial helps you to solve your problem somehow. In case you have any confusion or any suggestion then comment box is all yours!!


Hello and thank you for this detailed guide.
I’m almost certain that I’ve been able to access my Synology DS214 NAS without downloading any third party software or going through these steps. Or have I dreamt that?
The routine described in this article didn’t work for me though I was sure I did initial NAS setup through direct ethernet connection to my PC. As it turned out, the DHCP server on the DiskStation is _on_ when you turn the NAS for the first time, but it was somehow disabled when I tried to reconnect the box directly to the PC to copy some huge files over ethernet. Check out the Synology’s own manual on how to turn the DHCP on on the NAS. Once it’s enabled, connect the box back to PC ethernet port and check the DHCP server IPv4 address in the windows ethernet adapter settings (sorry, the russian windows UI here, so I can’t give more specific directions). In my case it was 192.168.31.119 – add “:5000” port number to it and open in your web browser to access the DSM. OR, type in the same IP address right into your Windows Explorer address bar (you will be prompted to enter the NAS credentials).
Thanks to the article author for the hint that the problem was with DHCP (frankly, I’ve no idea how all this LAN stuff actually works 🙂
Very detailed guide.
But no 3rd party software is required to access a Synology NAS from your PC.
That’s correct, providing the DHCP server is enabled on the NAS itself.
So how do you access your Synology NAS after connecting it directly to your computer?
Yes, we can simply use the IP address of the NAS to access it but it that case we would not be to access internet from hotspot thus bridging comes handly at that time https://www.how2shout.com/how-to/bridge-wifi-to-ethernet-adapter-to-share-internet.html
I have followed all the steps and problem is that sometimes I am able to access DS918+ and sometimes I am not and everything is correctly configured. Do you know what can cause the issue?
Didn’t work for me.
I got an error – Unable to connect. What can i do next to troubleshoot this?
Hi there, I’ve done all the steps and when I reach step 18 the service status shows as Not Installed. I’ve gone back and done the steps 3x now and still I’m stuck there. What could be the issue? I’m using a DS418 model
Thanks for posting this – it almost worked. Everything is fine until I get to posting 192.5.5.2:5000 and the site cannot be reached. Any suggestions?