If you work with virtual machines, you know about virtual disk images where the files, the operating system, and other necessary data of a virtual machine is stored. That is what for, virtual disks are used by most people, however, you can even use a virtual disk to keep your important files, backups and a number of other items in a consolidated form if you don’t want to lose them suddenly. After a virtual disk is mounted, you can use it like ok a normal hard drive or a removable storage device. There are a number of ways, virtual drives can come in handy for you.
Besides that, you can even use a virtual drive as shared storage on your network so that others can send and receive files between the virtual drive and their computer without getting any access to your physical hard drive, where some private or sensitive data might also be stored. So, today I will discuss how you can create a virtual hard drive on your computer. After a virtual drive is created, you can see the content of the virtual drive by normal opening it or by mounting it on your computer. You can read this article (how to use 7zip to extract virtual images- Windows & Linux) to know more about how you can mount virtual drives on your computer.
Creating a virtual drive on Windows 10/8/7
The tutorial steps given below to add virtual drive will work on Windows 10, Windows 8 and Windows 7.
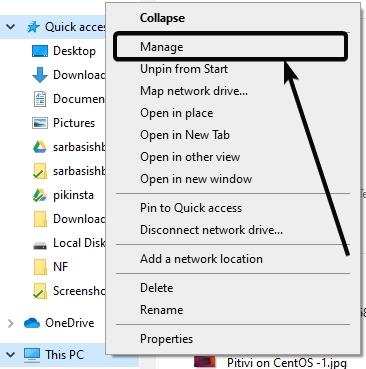
1. Right-click on ‘My Computer’ or ‘This PC’ and click on ‘Manage’.
2. Now right-click on ‘Disk Management’ and click on ‘Create VHD’.

3. You can choose the size of your virtual hard drive, the location of the virtual hard drive and configure other necessary settings before the virtual hard drive is finally created.
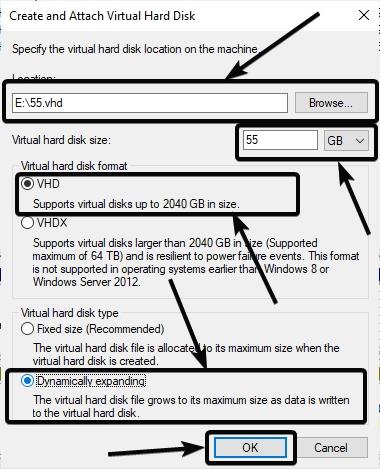
4. If you create a virtual hard drive with the VHD format, the maximum size of the hard drive should not be higher than 2040 GB and this should be enough for most users, but if you are looking for more storage within your virtual hard drive, choose the VHDX format.
To conserve space on the hard drive, you can just choose between fixed size hard drive or dynamically increasing size of the virtual hard drive. If you choose ‘Fixed size’, the size allocated for the virtual hard drive will be reserved right after creating the virtual hard drive and if you choose ‘Dynamically expanding’, the size of the virtual drive will increase as you add files to it. So, just use appropriate settings depending upon your requirements. Finally, click ‘OK’ to create a virtual hard drive.
Now the virtual hard drive is created you can follow the tutorial I mentioned at the beginning of the tutorial to mount the virtual hard drive or you can even Mount the same from Windows disk management. Just go for the best option as per your convenience.
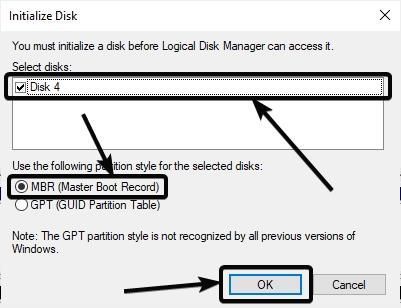
To mount a virtual hard drive created using this management on Windows, scroll down in the list of storage drives connected to your computer, and right-click on the one that is not initialized, and that will probably be the virtual hard drive created by you. Click on ‘Initialise Disk’.

You will find two options. just choose ‘Master Boot Record’ or ‘MBR’ and click on ‘OK’.
Now, right-click on the unallocated space, which is 55 GB for me, and click on ‘New Simple Volume…’.

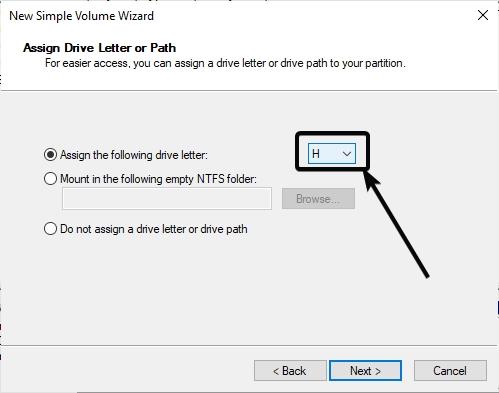
Now, assign a disk letter to the virtual hard drive and format the virtual hard drive in your preferred file format. I will recommend you to format the disk in NTFS format.
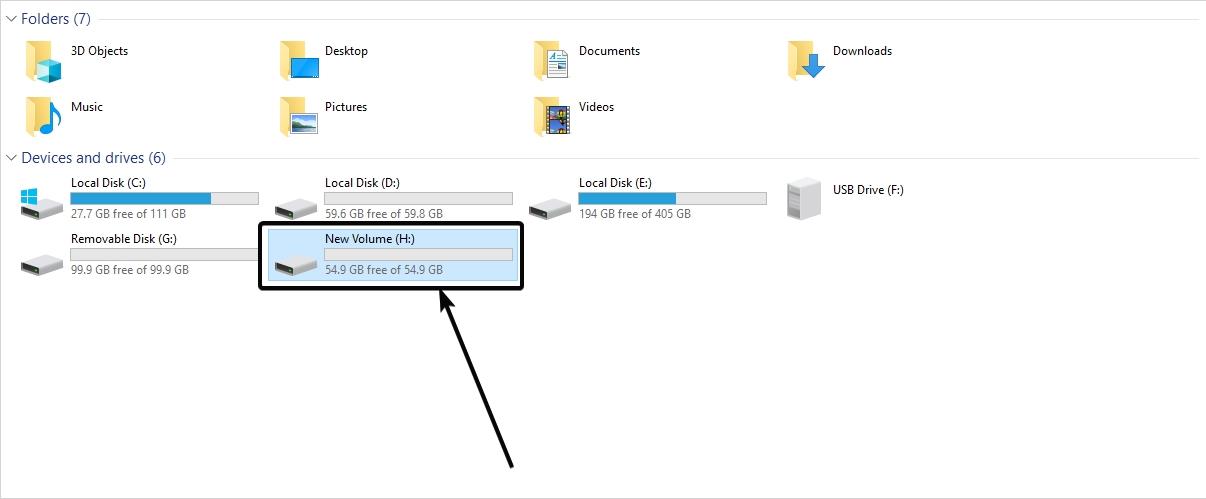
After the virtual hard drive is created, you will be able to find the drive as a removable storage device within ‘My Computer’ or ‘This PC’. The drive with 55 GB of storage is one that I have created.
You can simply eject the virtual hard drive by right-clicking on it or do the same by going to Disk Management, and then by choosing ‘Detach VHD’ by right-clicking on the respective volume.

You can even treat a virtual hard drive as an archive and you can even encrypt the contents of the virtual hard drive using BitLocker or any other advanced encryption software that you have access to. You can know more about how you can encrypt a storage device using BitLocker in this tutorial. If you need to keep something sensitive on your computer, keeping the same within a virtual hard drive and encrypting it it can be the best task you can do as you can transfer files between a physical and a virtual hard drive effortlessly unlike ISO files or disc images and archives, where it is very inconvenient to add new files.
So, that was all about how you can create a virtual hard drive on your Windows computer. Do you have any questions in mind? Feel free to comment on the same below.
Related Posts
How to create email groups in Gmail? Send one email to multiple recipients in a matter of seconds.
Getting the right dashcam for your needs. All that you need to know
How to Install 7-Zip on Windows 11 or 10 with Single Command
Install Google Earth on Windows 11 or 10 Using a Single Command
How to install Gaming Services on Windows 11
How to Install Telnet Client on Windows 11 Using PowerShell