IntelliJ IDEA is an IDE by JetBrains and Copilot is an AI-powered coding assistant that we learn how to install on IntelliJ with the help of an extension.
IntelliJ IDEA doesn’t need any introduction if you are a developer because it is one of the famous integrated development environments (IDE) created by JetBrains. It is developed especially for Java programmers, however, can support a wide range of programming languages with the help of extensions. IntelliJ IDEA offers a comprehensive set of tools for coding, debugging, and testing software.
Key features of IntelliJ IDEA include code completion, intelligent code analysis, refactoring tools, project navigation, version control integration (e.g., Git), and support for various frameworks and technologies.
Know what is the need of GitHub Copilot?
Well, AI is proliferating somehow in all sectors where the demand for the latest tech is rising, so how the coding world be left behind? In short, Copilot is designed by GitHub to use the power of Open AI and help developers write codes more efficiently by providing code suggestions, autocompletion, and even generating entire code blocks. We can get the Copilot AI assistance in popular code editors and IDEs such as VSCode, IntelliJ IDEA, Visual Studio, and VIM/neoVIM using plugins. Well, this AI service is not free and users have to pay for it.
So, if you are a user of JetBrains IDEA product then in this tutorial we learn how to integrate and use Copilot with it…
Step 1: Install JetBrain IntelliJ idea
Well, you have to use IntelliJ IDE on your respective system to integrate the Copilot feature or service into it. If you already have it then can move to the next step otherwise first download the IDE from its official JetBrains website.
Step 2: Launch IDE
Once the installation of IDE is completed or those who already have it open the same from the application area.
Step 3: Open Settings/Preferences
Next, either click on the burger icon given on the left top side on IntelliJ Idea to access the File menu and then Settings or just click the Gear icon given on the top right on the IDE and select Plugins.

Step 4: Install Copilot Plugin on JetBrains IntelliJ idea
Select the Plugins option from the left side Menu. After that in the search box type – Copilot, to search it in the Plugin library.
As it appears in the results, click on the Install button in front of the “GitHub Copilot” plugin.
After that, you will see the “Restart IDE” button to restart the IntelliJ Idea.

Step 5: Log in to the GitHub Account
Since Copilot is a paid service, you’ll need to log in to your GitHub account from within IntelliJ IDEA to access its AI coding assistant features.
After finishing with the installation of Copilot, you will see a notification on the IDE asking you to connect GitHub account.

Click that and the “Sign in to GitHub” dialog box will open along with a Device code. You just need to click on the “Copy and Open” button.

It will open the default browser on your system along with the GitHub device Activation page. Press Ctrl+V to paste the automatically copied device code.
GitHub will ask you to provide the required permission, click on the Authorize GitHub Copilot Plugin.
Once you have provided the permission, in a few seconds JetBrains IDE will show the confirmation.
Step 6: Start using Copilot in JetBrains IDE
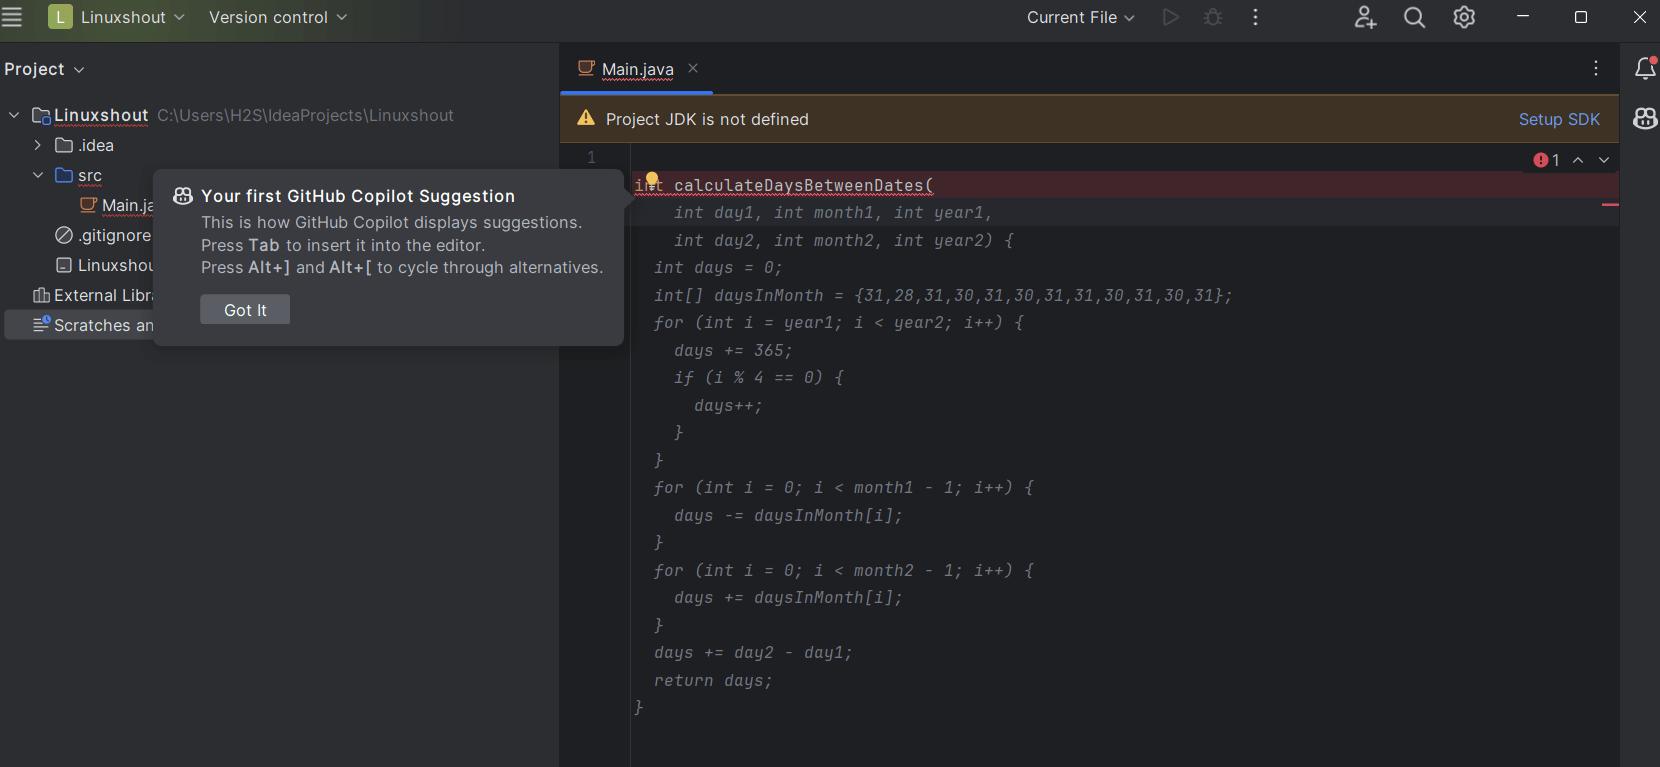
Now, just create a file and start coding in your preferred programming language. As you start writing your code, GitHub’s Copilot will detect reasonable suggestions and give you the same to auto-complete your codes. Also, over time it will analyze your coding structure and preference to give more refined results.
The given suggestion will be highlighted in grey color on the code editor windows, you can go through it, and if you find it useful then just press the “Tab” key to complete the same.
Whereas, you can see alternative suggestions, if any are available by pressing:
| OS | See next suggestion | See previous suggestion |
|---|---|---|
| macOS | Option+] | Option+[ |
| Windows | Alt+] | Alt+[ |
| Linux | Alt+] | Alt+[ |
And if you want to reject all suggestions, press Esc.

Not just this, as you start with your project file to write code for a program, you can type a few initial lines and then ask Copilot for multiple suggestions.
For multiple suggestions, type a few initial lines of your code and then click on the GitHub Copilot icon given on the right side.
You will see multiple solutions, go through them and if you like any, click on the Accept Solution button.

Moreover, we can generate the codes using comments. Type what you want as comments and AI will give you suggestions.

Disable GitHub CoPilot completions on JetBrains IDE
In the future, if you think want to disable the Copilot suggestions either because you don’t need or want a break from the AI service. Then, at the bottom of the IDE, you will see the Copilot icon, click that, and select Disable Completions, alternatively, you can use the keyboard shortcut – Ctrl+Alt+Shift+O.

Ending note:
Exactly, by following the steps mentioned, you not only install the GitHub Copilot plugin on JetBrains IDE IntelliJ IDEA but also enable its powerful AI-assisted coding capabilities. GitHub Copilot provides you with multiple coding suggestions, helping to accelerate your coding process and boost productivity. It’s a valuable tool for developers, streamlining the development workflow and offering helpful code suggestions and completions.
Related Posts
How to create email groups in Gmail? Send one email to multiple recipients in a matter of seconds.
What is a juice-jacking attack? How can we be safe from such attacks?
Getting the right dashcam for your needs. All that you need to know
How to Install 7-Zip on Windows 11 or 10 with Single Command
Install Google Earth on Windows 11 or 10 Using a Single Command
How to install Gaming Services on Windows 11