Lubuntu is easy to install Linux Distro, however, here is the tutorial to know how to install it on PC using a bootable USB or Pen drive.
There is an innumerable number of distributions available for Linux, and one of the most popular among them is Ubuntu. Ubuntu is a large community, and you can get answers to your questions just in case you face some issues using it. Lubuntu is an official flavour of Ubuntu, and it is best suited for computers with not so powerful or old hardware. Lubuntu comes with the lightweight LXDE desktop environment, which is sleek and the user interface should please most users. Lubuntu might not be that beautiful, but it is one of the best flavours of Linux you can use.
Due to too very low system requirements, Lubuntu is very responsive, at least way more responsive than Ubuntu, and you can even use Lubuntu on a new system, and change the desktop environment later on, if you are looking for a more beautiful user interface. Lubuntu is easy to install, and here is the tutorial, if you are finding it difficult. Lubuntu doesn’t come with any bloatware or unnecessary programs and thus, you will eventually have a lot of space for installing those programs that you actually need. It only lacks the snap repository, which though can easily be added before you can start downloading packages from it.
So without any delay, let’s get started with how you can install Lubuntu on your computer.
The steps to follow
Step 1: Download Lubuntu ISO file
Go to Lubuntu official website Download Page. The latest version which was available for downloading while writing this article was Lubuntu 19.04.
Step 2: Create a Bootable Lubuntu USB drive
To create Lubuntu bootable USB drive simple download a tool known as Universal USB Installer. Here is the link to get it. It is a cross-platform tool after a downloading click on the setup to run it.

Step 3: Boot PC with a USB drive
Insert the USB stick with Lubuntu on your computer’s USB device and boot from it. You can read this tutorial to find out how you can create a bootable USB stick.
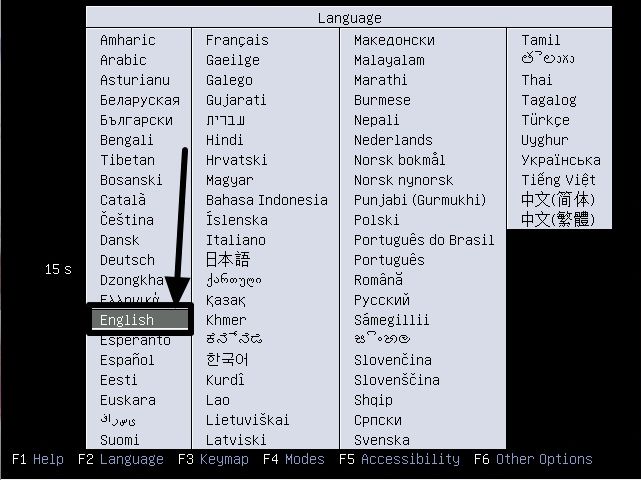
Step 4: Select Lubuntu Language
Once it boots up, choose the language for the installer. I am choosing ‘English’ here.
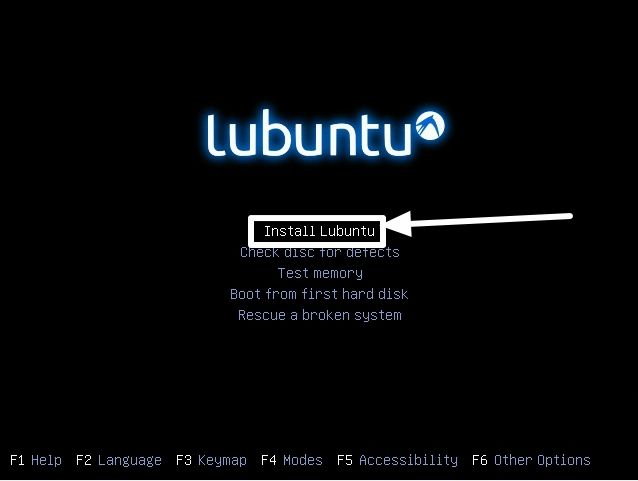
Step 5: Install Lubuntu
Now the boot menu for Lubuntu will appear. Just select ‘Install Lubuntu’, which should be chosen by default, using the navigation keys, and hit the enter key.
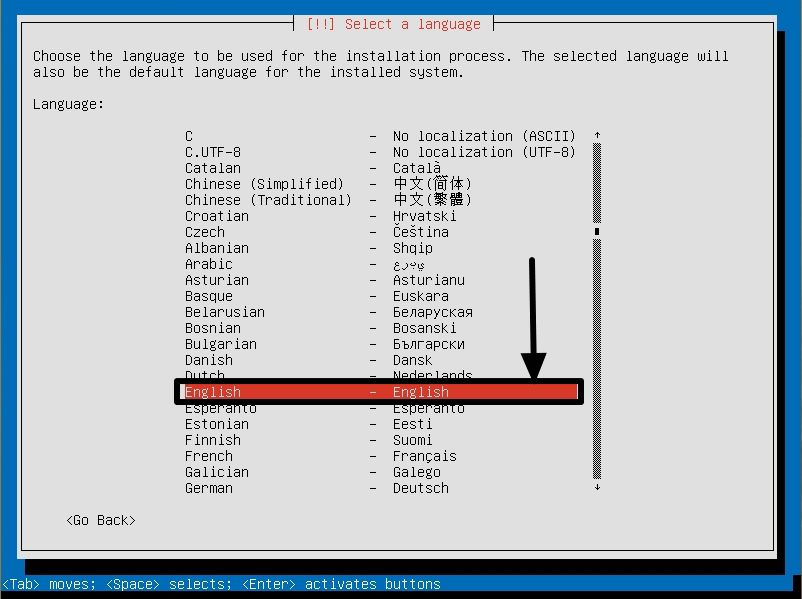
Now choose the language that you want to use for the installer, and hit the enter key. I am choosing ‘English’ here.
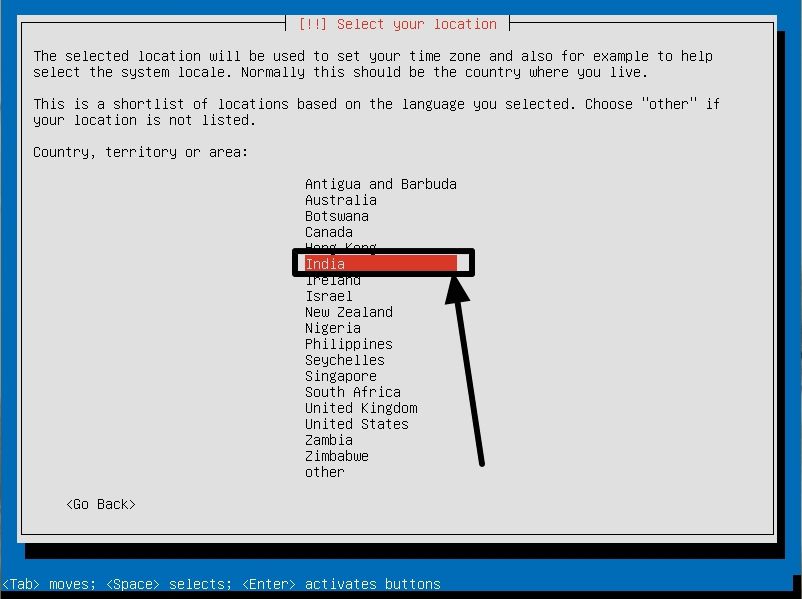
Step 6: Choose Location
Now choose your location using the navigation keys. Obviously, it will be India for me. Once you select your location, hit the enter key.
Step 7: Keyboard selection
Now you will get an option to set up the keyboard. Chances are there you are already using the QWERTY keyboard. If that is the case, select ‘No’ using the Tab key, and hit the enter key. Alternatively, you can select ‘Yes’ to choose a different layout.

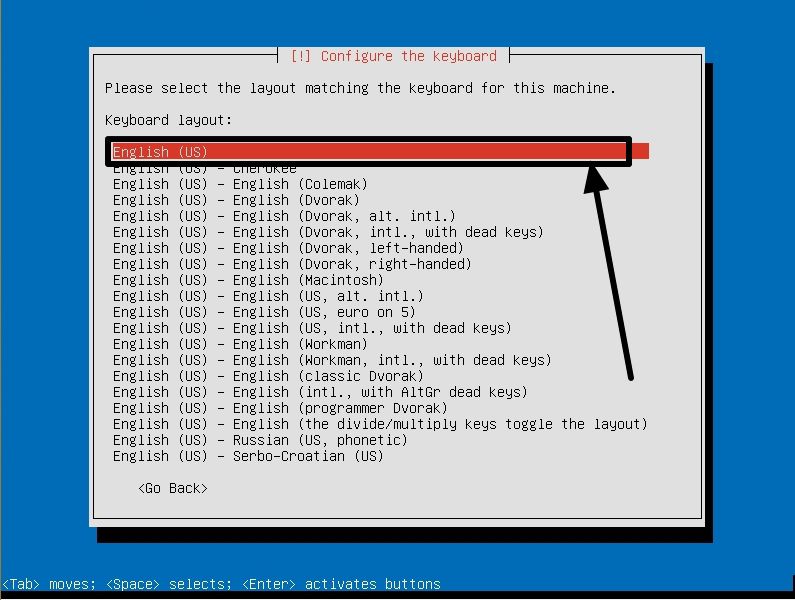
Now you will have to choose the origin country of your keyboard. It is ‘English (US)’ for me, and will possibly be the same for most other users.

Now choose the language of your keyboard. It is ‘English (US)’ for me, and should be the same for most other users.
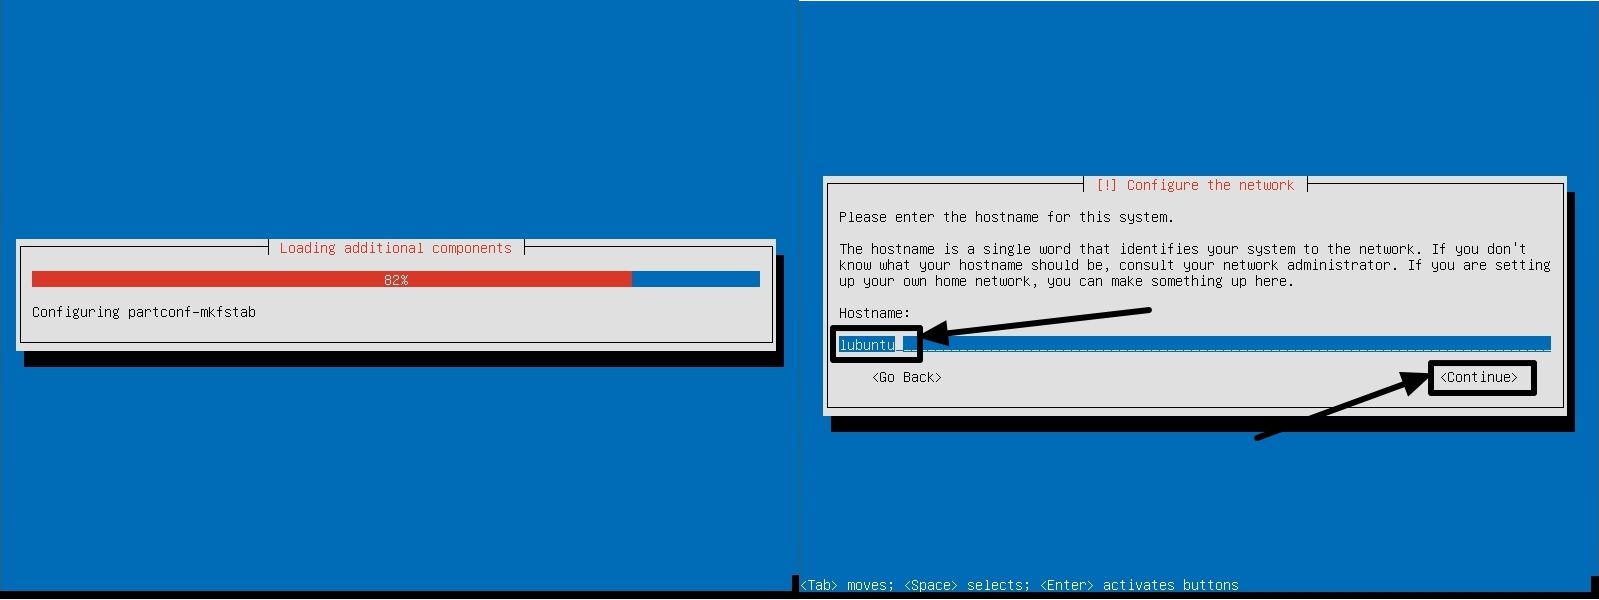
Step 8: Give Hostname to Lubuntu
The installation should start now, and once it is complete, assign a hostname for your computer, and hit the enter key. I am naming it ‘lubuntu’
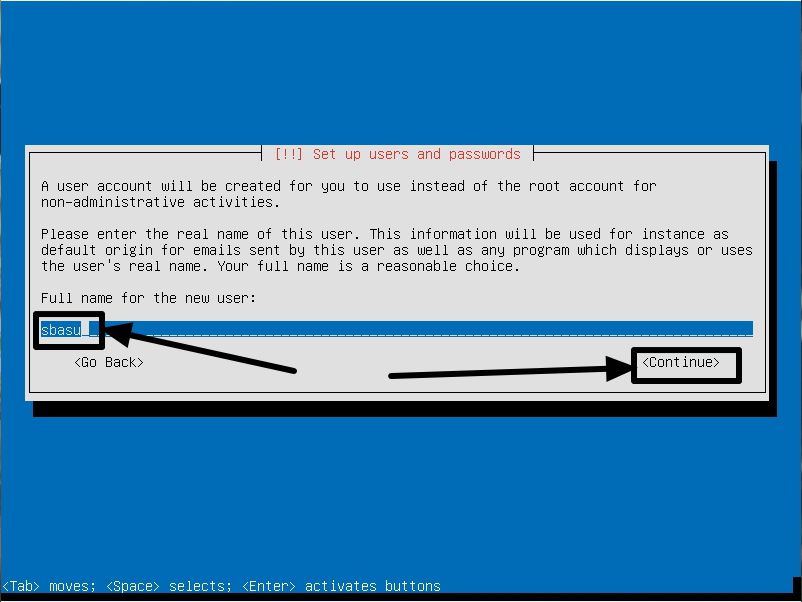
Step 9: Create a Username and Password
Now you will have to enter the name of the user, who will be using the computer. I am assigning ‘sbasu’. Once you are done, hit the enter key.
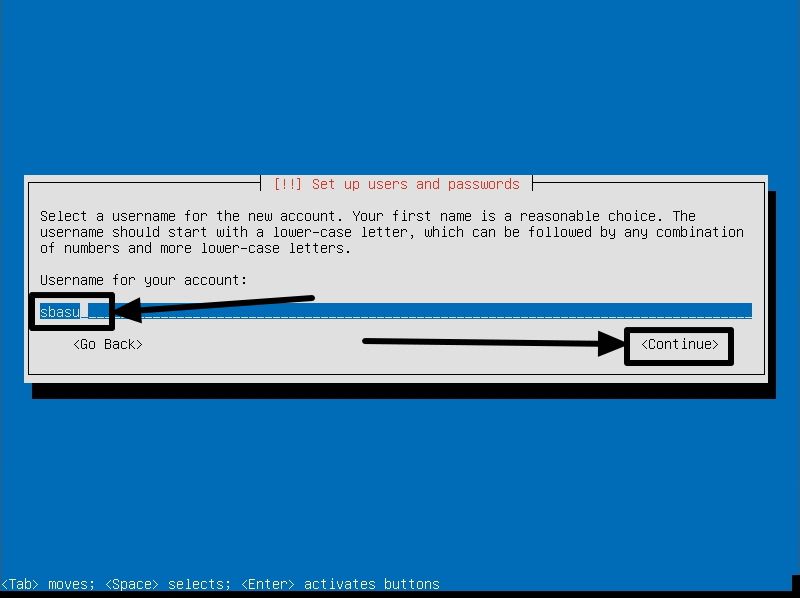
Now enter the username. You can keep the username same as the full name of the user. I am assigning ‘sbasu’. Once you are done, hit the enter key again.
Now assign a password, and enter the same twice, hitting the enter key after you enter it each time.

Step 10: Configure Time zone
Now your location will be automatically detected. Use the tab key to navigate to ‘Yes’, if the detected physical location is correct, else choose ‘No’ if you want to find out the location manually.

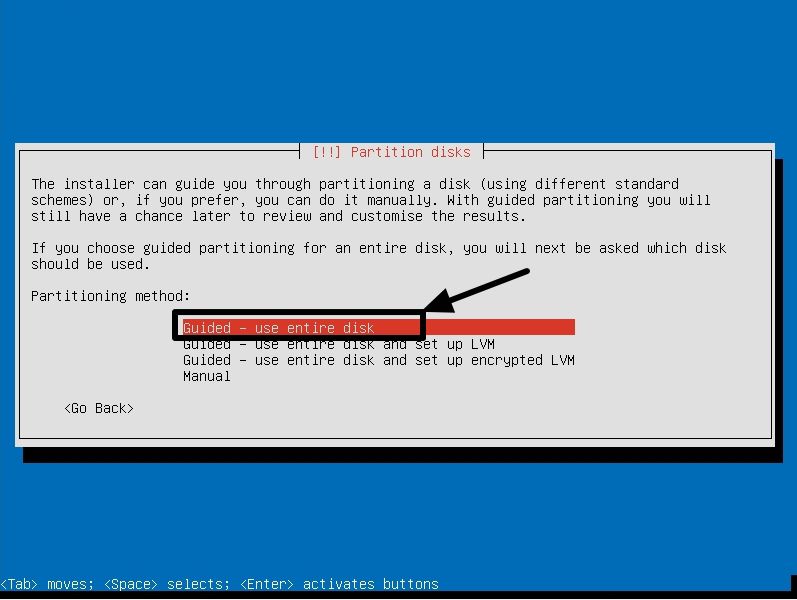
Step 11: Partition Disks
Now the next task is to partition your disk. Choose ‘Guided-use entire disk’, and hit the enter key.
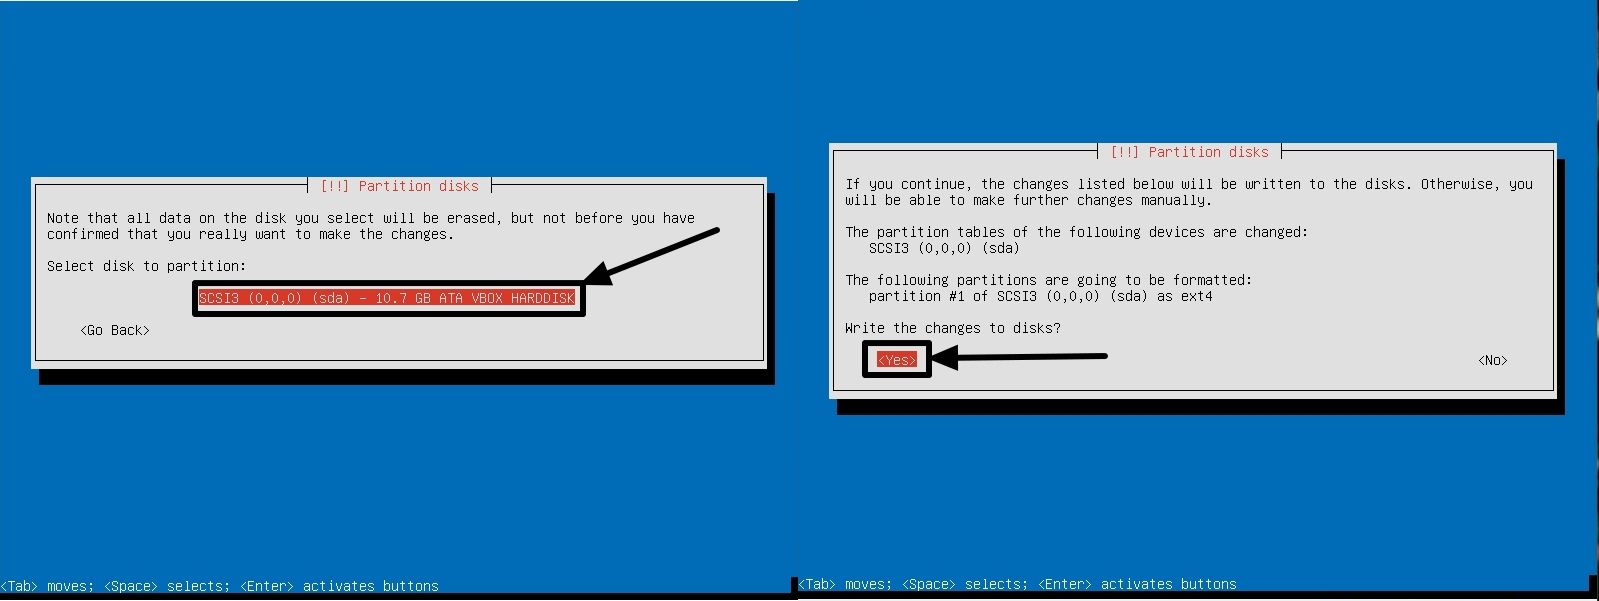
Select the partition, where you want to install Lubuntu, using the navigation keys, and hit the enter key. Now you will be asked for the confirmation to write changes to the disk. Select ‘Yes’ using the tab key, and hit the enter key.
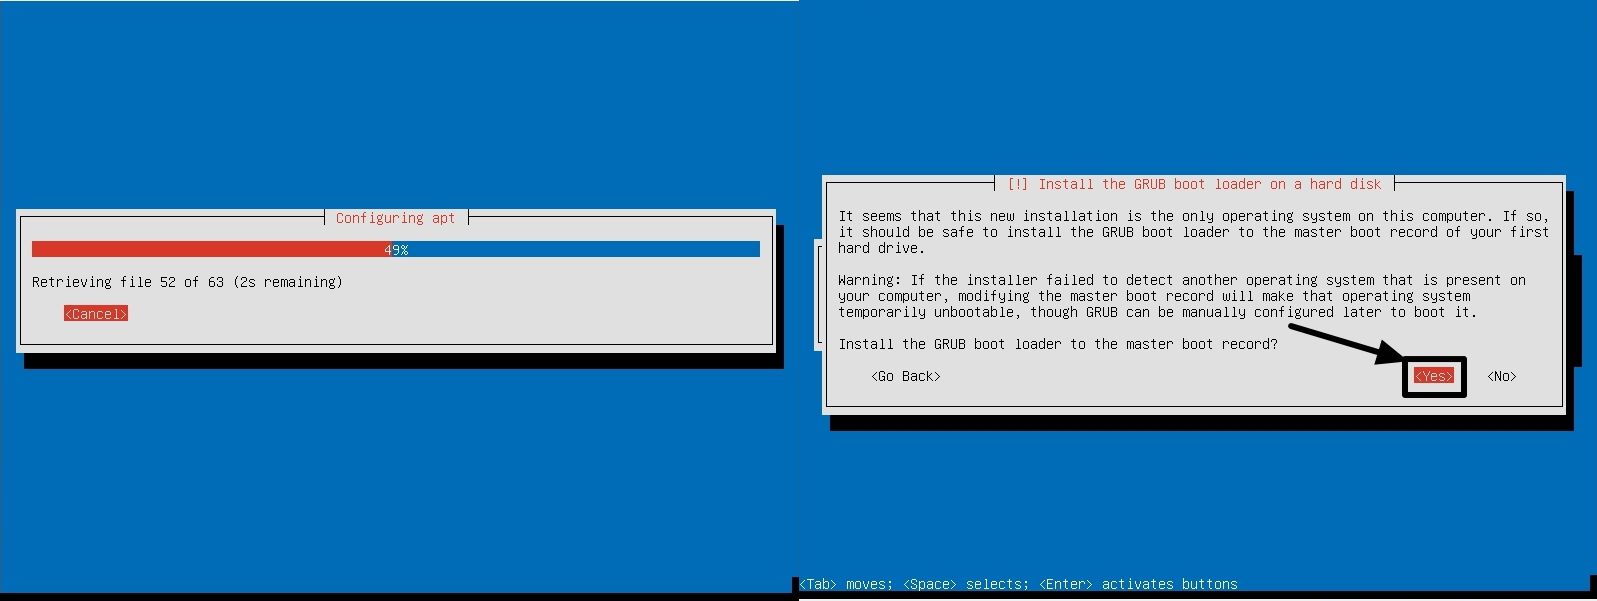
Now the system installation will start, and once it is over, you will be given the option to enter proxy information. If there isn’t any proxy to access the internet, leave it blank, and hit the enter key.

Now some updates will be downloaded, and once it is done, you will be given the option to install GRUB Boot Loader on to your hard drive. Use the tab keys to navigate to ‘Yes’, and hit the enter key.
Now depending upon whether your clock is based on UTC, use the tab keys to choose ‘Yes’ or ‘No’ and hit the enter key. It is ‘Yes’ for me. Once the installation is complete, hit the enter key to select ‘Continue’.

Once you choose ‘Continue’, remove the installer media. Now Lubuntu is ready for you to use.
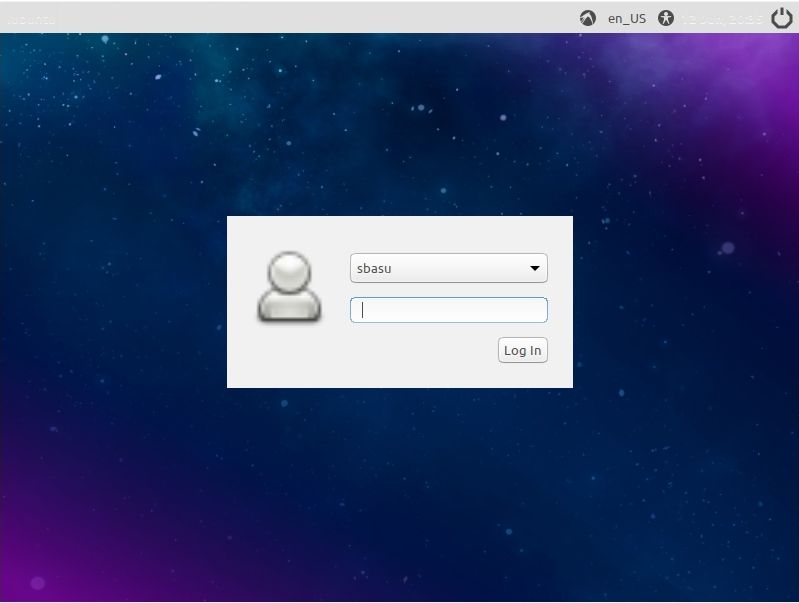
Your computer is now ready to use. Lubuntu features a very user-friendly interface, and you will hardly face any issues using it.
Hope the process was useful for you. Do you have any questions in mind? Feel free to comment the same down below.


Hi,
I tried to install Lubuntu on Intel Pentium 4. Everything install and at final stage it say boot failed. Do you have any solutions.
thank you am having some trouble with grub loader but I will try again using your guide.