Navicat is a commercial database management tool that is relatively affordable as compared to other popular tools in the same category It is developed to manage different databases using a graphical user interface rather command line which ultimately reduces the intricacies of database system administration. It has been designed to address different sort of people in the industry such as administrators, developers, and small and medium-sized businesses.
It available in up to 7 languages for customers to choose from, Navicat is one of the popular database front-end user interface tools. It can be used to manage and develop native or remote MySQL, SQL Server, SQLite, Oracle, PostgreSQL and MongoDB databases.
With the help of Graphical use interface (GUI) the newbies or leaners can also be able to manage databases like a professional, indeed S/he should have some basic knowledge. It lets you create, organize, access and share information in a safe and easy way. Furthermore, it allows users to connect to any local or remote server, providing useful database tools such as data models, data transfer, data synchronization, structure synchronization, import, export, backup, restore; report creation tools, and plans to assist with data management.
The best part is, Navicat is a cross-platform database management tool that is available for Microsoft Windows 10/8/7, Linux and macOS.
Also, it offers a single premium package called Navicat Premium, comprises capabilities to connect all popular database systems such as MySQL, MariaDB, MongoDB, SQL Server, SQLite, Oracle and PostgreSQL. However, if someone wants to access and control some particular type of database then individual application packages are also available which makes this Database management tool affordable for everyone. These are the independent applications:
- Navicat for MySQL
- Navicat for PostgreSQL
- Navicat for MongoDB
- Navicat for MariaDB
- Navicat for SQL Server
- Navicat for Oracle
- Navicat for SQLite
Here we are going to install Navicat for MongoDB to connect and manage databases of MongoDB on Linux system. The below-given steps will be the same to install other DB management tools provided by the same developer.
For Ubuntu
Step 1: Open command Terminal
Go to your Ubuntu system and open command terminal. To quickly access, you can use a shortcut key combination that is CTRL+ALT+T. Or just go to activities panel / Application for Centos or other Linux Distors to search for the Terminal.
Note: Here we are using the Ubuntu 19.04 & CentOS 7, however, the steps will be the same for Ubuntu 18.04/17.04/16.04… Debian, Kali Linux, Linux Mint, CentOS 6 , RedHat, Elementary OS and other supported Linux operating systems.
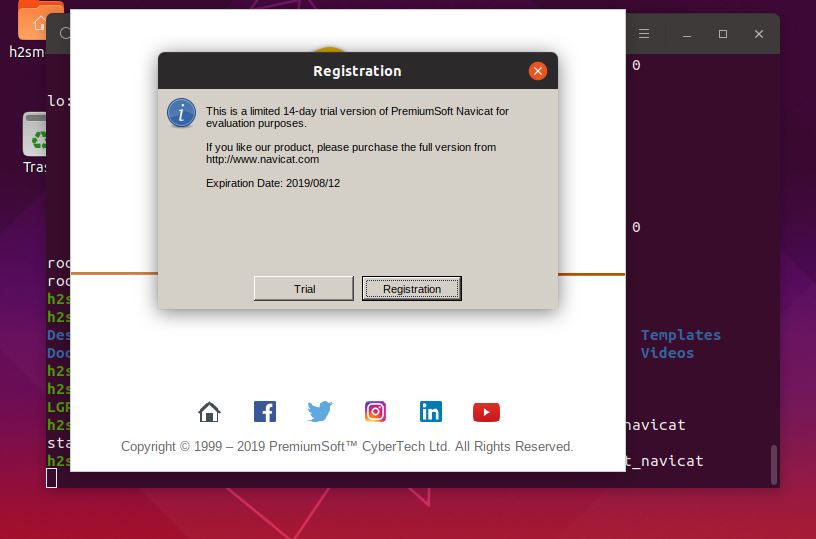
It is a commercial and premium database management, however, it comes with 14 days trial, thus you can download, install and try Navicat for MongoDB before actually investing your hard-earned money.
To download, the latest setup of MongoDB, here we are about to use the command terminal. Just copy and paste the following command in your terminal.
For the 32-bit version:
wget http://dn.navicat.com/download/navicat121_mongodb_en_x86.tar.gz
For the 64-bit version:
wget http://dn.navicat.com/download/navicat121_mongodb_en_x64.tar.gz
For other operating systems such as Windows 10/8/7 or want to directly download the Navicat for MongoDB setup; you can visit its official website.
After downloading the Navicat on your respective Linux operating system it’s time to extract the downloaded tarball. For that first of all type:
ls
The above command will show the downloaded file in your Terminal. Now type
For Ubuntu or Debian OS and on its derivatives:
tar -xf navicat121_mongodb_en_x64.tar.gz
Now enter into the extracted directory of the Navicat
cd navicat121_mongodb_en_x64/
And type
ls
For RedHat or CentOS and on its derivatives, the command will be the same:
tar xf navicat121_mongodb_en_x64.tar.gz
cd navicat121_mongodb_en_x64/

Inside the folder of Navicat, you will see a file start_navicat, that is our main target. Just run this script.
./start_navicat

You will get a GUI Wizard to run Navicat on your Linux OS. As it offers a trial period of 14 days you can test it without paying anything, for that just click on Trail button.
By default, if you want to run this GUI database management tool, then every time you have to go to its folder as we did above to run it. However, we can create a Desktop shortcut for it to save time.
For Ubuntu:
sudo apt-get install --no-install-recommends gnome-panel
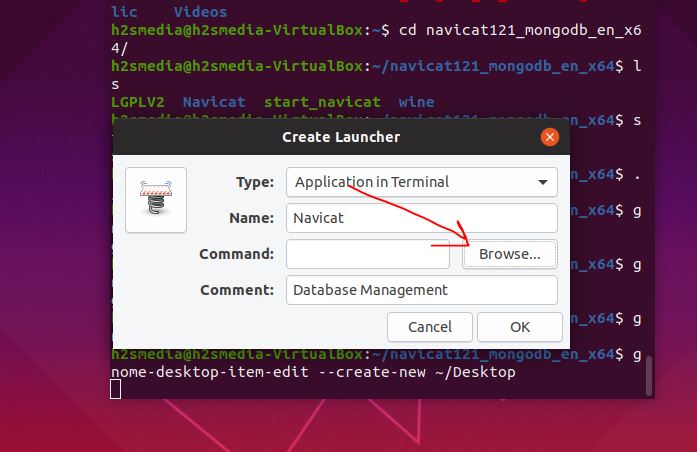
gnome-desktop-item-edit --create-new ~/Desktop
Select Type – Application in Terminal
Name– You can give any name to your shortcut, here we are giving Navicat.
Browse– Select the app or script you want to be executed.
Comment: Just to recognize remark something.
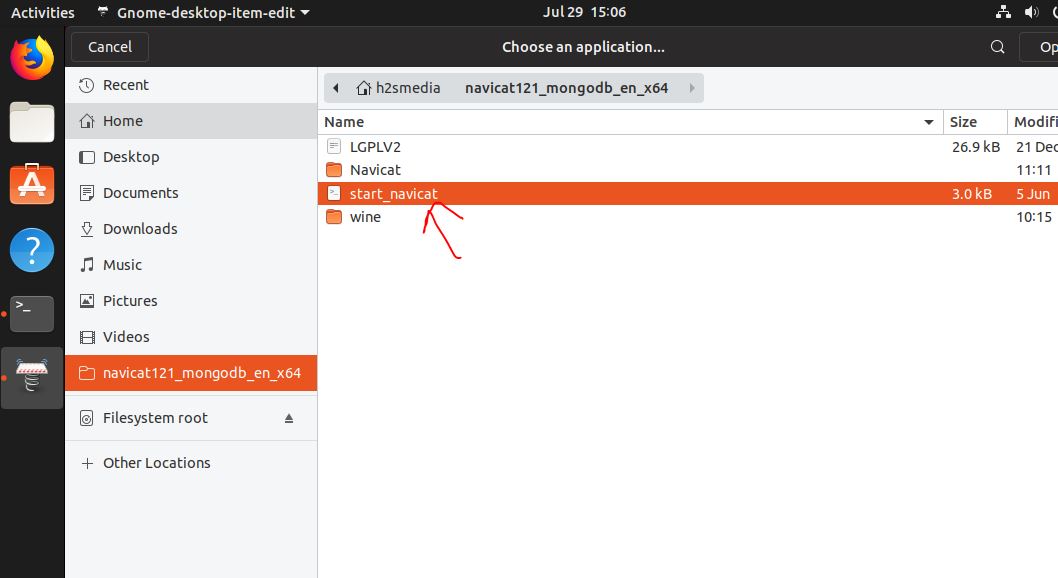
When you click on the Browse button, the Ubuntu explorer will open go to the extracted Navicat folder and select the script start_navicat.
Press the OK button to save the Desktop shortcut configuration.
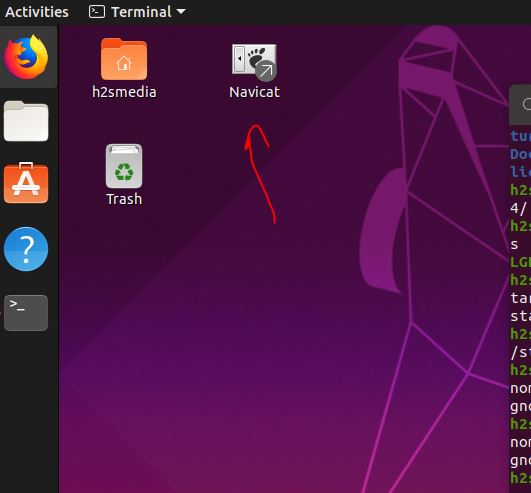
You will see a shortcut icon on the Desktop with the name Navicat.desktop or whatever you have given to it. Now, right-click on it and select the option called Allow launching.
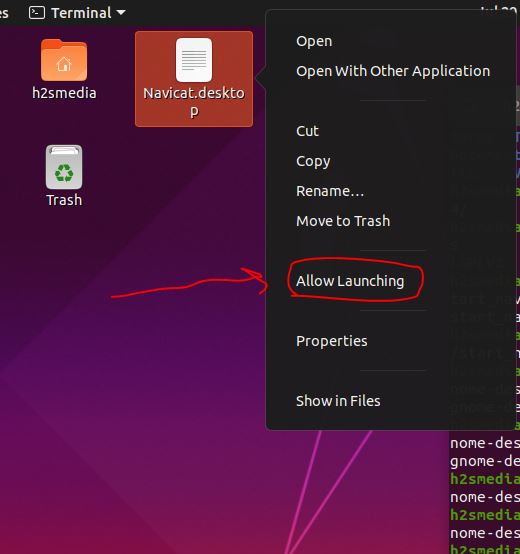
The shortcut is there, click to access this GUI database management tool.
To create a launcher shortcut in CentOS 7 follow the below steps:
Go to File Manager
Right-click on the white space area.
Select Create New and then Link to Application

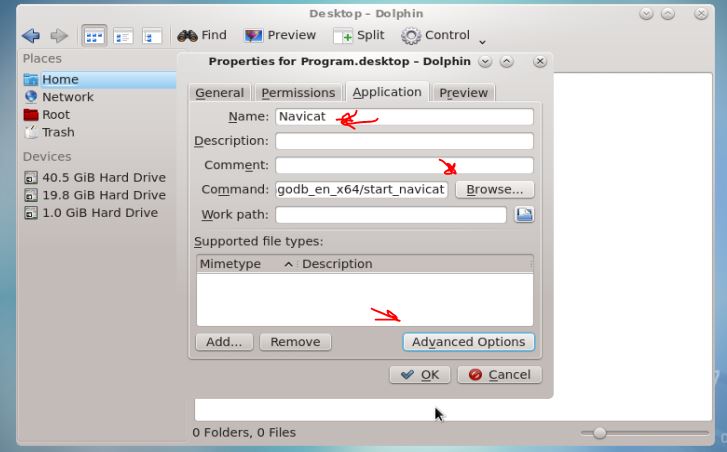
In the General tab, give a name to the shortcut we are about to create. For example Navicat.
Secondly, Go to the Application Tab type Name whatever you want, and then come to the command section. Where click on the Browse button and just like we did for Ubuntu, go to the downloaded Navicat folder and select start_navicat script.
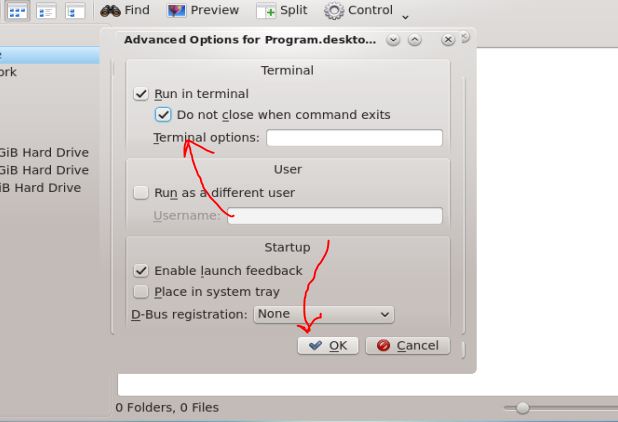
After that click on the Advanced options.
Check Run in the terminal and its subsequent option. Finally, press the OK button to save the shortcut.
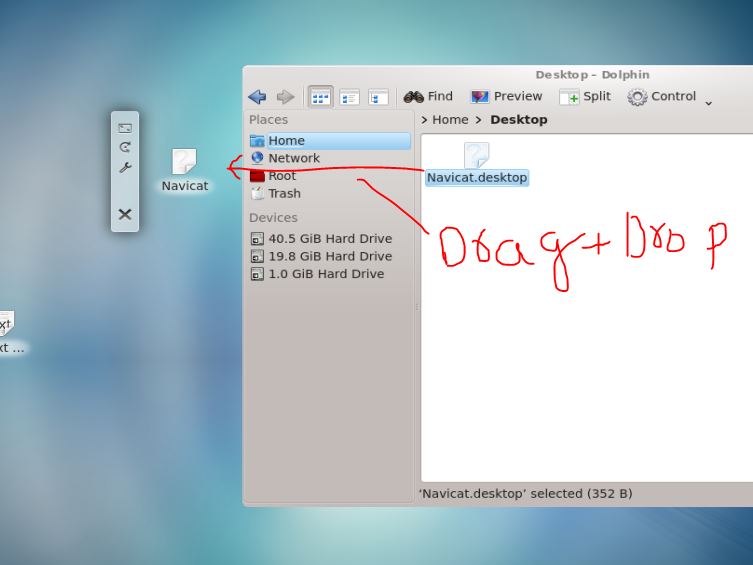
Now, simply Drag and drop that launcher shortcut to Desktop, that’s it.
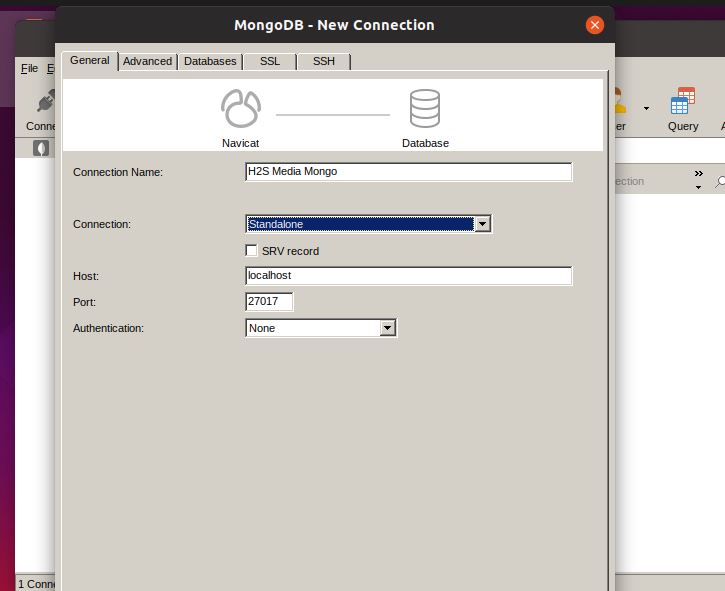
Step 6: Connect MongoDB
Click on the Connection button.
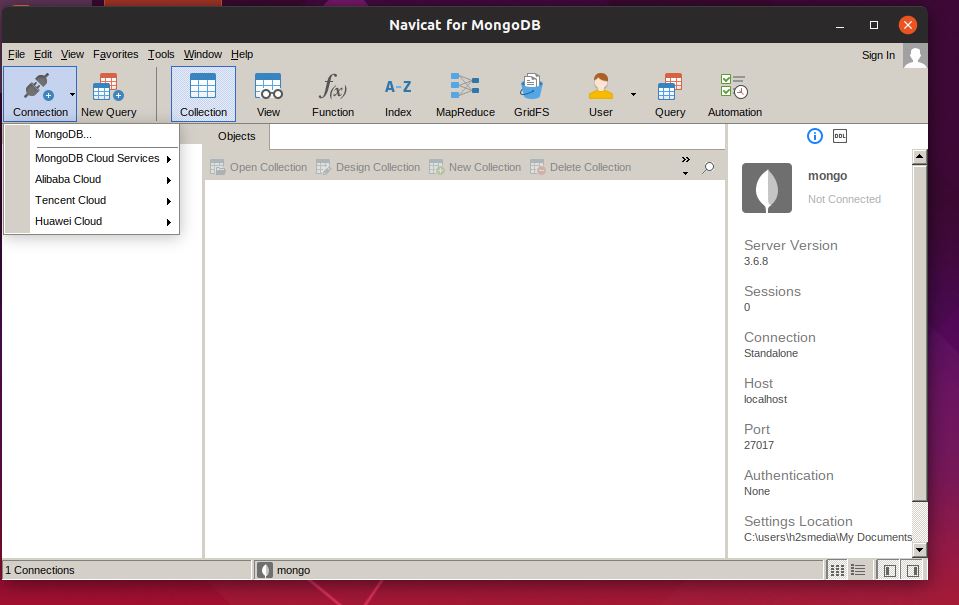
Give Connection a Name.
Select the type of connection.
Host– If MongoDB is installed on the same system where the Navicat, then leave the localhost text as it is; otherwise type the address of the remote server running with MongoDB.
Finally, press the Enter button.
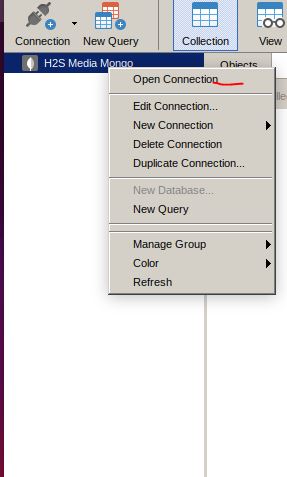
Now the connection will show on the right side pan of the Navicat Linux graphical user interface. Right-click and select the option Open Connection.
Hence, everything is ready to go. Now, you can select the one amid a wide range of options to play around the MongoDB system.
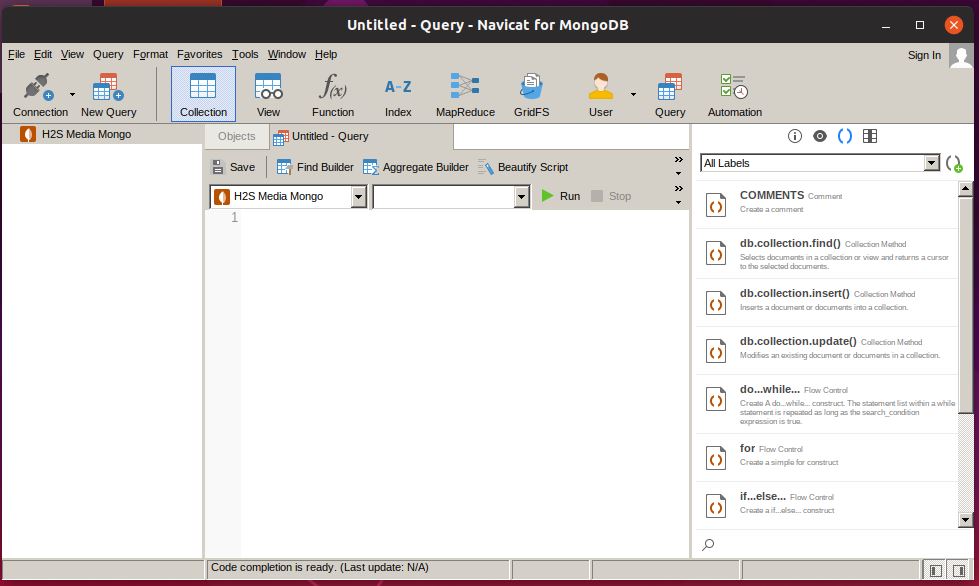
In this way, we can install any Navicat Database management tool on a Linux operating system to manage different database systems graphically. If you have some doubts or questions, please feel free to use the comment section.
Related Posts
How to create email groups in Gmail? Send one email to multiple recipients in a matter of seconds.
Getting the right dashcam for your needs. All that you need to know
How to Install 7-Zip on Windows 11 or 10 with Single Command
How to Install ASK CLI on Windows 11 or 10
How do you install FlutterFire CLI on Windows 11 or 10?
How to create QR codes on Google Sheets for URLs or any other text elements