This tutorial is about how you can install OpenSUSE Tumbleweed on your computer, from a bootable USB stick. However, the installation process is the same for installation from a DVD. You just have to choose the bootable DVD as the first boot device.
There are several Linux distributions that you can find. One of the best among them is OpenSUSE, which is best suited for personal users, and also for users, who are into development or so. It isn’t a feasible task to find out the best Linux distribution, as requirements vary, and there is always some Linux distribution, which is suited for a certain domain of users. Talking about OpenSUSE, it is a robust operating system, and the integrity of OpenSUSE is something, which deserves special mention. So if you keep trying new programs, you will not end up breaking your system, which is undoubtedly the bottom line of OpenSUSE.
Talking about download and installation, OpenSUSE is available in two flavours, the LEAP, and the Tumbleweed. LEAP is meant for normal end users, and it contains the most necessary stable packages so that you can get working on the operating system right after you install it on your system. The Tumbleweed, on the other hand, is meant for developers, who look out for new versions of programs, which are tested and want to contribute to the OpenSUSE community at the same time.
So now let’s get started with the process
Install OpenSUSE Tumbleweed on PC
Step 1: Download OpenSUSE Tumbleweed
Go to the Download page of OpenSUSE Tumbleweed, where you will see multiple type os files to download. As we are about to create a bootable USB flash drive of OpenSUSE that’s why we will get the ISO file. Click on For DVD and USB stick image.
Step 2: Create a bootable USB drive with OpenSUSE
Creating a bootable USB stick of Linux distro is rather easy. Here we already have two tutorials on them one is using Rufus and other is with BalenaEtcher. You can follow any of them, the process gave there may be with other Linux Distro, however, the procedure will be the same.
Step 3: Boot PC using a bootable Tumbleweed USB drive
Insert the USB drive into the PC or laptop where you want to install OpenSUSE Tumbleweed and switch on it. Use ESC or F12 to get the boot menu and select the connected USB drive to boot with.
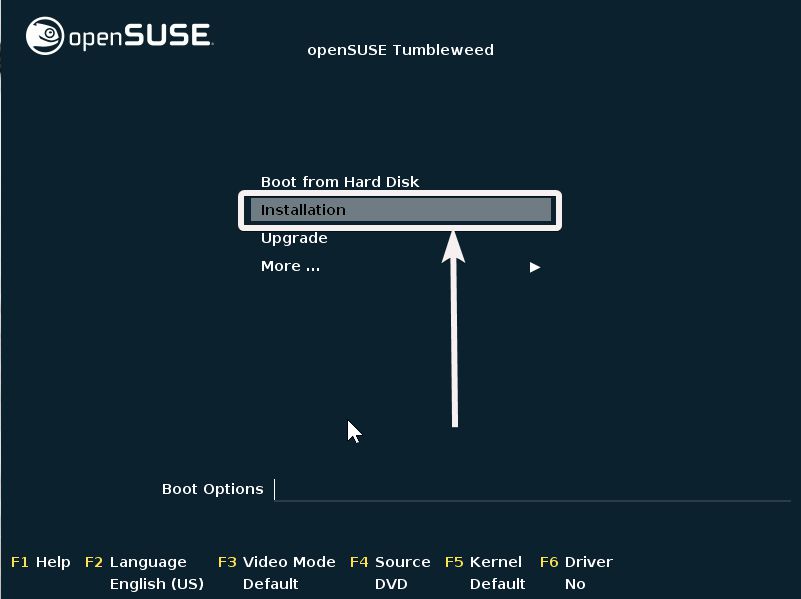
On booting from USB, the boot screen will come up. Just select ‘Installation’ using the up and down navigation keys, and hit the enter key.
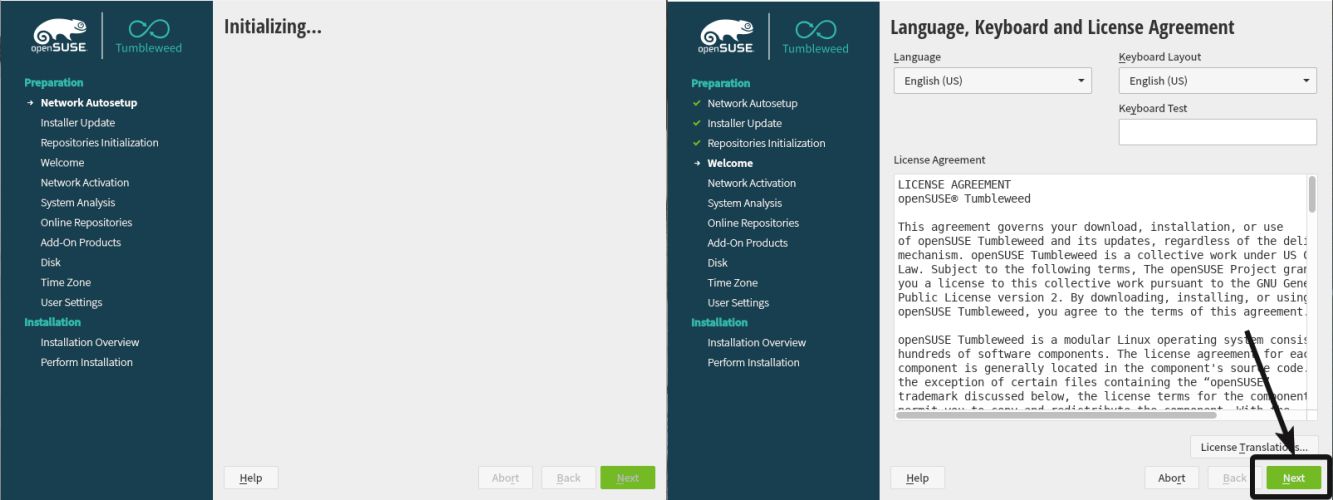
Step 4: Language, Keyboard and License Agreement
Now some basic initialization tasks will be carried out automatically by the installer, as shown in the screenshot below. Let the tasks get carried out automatically, and the initial tasks will possibly take a few minutes to complete.
Once that is complete, just agree with the terms and conditions by clicking on ‘Next’.
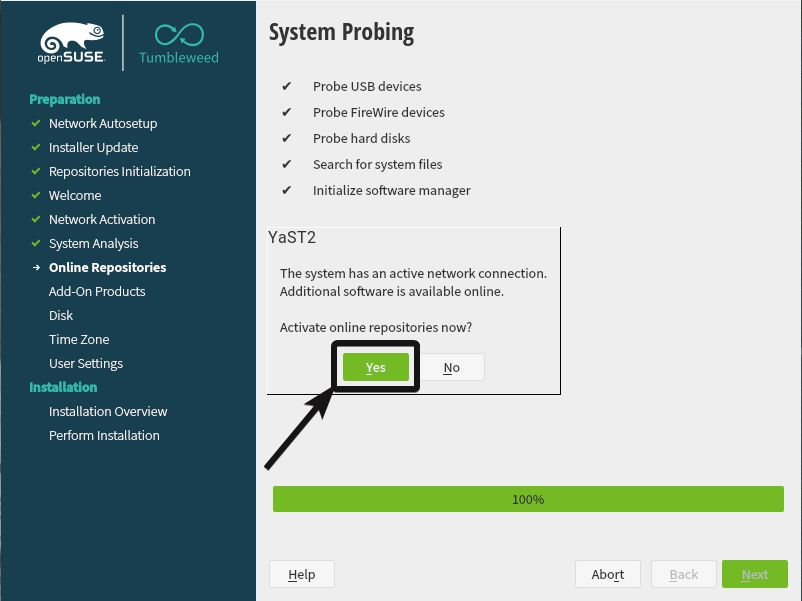
Step 5: Activate OpenSuse Online Repositories
Depending upon, whether you are connected to the internet, you can download available updates and activate the repositories at the time of installation. If you are connected to the internet, I will recommend you to click on ‘Yes’. Alternatively, you can click on ‘No’ to install updates and activate the repositories later.
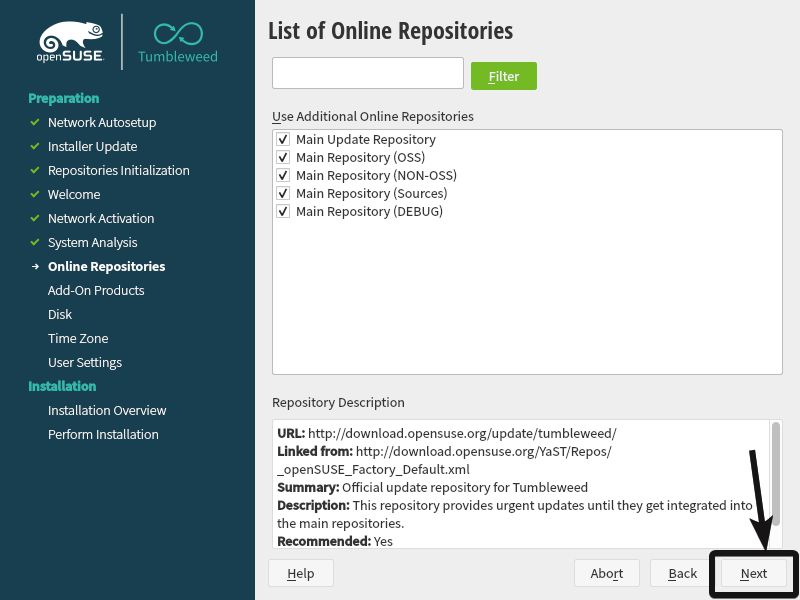
Now, you can select the additional repositories that you want to add. Once you are done selecting, click on ‘Next’.
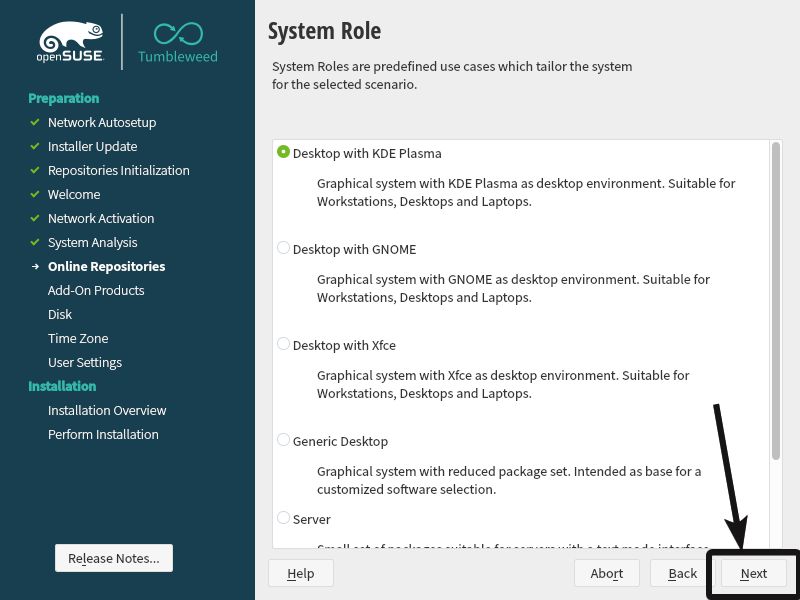
Step 6: Select Linux Desktop Environment for OpenSUSE Tumbleweed
Once the repositories are added, just select your default desktop environment for using OpenSUSE. Depending upon whether you are installing it for your personal computer or server, you can select KDE Plasma, GNOME, Xfce or the generic desktop. Once you are done, click on ‘Next’ once again. I am choosing KDE Plasma here.
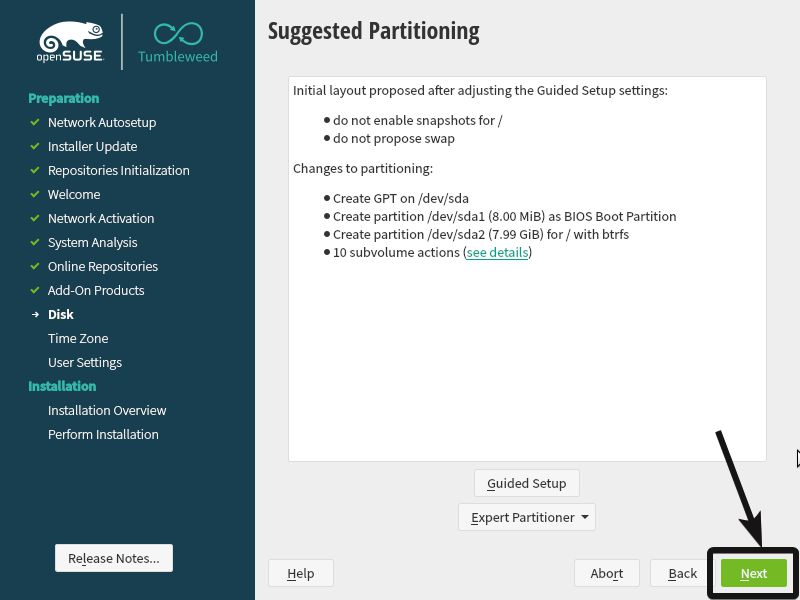
Step 7: Manage partitions to install OpenSUSE
Next, select the partitioning scheme. You can use ‘Guided Setup’ or ‘Expert Partitioner’ to manage partitions and install OpenSUSE. Alternatively, you can skip partitioning, and install OpenSUSE on your hard drive or SSD. To do that, click on ‘Next’.
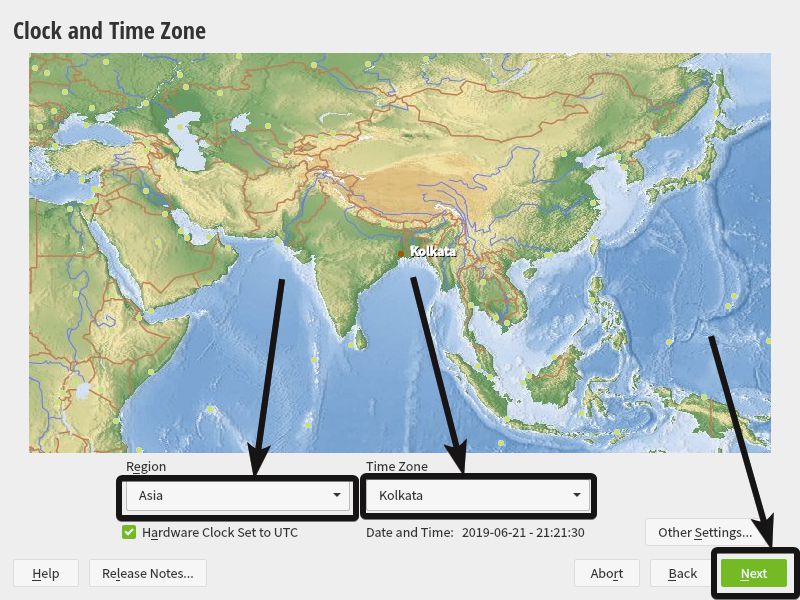
Step 8: Select TimeZone
Now it is time to choose the time zone. First, choose the ‘Region’, which is ‘Asia’ for me, and choose ‘Time Zone’, which is ‘Kolkata’ in my case. Once done, click on ‘Next’ to proceed to the next step.
Step 9: Setup Username and Password
Now, set up a local user. Just enter your full name, and other necessary details, along with a strong password, and click on ‘Next’. You can even use ‘Automatic Login’ if you want. Though you can change all such settings later on.

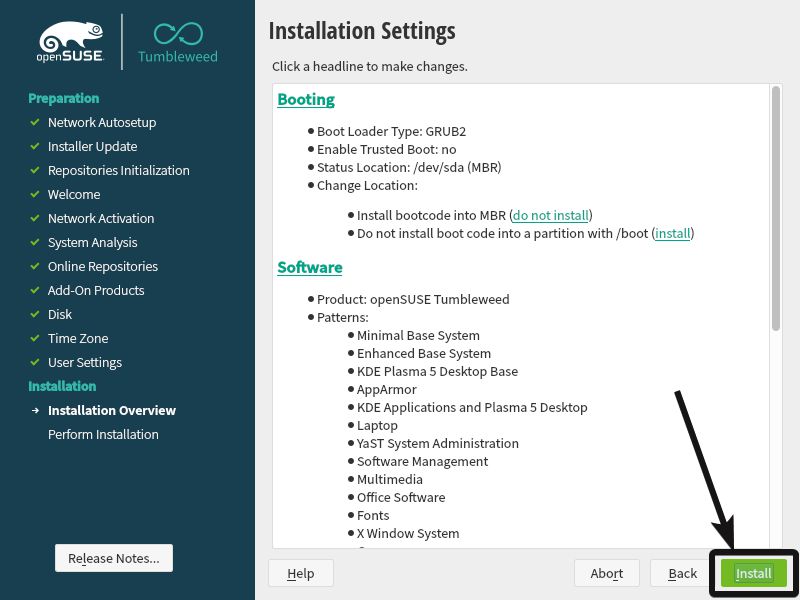
Step 10: Installation Settings
Finally, click on ‘Install’ to start the OpenSuse tumbleweed installation process with the settings chosen by you.
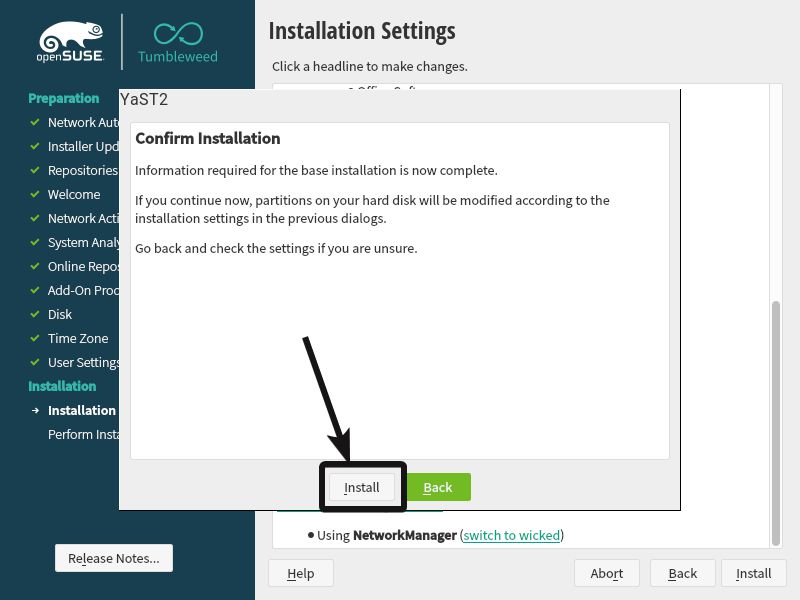
Step 11: Confirm and Install OpenSUSE Tumbleweed
Before the operating system starts getting installed, and changes are made to the disk, you will again be asked, whether you are sure about the partitions. You can click on ‘Back’ to go back and change the partitions or click on ‘Install’ to proceed with the installation with the selected partitions.
Step 12: Boot from Hard Disk and select openSUSE Tumbleweed
The installation will now start, and your system will automatically restart once the installation process is complete. The boot menu will again appear at the time of startup. Select ‘Boot from Hard Disk’, and hit the enter key.
Note: If you have removed the USB drive then you directly get the Default boot option, as shown in next image.

Now go for the default option, i.e. ‘openSUSE Tumbleweed’, and hit the enter key once again.

Meanwhile, you can remove the flash drive that was used for installation.
Here is the first appearance of the KDE Plasma desktop environment on OpenSUSE Tumbleweed.
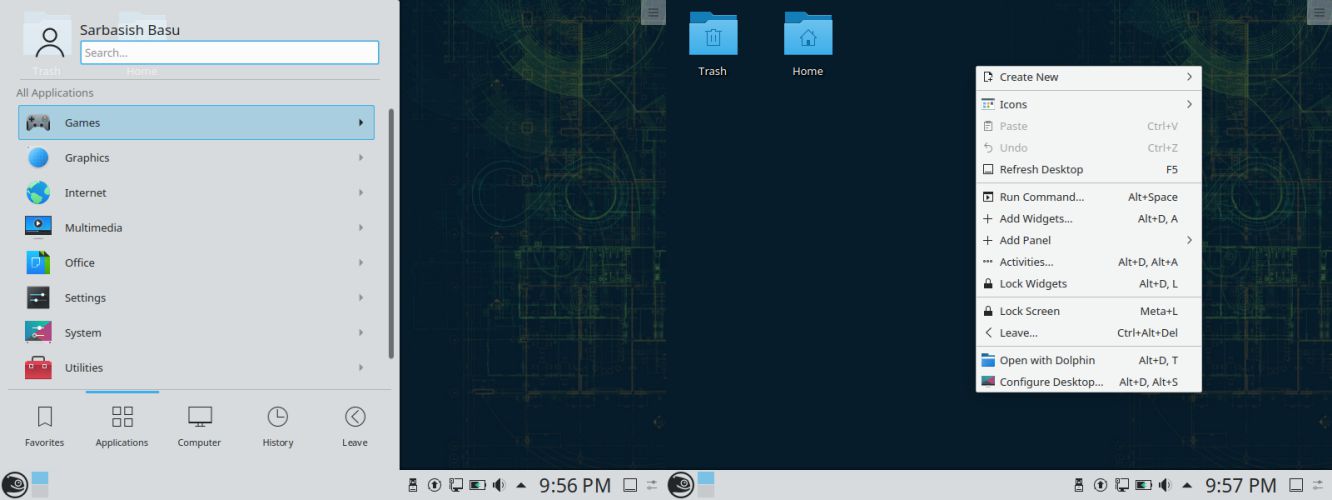
The user interface is undoubtedly pleasing, and you will feel at home if you have switched to OpenSUSE Tumbleweed right from Windows. Yes, there is a start menu like the icon to show you the list of installed programs, and other settings, along with a right-click context menu with a handful of useful options.
The YaST control centre on OpenSUSE is also something that deserves special mention, where you can control literally everything, in the easiest possible way. From configuring small software settings to display and network, you can use YaST Control Center for everything.
The OpenSUSE kernel is built with some useful changes to the Linux kernel by an enthusiastic team of contributors. What that means to the end-user is simple! The users can enjoy excellent hardware support and a decent collection of software, which means, you can get started with your new operating system right after installing it on your computer.
So that was all about how you can install OpenSUSE Tumbleweed on your fresh new computer. Do you have any questions in your mind? Feel free to comment the same down below.
Related Posts
How to create email groups in Gmail? Send one email to multiple recipients in a matter of seconds.
Getting the right dashcam for your needs. All that you need to know
How to Install 7-Zip on Windows 11 or 10 with Single Command
How to Install ASK CLI on Windows 11 or 10
How do you install FlutterFire CLI on Windows 11 or 10?
How to create QR codes on Google Sheets for URLs or any other text elements