Plex Media Server and Amazon LightSail, the combination sounds very interesting, isn’t. Thus is it possible to install Plex on Amazon LightSail Cloud Virtual Private server, the answer is yes, absolutely. And here in this tutorial, we will show how?
We got multiple queries from our readers regarding this and why they are interested in AWS lightsail cloud Plex? Because of the low price model of the Amazon Lightsail. The starter plan price is just $3 on which 40GB of SSD, 512 MB of RAM and 1vCPU are available.
Let’s start with installation, configuration and setup of Plex on AWS Lightsail.
Step 1: Signup and Create an instance on Amazon Lightsail
Go to Amazon LightSail official page and signup for it. The basic plan which $3.5 comes with one-month free usage, still the credit card is required during the signup process. Although you will not get charged anything till one month.
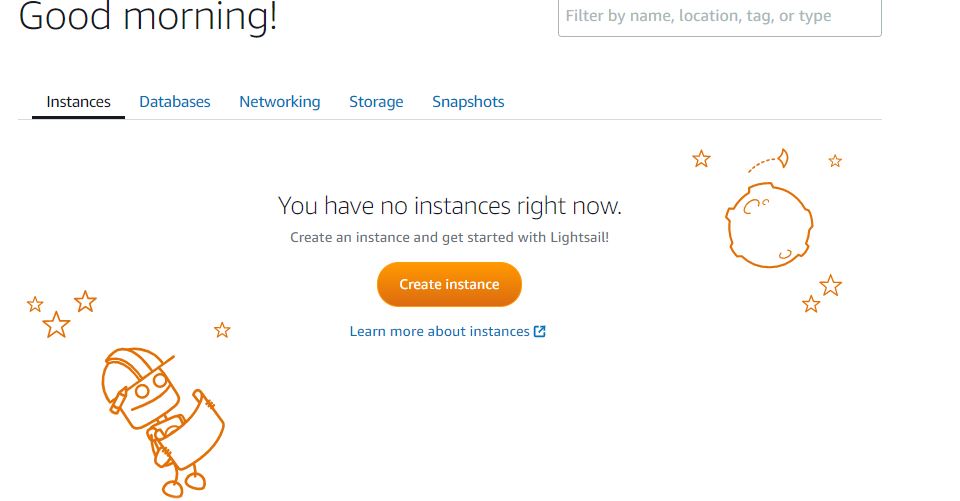
Once you signed up successfully, from the AWS Management console page service section select Lightsail. Now click on the Create instance button.
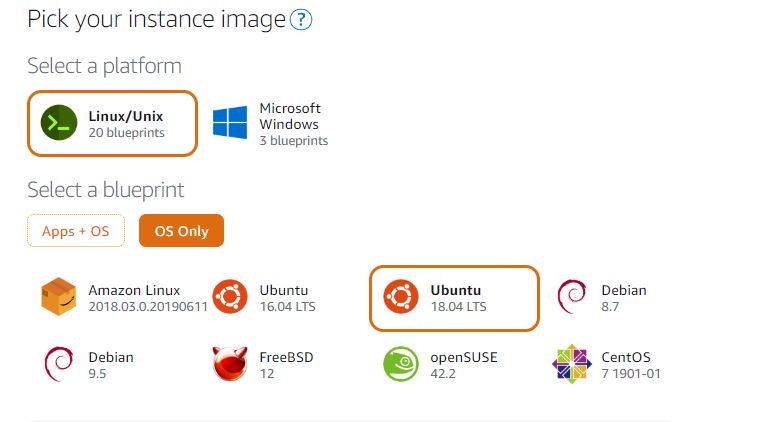
Step 2: Select OS image for Instance to install Plex
Select the Linux/Unix platform and then click on option OS only. After that click Ubuntu 18.04 to select it as OS to install on Lightsail instance.
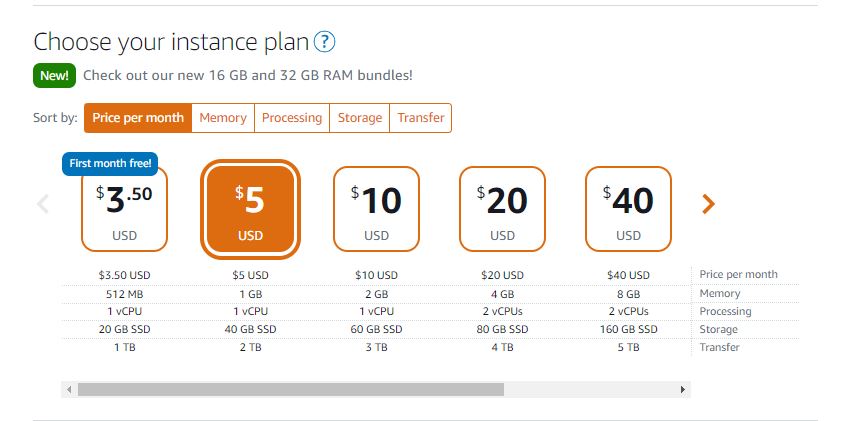
Step 3: Choose the Amazon Lightsail plan/price
Although you can install Plex on $3.50 USD plan that is providing 512MB, it recommended starting with 1GB RAM for good response or 2GB RAM for smooth operations. Here we are going with 1GB RAM plan that cost us $5/month.
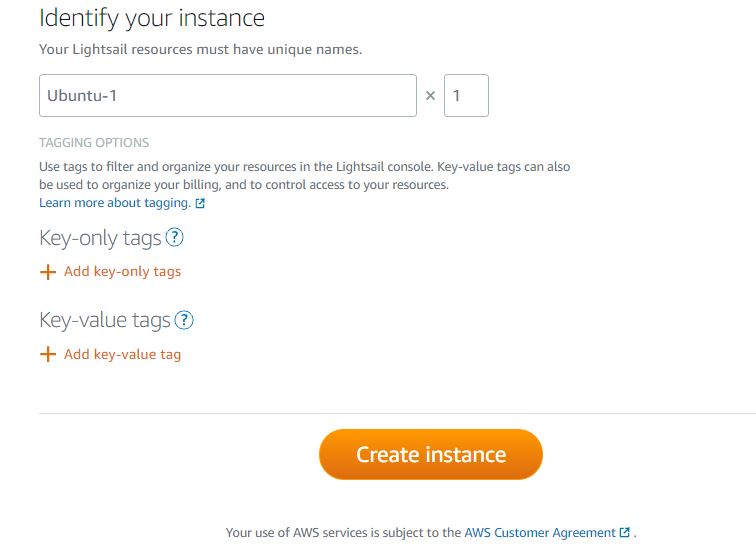
Step 4: Create Instance
Change the name of the Instance, if you have multiple instances and want to easily remember that which one has the Lightsail Plex installation. However, we are leaving the default one as it is i.e Ubuntu-1.
After that click on Create instance button.
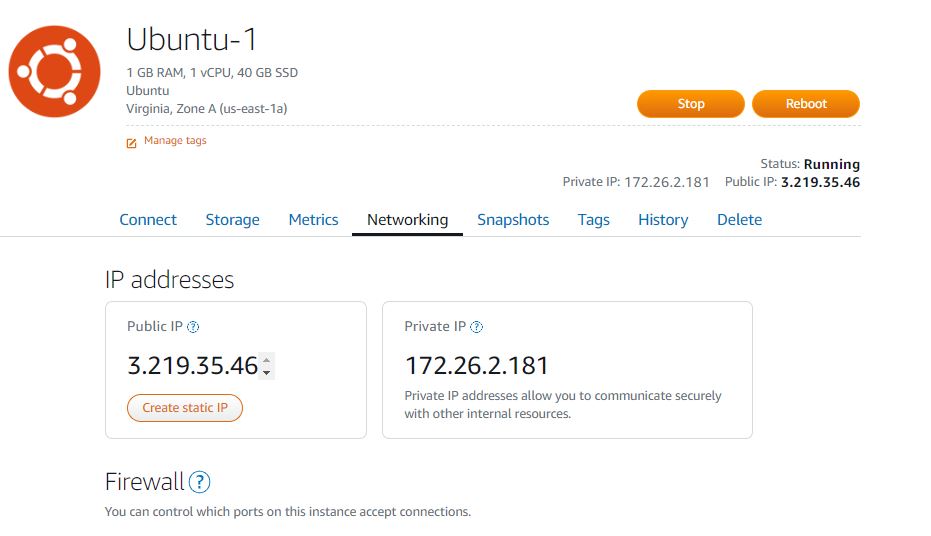
Step 5: Create a Static IP address
Once our instance gets created, go to Networking Tab and click on Create Static IP address.
Step 6: Connect to Lightsail instance via SSH
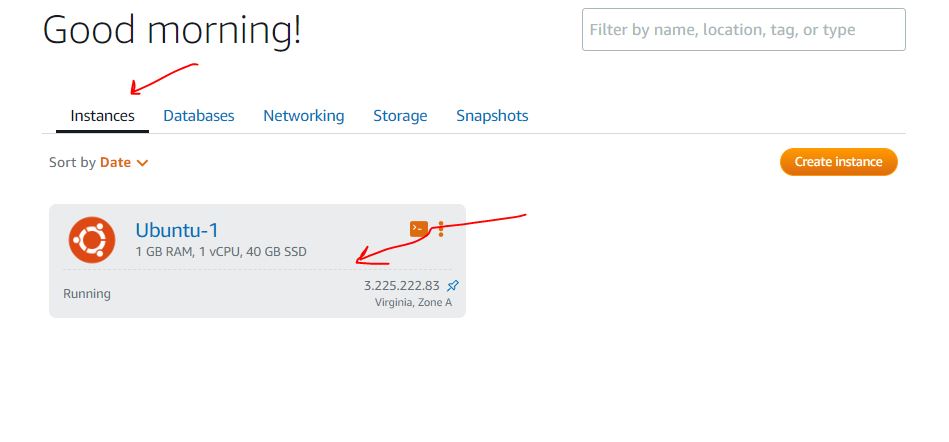
Finally, the Ubuntu instance on Lightsail has been created, click it, to open.
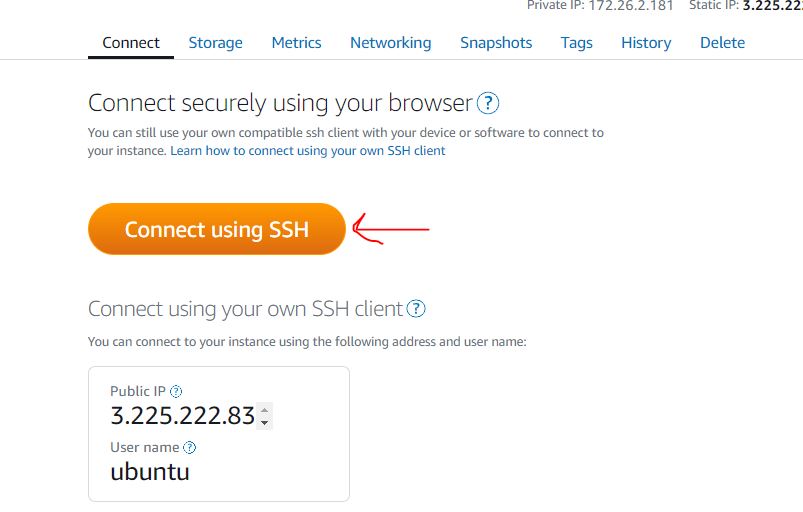
Scroll down and click on Connect using SSH. This will give access to the command line shell of Ubuntu so that we can install our Plex Media server over it.
Step 7: Update the System
To make sure that Ubuntu image on Amazon Lightsail is updated and all packages are upgraded, use the following two commands:
sudo apt update
sudo apt upgrade
sudo reboot
Step 8: Download Plex on Amazon Lightsail’s Ubuntu
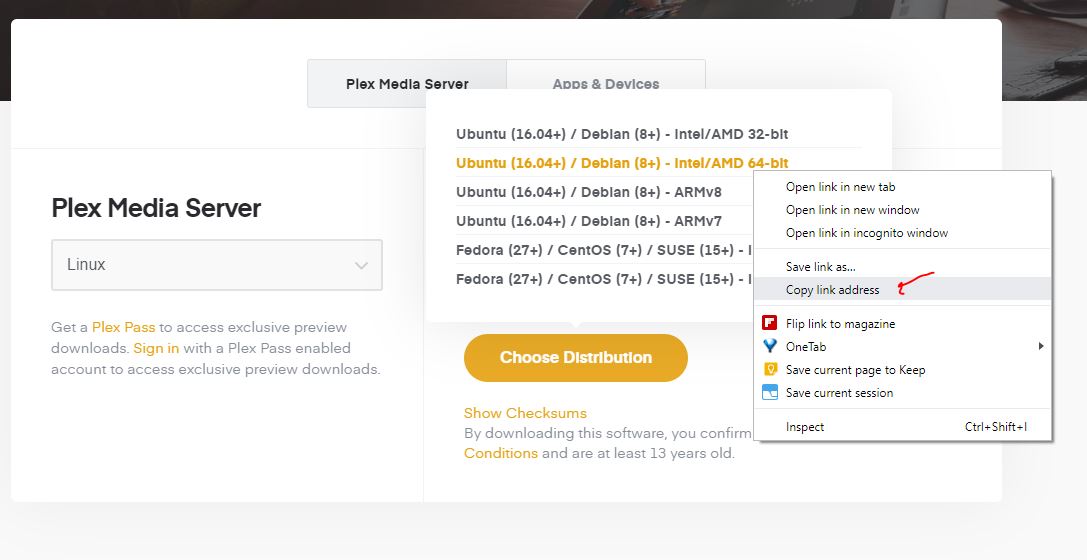
To download, first, go to Plex Media server download page. Here is the link. Select the Linux Platform and then click on Choose Distribution. Now right click on Ubuntu 64-bit version and copy the link.
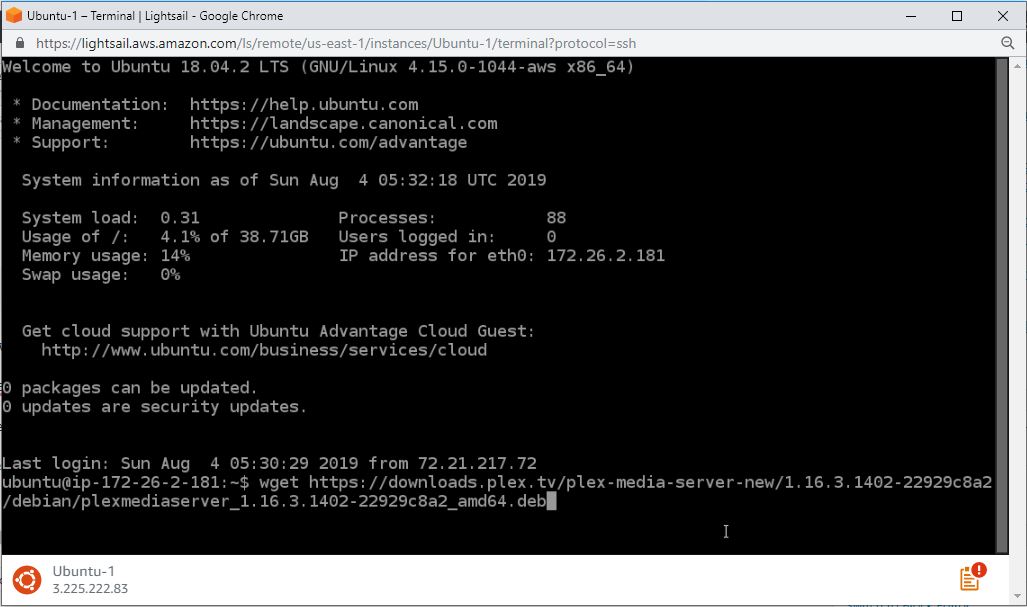
Come back to LightSail Ubuntu SSH Command window and type wget and paste the link. For example:
wget paste link
wget https://downloads.plex.tv/plex-media-server-new/1.16.3.1402-22929c8a2/debian/plexmediaserver_1.16.3.1402-22929c8a2_amd64.deb
Press the Enter button.
Step 9: Install Plex media serve DEB file Lightsail
Here is the command to install the above-downloaded Plex file.
First type:
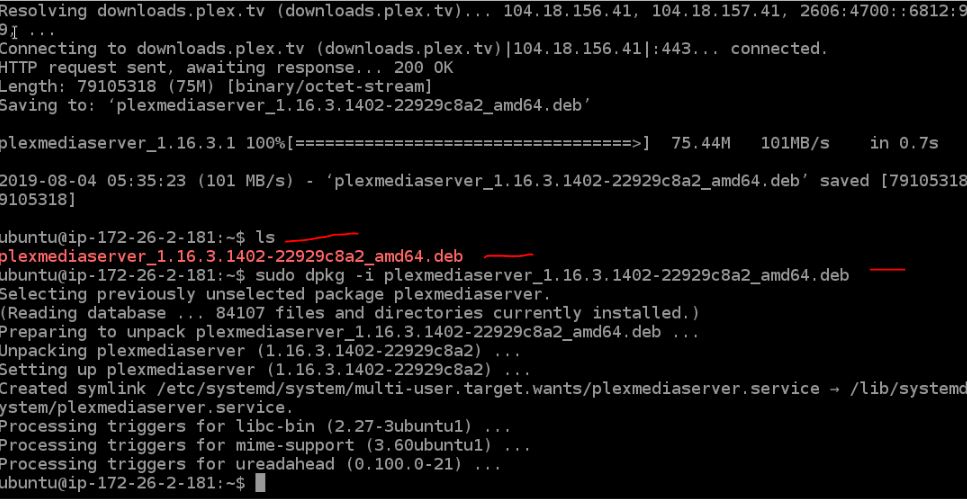
ls
And you will see the downloaded files, copy its name using your mouse or type manually along with dpkg command.
sudo dpkg -i filename
sudo dpkgs -i sudo dpkg -i plexmediaserver_1.16.3.1402-22929c8a2_amd64.deb
Step 10: Enable Plex Media service to start with boot
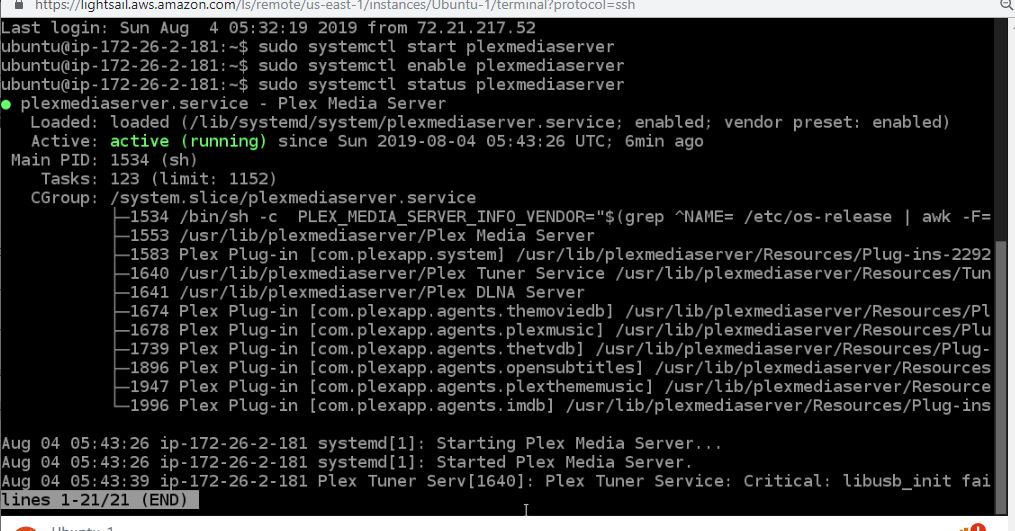
Now, we have Plex on our Ubuntu 18.04 server installed on Amazon Lightsail before moving further let’s enable its service and make sure it starts automatically after the OS boot up.
sudo systemctl start plexmediaserver
sudo systemctl enable plexmediaserver
Check the status of Plex media server service using the below-given command:
sudo systemctl status plexmediaserver
Step 11: Add Plex Media user to root group
Finally, the Plex server is installed on Ubuntu and its time to change some permissions.
Add plex user to the current Ubuntu user
sudo gpasswd -a plex myuser
Note: Change the myuser with your current Ubuntu username.
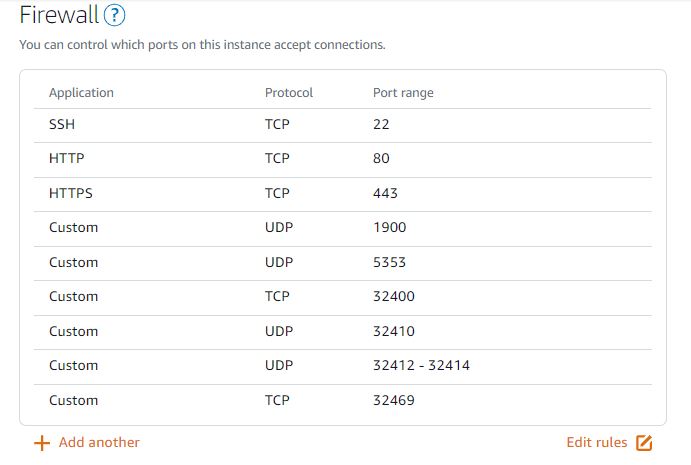
Step 12: Whitelist Plex Media Port in Lightsail Firewall
To access the Plex Media server live on Amazon lightsail, first, we have to whitelist its port in the firewall. For that, go on AWS Lightsail Dashboard and select Networking tab.
In the Firewall section, click on Add another option, then select Custom, TCP and enter port number 32400; click to save it.
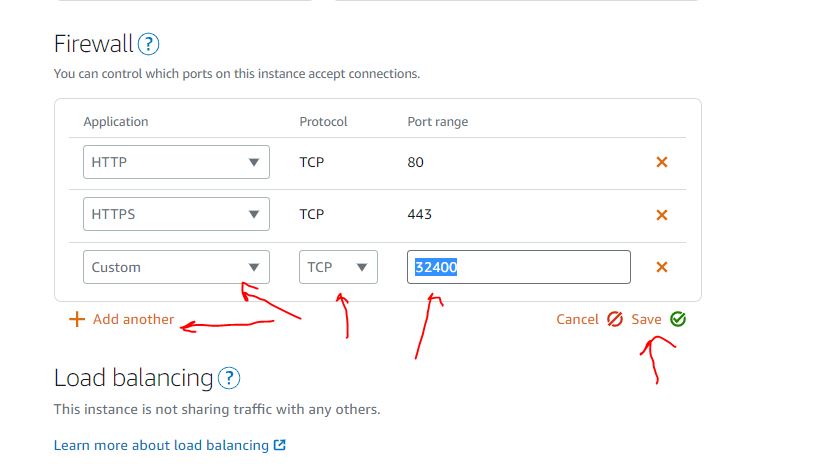
In the same way, also add to open other Plex required ports:
- UDP port 1900 for the Plex DLNA Server
- TCP port 3005 for Plex Companion
- UDP port 5353 for network discovery
- TCP port 8324 for Roku via Plex Companion
- UDP port 32410, 32412, 32413, 32414 for network discovery
- TCP port 32469 for the Plex DLNA Server
Step 13: Access Amazon LightSail Plex in browser
Open your web browser and type the public IP address of your Amazon Lightsail in that along with port number 32400.
In our case, the IP address was 3.225.222.83
So, along with the port number, it will be like this: http://3.225.222.83:32400
Sign in using any of the given methods…
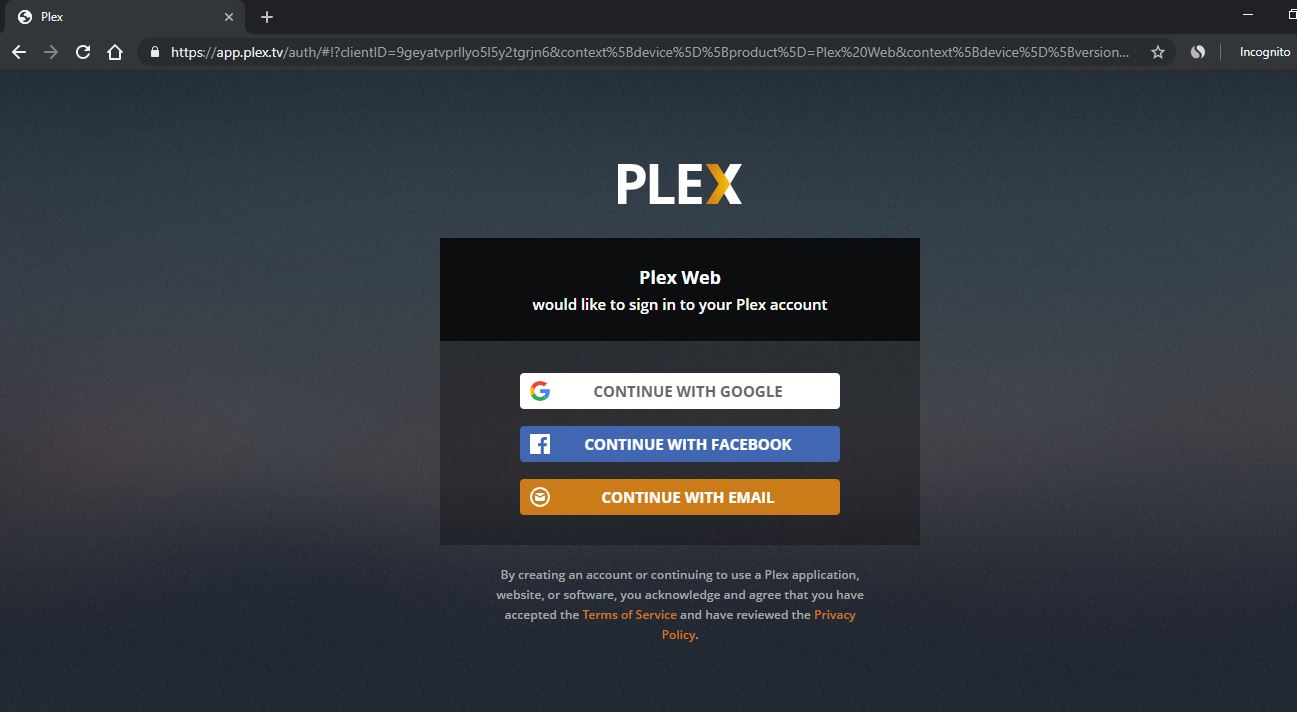
Error- Looking for a server…A server could not be found.
Do you know for security reasons we can’t set up and configure the Plex server’s initial application using the different network? For that, the user and Plex both must be on the same network. Thus, we have to open a Tunnel from our local machine to Amazon Lightsail instance for port 32400.
Step 14: How to use Putty to Tunnel Amazon Lightsail Plex port
Here we will set up Plex Media on AWS Lightsail using SSH Tunnel…
1. Download Putty on your System and install it.
2. Go to Instance and click on Account Page and after that download the SSH Public key.
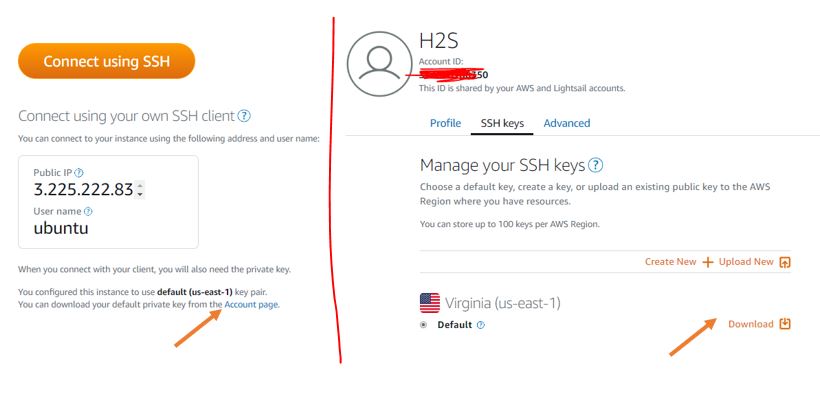
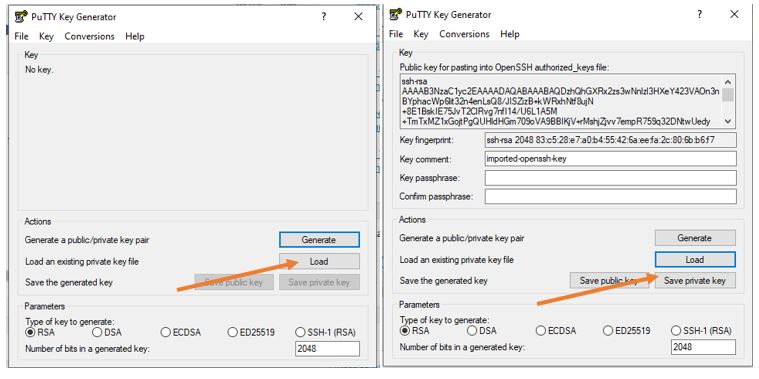
The AWS SSH public key will be in .PEM from and Putty uses .PPK. Thus, to convert it open PuTTY Gen, search for it, when it opens.
- Click on Load button.
- Explorer will open, select to show All files from the drop-down box.
- Select the above downloaded Lightsail PEM SSH public key.
- Click on Save Private Key. It will download in PPK format
- Close the PuTTY KeyGen.
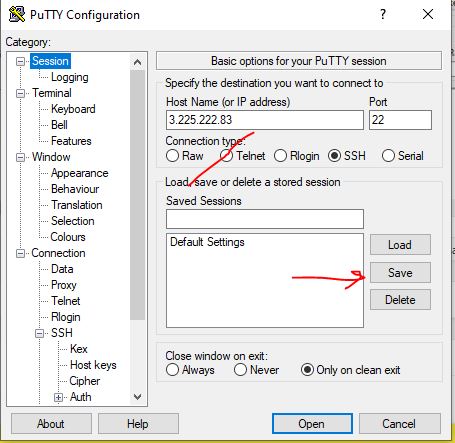
Now open the PuTTY main application and click on Session from the right side given navigation structure.
In the Hostname – Type the public IP-address of your Lightsail Instance and click on the Save button.
Note: Don’t click on the Open button.
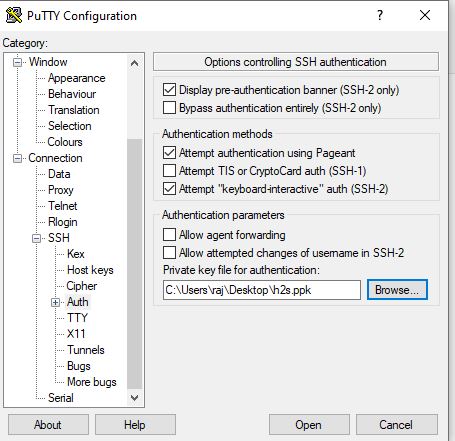
Now from the Navigation structure select Auth under SSH and click on the Browse button. Select above create a PPK private key.
Note: Don’t click on the Open button.
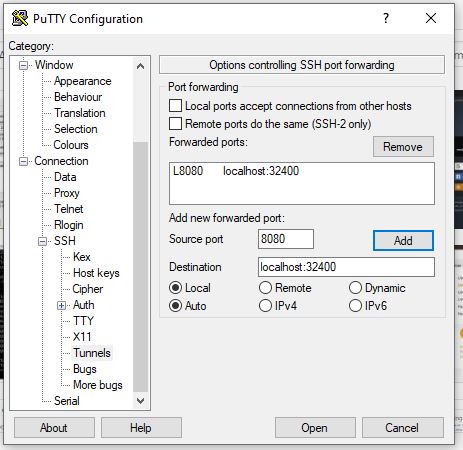
After all the above select Tunnels.
- For Source type 8080
- Destination: localhost:34200
- Click on Add button.
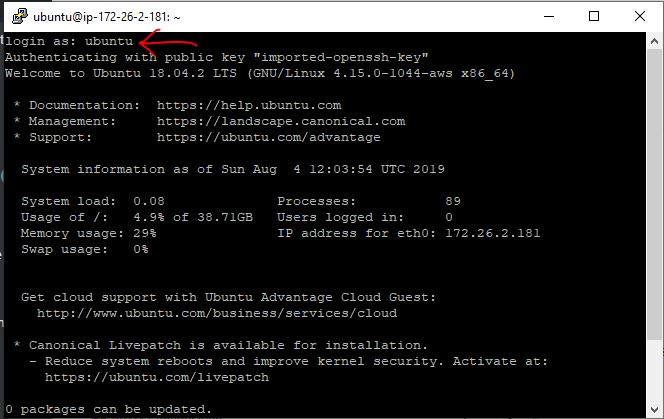
- Finally, now click on the Open button to establish a Tunnel.
The connection would get established and Putty will ask you enter the username for login. Type: ubuntu
Step 15: Configure Plex Remotely via SSH Tunnel
In the browser, this time to access Plex use http://localhost:8080/web. This will redirect us to the main Plex setup screen.
Login, as usual, using any of the given methods and then start configuring it.
Finally, on Server Setup screen give some name to your server which is familiar to you.
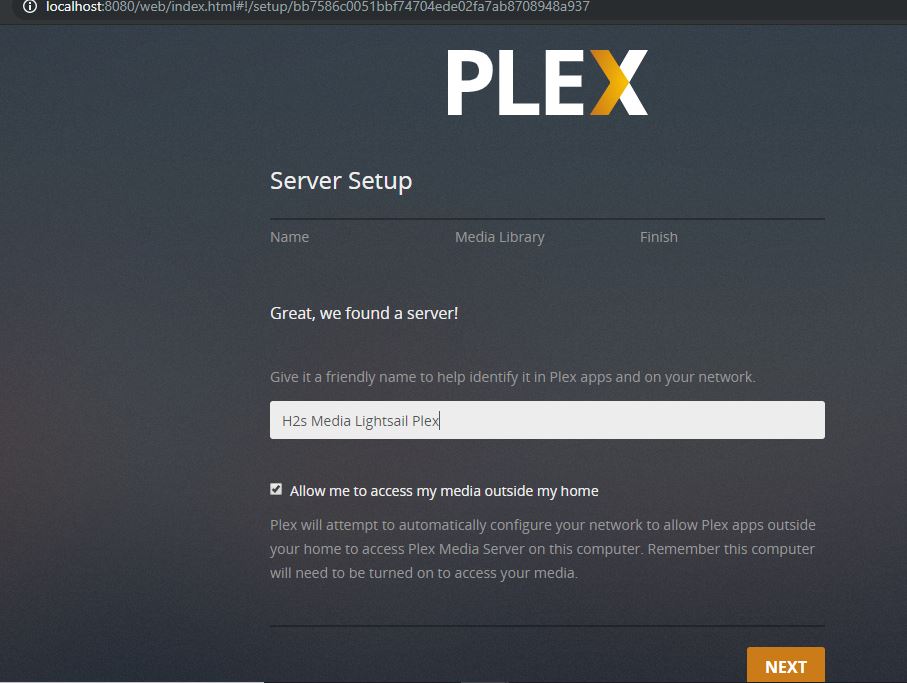
For Media Library, itself the Ubuntu instance doesn’t have that much space and if you don’t have any external media source then buy some extra storage space on Amazon to upload your media files using FTP/SFTP.
Finally, the Plex is ready to use…
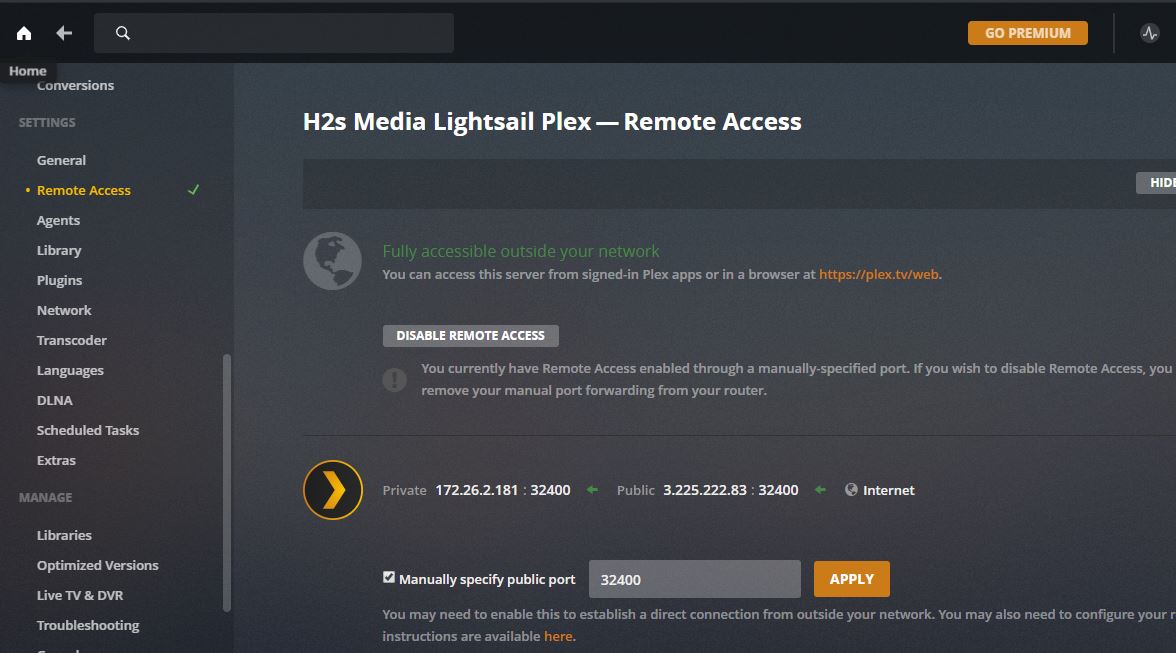
Enable Plex server Remote Access
We can’t open tunnel every time to access the installed Amazon LightSail Plex server, thus enable the full remote access from the settings.
- In Settings click on Remote Access.
- Check Manually specify Public port box
- Type- 32400
- And click on Apply.
- Then it will show an option to enable the remote access.
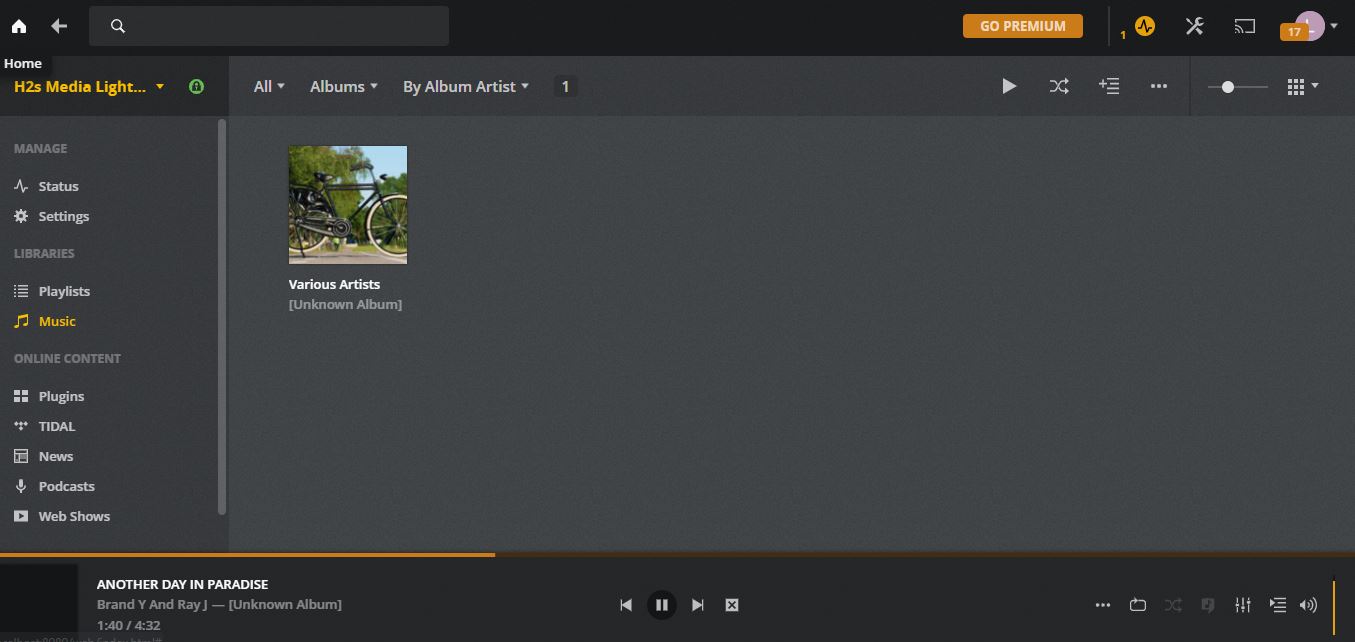
Upload some Demo content on
Let’s upload some content on Amazon Lightsail Plex Media server to check whether everything is working fine or not.
Use the SSH Command line to create a folder Music
mkdir music
Now use some SFTP application to upload a few music files to check Plex is working fine or not.
After uploading go to Plex server, click on the Media library given on the left side. Select Music and for path type the below-given one.
/home/ubuntu/music
Save it and Plex will automatically refresh and update the Media library.
Related Posts
How to create email groups in Gmail? Send one email to multiple recipients in a matter of seconds.
Getting the right dashcam for your needs. All that you need to know
How to Install 7-Zip on Windows 11 or 10 with Single Command
How to Install ASK CLI on Windows 11 or 10
How do you install FlutterFire CLI on Windows 11 or 10?
How to create QR codes on Google Sheets for URLs or any other text elements